8 Ways How to Fix Resin 3D Prints That Fails Halfway
There have been many instances where I find my resin 3D prints fail halfway through the printing process which can be quite frustrating.
After much research and looking into the way resin 3D prints work, I figured out some of the main reasons why resin 3D prints fail.
This article will try to guide you along the way to fixing resin 3D prints that fail halfway or resin prints that fall off the build plate, so stay tuned to find out more.
Why Do Resin 3D Prints Fail Halfway?
There are many reasons that can cause the resin 3D prints to fail halfway. It can be caused because of the wrong exposure time, unbalanced build platform, not enough support, bad adhesion, wrong part orientation, and many more.
Below are some of the most common and major reasons that cause the resin 3D prints to fail halfway. The reasons could be:
- Resin is Contaminated
- LCD Optical Screen is Too Dirty
- Having Too Many Prints on the Build Plate
- Wrong Print Orientation
- Improper Supports
- Build Plate is not Level
- Damaged FEP Film
- Wrong Exposure Time
The section below will help you fix the above-mentioned problems to prevent 3D prints’ failing and getting the best results from your 3D printer. Troubleshooting SLA resin 3D prints can be difficult, have patience and try different methods out.
How to Fix Resin 3D Prints That Fail Halfway
1. Make Sure Your Resin is Free of Residue
Check the resin you are going to use before every print. If your resin has cured resin residues from previous prints mixed in the bottle, the resin can cause issues in your print and may not print at all.
If your resin printer is not printing anything, definitely check for cured resin. It could be from a previous print failure.
This is likely to happen if you have a 3D printer that uses a fairly powerful LCD screen. For example, the Photon Mono X has settings within the 3D printer where you can set the “UV Power”.
When I had my UV Power setting up to 100%, it actually cured resin outside the lights’ precision due to being so powerful. On top of this, it has a monochrome LCD screen which is known to be stronger than the average screen.
If you have added a few drops of alcohol to the resin by accident, this may contaminate the resin and can result in print failure.
My normal routine before starting a 3D print is to use my plastic scraper and move the resin all around so no cured resin is stuck to the FEP film.
Check out my article called Ways How to Fix Resin Prints Sticking to FEP & Not Build Plate.
This Photon Scraper on Thingiverse is a good example of a tool you can use to help clean out any residue. Printing this on a resin printer rather than a filament printer is a good idea because you get that needed flexibility and softness for a resin scraper.
- Clean any used resin thoroughly before pouring it back into your original resin bottle
- Keep the resin away from the alcohol during the cleaning process to prevent alcohol from entering the resin.
- Clear the resin vat of cured resin/residue, so there is just uncured resin left
2. Clean the 3D Printer’s LCD Screen
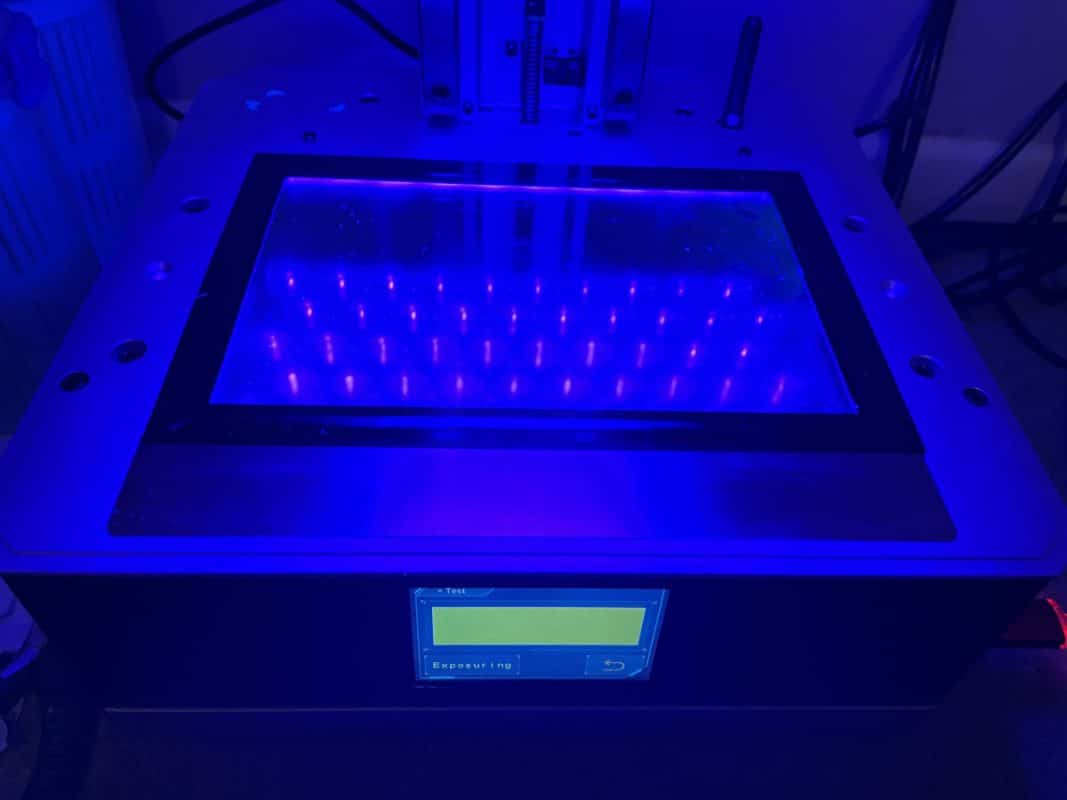
Keeping the screen clean and clear of any cure resin residues and dirt will bring you better results. A dirty or stained screen can cause print defects and this is one of the most common reasons behind print failures.
If there is dirt or resin residue on the screen, your resultant print may have some gaps. The part that has dirt on the screen may not allow the UV lights to pass through the screen and the part of print above that area will not be printed properly.
I managed to get a hole in my FEP film which meant that uncured resin leaked through to the monochrome screen. I have to remove the resin vat and carefully clean the LCD screen with a scraper to remove the hardened resin.
The LCD screen on a 3D printer is pretty strong, so the light can usually pass through some forms of residue, but it’s possible that it negatively affects your print quality.
- Check your 3D printer LCD screen occasionally to ensure there is no dirt or resin present on the screen.
- Only use a simple scraper to clean the screen because chemicals or a metal scraper can damage the screen
3. Try Not to Overfill the Build Plate to Lower Suction Pressure
Reducing the number of miniatures prints on the build plate can effectively mitigate the probability of resin print failures. No doubt, printing a lot of miniatures at the same time can save you time and costs, but this can result in failures as well.
If you overload the build plate with so many prints, the printer will have to work hard on each layer of all prints. This will affect the performance of the 3D printer as it may not be able to handle all parts efficiently.
You can experience resin prints falling off the build plate when this happens.
This is something you’ll want to be doing when you have a little more experience with resin SLA printing. I’m sure you can still successfully print models with a lot on the build plate, but if you get something wrong, you can get print failures.
On top of this, having a print failure when you have so many models and resin used up isn’t ideal at all.
Some people have actually had their screen ripped off from suction pressure, so definitely look out for it.
- Print 1, or a maximum of 2 to 3 miniatures at a time in your early days
- For larger models, try to minimize the amount of surface area on the build plate by angling your models
4. Rotate Prints at 45 Degrees
The general rule for SLA 3D printing is to keep your prints rotated at 45 degrees because straight oriented prints are more prone to failure compared to prints that have a diagonal orientation.
Printing models at a rotated angle means that every layer of the print will have less surface area. It also works in your favor in other ways such as easier removal from the build plate, as well as more efficient printing quality.
When you build up the supports on your resin prints, you can decrease the strain on them by rotating your resin prints, versus having vertically straight prints. It spreads out the weight of your model, rather than have it weigh down in one direction.
Whether you have an Anycubic Photon, an Elegoo Mars, a Creality LD-002R, you can benefit from rotating your models to improve your success rate overall. This is one of those small things that can make a difference to your resin printing journey.
- Try to have a rotated orientation for all your resin 3D prints, and avoid having completely straight models.
- A rotation of 45 degrees for your models is an ideal angle for your resin 3D prints.
I wrote an article called Best Orientation of Parts for 3D Printing that you can check out.
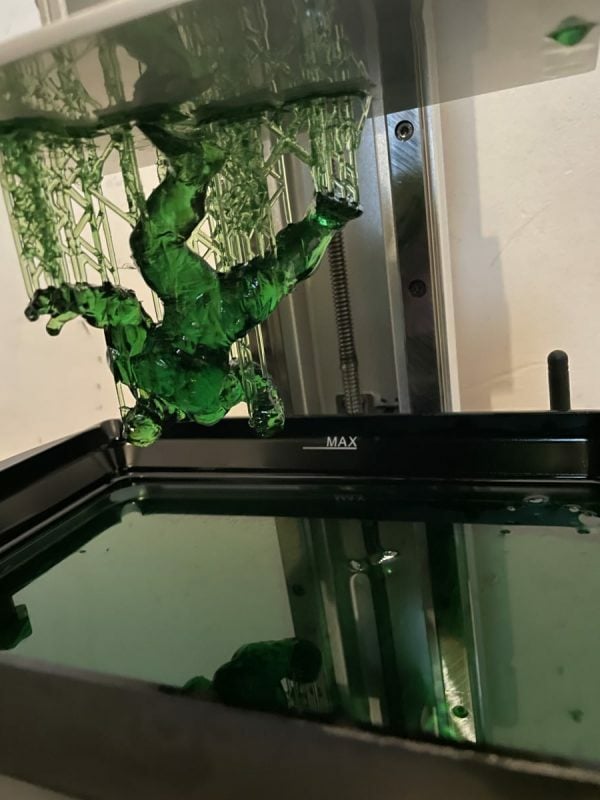
5. Add Supports Properly
Supports play a primary role in resin 3D printing and great supports is likely to bring high-quality results. As resin 3D printers print in an upside-down manner, it would be pretty difficult to 3D print without supports.
When I first got my SLA 3D printer, I didn’t really understand supports, and it really showed in my models.
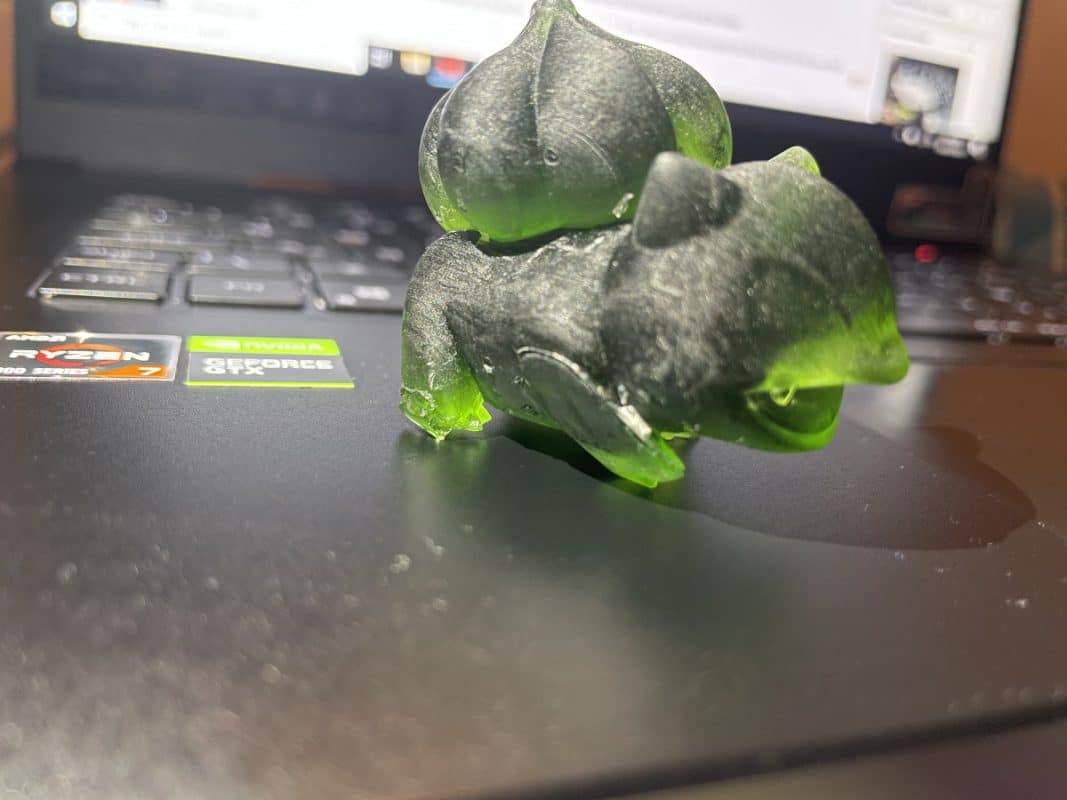
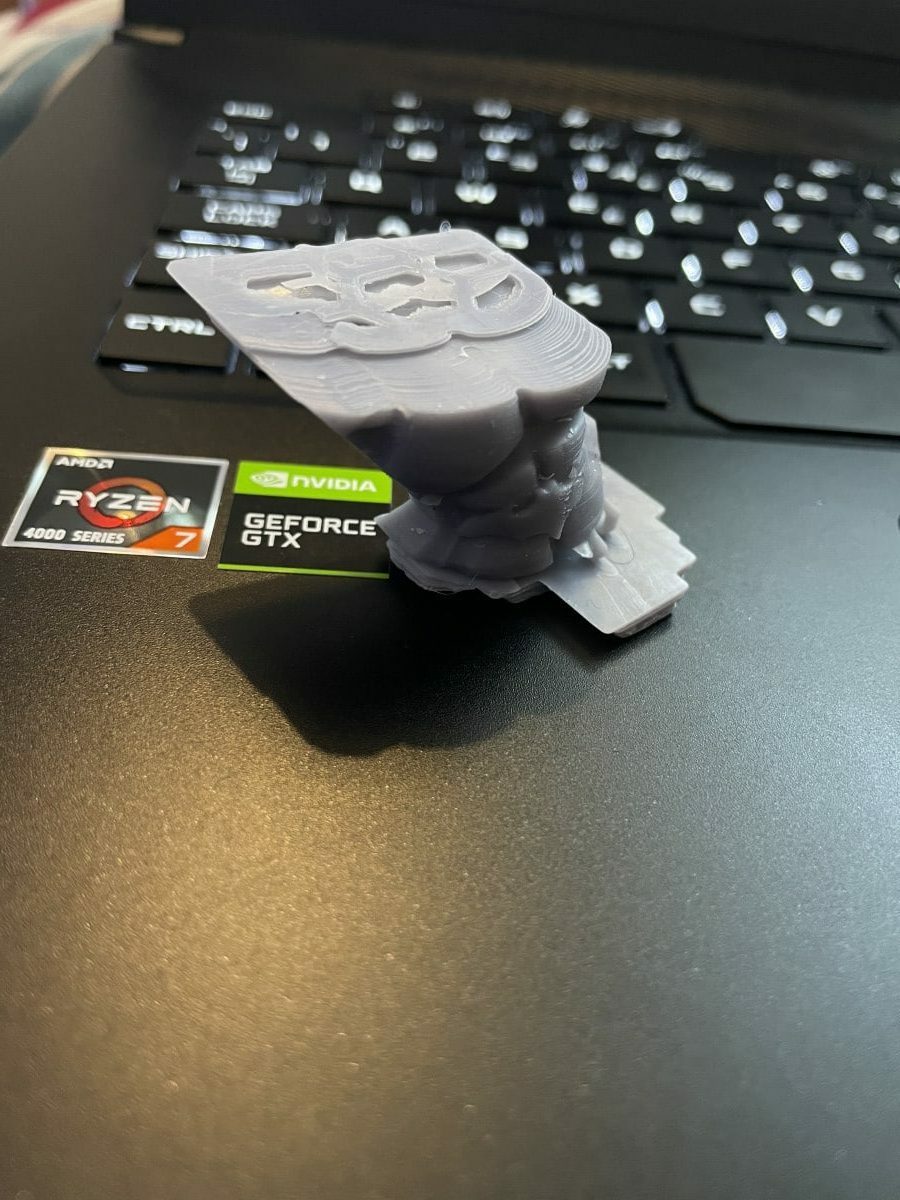
The leg on my Bulbasaur 3D print came out terribly because my supports weren’t good enough. Now that I’ve got more experience with supports, I’d know to rotate the model 45 degree, and add in plenty of supports to ensure there is a good foundation underneath.
Creating supports on resin models can definitely get tricky depending on how complex your model is, so you should definitely start off with simpler models.
If you find that your resin supports keep failing or falling off the build plate, you should take some time to learn how to create them like the experts do.
The video below by Danny at 3D Printed Tabletop takes you through the proper process to add supports to your resin models.
- Use software preferably Lychee Slicer or PrusaSlicer to add supports to the models. This software will provide you with a visualization of each layer and how the model will be printed.
- Add supports of high density and make sure that no parts are unsupported or is left as an “island”.
The Lychee Slicer is excellent at identifying unsupported sections of 3D prints, as well as having Netfabb in-built to fix common model issues right in the slicer.
Check out the video below by VOG giving his honest comparison between Lychee Slicer and ChiTuBox.
Check out my article Do Resin 3D Prints Need Supports? How to Do It Like The Pros
6. Level the Build Plate
If you have a grip on this factor, you can get prints of the best quality without any hassle. If the build plate is tilted to one side, there is a huge probability that the print of the lower side will not come out efficiently and may fail halfway.
The build plate on your resin 3D printer usually stays pretty level, but after some time, it can require a recalibration to get it level again. This really does depend on the quality of your machine, with higher quality ones staying level for longer.
My Anycubic Photon Mono X is extremely sturdy with its design, from the dual linear Z-axis rails and strong foundation overall.
- Re-level your build plate if you haven’t done it for a while, so it’s back into its optimal position.
- Follow your printer’s instruction for re-levelling – some have a single leveling screw, some have 4 screws to loosen then tighten.
Another thing to check is if your build plate is actually flat. MatterHackers created a video showing you exactly how to make sure your build plate is flat through sanding with low grit sandpaper. It also works very well to increase bed adhesion.
I wrote an article in more detail called How to Level Resin 3D Printers Easily – Anycubic, Elegoo & More
7. Check & Replace FEP Film if Needed
FEP film is one of the most important components of resin 3D printers and a minor hole can ruin the print and result in failure.
If there is a hole in your FEP film, the liquid resin can get out from that hole in the vat, the UV light will cure that resin under the film, and it will harden on the LCD screen.
The part of the print above that area will not be able to get cured because of UV light blockage and will result in print failure halfway.
I’ve experienced this first-hand, with my FEP leaking out due to a small hole. I managed to cover the hole using some simple see-through sellotape and this worked well until I received my replacement FEP film.
Usually you can get FEP film pretty quickly from Amazon, but since I have a larger resin 3D printer, I had to wait about 2 weeks to get the replacement.
Many people have gone through constant failures in their resin 3D prints, then after changing their FEP film, started getting successful resin prints.
- Inspect your FEP film sheet regularly
- If you notice any holes in the FEP film, replace it immediately with a new one before starting the printing process.
It’s a good idea to have spare FEP film sheets on hand just in case.
For the standard 140 x 200mm FEP film size, I’d recommend the ELEGOO 5Pcs FEP Release Film from Amazon, which is 0.15mm thick and is loved by many customers.

If you have a larger 3D printer, you’ll need 280 x 200mm, a great one being the 3D Club 4-Sheet HD Optical Grade FEP Film from Amazon. It has a 0.1mm thickness and comes packed in a hard envelope to prevent the sheets from bending during transit.
You’re also getting a 365-day return policy for top satisfaction guarantees.

Check out my article 3 Best FEP Film for Anycubic Photon, Mono (X), Elegoo Mars & More
8. Set Correct Exposure Time
Printing on wrong exposure time can result in many issues and can eventually lead to a failed print. Right exposure time is necessary so that the resin can get cured properly.
Make sure that the first few layers have a bit more exposure time as compared to other layers because this will provide better adhesion of the print to the build plate.
- Make sure that you set the right exposure time depending on the type of resin.
- Calibrate all the settings properly, and it is recommended to review the settings every time before printing a model.
In order to find the ideal exposure time for your chosen resin and 3D printer, it can take some testing. There is a great way to get the perfect exposure time, which involves printing out a quick series of tests at different exposure times.
Depending on how each test print comes out in terms of detail, we can figure out the range in which your exposure times need to be in.
I wrote a pretty detailed article called How to Calibrate Resin 3D Prints – Testing for Resin Exposure.