How to Separate Parts in PrusaSlicer – Cutting Parts
Separating parts or cutting parts in PrusaSlicer is a very simple and straightforward process! The slicer lets you split up a single object into multiple meshes, so you can move and edit each part individually from the rest.
To separate parts in PrusaSlicer, import the model you want to split into the slicer, right-click on the part in the object list, and select the split option. You can choose to either separate the 3D model into individual objects, or parts of a single object
In this article. I’ll go into more detail on how you to separate parts in PrusaSlicer. I’ll also be explaining the different options available and how you can use them.
So, keep on reading for more information!
How to Separate Parts in PrusaSlicer
A standard STL file or model in PrusaSlicer can’t be separated because it is made up of one main shell or part in the slicer. You can cut the model using a different method which I’ll explain in the next section.
However, for models that have more than one shell that are merged together, you can separate them using PrusaSlicer.
In your 3D printing journey, you might encounter parts of an assembly that are directly combined into one 3D file for printing. This is done to reduce printing time and maximize the use of the available build volume.
However, this might be problematic in some instances. For example, let’s say your printer isn’t big enough and you want to print the parts of the assembly separately. Or you might also want to edit and change the print settings for specific items in the assembly.
In these scenarios, you won’t be able to make a change to one part of the assembly without changing the entire assembly. This is why you need to separate parts in PrusaSlicer.
To separate the parts, these are the steps you have to follow:
Step 1: Import the File into PrusaSlicer
- You can do this by dragging and dropping the file into the PrusaSlicer virtual build plate. You can also use the Ctrl + I shortcut to search for the file in your file system.
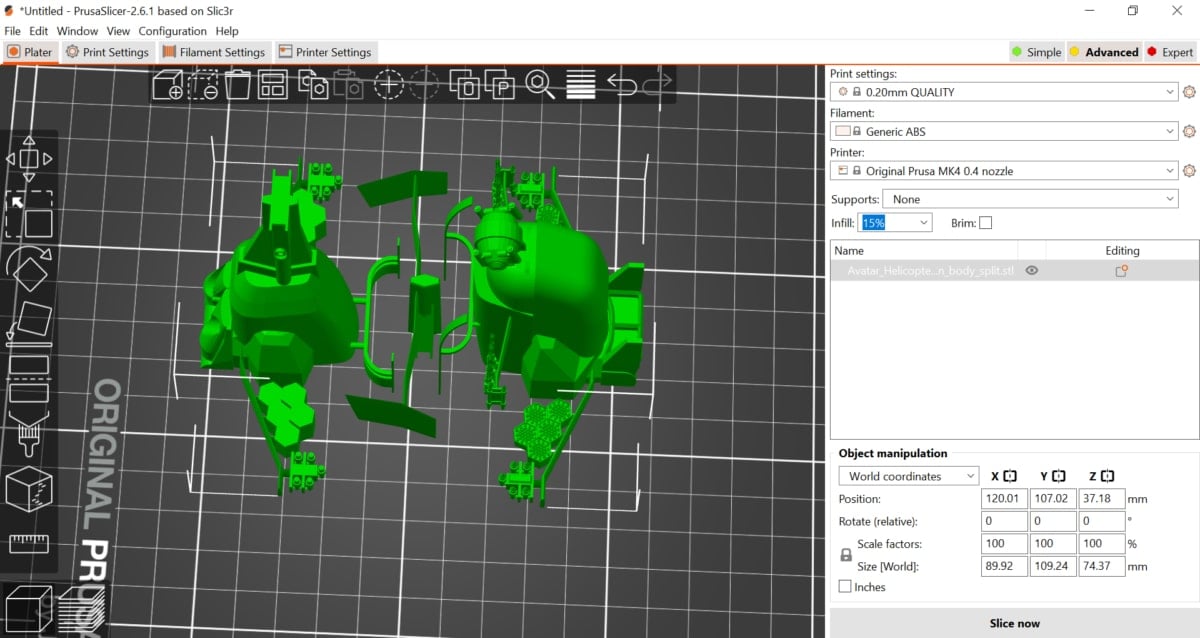
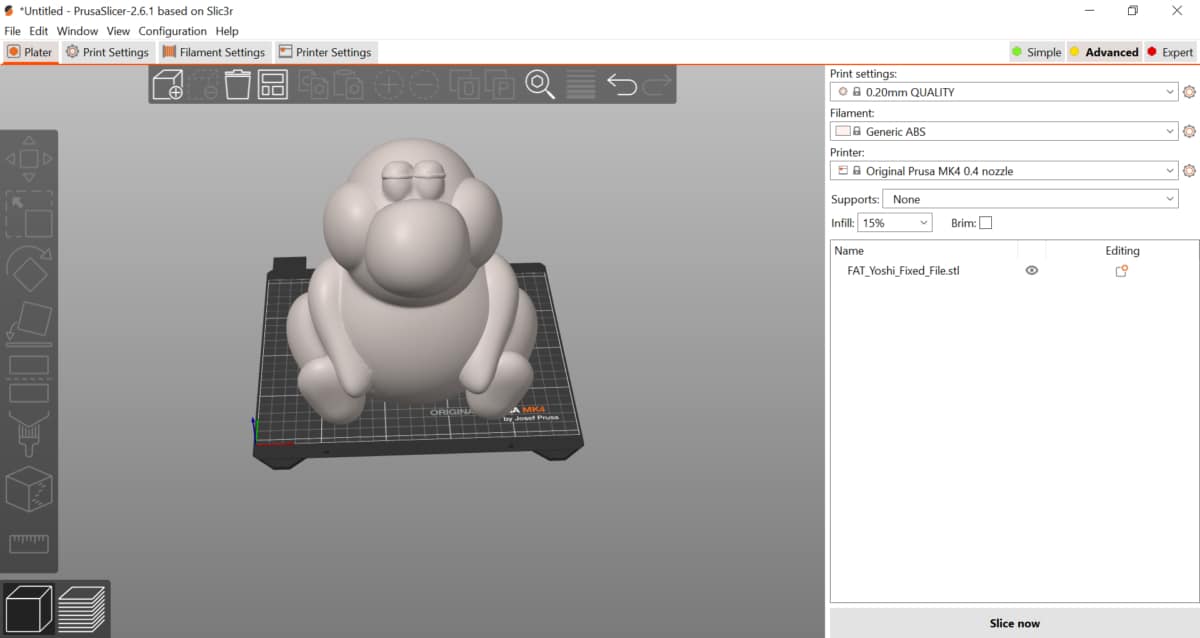
- For this demonstration, I’ll be using this model of a helicopter from the Avatar movies. It’s divided into three pieces which are merged into the same 3D file.
- Now, the file is inside our build volume. You can see that although there are multiple models in the STL file, everything moves as one. If we make any changes, it will be reflected in the model
Step 2: Right Click On the File in the Object List
- Click on the Expert You’ll see the name of the model in the object list.
- Right-click on it.
Step 3: Split the File
- After right-clicking the name of the file on the object list, you’ll see a series of options.
- On the list, select Split.
- Choose between To objects and To parts.

- After clicking on an option, the two different sections will be split into different parts on your build plate.
Step 4: Edit the Different Parts
- Now, if you check the object list, you’ll see multiple parts instead of one.
- You can move each part individually, apply custom settings to it, delete, and even save any one of the new parts.
Check out the video below to see a visual tutorial.
Split to Parts vs Split to Objects: Which One is Better?
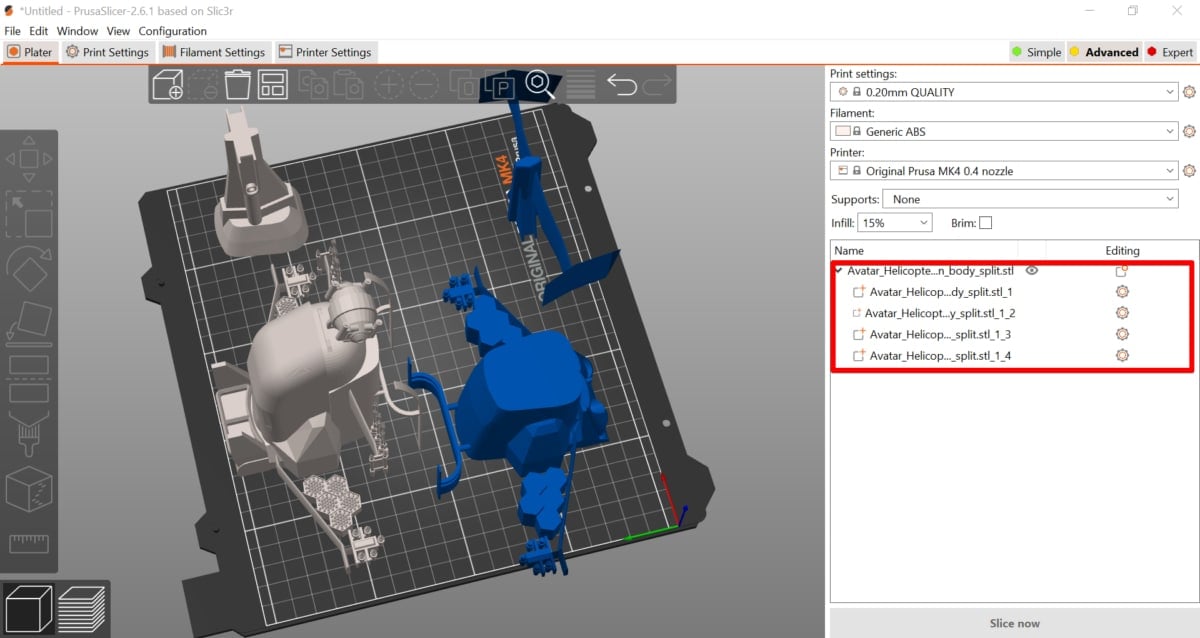
When you choose to split a file in PrusaSlicer, it offers you two options; Split to Parts and Split to Objects. The split-to-objects option creates an individual object for each shell it craves out from the print’s main body and places it on the print bed.
Basically, it separates the 3D model into individual parts and places each of the individual parts on the build plate. We can see in the model below that it separates the components of the helicopter and places them directly on the build plate.

On the other hand, the split-to-parts option preserves the assembly after splitting the file. All parts stay in their original position even after you split up the model. Prusa recommends using it when you’re printing a part that you want to avoid being misaligned.
As we can see in the file above, all the components of the helicopter are still in their original position even after the model has been split.

How to Cut a Part in PrusaSlicer
We will look at how to cut parts in PrusaSlicer in this section rather than separating out the parts by the multiple shells. Cutting parts and separating or splitting them are two different functions.
PrusaSlicer has a cut feature that allows you to cut parts along a set plane or axis so you can edit and print each part separately. You can also add alignment aids like pins and dowels to the cut pieces to make joining and re-assembly easier.
Here are the steps to cut parts in PrusaSlicer.
Step 1: Import Your Model into PrusaSlicer
- Using the CTRL + I shortcut, import your model into the build volume.
- You can also drag and drop it inside the build volume
Step 2: Setup the Cutting Plane
- To cut the model, press the C button on your keyboard, or click on the cut icon on the left toolbar.
- A cutting plane with a ball on top will appear on the model.
- Click on the ball and move it with your mouse to drag the cutting plane to your preferred cutting location. You can also rotate the cutting plane using the ball.

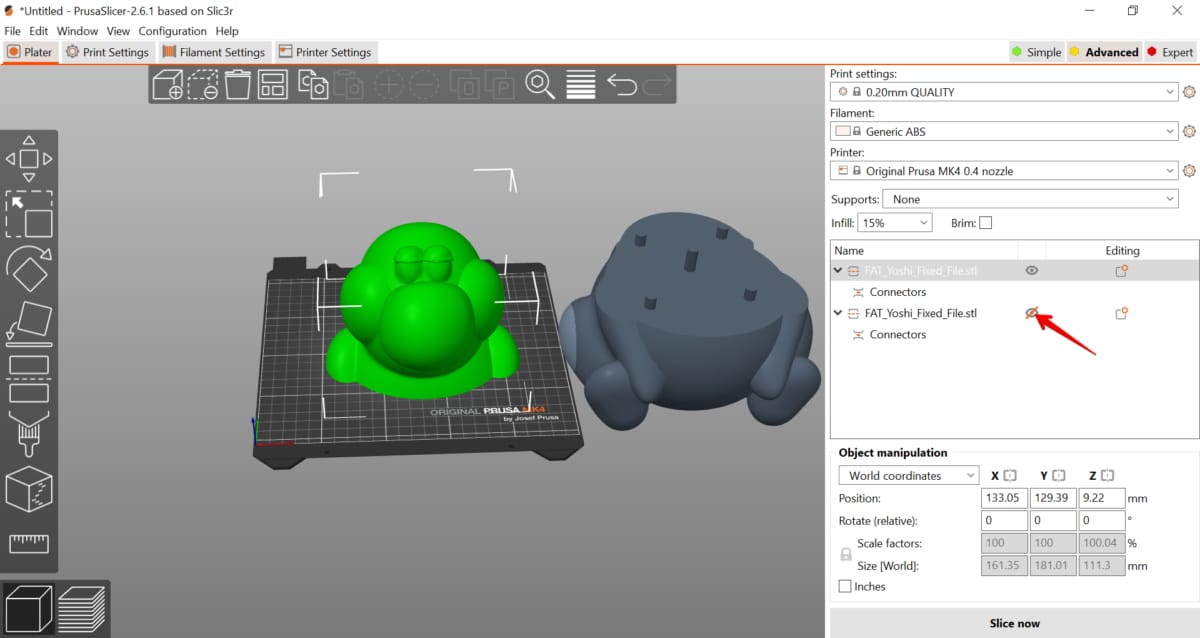
Step 3: Add Connectors
- Connectors make re-assembling the model easier after printing. To add them, select the Add Connectors option on the cut menu.
- Next, edit the size and shape of the connectors. Once you’re done editing the size and shape, select where you want the connectors on your model and click on them.

- PrusaSlicer will place your connectors there. Click on Confirm connectors to save your settings
Step 4: Modify the Cutting Settings
- After adding the connectors, you can modify the rest of the cutting settings.
- You can choose to keep one or both objects. You can choose to cut them as objects or parts.
- You can also choose to change the orientation of the final cut objects.
- Now you can click on cut.
Step 5: Print the Final Model
- After cutting it, you’ll see both halves of the print on the build plate. You can choose to delete the other half or to simply just hide it and move it off the build plate till you are ready to slice and print it.
- You can hide the object by clicking on the eye icon on the object list.
Check out the video below to see a visual tutorial.
Final Thoughts
Separating parts is a very handy skill to have when you’re working with complicated 3D models in PrusaSlicer. In this guide, we’ve covered some very simple yet effective methods to separate your parts in PrusaSlicer. I hope they help you in your printing journey.
You can also check out this guide on How to Split & Cut STL Models For 3D Printing to learn how to separate models in other software. Good Luck and happy printing!
Good job. Thank you.
My pleasure, thanks for reading.