How to Split & Cut STL Models For 3D Printing
Splitting and cutting your models or STL files for 3D printing is important if you want to create prints that are larger than your build plate. Instead of scaling down your project, you can separate your model into different parts which can later be joined together.
In order to split and cut your STL models for 3D printing, you can do this in many CAD software such as Fusion 360, Blender, Meshmixer, or even directly in slicers like Cura or Lychee Slicer. You simply select the split or cut function within the software and split the model where you choose.
This is the basic answer for splitting and cutting your model, so keep on reading to get the details on how to do this successfully, along with more useful information that you can use.
How Do You Break Up Models & STL Files for 3D Printing?
When it comes to 3D printing, breaking up large models is an important skill to learn since we are limited by the size of our build plates for each print.
Rather than stopping at this limitation, people figured out they could break models into smaller sections, which can then be glued back together afterwards.
This can be done by using design software or even directly within our slicers, though it takes some knowledge to get it right.
It’s similar to having a model which is split with the main model and the base or stand of the model, but doing this for multiple parts of the model.
After you split and print the model, people tend to sand the prints down, then superglue them together to provide a strong bond that shouldn’t come apart.
Popular software that can split your STL files or models up are Fusion 360, Meshmixer, Blender, and many more. Some of these are easier than others, mainly due to the user interface or how many features the application has.
It’s best to pick a software and follow a good video tutorial that takes you through the steps to split up your models with ease. You can actually use the popular Cura slicer to split your models down and separate them into different STL files which can be printed separately.
Similarly, you have resin slicers such as ChiTuBox or Lychee Slicer that have inbuilt split functions where you can cut a model and organize it on the build plate as you wish.
The process of splitting a model and changing the orientation can allow you to easily fit a large model on your build plate, by utilizing the whole area.
In some instances with more advanced models, designers actually provide STL files where the model is already split up, especially when it comes to figurines, complex characters, and miniatures.
Not only are these models split up nicely, but sometimes they have joints which fit together nicely like a socket, allowing you to easily glue them together. With experience and practice, you can even take STL files, edit them and make your own joints.
Let’s look into how to actually split models using different software.
How to Split a Model in Fusion 360
A simple way to split a model in Fusion 360 is to sketch where you want to split the model, Extrude the sketch towards the inside of your model, then change the Operation to “New Body”. Now you can hit the “Split Body” button with the Splitting Tool highlighted and select the model to split up the two separate parts.
Another way to split a model in Fusion 360 is to create an Offset Plane on your model under the “Construct” section in your toolbar, then move the Plane to where you want to split the model. You then click the “Split Body” button in the toolbar and select the Plane to cut. Each face of your model can have a Plane.
Check out the video below for a great illustration and tutorial on how to get this done for your models.
The video above shows how to split really simple models, though for more complex ones, you may want to use a more advanced technique to get the splits perfect.
The video below by Product Design Online takes you through two main methods on how to split large STL files so you can successfully 3D print them. It works for STL files or even STEP files that are large meshes.
Many people describe it as one of the best videos on how to split 3D printer files for printing.
The first method consists of:
- Measuring the Model
- Turning on the Mesh Preview
- Using the Plane Cut Feature
- Selecting the Cut Type
- Selecting the Fill Type
The second method consists of:
- Using the Split Body Tool
- Moving the Newly Cut Parts
- Creating a Dovetail
- Copying the Joint Type: Making Duplicates
How to Split a Model in Cura
To split a model in Cura, you first have to download a plug-in called “Mesh Tools” from the Cura Marketplace. After getting it, you simply choose your model, click on the Extensions tab and find Mesh Tools there. Finally, click on “Split model into parts” and enjoy your model cut into two.
Cura’s method for splitting up a model is quite uncomplicated. The older versions of this slicer software didn’t even require downloading the Mesh Tools plug-in.
You simply had to right-click on the model and the option to split your model would appear. Painless360 has explained how to break your model into parts in the following video.
Unfortunately, Cura does not involve advanced techniques to cut your model. You’ll have to use Meshmixer or Fusion 360 for more complex part splitting.
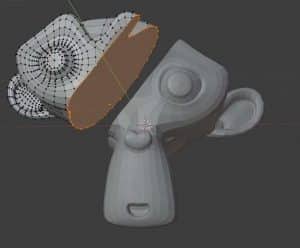
How to Cut a Model in Half in Blender
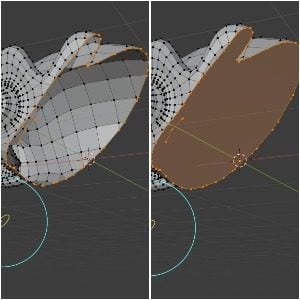
To cut a model in half in Blender, go to “Edit Mode” by pressing the “Tab” key, then find the “Bisect Tool” in the “Knife” section on the left column. Ensure the mesh is selected by pressing “A” then click the first and second point to create a line where your model will be cut. Now press “P” to separate the model.
- Go into Edit Mode by pressing the Tab key
- On the left column, find the “Knife” tool, hold the left click and select the “Bisect Tool”.
- Make sure the mesh is selected by pressing the “A” key
- Create the line by clicking the first and last point across your model to start the split.
- Press the “V” key then right-click to make the actual split in the model
- While the split is still highlighted, press “CTRL+L” to select the active mesh it’s connected to.
- You can also hold “SHIFT” and click any meshes if there are loose parts, then hit “CTRL+L” to select it.
- Hit the “P” key and separate parts by “Selection” to separate the parts in the model.
- Now you can hit “TAB” to go back to Object Mode and move around the two separate pieces.
There are some options that you can play with while splitting up your models, though it’s very simple to do for the most part.
You can choose whether you want to keep the part of the model you are splitting by checking the “Clear Inner” or “Clear Outer” part of the model, as well as choose whether to “Fill” the mesh, so the split doesn’t just have a gap in there.
If you forgot to fill in your models during the splitting process, you can hold “SHIFT + ALT” then Left-Click the outer mesh or edge of the model to select the whole exterior or “loop select” the model. Now press the “F” key to fill in the mesh.
There are more tips that you can do to smooth your model and even make the edges match up better. Check out the video below by PIXXO 3D for a great tutorial on how to split models on Blender.
How to Separate Objects in Meshmixer
When it comes to creating complex cuts, doing it in a slicer or very basic CAD software can be difficult or just not possible. Meshmixer is a popular CAD software that allows you to have a lot more control over how you separate and split your 3D printing files.
To separate objects in Meshmixer, you have to click on the “Edit” section and choose “Plane Cut” from the options there. Then, select “Slice” as the “Cut Type” and separate the object using a plane cut. Go back to “Edit” and click on “Separate Shells.” You will now be able to easily “Export” the individually split models from the menu on the left.
You also have a second option to split models by using the “Select Tool” and specifying a smaller area of the model to be cut.
Josef Prusa has a great video showing you exactly how you can cut STL models successfully in Meshmixer.
Here is a summary step-by-step guide to separating objects in Meshmixer.
- First, import your model into the Meshmixer platform
- Select “Edit” & hit “Plane Cut”
- Rotate the view to identify the Plane you want to cut
- Click and drag to cut the model in the desired area
- Change the “Cut Type” to slice so you don’t discard any of the model and hit “Accept”
- Your model is now separated
- You can go back to “Edit” and select “Separate Shells” to split the model up
Another cool thing you can do in Meshmixer is to actually create aligning pins for your split models which fit like a plug between two pieces. This is also shown in the video above, so definitely check that out to learn how to do it like the pros.
Bonus Method: Use 3D Builder to Split 3D Models Easily
3D Builder is one of the easiest ways of splitting up an STL file and cutting it into different parts. It comes pre-loaded on most Windows computers, and can also be downloaded for free through the Microsoft Store.
The application enjoys a fluid, responsive interface with easy-to-understand controls that even beginners won’t have a difficult time getting used to.
To split a model in 3D Builder, simply select your model, click on “Edit” in the Taskbar above, and then click on “Split.” You would then use the rotation gyroscopes to position the cutting plane however you want. When done, click on “Keep Both” and select “Split” to cut the model in half and save it as an STL file.
3D Builder makes the splitting process quite effortless for 3D printing enthusiasts and experts alike. The cutting plane is easy to handle, and you can easily use it as your go-to model slicer, as thousands of other people do.
The following video can help illustrate the process even further.


