What Are the Parts of a 3D Printer? A Simple Breakdown (Filament, FDM)
FDM (Fused Deposition Modelling) is the most popular 3D printing technology among hobbyists. These printers have carved out a niche for themselves as the premier choice for low-cost, desktop 3D printing.
Therefore, if you are a beginner looking to enter 3D printing, chances are your first 3D printer is going to be an FDM printer.
To help you understand 3D printers better, I’ve written an in-depth guide about all the parts that make up the FDM printer.
In this article, we’ll be taking each part and exploring the functions they perform during the printing process. We’ll also be answering some of the commonly asked questions about Filament 3D printer parts.
What Are the Components of an FDM 3D Printer?
Many different manufacturers are offering various FDM printers on the market. However, the basic components of the printer remain the same across all brands.
Let’s look at some of these components:
Extruder
The extruder is one of the most important part of the printer. Also known as the cold end, it is responsible for guiding and conducting the filament from the reel to the hotend for melting.
The extruder is the upper portion of the extruder assembly. Its job is to transport and push the filament into the lower parts of the assembly, the hotend.
How Does the Extruder Work?
A standard extruder comprises three parts: a stepper motor, a drive gear, and an idler (bearing).
The stepper motor provides the torque for unwinding the filament spool and pushing the filament to the hotend. The motor is very accurate and capable of precise motion and speed control as needed during printing.
The drive gear and the idler (usually a bearing) grab the filament and extrude it through to the hotend. They hold on to the filament and make sure it stays on a straight path to the hotend.
So, that’s how the standard extruder works basically. However, based on their construction, we have two types of extruders on the market:
- The Bowden Extruder
- The Direct Drive Extruder
Bowden Extruder

The Bowden extruder isn’t directly connected to the hotend. Rather, the main extruder body is placed some distance away and connected to the hotend using a Bowden tube. The Bowden tube is commonly made out of Teflon due to its low friction property.
The arrangement relieves the extruder weight on the nozzle and allows for faster and more accurate printing. However, filament control is much harder.
Furthermore, the distance from the extruder to the hotend can introduce lag into the system causing retraction problems like stringing and oozing. Also, the motor load is greater due to extra distance and friction.
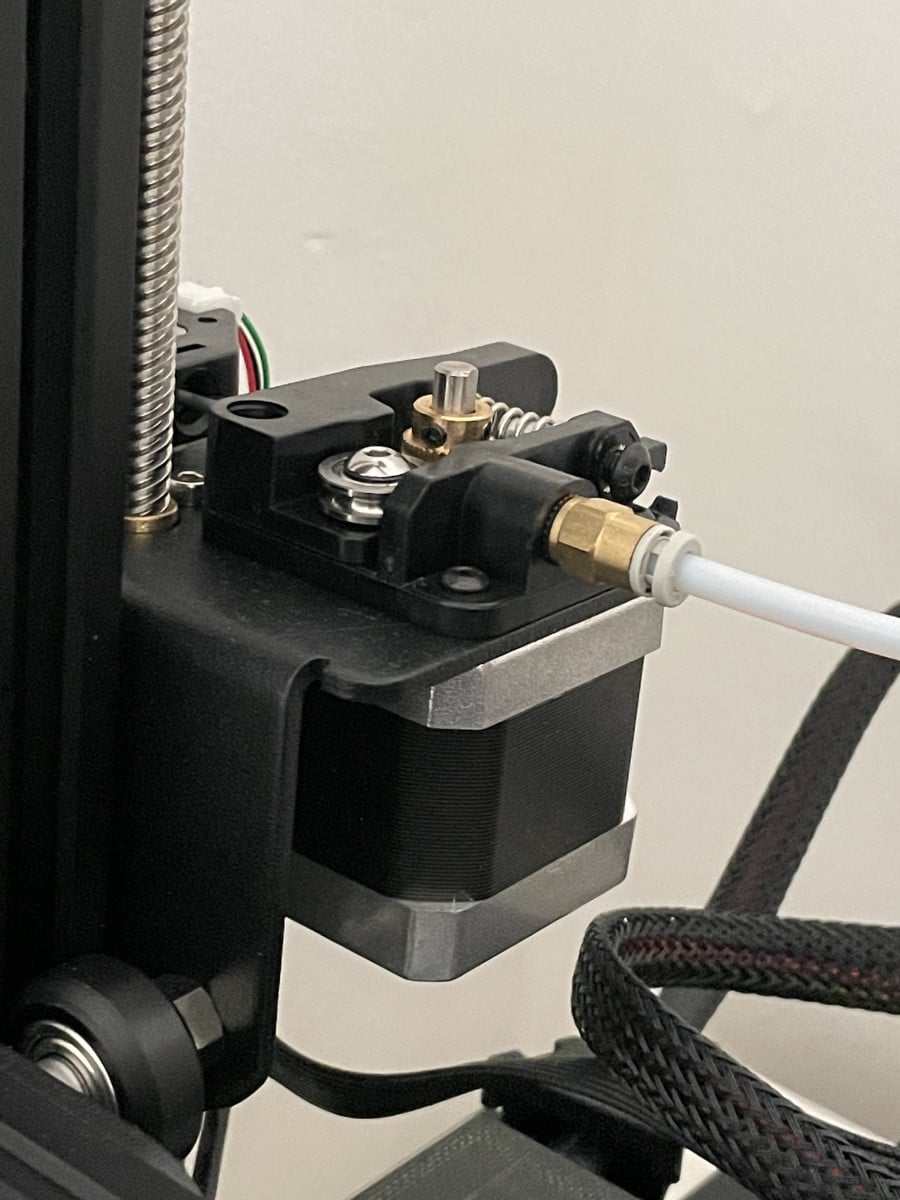
Direct Drive Extruder

Here, the extruder body is directly mounted above the hotend. The filament goes directly from the extruder to the hotend.
Although the extra mass of the extruder on the hotend can cause problems if improperly configured, a direct drive extruder provides more advantages.
The torque load for the motor is smaller. The low travel distance reduces friction and provides greater filament control enabling users to print flexible filaments.
Most 3D printers come with the Bowden setup, but you can find some 3D printers that are Direct Drive Extruders like the Artillery Sidewinder X1 V4 from Amazon.
You also have the choice to upgrade your Bowden setup to a Direct Drive setup with an upgrade kit like the Creality Direct Drive Extruder Upgrade.
Hotend

The hotend is also another essential part of the 3D printer. It is the part that melts, extrudes, and deposits the filament on the printer’s bed for printing.
After the extruder feeds the filament into the hotend, the filament goes through a heated path called the melt zone. Here, the filament melts from the heat. Due to the pressure from the extruder, it is forced out of the small nozzle opening.
A standard hotend comprises mainly of the heater block, heat break, nozzle, heat sink.
- Heat Sink: The heat sink forms the upper part of the hotend. It transfers heat away from the heat break making sure the filament doesn’t melt before it reaches the melt zone. It has a large surface area for convection and can also be cooled by fans or water.
- Heat Break: The heat break is a component that joins the cold side and the melt zone of the hotend. The upper part of the heat break is nestled in the heat sink, while the lower part goes into the heater block to form parts of the melt zone.
The heater block forms the transition zone where the filament goes from a solid to a semi-solid state.
- Heater Block: The heater block supplies heat to the nozzle and the melt zone. It contains a heater cartridge, which converts the current to electricity, and a thermistor for regulating the temperature.
- Nozzle: The nozzle is the final part of the extrusion assembly. It is a cylindrical tube with a small opening at the end where the melted filament comes out. The size of the nozzle’s opening determines the resolution or level of detail of the print.
Depending on the filament, the nozzle can be brass, steel, or ruby-tipped brass.
That’s all about the structure of hotends. Hotends available on the market are divided into two main categories: All-metal and PEEK/ PTFE hotends.
PTFE/PEEK Hotends
PTFE hotends are mostly found in budget printers. In PEEK hotends, the filament travels through a low friction PTFE tube to the melting zone (heat break).
Right before the melt zone, the PTFE tubing and filament are insulated by a PEEK block. The insulation stops the filament from melting prematurely which can lead to poor extrusion and clogs.
The PEEK setup works for low-temperature filaments, but at higher temperatures, PEEK and PTFE begin to break down.
All-Metal Hotends

All-metal hotends replace the PEEK and PTFE with a metal strip (stainless steel) connected to a heat sink. Using this, the hotend can now withstand high temperatures and print abrasive, higher temperature materials.
The MicroSwiss All-Metal Hotend is an example of a popular aluminum hotend.
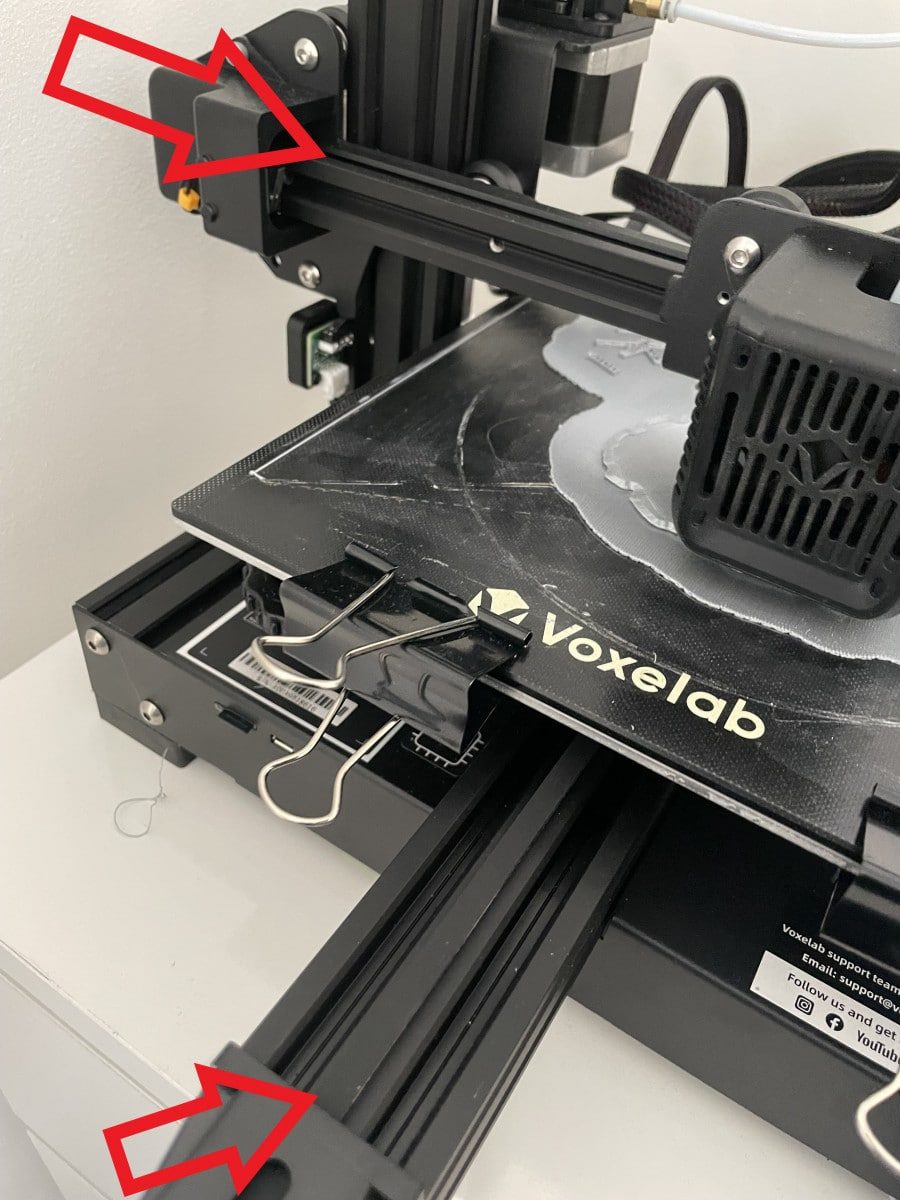
Frame – XY Axis

The frame of the 3D printer is the base on which everything is built upon. As I mentioned earlier, there are several types of frames for 3D printers, but the most common by far is the Cartesian (X, Y, Z) system.
In the popular Cartesian system, the position and direction of the print head are determined by its movement in the X, Y, Z-axis. Usually, the print head is mounted on a series of rails which enable it to move about in the X, Y direction.
For the Z motion, the print bed is also attached to a rail or lead screw which moves it in the Z-axis.
The frame has to be made as sturdy as possible to avoid jerking and backlash during printing. Common choices for frame construction are Aluminum extrusions and stamped steel gantries.
The frames can be found on Amazon by looking for 2020 V Type Aluminum Profile Frames.

Belts
Belts in 3D printers are central to how the print head can move about in the X and Y-axis. They transfer the rotary motion of a motor to a pulley which results in linear movement of the connected print head along the rails.
The print head and other components are connected to the belt and the rails. They are mounted in between the pulley and the motor.
For increased accuracy during printing, 3D printers use a special type of belt called a Timing Belt. A timing belt is a toothed belt that latches onto special grooves in the pulleys and the print head carriage.
Toothed belts help eliminate velocity losses and belt slip, giving the 3D printer more control over the printing process. Toothed belts are usually made of rubber, but you can find variants reinforced with materials like steel or fiberglass.
You can find the Befenybay Timing Rubber Belt with Copper Buckle from Amazon, a fiberglass reinforced open belt that is popular with 3D printers.

POM Wheels
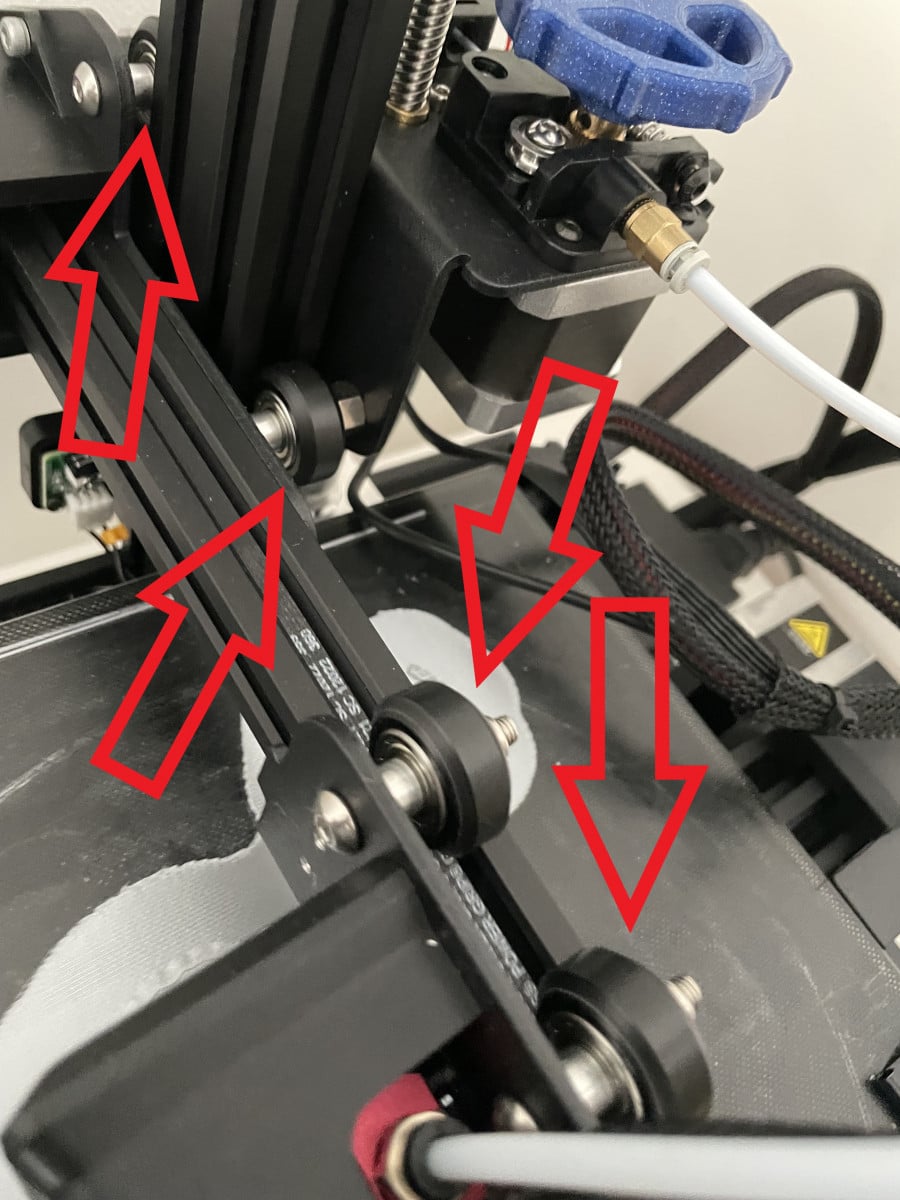
POM wheels are guided rubber rollers with bearings inside. POM wheels are used in mounting the print head and print bed carriages on the 3D printer’s frame.
The frames have special recesses and profiles for the wheels machined into them. So, after mounting the respective carriages, the wheels slot directly into their running tracks.
The wheels provide smooth, low-friction movement for the print head and print bed as they move throughout the print space.
You can get some Aokin 3D Printer POM Wheels (10 Pcs) from Amazon

PTFE Tubing
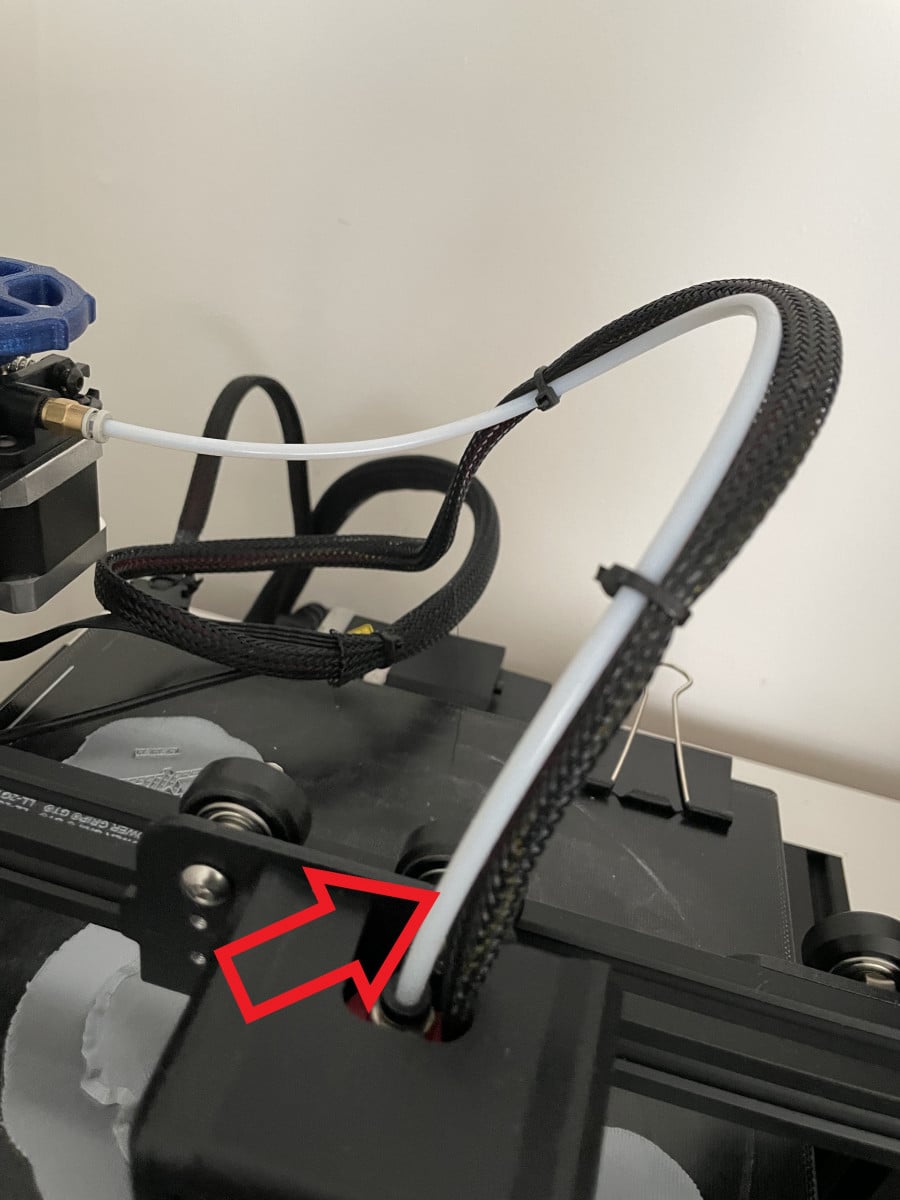
I’ve mentioned some of the applications of the PTFE tube in this article, but let’s take a deeper look at this material.
Polytetrafluoroethylene (PTFE), or as it’s commonly known Teflon, is a transparent, odorless, non-toxic, chemically inert material with a low coefficient of friction.
Its low coefficient of friction makes it very suitable for flow of all kinds. As a result, it has a wide range of applications in fluid flow fields where low friction is a necessity.
In a 3D printer, PTFE has many uses depending on the printer’s configuration. Its low friction makes it a natural choice for conveying the filament.
PTFE tubes serve as the filament guide tube in direct-drive extruders. It also serves as the connector between the extruder and the hotend in a Bowden extruder.
However, when using PTFE in an extruder, you must note that it doesn’t fare well at high temperatures. At elevated temperatures, the PTFE material begins to deform and can even break down and release harmful gases.
So, know when and where to use PTFE appropriately.
Capricorn PTFE Tubing is the premium type that can withstand higher temperatures and is a lot more durable for your 3D printer.

Build Surface/Print Bed

The build surface of the 3D printer refers to the platform on which the filament is deposited to form the print. Depending on the printer’s model, the build surface can be stationary or move in a specified direction.
In 3D printing, the print’s quality is influenced heavily by the first layer and the build plate adhesion. So, the build surface plays a big role in the printing process.
Depending on the filament’s material, there are different things to consider when using a print bed. These things include:
- Heating: Some print beds come with a heating pad attached to raise the temperature of the build surface. The increased temperature helps with first layer adhesion and warping, especially when printing filaments like ABS and polycarbonate.
- Material: The build plate’s material also determines its performance. It determines how well the build plate holds up under heat, and also how well the filament will stick to it. Common print bed materials include:


- Aluminum
Control Box/LCD

The control box is the Human Machine Interface of the 3D printer. It is how the printer’s operator communicates with the 3D printer directly without using a PC or any device.
Using the control box, the operator can start, pause or stop printing. They can also load the print files from external media like a USB stick or an SD card. It all depends on the sort of firmware loaded on the printer.
The control box interface can be a touchscreen or a plain LCD with physical buttons or a control knob.
The control box can also contain other sensitive electronics required for the proper functioning of the 3D printer. These electronics include the power supply unit, motherboard, USB ports, Wi-Fi antennae, etc.
Motherboard
The motherboard of the 3D printer houses the brain of the 3D printer, the microcontroller. It serves as the nerve center for all the electronic functions of the 3D printer.
All the sensors, drivers, and all other electronic components of the printer provide feedback and get instructions from the motherboard.
It is responsible for regulating the heaters, converting the GCode into instructions for the motors, and several other functions. Some motherboards can also have special features like wireless monitoring, camera slots, etc.
A popular motherboard for a 3D printer is the BIGTREETECH Direct SKR Mini E3 V2.0 32-Bit Silent Control Board from Amazon.

Fans
Like any other manufacturing device, 3D printers generate a lot of heat. So, naturally, they need to be cooled off using fans.
3D printers have many fans for cooling different parts of the printer. Let’s take a look at these fans and the functions they perform:
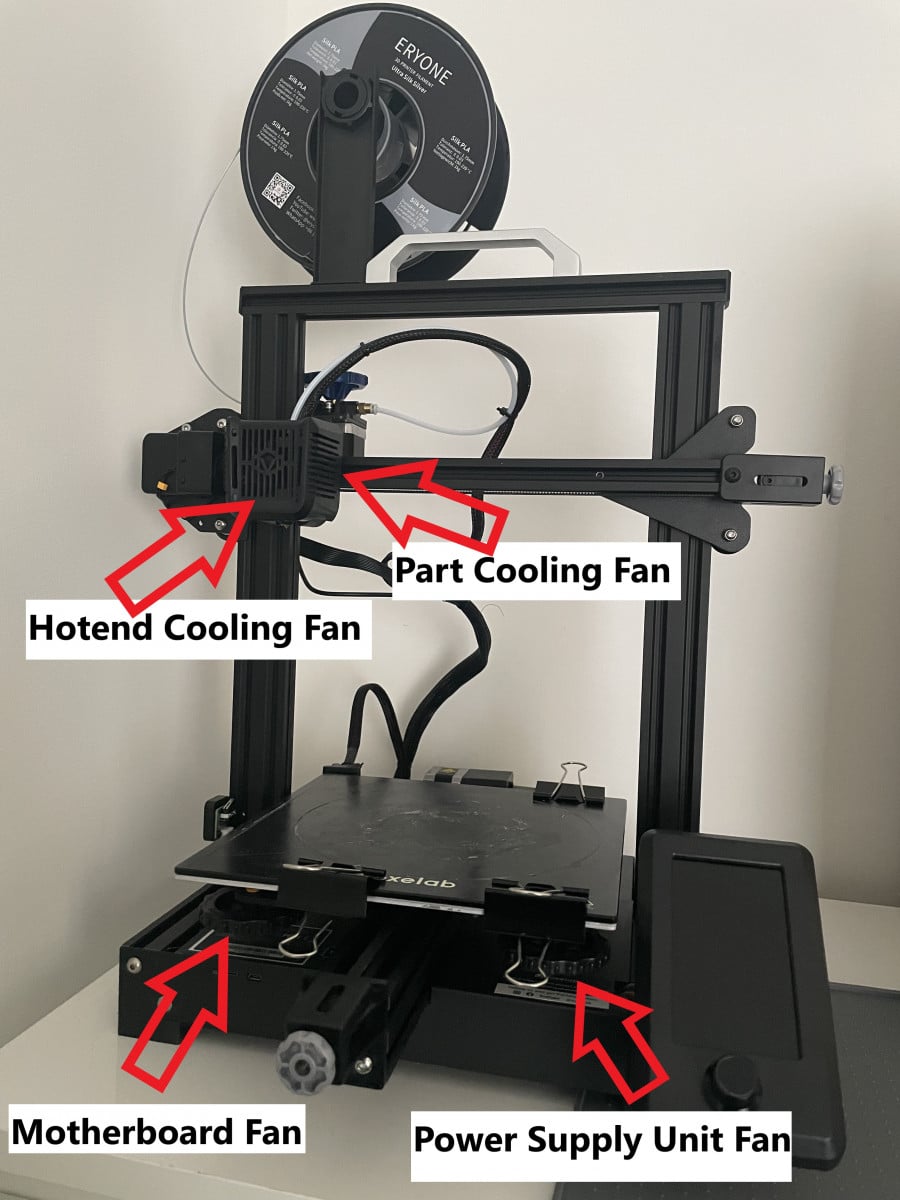
Part Cooling Fan
Like its name says, the parts cooling fan cools down the part currently being printed. It is located near the nozzle and directs its airflow to the print area.
The part cooling fan cools down the molten filament as it’s being extruded from the nozzle onto the print. The cooling helps eliminate print problems like warping and also provides a good surface finish.
However, not all filament types require part cooling. Using part cooling with filaments like ABS or Polycarbonate can lead to unsatisfactory results. For materials like this, it’s best to disable the cooling or keep it at a low level.
Hotend (Heat Sink) Fan
The function of the heat sink in the hotend is to dissipate heat quickly and efficiently. The fan provides cool air that helps the heat sink dissipate the heat faster.
Fast cooling like this helps eliminate heat creep from the hotend, prevents the filament from melting prematurely. It also prevents clogs and jams in the hotend.
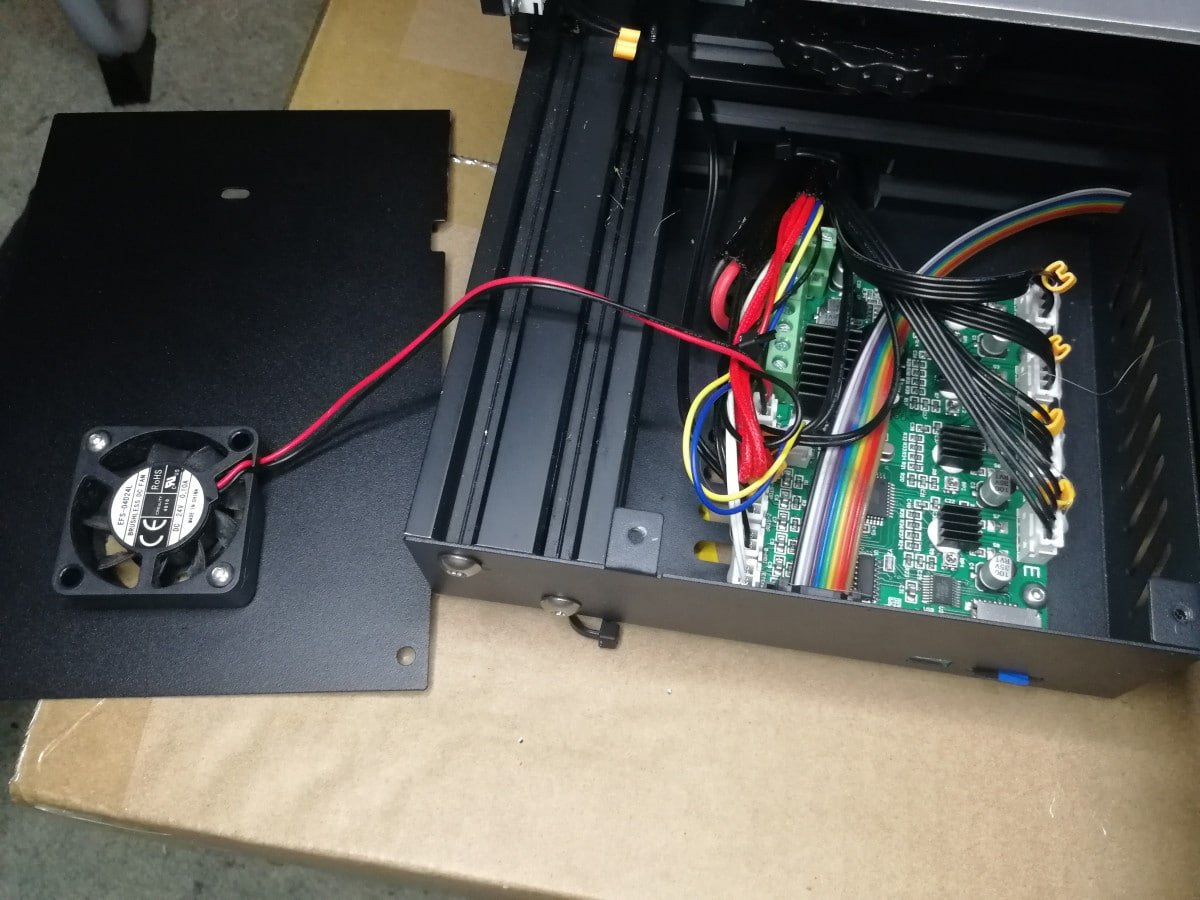
Motherboard Fan
The motherboard contains electronic components which tend to run hot during the printer’s operation. Components like the processor, transistors, and stepper drivers produce a lot of heat which can negatively affect their operation.
The fan helps the motherboard’s heat sink dissipate the heat effectively by drawing cold air over it. As a result, the motherboard can run at an optimal temperature without overheating.
Power Supply Unit Fan
The power supper unit (PSU), otherwise known as the battery has a fan that runs to keep the battery at an operable level for reducing overheating and contributing to long-term durability.
You will usually see some grates or holes on your battery supply which allows the air to exit the main battery frame. These can be loud in some cases, so some people 3D print PSU covers to reduce the sound.
Fans are fairly simple units, so getting the right size is the most important factor, ensuring it fits the specific part for your 3D printer. Many people go for the Noctua NF-A4x10 FLX Fan from Amazon for an Ender 3 and other machines.

Motors

Motors are an essential part of every 3D printing machine. They provide the power needed to drive all the moving parts of the printer.
Motors provide the power for functions like moving the print bed forward and backwards along the Y axis, moving the print head side to side along the X axis, raising and lowering the height along the Z-axis, as well as extruding and retracting the filament through the extruder.
3D printers commonly use a brushless DC motor called a Stepper Motor. However, the stepper motor is different because it doesn’t rotate continuously like other DC motors.
Stepper motors move in small rotational intervals called steps. These steps are formed by dividing the shaft of the motor into several equal angles. So, each input pulse from the controller (stepper driver) turns the shaft one step until it reaches the desired position.
Simply speaking, this results in stepper motors being very accurate and precise. They come in many sizes, but the most common one for 3D printers is the NEMA 17 stepper motor or the 42-40.
The Creality 3D Printer Stepper Motor is an example of a motor used in a 3D printer.

Power Supply Unit

As you might’ve guessed from the name, the Power Supply Unit is the component that provides the electricity that the printer runs on. It supplies electricity to the motherboard, motors, and all the other components that need it.
3D printers require DC voltage to run, so you cannot just plug it into a wall outlet. Thus, the PSU is needed to step down and rectify the AC voltage from the wall outlet.
Depending on the requirements of the 3D printer, there are many PSUs to choose from. Let’s look at some of the specifications to look out for:
- Output Voltage: PSUs come in 12V and 24V variants. The hotend and the heated bed usually determine the output voltage that the printer will require. As a rule of thumb, a higher output voltage results in better performance.
- Power/Current rating: The power rating of the PSU will determine if it will successfully support all the printer’s components. So, before buying one make sure you consult the manufacturer’s datasheet and find out each component’s power requirements.
Lastly, note that quality matters a lot when buying a PSU. A poor-quality PSU can bottleneck the printer and even damage sensitive electronics.
So, when getting one, make sure you invest in a quality PSU from a reputable manufacturer like Meanwell. The Meanwell LRS-350 Switching 12V Power Supply from Amazon is a good example that many 3D printers use.

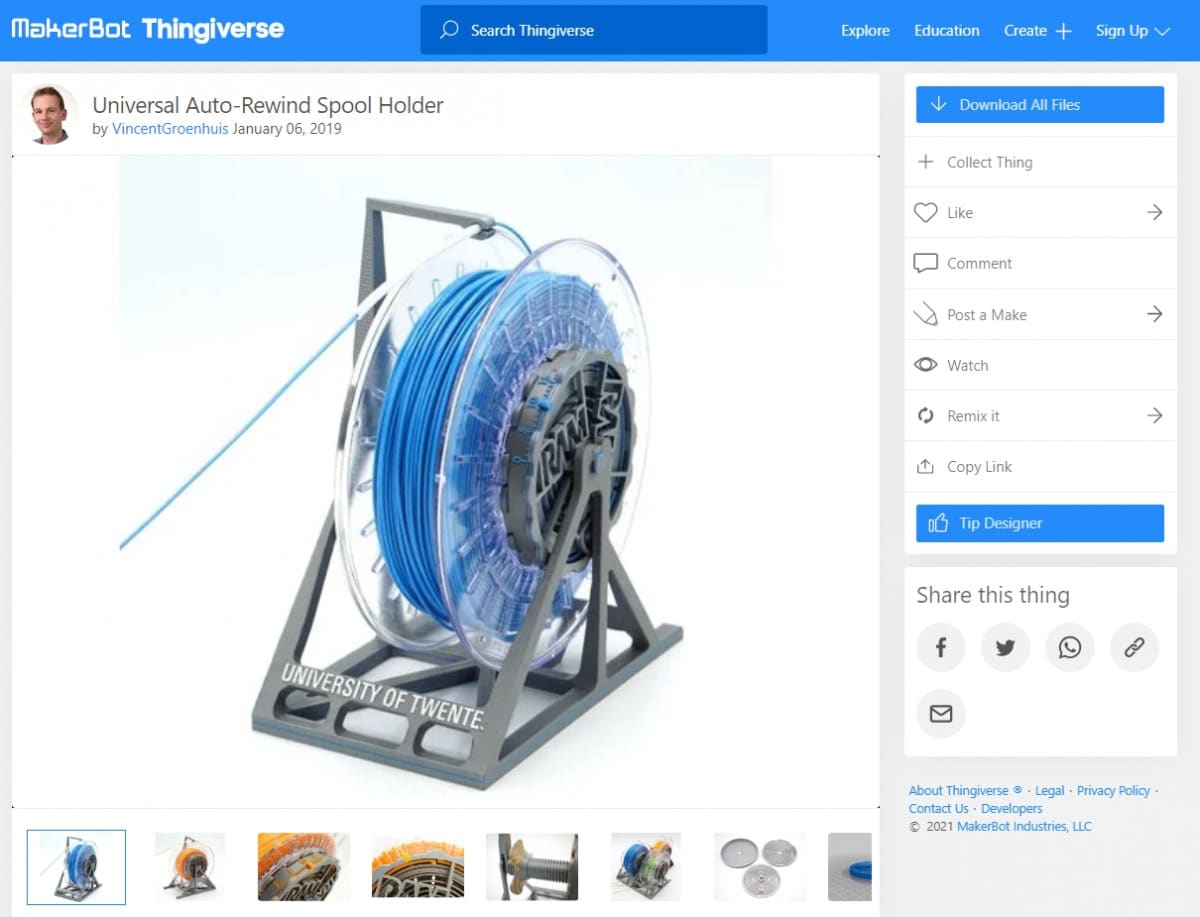
Spool Holder

A spool holder is an accessory or structure that holds the filament reel while it unwinds during printing. This part of the printer can seem inconsequential, but that’s far from the truth.
A quality spool holder can improve the printing process. It can have features like auto-rewind, anti-tangling, and even protect hygroscopic filaments like Polycarbonate during printing.
You can find the Universal Auto-Rewind Spool Holder on Thingiverse which you can 3D print yourself.
All these features are important and can make the difference between a successful print and a failed one. 3D printers will come with a spool holder, but you can get a separate device that can hold your filament, with a drying feature to dry out moist filament.
The Sunlu Filament Dryer from Amazon is a good example of this, reaching temperatures of 55°C and a timer range of 0-24 hours.

Endstops

An endstop is a sensor that tells 3D printer components when they reach the limit of their travel path. You can find endstops on any axis with moving parts like the X, Y, Z-axis rails.
They are placed at the end of these axes to help restrict the machine from moving past its intended range. Once the sensor is triggered, the stepper motor stops moving these components.
Endstops also help provide a positional reference for these components and keep them from jamming up or derailing.
There are three main types of Endstops for 3D printers.
Mechanical Endstop
This type of endstop uses a contact-based manual switch. When the moving component touches the endstop, the endstop sends a signal to the motherboard. The signal tells the motherboard that the component is at the end of the axis and stops motion.
Optical Endstop
An optical endstop uses a light beam to determine the position of the moving component. A photo-interrupter determines the position of the traveling component and cuts of its motion when it reaches the end of the axis.
Unlike the mechanical variant, it doesn’t require physical contact.
Magnetic Endstop
Also contactless, this endstop variant uses a magnetic field to sense when the object reaches the endstop. The sensor detects the magnetic field emitted by a magnet attached to the moving component.
When the component gets to the end, the endstop detects the object and cuts off motion.
The more popular endstops that you find in most 3D printers are mechanical endstops. An example of some you can find on Amazon are the FYSETC Limit Switch Mechanical Endstops.

Nuts & Screws
Finally, last but not least, we have the nuts and screws. The nuts and screws perform the super important task of holding everything together in the printer’s assembly.
From the printer’s frame to the smallest subassemblies, you will always find nuts and screws performing essential functions.
Thus, to keep the printer running efficiently, make sure you buy the best quality nuts and screws to hold everything together.
FAQs on Filament 3D Printers
I’ve compiled some of the most asked questions on Filament 3D printers and answered them. So, let’s dive in.
Q: Are 3D Printer Parts Interchangeable?
Yes, 3D printer parts are interchangeable, but it all depends on the brand. In common brands like Creality or Prusa, you can modify and upgrade almost any aspect of their design. The same also applies to kit or DIY printers.
However, in printers like the Monoprice Voxel and the Dremel Digilab 3D20, you cannot swap out their parts with third-party components. You can only use manufacturer-approved designs.
Q: Can I Print 3D Printer Parts with a 3D Printer?
Yes, however, what you can do is limited. Although 3D printing has advanced considerably in the last decade, you still can’t replicate a 3D printer with a 3D printer.
While it’s possible to print components like the frame and spool holder, you can’t print parts like the PSU, endstops, etc. However, you can still print a majority of the parts and modifications for your printer with a 3D printer.
Q: Which is Better: Buying or Building a 3D Printer?
Both options have their advantages and disadvantages. If you’re a DIYer looking to save money, building a 3D printer might be the best option.
However, assembling a 3D printer from scratch is no small undertaking. If you want to save yourself some stress and get to printing, buying a fully built one might be a sound investment.