4 Ways How to Fix a 3D Printed QR Code Not Working
Have you ever tried to scan a QR code on a 3D printed object, only to find that it’s not working? It can be frustrating when you’ve spent time and effort creating a QR code, only to have it fail when it comes to the crucial moment.
To fix a 3D printed QR code that doesn’t work, increase its size, avoid inverting colors, provide sufficient contrast through a filament color change, reduce layer height, and create a clear and sharp QR code. Follow these steps to ensure your 3D printed QR code scans perfectly every time.
This is the basic answer but there are more details to fix a QR code not working.
How to Fix 3D Printed QR Code Not Working
Here’s how to fix a 3D printed QR code that doesn’t work:
- Don’t have the QR code too raised
- Fix the contrast between colors
- Increase the size of the QR code
- Create a QR code that is sharp and clear
1. Don’t Have the QR Code too Raised
When I tried to 3D print a QR code, it wasn’t working at first. I figured out that it was due to the actual QR code part being raised up too high so the contrast between the black and white colors didn’t show up too well on my phone’s camera.
In order to fix this, I simply redesigned my QR code to be just a few layers of filament (2-3) above the based so there was a nice contrast between the black and white colors. After I did this, the QR code scanned nicely.
One user who had printed a dual-color QR code scanned it once, but it failed to work.
A user recommended to the inquirer to keep the QR code depth at 2-3 layers max since it seemed to be too high. It was noted that when the black part was too high, it stuck out, creating shadows that confused the scanners.
A smaller layer thickness, on the other hand, could be read properly from any angle.
Another user who printed a black QR code on a white background said that he kept the height of the black part between 0.2mm-0.4mm to avoid creating shadows that would mess up the contrast and make it hard to scan.
Printed dual-color QR code scanned once then won’t anymore.. any tips on printing them? I did so some clean-up of what I thought was stringing but still seems very hit or miss
byu/breakingd4d in3Dprinting
2. Fix the Contrast Between Colors
One of the main reasons QR codes fail to work is poor contrast. This happens when the color of your foreground closely matches that of your background, making it difficult for the code reader to decipher the code.
To fix this problem, try to choose colors that contrast enough. I would advise you to go with the recommended white background and black QR code (foreground) or vice versa.
Keep the foreground height at a minimum (approximately 2mm) to avoid creating shadows that lessen the contrast.
Note: Glare from shiny PLA can also reduce the contrast. Additionally, you should avoid using silk PLA since it’s quite shiny.
A user who had printed his QR code with a red background and black code said that his phone had failed to scan it. However, after switching to a black background and white foreground, it worked perfectly.
A user who had printed a bunch of QR codes noticed that the glare from the PLA made his camera not pick up the QR unless it was in pretty low light.
The first solution he gave to this problem was to file down the black part to make it less reflective. Alternatively, he said that using matte PLA for both parts worked better.
There are many instances where people invert colors for the QR code design to look cool. However, this can make it hard for the scanner to decode. To fix this issue, use a darker color for your QR code and a lighter color for the background.
One user was asking if he could print an inverted QR code with a black background and white foreground.
Another user replied that inverted QR codes were not recommended since they are difficult or impossible to read. He suggested using other colors so long as they contrasted, i.e., a light background and a dark color.
Is there any way to print a qr like this. If yes then how do I make the base and black part different colors?
byu/writingenglishessay in3Dprinting
3. Increase the Size of the QR Code
Yes, size matters. Printing a QR code that is too small makes it harder for the camera to scan. Remember, the camera qualities of different phones vary.
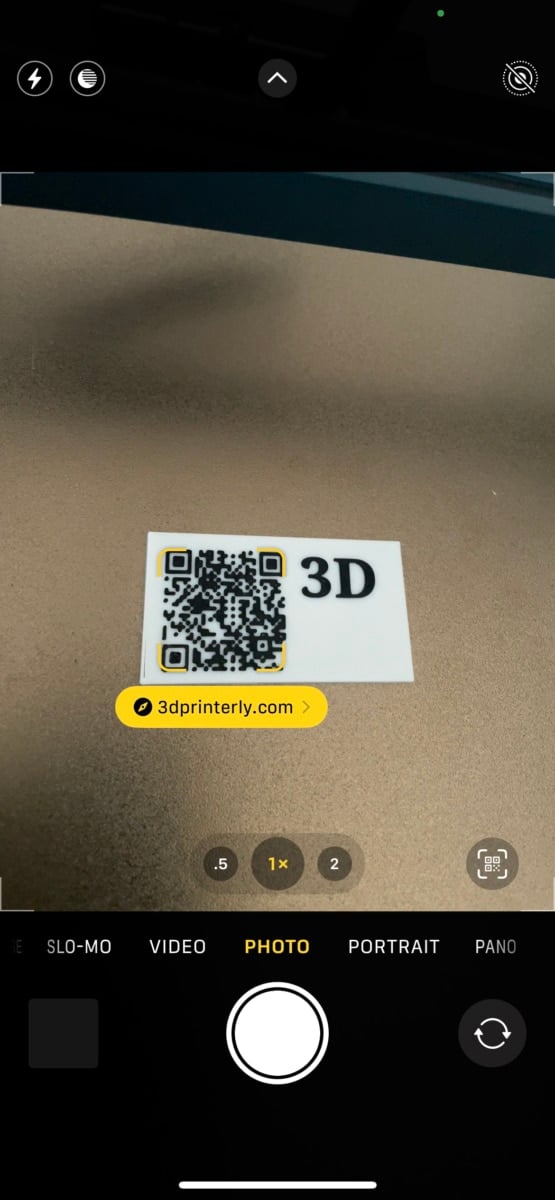
As a rule of thumb, you should print a QR code that is at least 20x20mm in size. If you encode more information in it, then make it even larger.
One user wanted to know why his 3D printed QR code didn’t work while the SVG file worked perfectly. He was advised to scale the size of the QR code higher and decrease the outer wall width as a possible solution. It is not clear if it worked for him.
Check out the image from the user below.
4. Create a Sharp and Clear QR Code
One of the main reasons your QR code fails to function properly is that you might have printed out something that is very shoddy. If any of the rows or squares are crooked, the device you’re using to scan the code may find it hard to define them.
A user was asking why his 3D printed QR code was not working, and one respondent stated that one of the main reasons for failure was a lack of contrast and sharpness. He also recommended that the black part of the code be less than two layers high.
Additionally, he recommended a lower speed to increase the chances of getting sharper corners and less castellated edges on the straight lines.
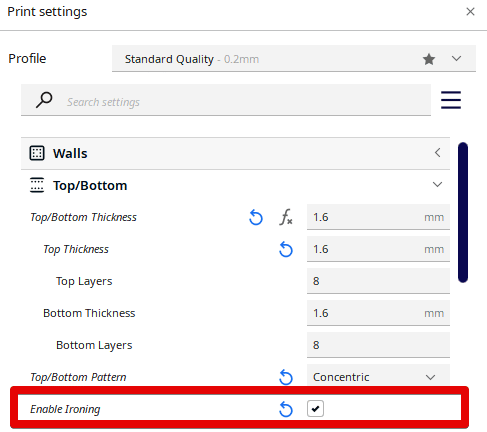
You can also use the Ironing setting in your slicer to create a smoother top layer and sharper QR code.
I have a 3d printer. I slice my item that I want to 3d print. How do I save my gcode to a sandisc so I can transfer it to my 3d printer?
Thanks
David
Depends on the slicer. With Cura, with your SD card already inserted, it will give you an option to save directly to removable drive after slicing.
You can also do it separately by slicing the item, saving the G-Code file to your Downloads folder. Then open the Downloads folder in the File Explorer and insert your sandisc drive, open the drive folder and drag the G-Code file over to the drive folder.