How to Dig Holes in Resin Prints Like a Pro
Digging holes in your resin prints is important for getting successful models that come out nicely, but many people get confused on whether they should do it in the first place, how to add holes, and even where to add them.
I decided to write an article explaining exactly how to do this, as well as more information that you’ll find useful.
To dig holes in resin 3D prints, you simply go into your chosen software and select the “Holes” section which may be under “Hollow” or within the Supports section in Lychee Slicer. You can adjust the width and depth of the hole and click on the model to add it.
This is the basic answer on how to dig holes in resin prints, so keep on reading for more insight on how to get it done properly for your future models.
Why Do Resin 3D Prints Need Drainage Holes?
Resin 3D prints need drainage holes to allow the uncured resin to drain out of the model, as well as to relieve internal pressure that builds up between the FEP sheet and your model. It also increases the success rate of your resin 3D prints by reducing the weight of your model. Two or more drainage holes are ideal.
The method of SLA 3D printing is done layer-by-layer using liquid resin. When your part is being created, the liquid resin can actually build up inside the model without leaking back out into the resin vat. This is where drain holes come in.
Rather than having the uncured resin trapped inside your print, you can create drainage holes so that the uncured resin flushes out easily.
Draining out this resin has many benefits such as saving resin, reducing print failures since prints are less heavy, and the holes work as a method of reduction in suction pressure.
Another thing that can happen when the uncured resin is left inside your prints is the increase in pressure actually building up which ends up leaking out and even creating cracks in the side of your model.
That can easily lead to safety issues with uncured resin leaking from your model, as well as print imperfections that ruin the look of the print.
In addition, a hollowed model with no drainage holes might “explode,” as stated by Formlabs.
There are many benefits to adding drainage holes to your resin prints, so making sure you know how to create drainage holes properly is important.
The usual process is to hollow your models in your slicer, then to add a few drainage holes where it makes sense. I’ll explain where you should add drainage holes further into this article.
Do keep in mind, drainage holes don’t always work as well as you think, especially if your part orientation isn’t optimal, or if the holes aren’t big enough.
The following video is a great explanation and illustration of how drainage holes work in your favor.
How Do You Dig Holes in Resin Prints
How to Dig Holes in Resin Prints In Lychee Slicer
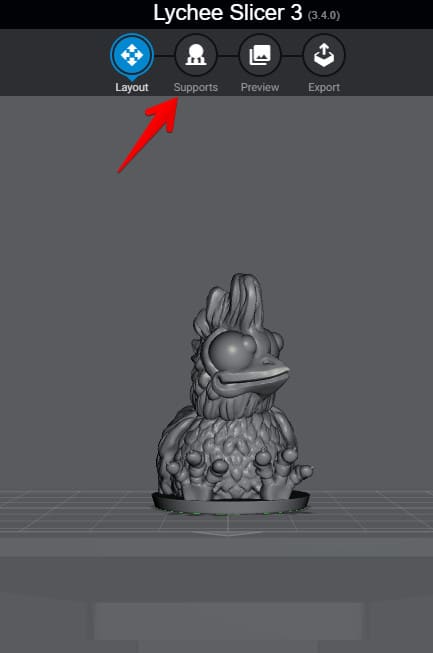
To find the “Hole” button in the Lychee slicer, you need to click on “Supports” in the Lychee Slicer workflow at the top. A window will appear where you can see the “Supports” and “Holes” tab. Click on the “Holes” tab then click on your resin 3D model to create the hole in your desired area.
You can adjust your “Diameter” and “Penetration” (length of the hole) in this tab. The default settings can get you started well, with a Diameter of 1.5mm and Penetration of 2.0mm, as long as your wall thickness is below 2.0mm.
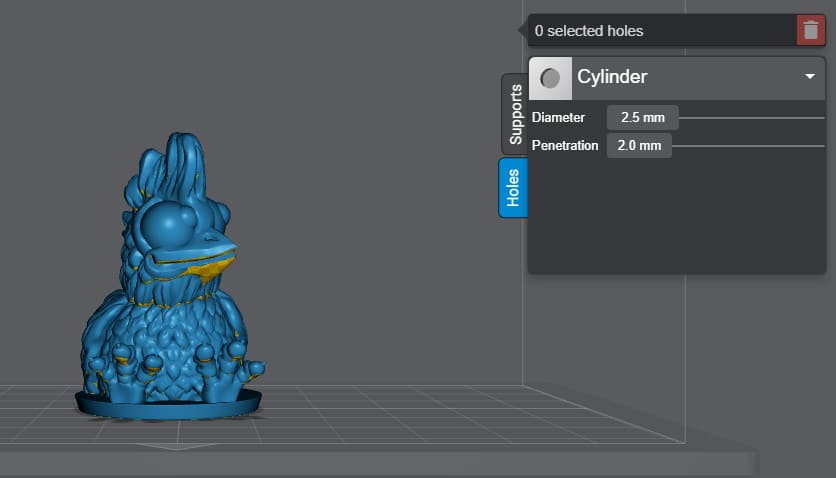
You can also choose to turn your object into a hole so you can apply it to other models. This can be useful if you want a differently shaped hole since the Lychee slicer only offers Cube and Cylinder as the hole shape.
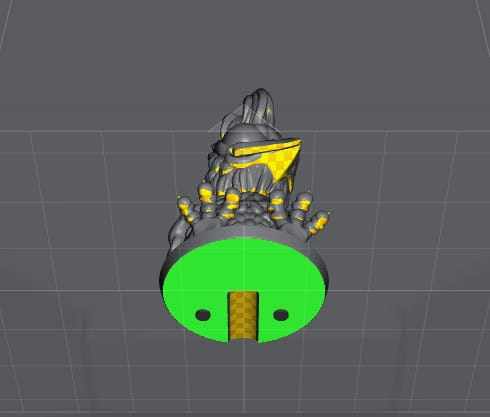
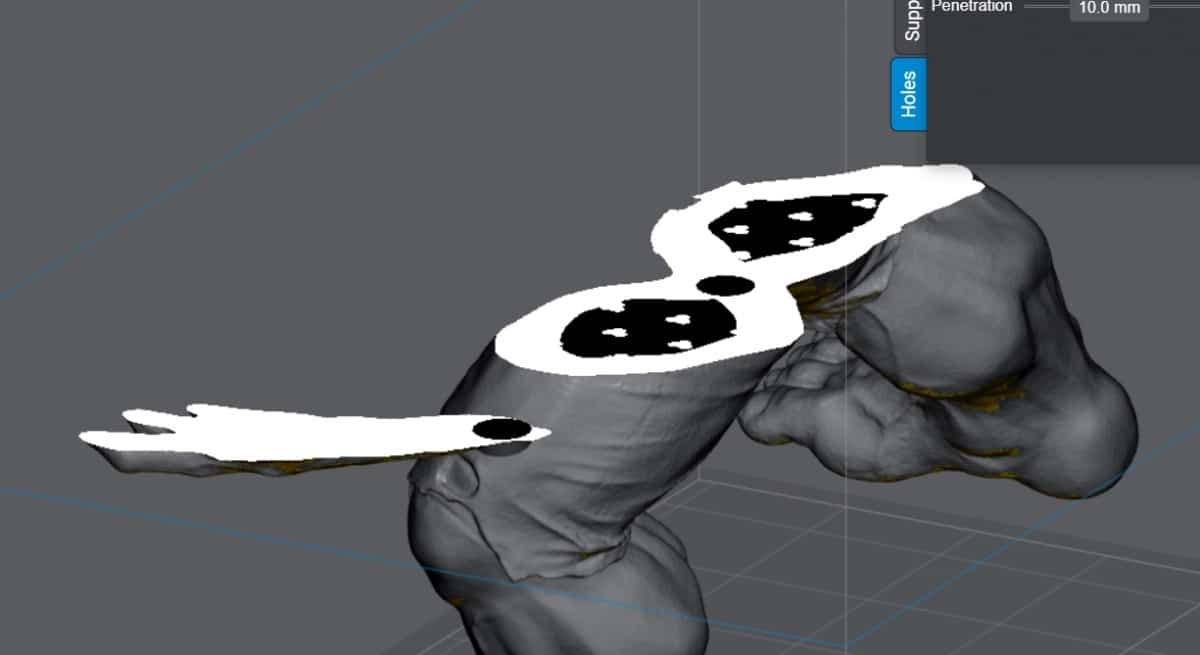
In the screenshot below, you can observe how the drainage holes are dug at the bottom of the model, facing the build plate.
When you hollow your model, you get to choose its wall thickness. This simply determines how thick the walls of your model are going to be when it’s hollowed out, which translates to strength.
On the other hand, drainage holes have a specific size and depth. Based on the wall thickness, you want the hole to be deeper than the wall thickness so it penetrates through easily.
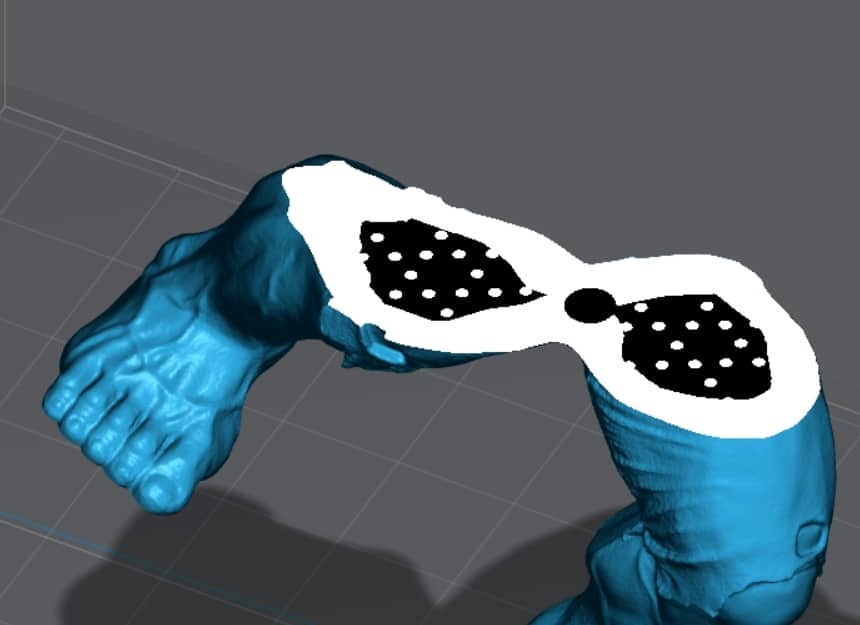
This will allow your drainage holes to reach the inner area of your model and not be left out halfway through. The image given below is a good example that even though the model is hollowed, the drainage hole still needs more depth to get through to the inner area.
The black part with little white dots represents the hollowed part and the single black circle is the drainage hole.
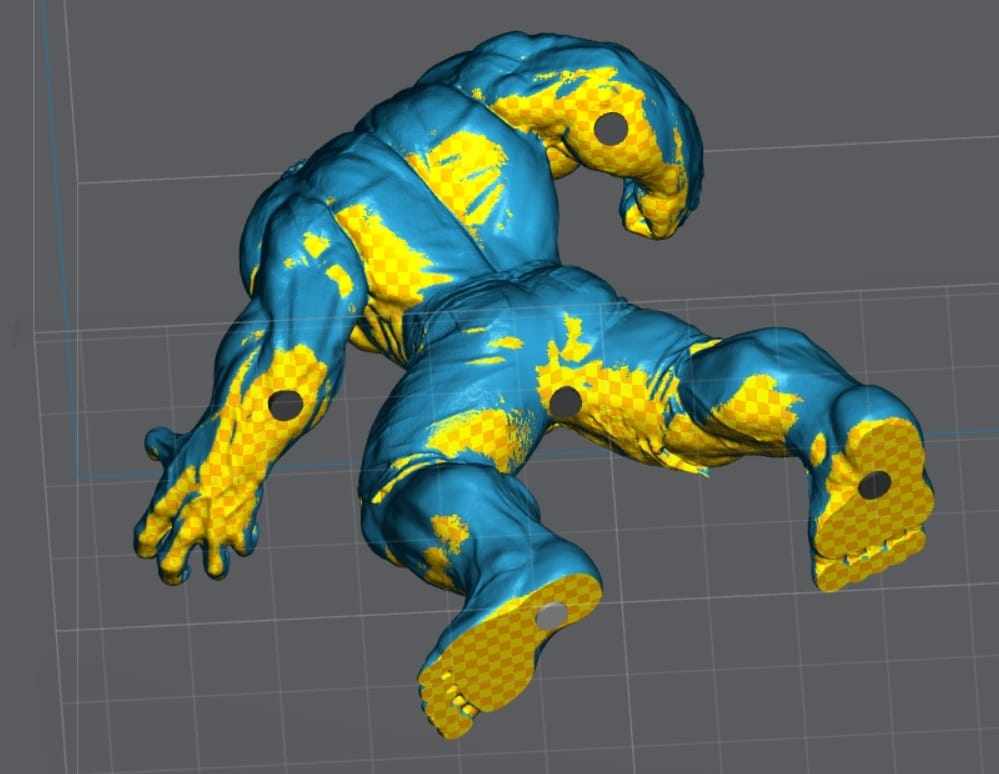
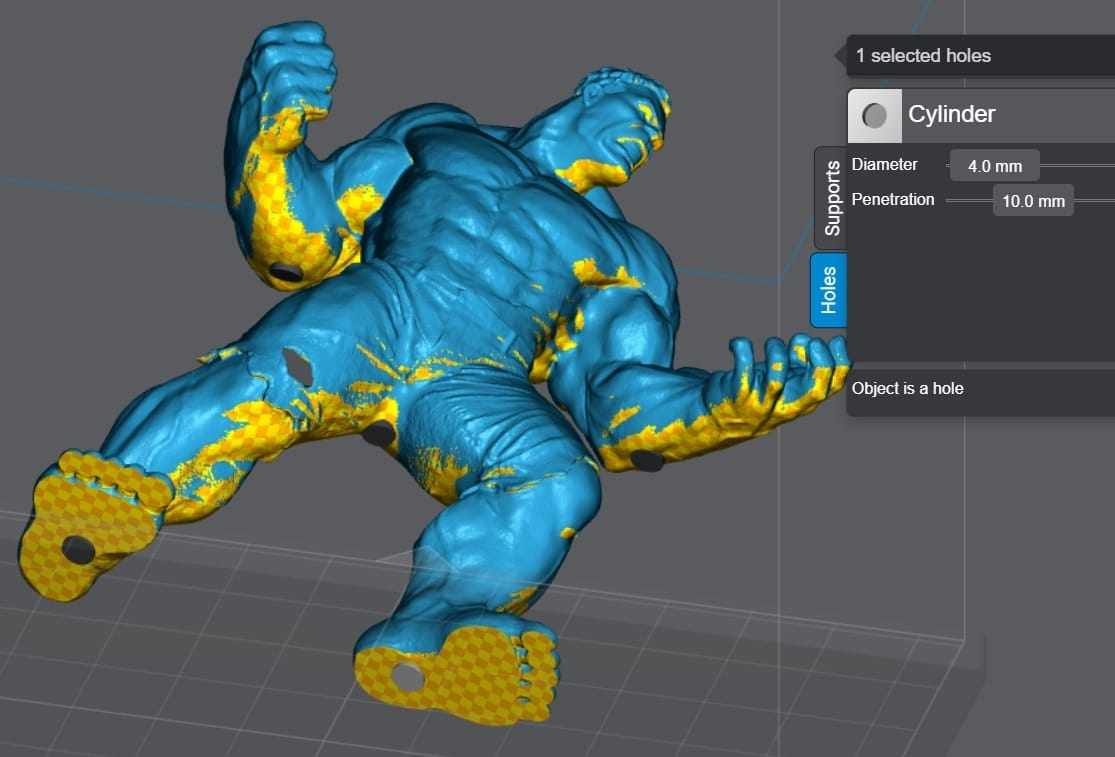
Here’s another example where you can see a drainage hole placed carefully on Hulk’s arm. The black hollowed part is where the resin can get trapped so we will use drainage holes to drain the resin out.
If you’re worried about the drainage holes ruining the look of your model, you can also add them within the design of the model itself so it doesn’t look too noticeable.
Lychee slicer has the Cylinder and Cube shapes of the drainage hole that you can choose from, depending on what will be more suitable for your model.
I tried using the Cube shape for the Hulk model and found out that it fits within the hole automatically.
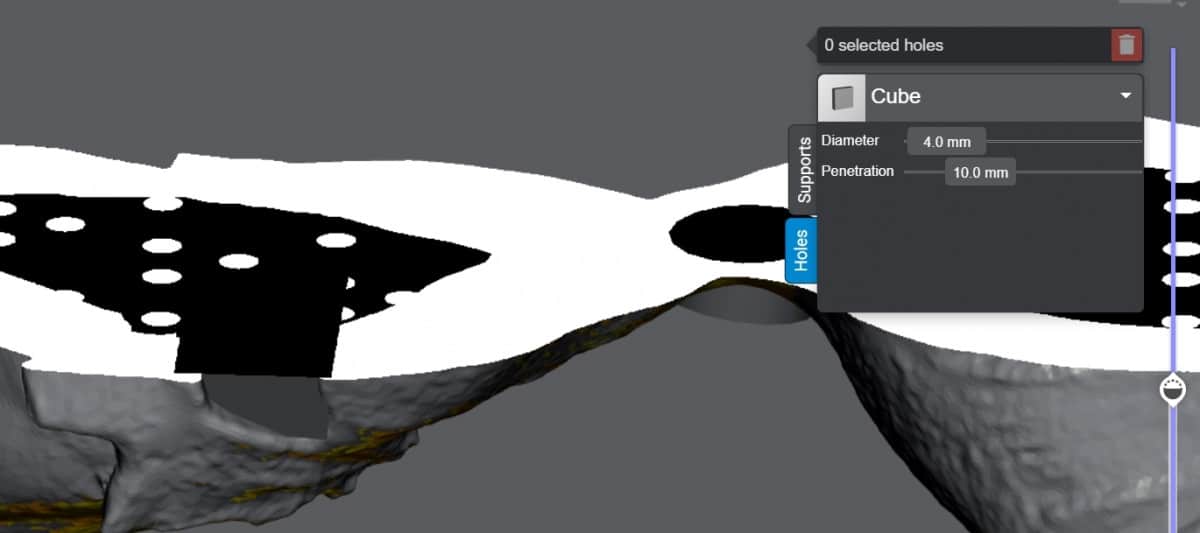
Keep in mind that the resin can get trapped where the walls close in on certain places. With the Hulk model, the resin can possibly get trapped in each of the limbs and then the main body.
To prevent that from happening, you can reduce the wall thickness when hollowing your model to reduce the resin getting trapped. This can allow enough space to connect with the rest of the main model to drain the resin out.
This many drainage holes aren’t always needed, but it definitely helps with draining the resin out easier if you can add it without decreasing the aesthetic of your model.
The following video is a quick explanation of how you can dig drainage holes in your model using Lychee slicer.
How to Dig Holes in Resin Prints In PrusaSlicer
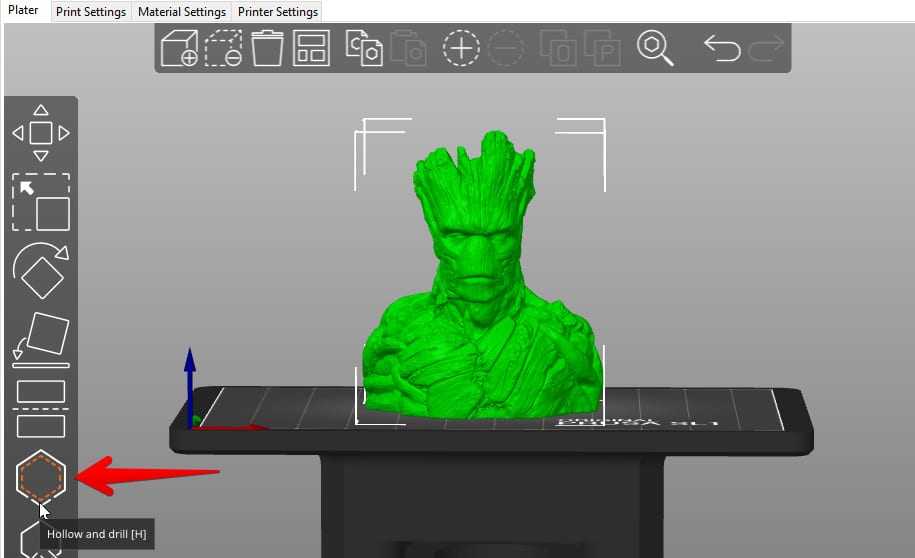
To dig a hole in resin prints in PrusaSlicer, go to the left toolbar and click on “Hollow and drill [H],” enable Hollowing, then simply choose where you want to place the drainage holes on your model. You can also adjust important parameters, such as Hole diameter and Hole depth as you wish.
Adding drainage holes in PrusaSlicer is easy and straightforward. You can dig holes in your resin prints even without checking the “Hollow this object” box in the slicer although I do recommend hollowing your prints out first.
PrusaSlicer defaults the Hole diameter at 4mm which is a good size for the uncured resin to drain out from. However, you can always change that value depending on the size of your model and wall thickness.
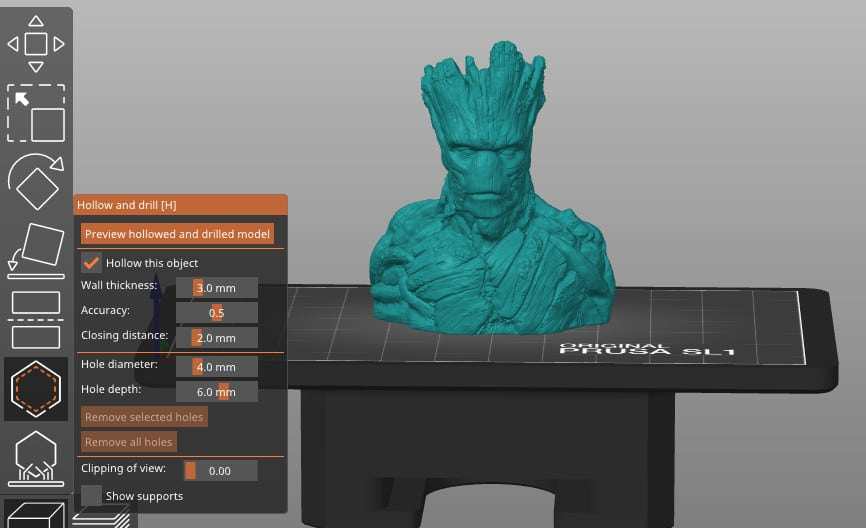
Here is how the drainage holes look like when inserted into the model. When you add the holes, you can also click and drag them around if you want to reposition them.
Make sure that your Hole depth is more than your part’s wall thickness or the drainage holes simply won’t penetrate your model in PrusaSlicer.
How to Dig Holes in Resin Prints In ChiTuBox Slicer
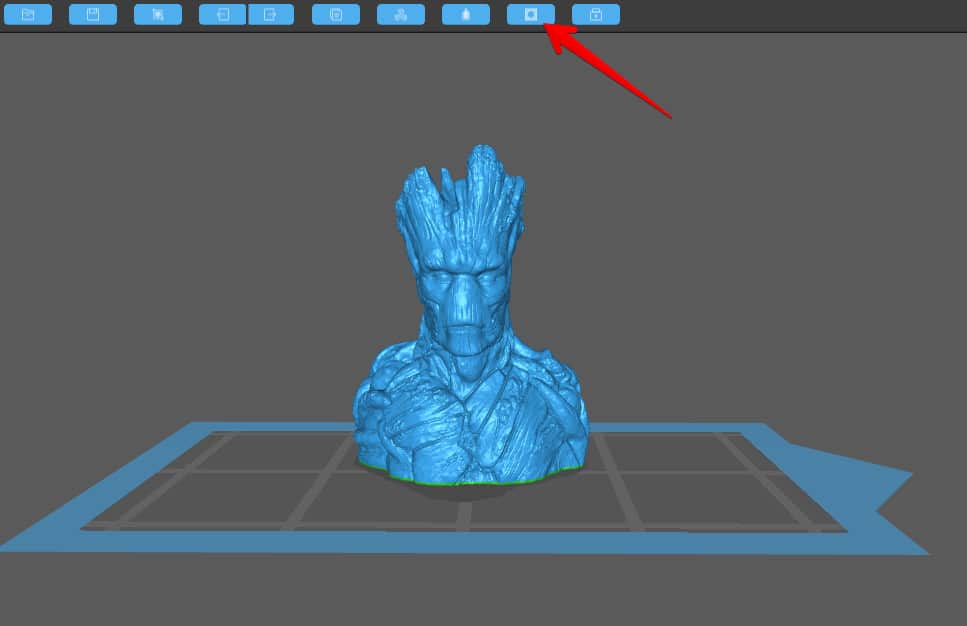
To dig holes in resin prints in the ChiTuBox slicer, you first need to hollow out your model by selecting “Hollow” in the toolbar above and then simply click on the “Dig Hole” button beside “Hollow.” This brings up a menu from where you can dig holes and adjust their shape, size, and depth easily.
Digging holes in the ChiTuBox slicer is similarly easy to do. The following screenshot shows where to click for bringing up the “Dig Hole” menu.
You will first need to hollow out your model otherwise the slicer won’t be able to dig holes for you. It will show you an error message saying, “Fail! Not hollowed out or too deep to dig.”
Hollowing your models in ChiTuBox slicer is very simple. You just have to click on the “Hollow” button, set your wall thickness, and click on “Start” to begin hollowing. After that, you will be able to add drainage holes.
ChiTuBox allows you to choose from three shapes when digging holes: Circle, Hexagon, and Square depending on what you’d like to go with for your model.
As for the size of the hole, anywhere from 2-3mm has worked great for most people. If you want to print smaller holes, you’ll have to use trial and error to see what value works well in terms of print quality and cleaning up the resin from the inside of the model.
You don’t want holes to be too small because resin can be quite thick, resulting in not being able to actually drain out from the holes. If that does happen to you, you can try to bore out the holes.
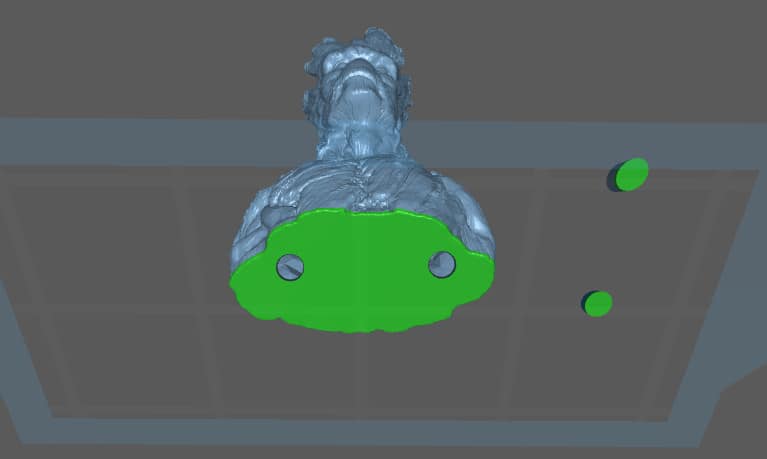
In the “Dig Hole” menu, you can also choose whether to keep the holes or not. This setting simply puts hole covers aside on the build plate so they can be printed and you can use them to fill in the holes later.
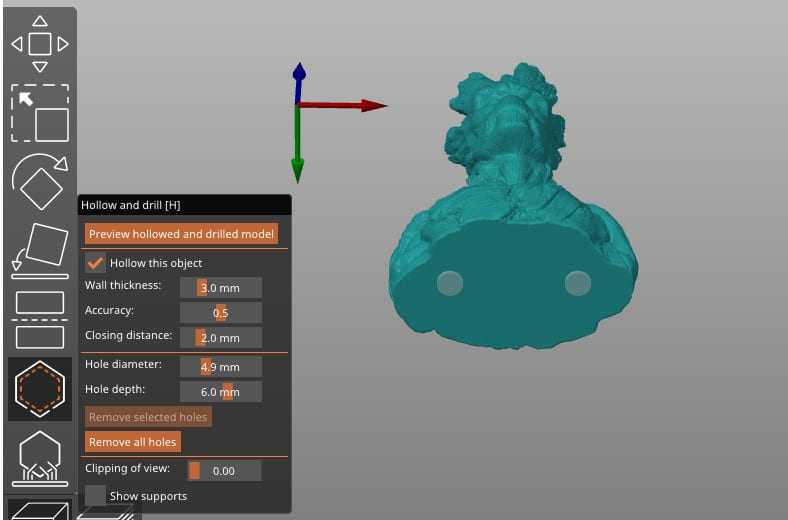
Here is how it looks like when you dig holes into a model using the ChiTuBox slicer.
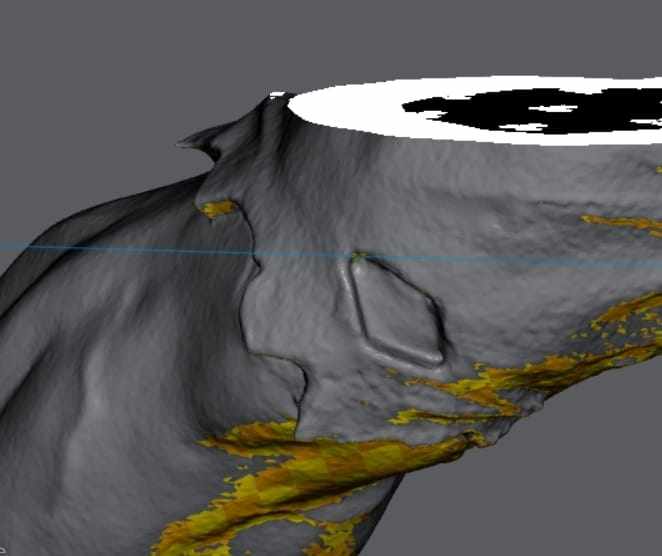
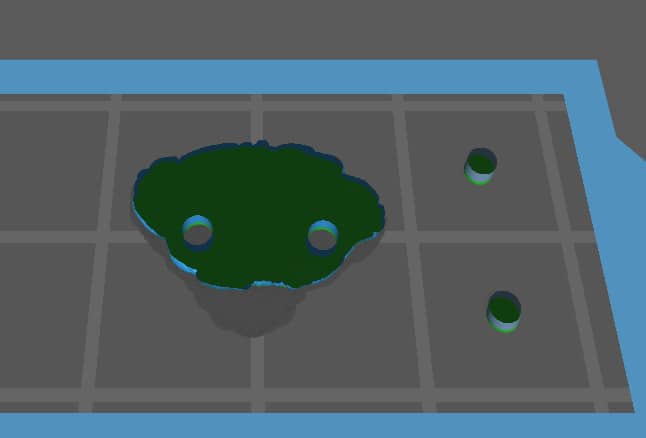
Here is an interlayer view of the drainage holes dug at the bottom of Groot.
The following video is a tutorial that explains how to dig holes for your model in the ChiTuBox slicer software. It’s definitely worth watching to get a visual idea of this concept.
Where Should You Dig Holes in Resin Prints?
Digging holes in resin prints at their lowest point or close to the print bed is what usually brings the best results. However, you can place drainages holes anywhere you think the uncured resin might get trapped. You can also place dig holes where there are holes or gaps in the model itself to blend them in.
Part orientation and drainage holes are closely connected to each other. When you do resin models, sometimes you rotate them so the model supports itself.
Orienting your part the right way and adding drainage holes strategically is the best way to make resin 3D prints. You can also try avoiding multiple negative overhangs for better results.
In addition, it’s very important to dig two or more drainage holes, so the uncured resin can flush out and the pressure inside the model can be released.
In the SLA 3D printing community, there’s much debate regarding whether you should also place your drainage holes at the top of your model.
While it is definitely possible, a very little amount of resin can get trapped at the top of the model. Digging a hole there wouldn’t be much useful and may ruin the final appearance of your model.
If you place two or more drainage holes at the bottom of the model, you should be able to easily drain out the uncured resin by submerging the part in isopropyl alcohol or warm water to fill it up, shaking it, and then pouring the resin remains out.
The best cleaning method usually involves an ultrasonic cleaner or a Wash & Cure machine.
A simple choice for the ultrasonic cleaner is the Magnasonic Professional Ultrasonic Cleaner from Amazon. It generates 42,000 Hz of ultrasonic soundwaves for a powerful, yet gentle clean. This works great for many resin 3D printer users.
I wrote an article called 6 Best Ultrasonic Cleaners for Your Resin 3D Prints – Easy Cleaning which you may find useful for cleaning your prints.

In terms of a Wash & Cure machine, the Elegoo Mercury Plus 2-in-1 Washing & Curing Machine from Amazon. You can fill the washing bucket with a good cleaning solution like isopropyl alcohol, set your parts in the metal strainer, then activate the washing current.
Depending on your machine, it has the ability to hold your build plate directly on the machine to wash your models.
It does a great job with washing and also doubles up as a curing machine which is great.
I did a review on the Elegoo Mercury Plus 2-In-One Wash & Cure, so feel free to check that out before getting it for yourself.

The following video is a good explanation of why drainage holes dug at the top of your model is incorrect for most cases.
I recommend sticking with digging holes at the bottom or close to the bottom of your model for the best results.
Thanks !
My pleasure!