Simple Elegoo Neptune 3 Max Review – Worth Buying or Not?
The Elegoo Neptune 3 Max is Elegoo’s latest addition to the Neptune FDM printers lineup. It was designed with the latest 3D printer features, to further improve its reliability and ease of use.
At under $500, its pricing is just right, especially when compared to similar 3D printers from other 3D printer brands. The Elegoo Neptune 3 Max has a massive build volume which makes it suitable for printing large models in one go.
This article is going to be a fairly simple review of the Elegoo Neptune 3 Max. We would be going over various aspects such as its features, specifications, benefits, downsides, and unboxing process. Keep reading to learn more.
Features of the Elegoo Neptune 3 Max
- Massive Print Volume
- PEI Coated Spring Steel Sheet
- Dual Gear Direct Drive Extruder
- XY Knob Belt Tensioners
- Titanium Nozzle Kit
- Filament Runout Sensors
- High Precision Dual Z-Axis
- 3-Inch Capacitive LCD Touchscreen
- Integrated LED Light Bar on its Gantry
- 63-point Automesh Bed Leveling
Massive Print Volume
This is the major selling point of the Neptune 3 Max. It has a build volume of 420 x 420 x 500mm, which makes it suitable for printing life-sized models, props, and costumes in one go.
This particular feature sets it apart from its predecessor (Neptune 3 Pro). The overall size of the printer and is about 658 x 632 x 740mm.
PEI Coated Spring Steel Sheet
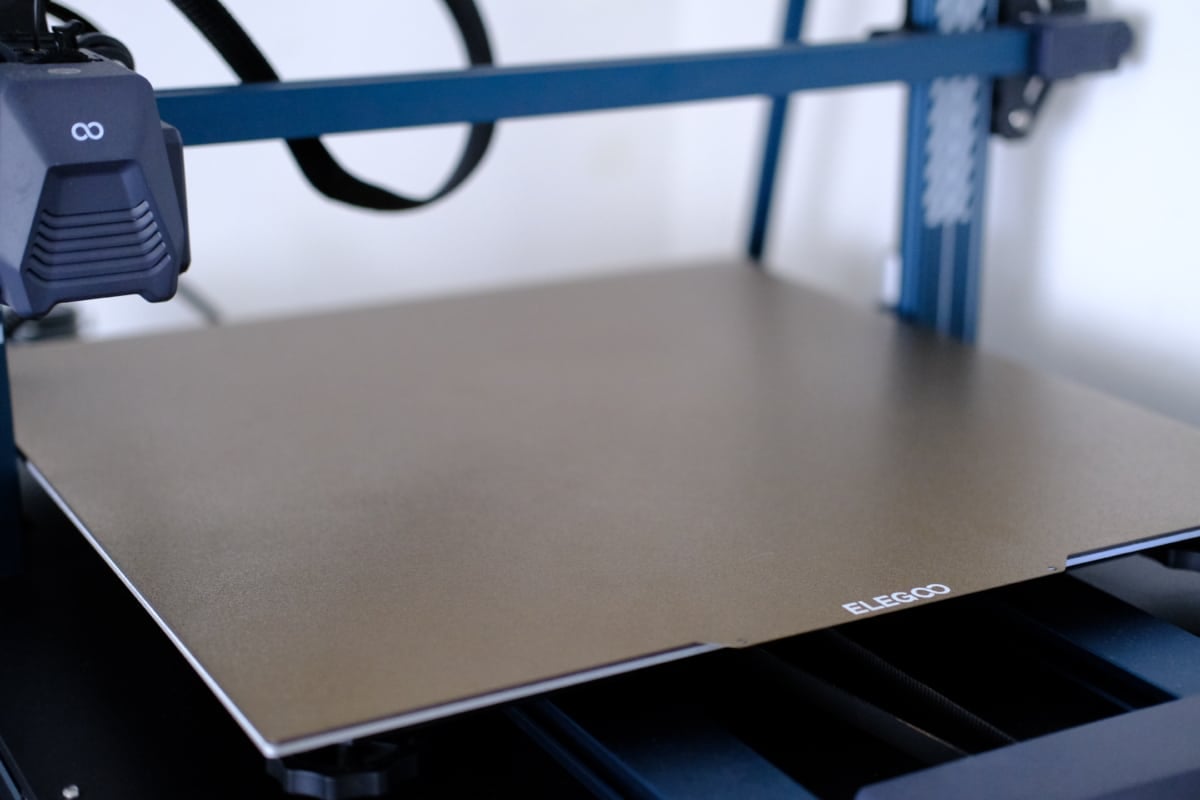
The Elegoo Neptune 3 Max has a detachable magnetic PEI-coated steel sheet. This allows you to pop off prints once they’ve cooled down.
The PEI sheet has a sandpaper-like texture that enables better adhesion and prevents warping during printing.
This is very ideal when you consider the enormous size of the Neptune 3 Max’s bed. It ensures that your large prints will stick to the bed for as long as the print is ongoing.
Once you are done printing, your model should start to release from the build plate as it cools down.
From there, you can usually remove the model, or you may need to detach the magnetic PEI steel sheet and flex it to remove your print. I haven’t had to yet though.
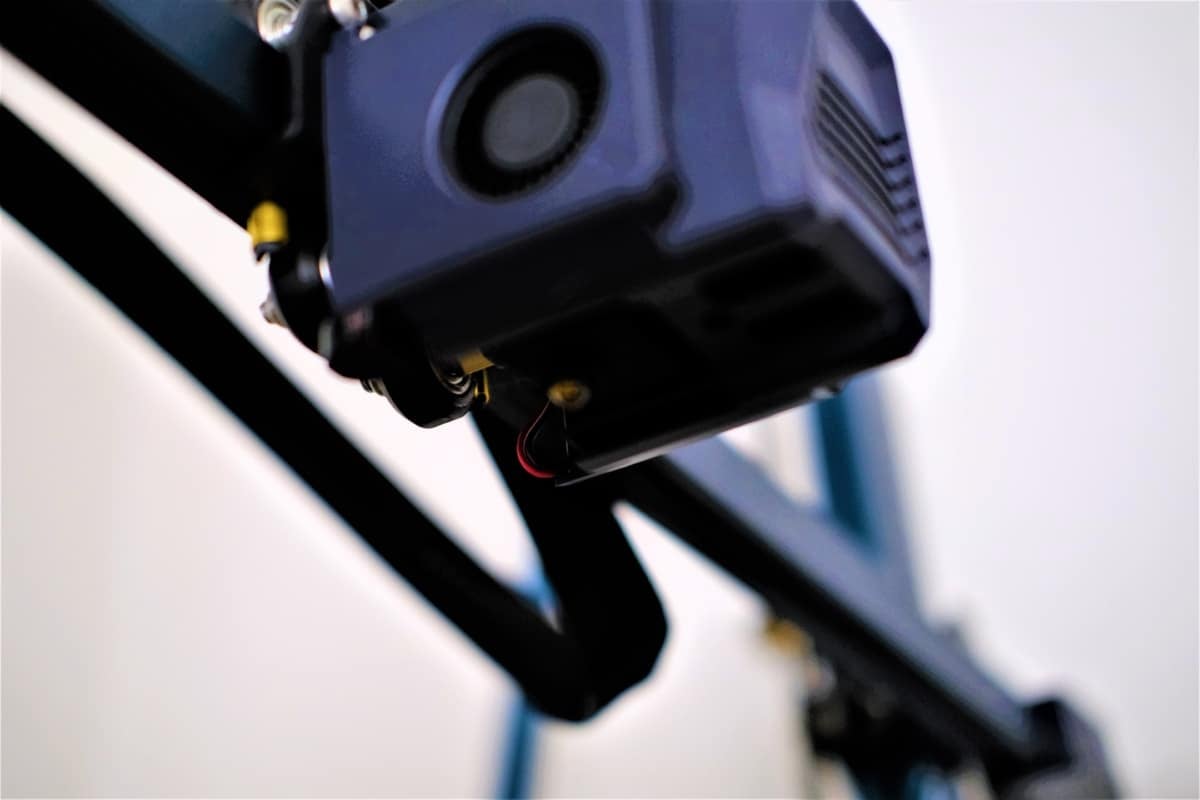
Dual Gear Direct Drive Extruder
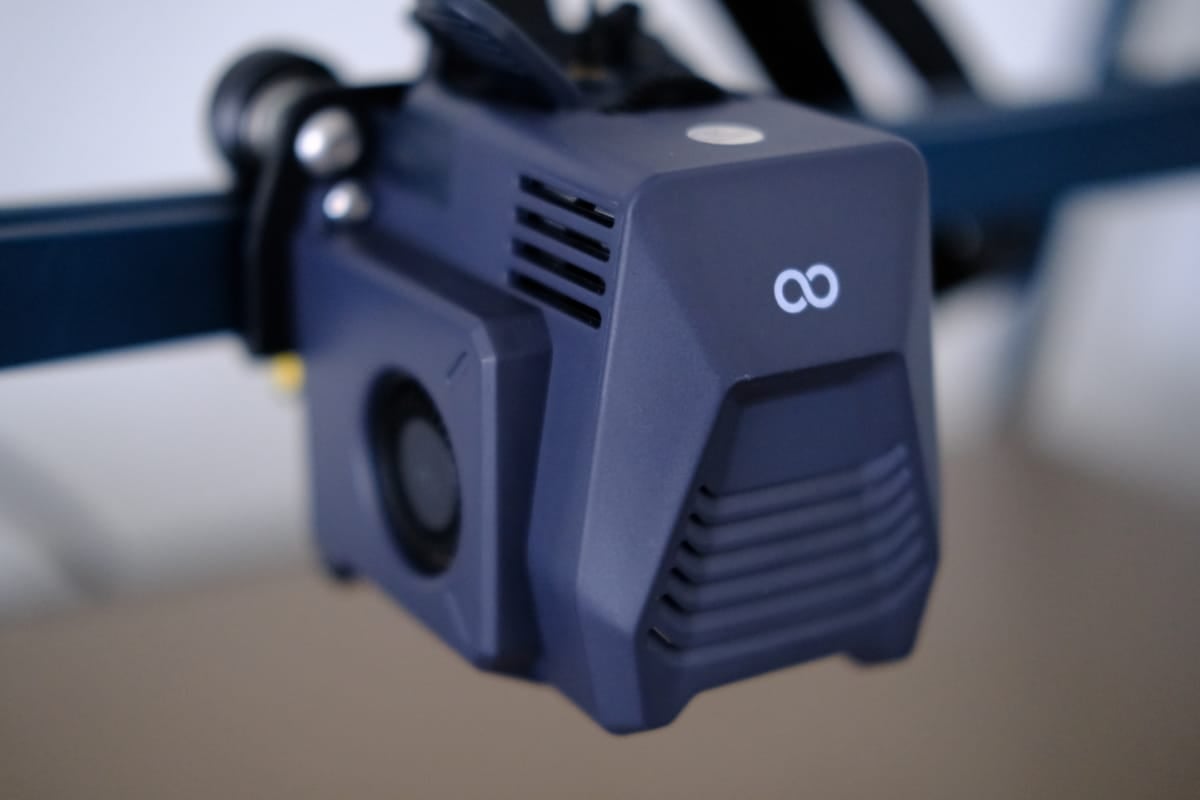
Just like the Elegoo Neptune 3 Pro and 3 Plus, the Neptune 3 Max also has a dual gear direct drive extruder. The gears are made of SUS303 stainless steel gears with a 3:1 gear ratio and an adjustable extrusion force to ensure the filament is fed smoothly.
Also, it reduces nozzle clogging and under-extrusion during printing.
The dual gear direct drive system on the Neptune 3 Max is compatible with various filaments like PLA, ABS, PETG, and even flexible filaments like TPU.
XY Knob Belt Tensioners
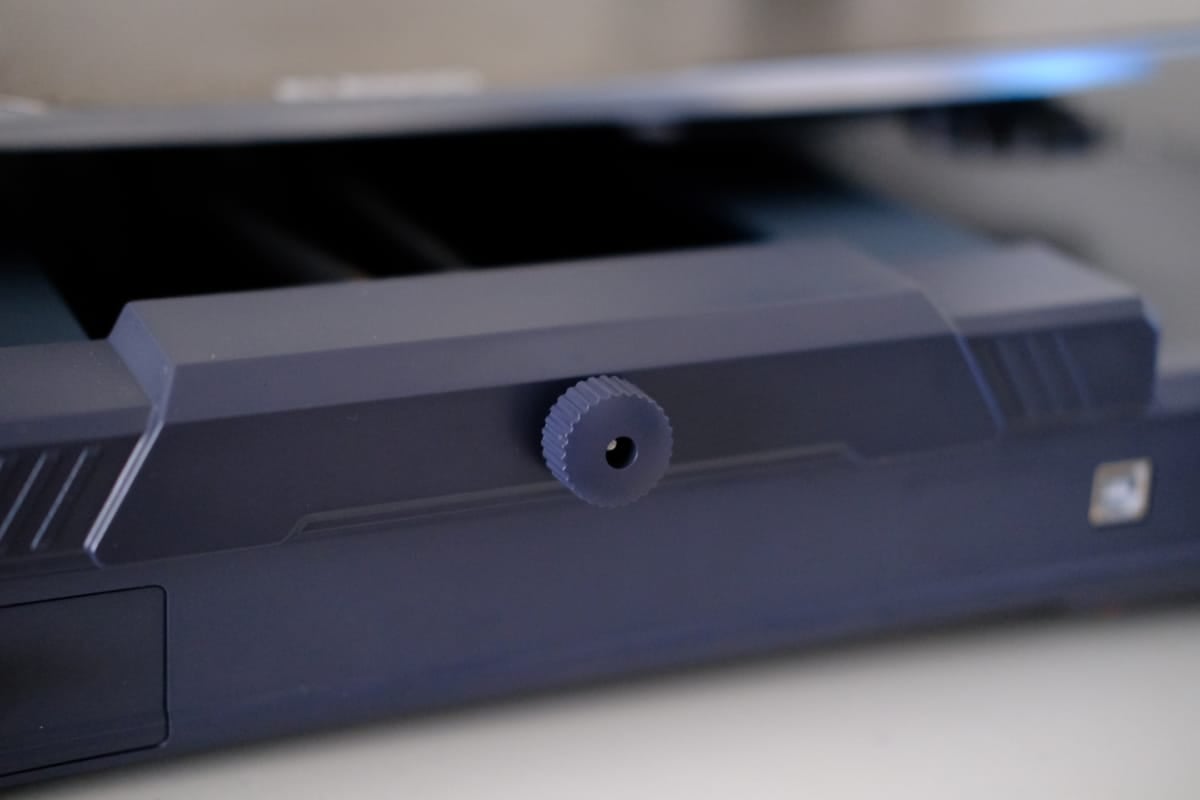

The XY knob belt tensioners on the Elegoo Neptune 3 Max is a welcome upgrade when compared to the screws used in other models to hold the XY belt in place. The knobs make the belt tensioning process and operation much easier and faster.
You simply need to turn the Knob on X or Y-axis to adjust the tension on the belt till it is just right. This is a much easier means to get the best quality with optimal belt tensioning.
Titanium Nozzle Kit
The Neptune 3 Max’s extruder assembly includes a brass nozzle, an aluminum alloy flat heat sink, and a throat pipe made of TC4 titanium alloy. The aluminum heat sink is much wider and is paired with a dual fan assembly which ensures better heat dissipation.
This ultimately reduces the likelihood of the nozzle clogging.
Filament Runout Sensor
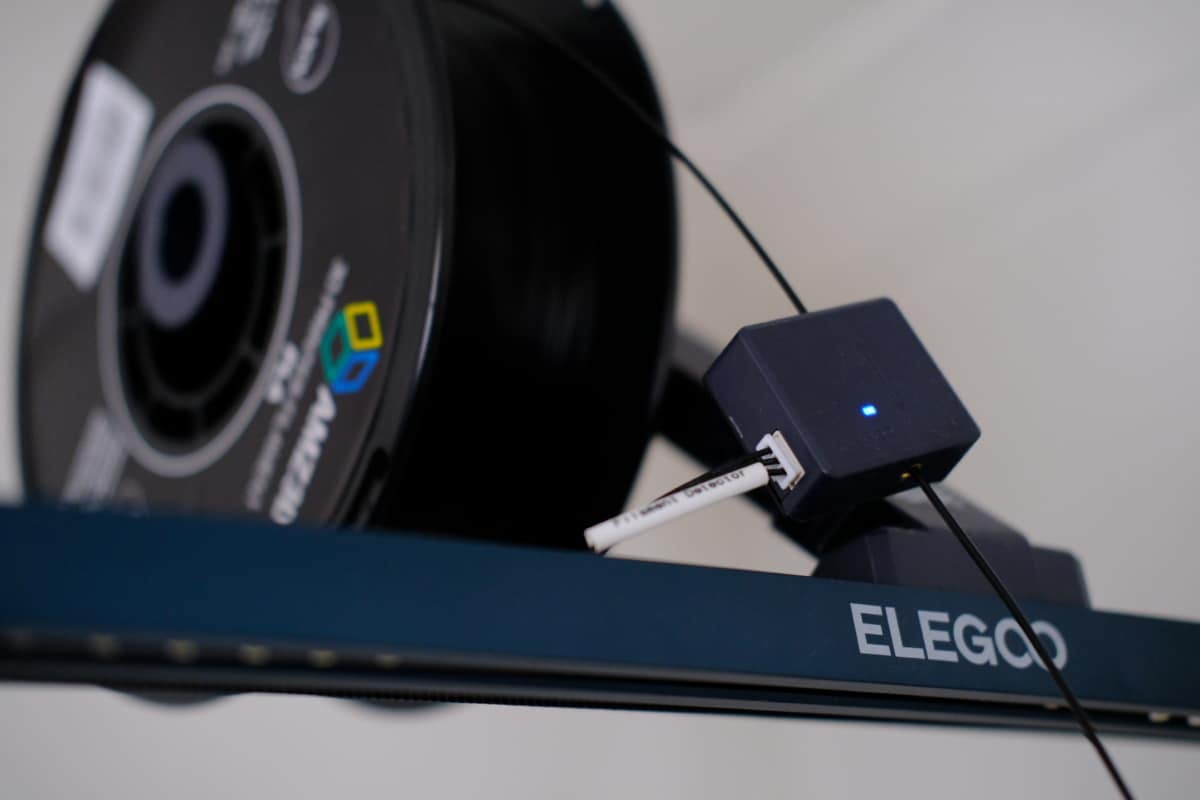
Like every other modern-day 3D printer, the Neptune 3 Max has a filament runout sensor. This small device is a very important piece for every 3D printer.
When you run out of filament or the filament breaks, the sensor recognizes that and immediately signals the printer to pause. This allows you to insert the filament and continue printing.
Once you resume printing, the hotend returns to the last location where the filament ran out and continues printing.
While this may be a great feature, you may get a visible layer line depending on how well the layer adheres to the previous layer.
High Precision Dual Z-Axis
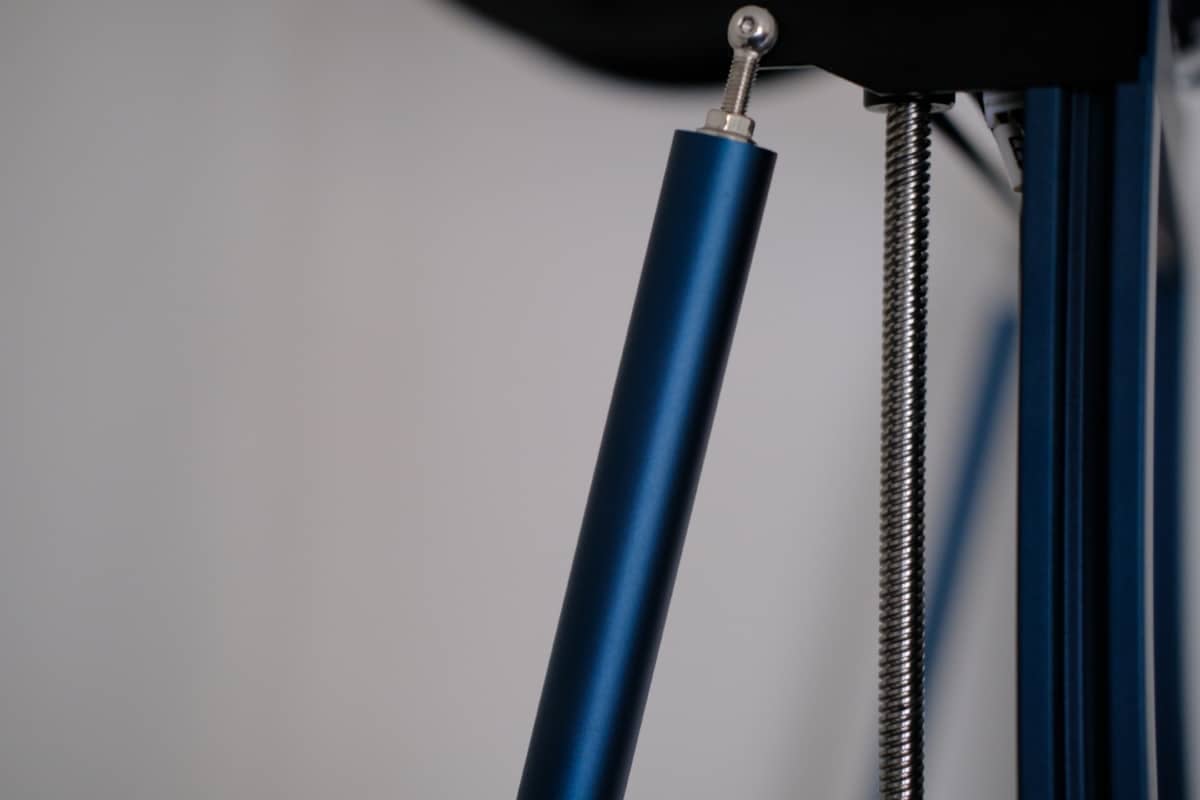

The gigantic height (500mm) of the Neptune 3 Max’s Z-axis makes this a very important feature.
The high precision dual Z-axis with synchronized lead screws and dual motor drive ensures a more stable movement of the print head and high printing accuracy.
It basically helps to prevent deviation, layer skips, and other imperfections caused by a single Z-axis lead screw motor.
Not only are there dual Z-axis leadscrews, but the gantry is also further reinforced with support tie bars that are attached to the base of the 3D printer and the top of the gantry. This is to further increase the stability of the printer during printing.
4.3-Inch LCD Touchscreen
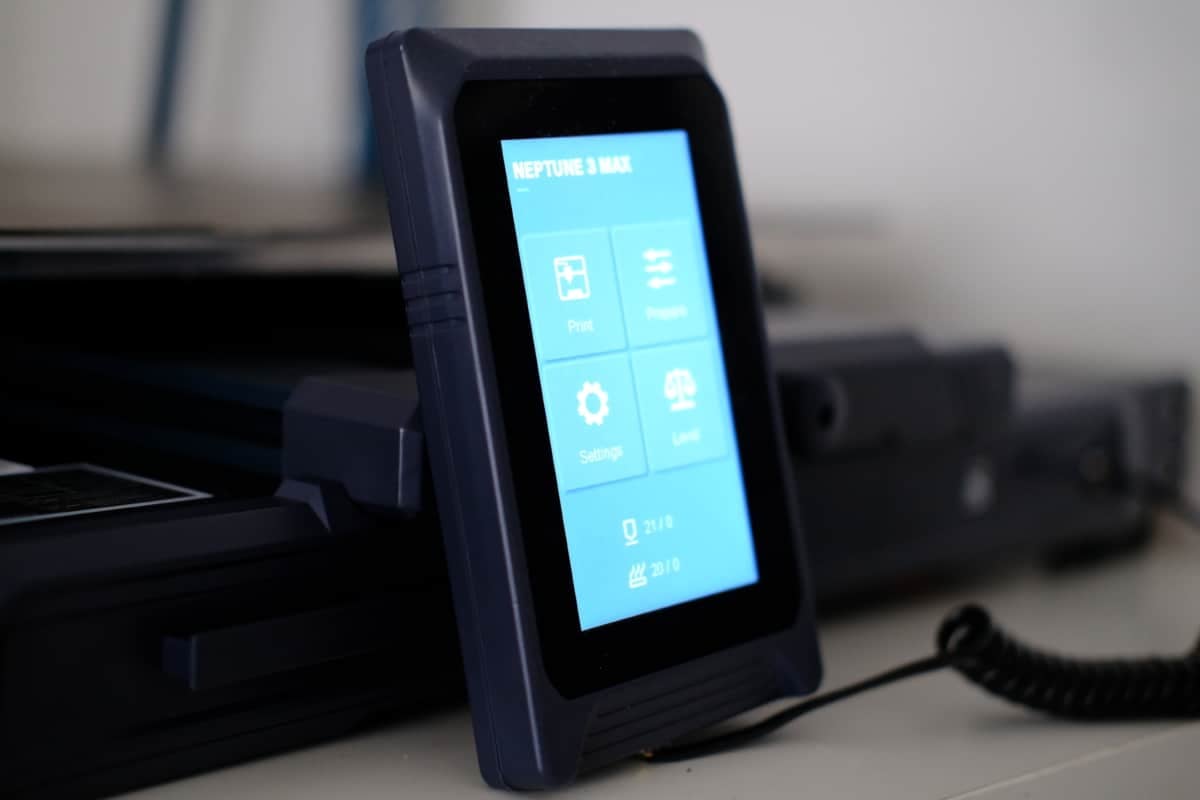
Another great feature of the Neptune 3 Max is the 4.3-inch LCD touchscreen. It is very easy to use and also very responsive to touch. This can either be operated handheld or attached to its magnetic base, just like the Neptune 3 Pro.
You can easily preview and monitor the progress of your prints with an LCD screen, amidst other functions. The LCD screen has a very simple and friendly interface to access whatever function you may need.
Integrated LED Light Bar on Gantry
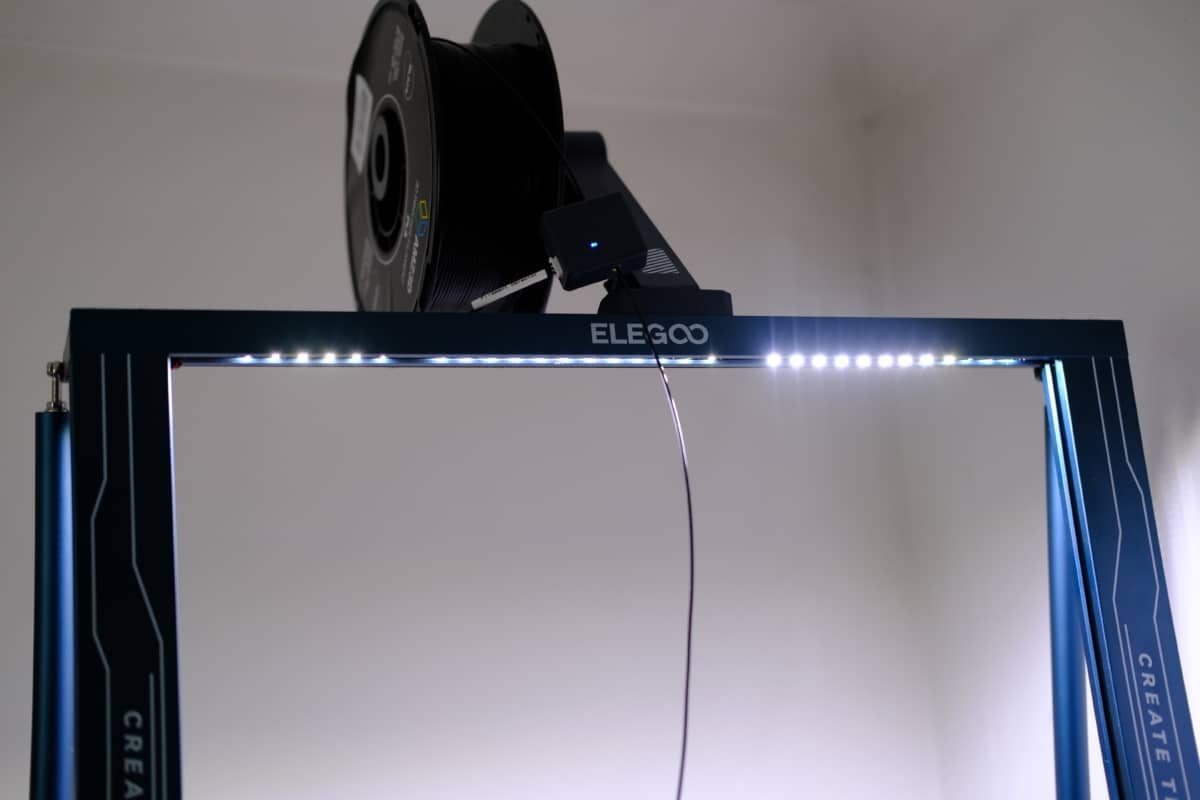
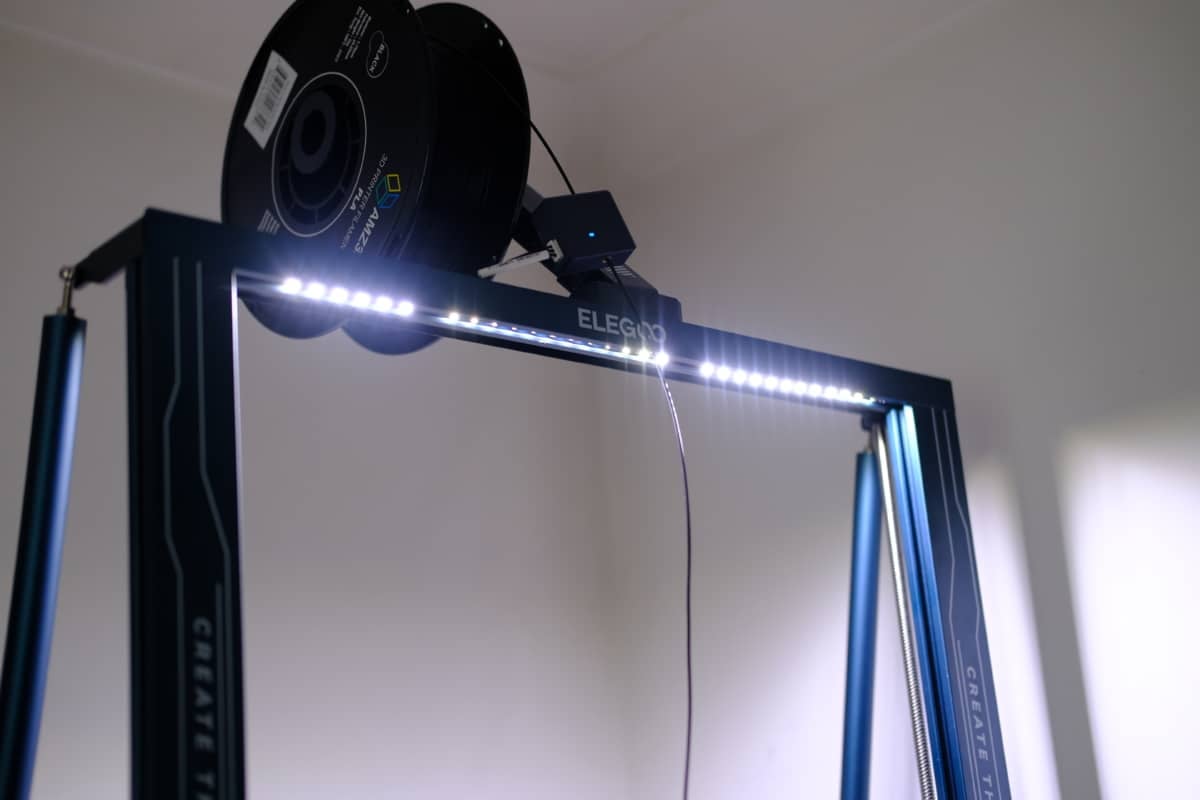
The Neptune 3 Max has an LED light bar tucked into the top gantry extrusion. At first, they may seem gimmicky, but they come in handy by illuminating the printer whilst preparing and actually printing your models.
It’s useful during overnight prints and in poor lighting conditions so that you can properly observe your prints. The light can also be turned on or off at any point using the LCD screen.
63-Point Automesh Bed Leveling
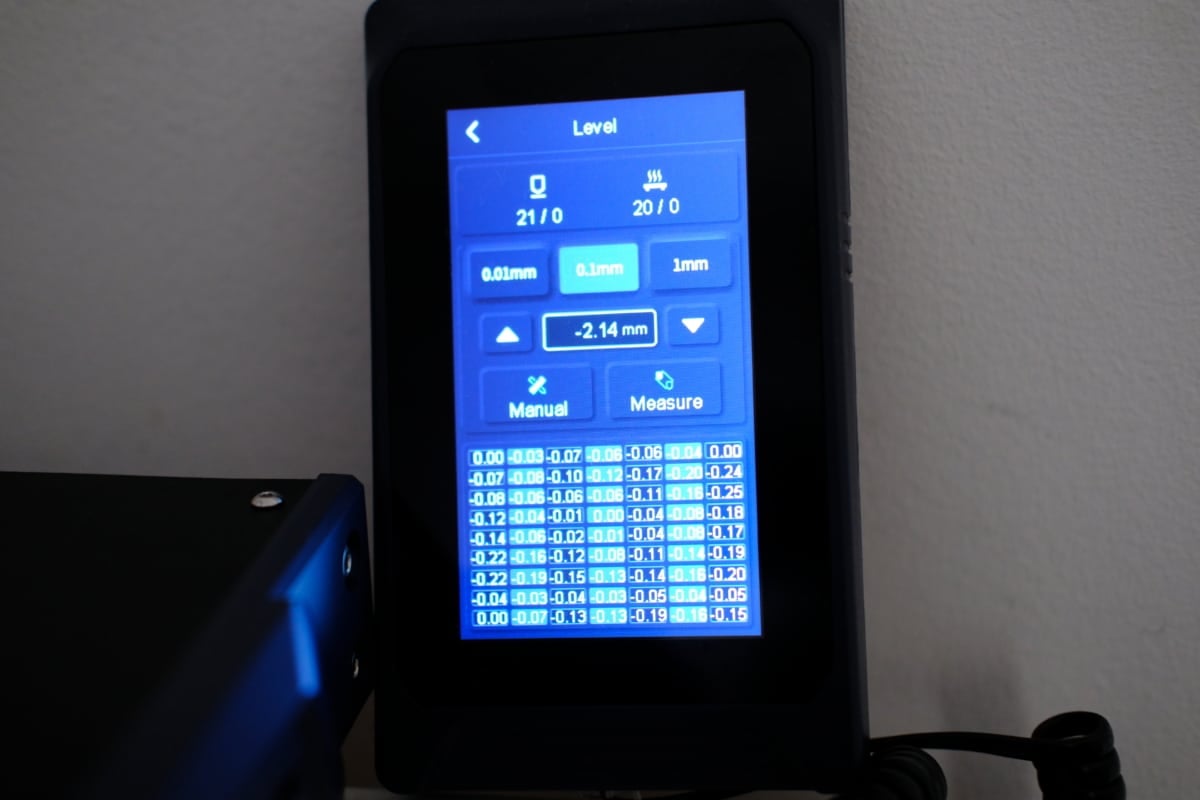
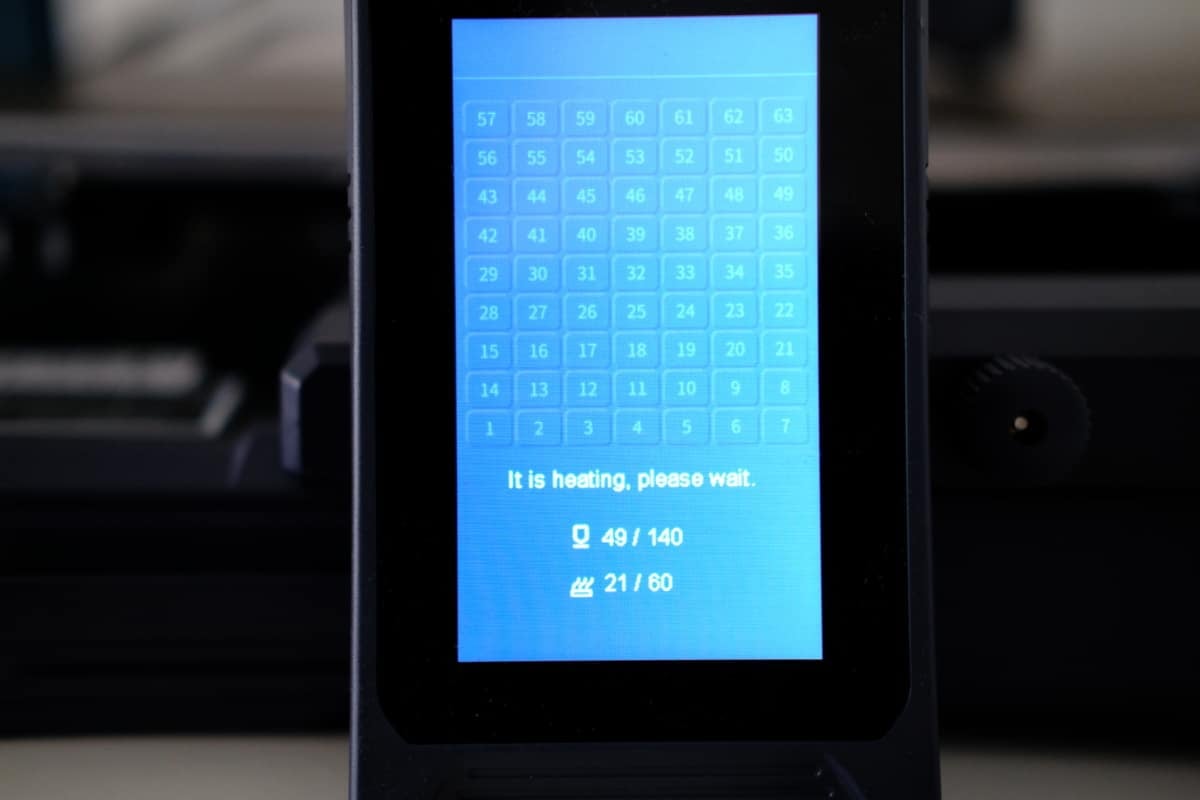
The Neptune 3 Max comes with Automesh bed leveling that uses a high precision inductive probe to automatically scan 63 points (9 x 7 grid) on the hotbed. This measures height differences across the print bed and accounts for it on the Z-axis during printing.
After leveling the bed, set the Z-offset manually by placing a piece of paper under the nozzle and lowering it, until there is a slight resistance when you pull the paper. You can also calibrate the Z-offset while running a test print.
Specifications of the Elegoo Neptune 3 Max
- Frame Material: CNC Machined Aluminum Extrusion
- Modeling Technology: FDM
- Rated Voltage: 100/240V 50/60Hz
- Rated Power: 500W
- Build Size: 658 x 632 x 740mm
- Printer Size: 420 x 420 x 500mm
- Nozzle Temperature: 260°C
- Hotbed Temperature: 100°C
- Connection Types: Micro SD Card, USB Port
- Nozzle Diameter: 0.4mm
- Print Precision: +-0.1mm
- Printing Speed: 30-180mm/s
- Layer Height: 0.1-0.4mm
- Display Screen: 4.3-Inch Color Screen
- File Format: STL/OBJ/AMF
- Supported Filament: PLA/ABS/TPU/PETG
- UI Language: English/French/German/Russian/Italian/Spanish/Japanese/ Chinese.
- Resume Printing: Yes
- Filament Detection: Yes
- Net Weight: 17.7 KG (39 lbs)
- Printing Platform: PEI Coated Spring Steel Sheet
Benefits of the Elegoo Neptune 3 Max
- The knobs for the X and Y-axis make belt tensioning much easier.
- All axes are driven by silent stepper motors for a quiet and more precise movement during printing. Noise levels during printing are usually as low as 50 dB.
- Dual fans mounted on the extruder head helps with uniform cooling across the model being printed.
- It is compatible with many filaments including flexible filaments due to the direct drive extruder.
- Bed leveling is automatic, making it much easier and faster.
- The LEDs light bar integrated into the gantry helps to ensure you can monitor the print at all times, even in poor light conditions.
- The Neptune 3 Max is embedded with a toolbox storage area, which makes your tools much more accessible.
Downsides of the Elegoo Neptune 3 Max
- No Wi-Fi support on the Neptune 3 Max.
- Due to its size, it takes up a large amount of space on whatever platform it is placed on.
Unboxing & Assembly of the Elegoo Neptune 3 Max
The unboxing and assembly of the Elegoo Neptune 3 Max is quite similar to that of the Neptune 3 Pro. The only difference is that the Neptune 3 Max is just bigger in all aspects.

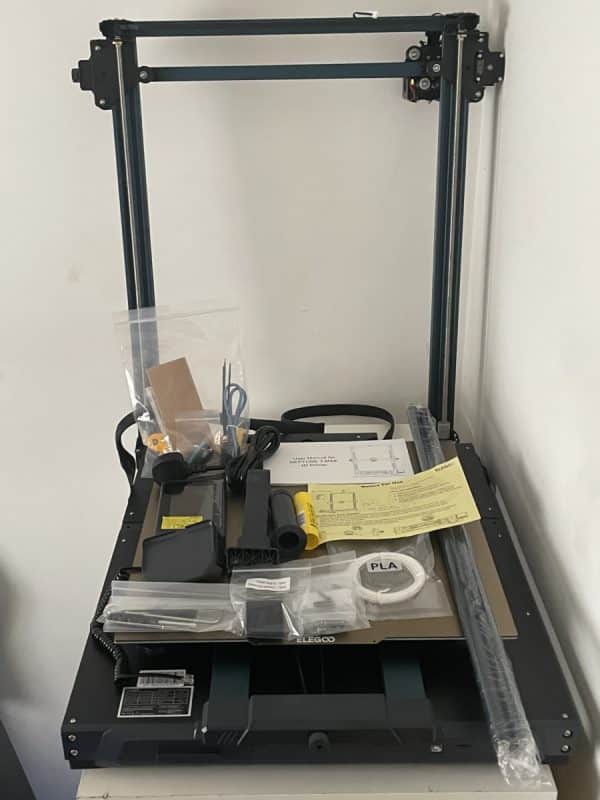
The assembly process is pretty straightforward, as the printer comes pre-assembled with some of its parts in place.
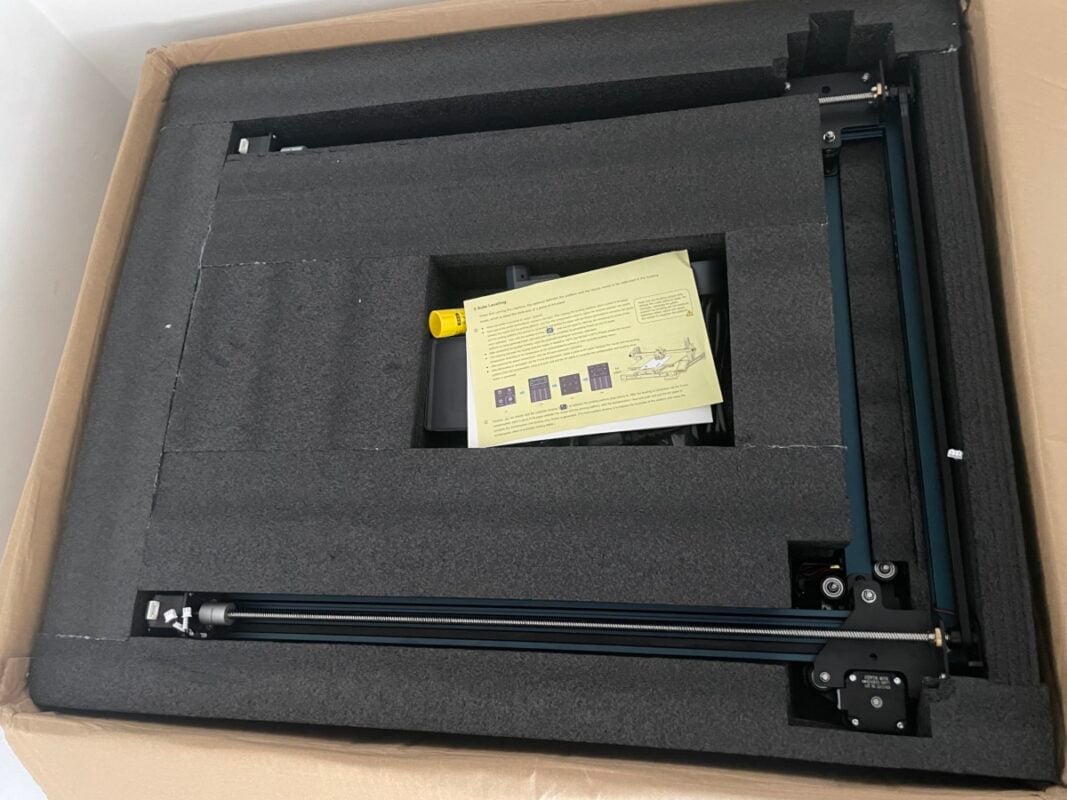
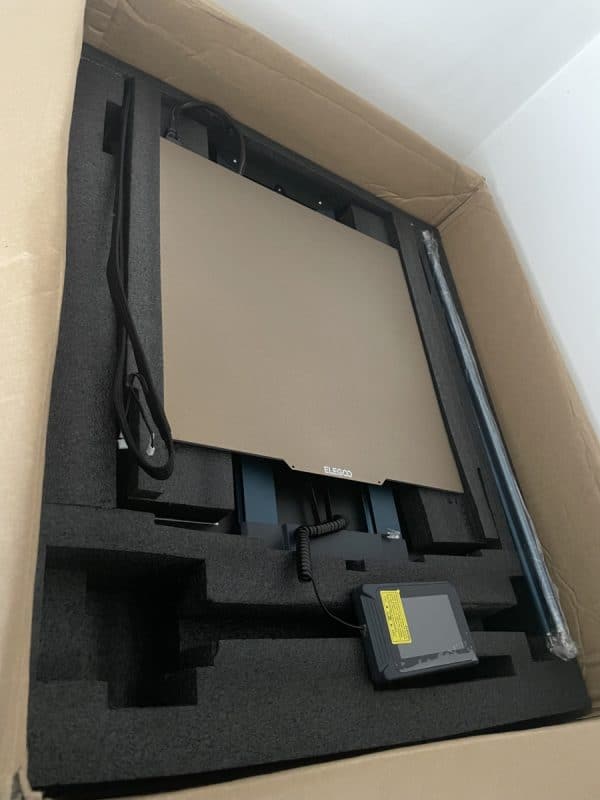
Upon opening the box, you are greeted with some fliers and instruction manuals to guide you on the assembly process and to inform you about the content of the box.
The box contains the spool holder, glue stick, power cable, the printer’s gantry, tie-bars, a bag containing 3D printer tools and accessories, and a magnetic display holder.
Also, it contains the LCD Touchscreen and the base of the printer all fitted nice and snug into the foam inserts.
It is good practice to lay all the parts on the table and ensure they tally with what was listed in the instruction manual included in the box. The assembly process should take about 20-30 minutes.
Step 1: Remove the 3D printed guards (4) placed under the hotbed used to prevent the bed from swaying back and forth during shipping.
Step 2: Place the gantry on the base and insert the screws under the base to hold the base and the gantry together. Insert two screws on both sides and tighten with a screwdriver.
Step 3: Attach the magnetic base for the display to the right-hand side of the gantry with a screwdriver. You can now place the LCD on the magnetic base and connect the telephone cord from the LCD to the port in front.
Step 3: Screw one part of the spool holder into the other and screw it to the top of the gantry. Attach the filament runout sensor to the spool holder using the remaining screws for the display.
Step 4: Connect the cables from the base to the Z-axis stepper motors, X-axis stepper motors, and limit switches.
Step 5: Attach one end of the tie-bar to the top of the gantry and the other to the left side of the base of the printer. Repeat this on the right-hand side, with the second tie-bar.
Step 6: Plug in the connectors for the limit switch and the filament sensor to their respective connectors.
Step 7: Insert the Ribbon cable for the hotend and secure it to X-axis for proper cable management using the R-shaped buckle.
Once all of this is completed, the main assembly is complete. Ensure you select the right voltage level based on the supply from the mains in your area. After this, you can plug in the power cable to the 3D printer, turn it on, and start the leveling process.
Check out this video from Randy May on how to assemble the Elegoo Neptune 3 Max.
Leveling of the Elegoo Neptune 3 Max
The Bed leveling process is simply straightforward. Once the printer is powered up, simply select “Level” on the LCD’s home menu. Follow the prompts to confirm the bed leveling process.
Once that is confirmed, the bed leveling sequence will begin. The automatic 63-point leveling process will operate across the bed, in a 9 x 7 grid to measure and compensate for the bed distances.
After the bed-leveling process is completed, kindly set the Z-offset with the prompt that pops up at the end of the bed-leveling sequence. Once the Z-offset is set, you can run a test print on the printer to ensure the settings are just right.
Some test filament is included in the box and a test file is included in the SD card in the printer.
Here’s a video from Randy May on how to level the hotbed on your Elegoo Neptune 3 Max.
Customer Reviews of the Elegoo Neptune 3 Max
One user stated that the Elegoo Neptune 3 Max is his new favorite printer. He said he was already printing huge pieces for a cosplay he was working on. He also commended Elegoo for making the Printer very affordable.
He said he won’t be needing to upgrade anything on the Neptune 3 Max anytime soon since everything he wants is already included.
Another user stated that the printer arrived in great condition and was well-packaged. He stated that the quality of the initial prints from the printer was fair, but the belts weren’t at optimal tension.
He also said that some of the roller wheels needed to be tightened and adjusted, possibly due to movement during shipping.
He further stated that if it had been assembled and printed perfectly without adjusting and maintenance, possibly with ideal settings profiles for popular slicers included, instead of just a proprietary version of Cura, it would’ve exceeded the value.
Ultimately, it falls just a hair short due to these issues, at this price point, in this period.
You can also check out Uncle Jessy’s review of the Elegoo Neptune 3 Max. He particularly talked about the size of the hotbed and showcased some of the life size models he printed.
Print Quality of the Elegoo Neptune 3 Max
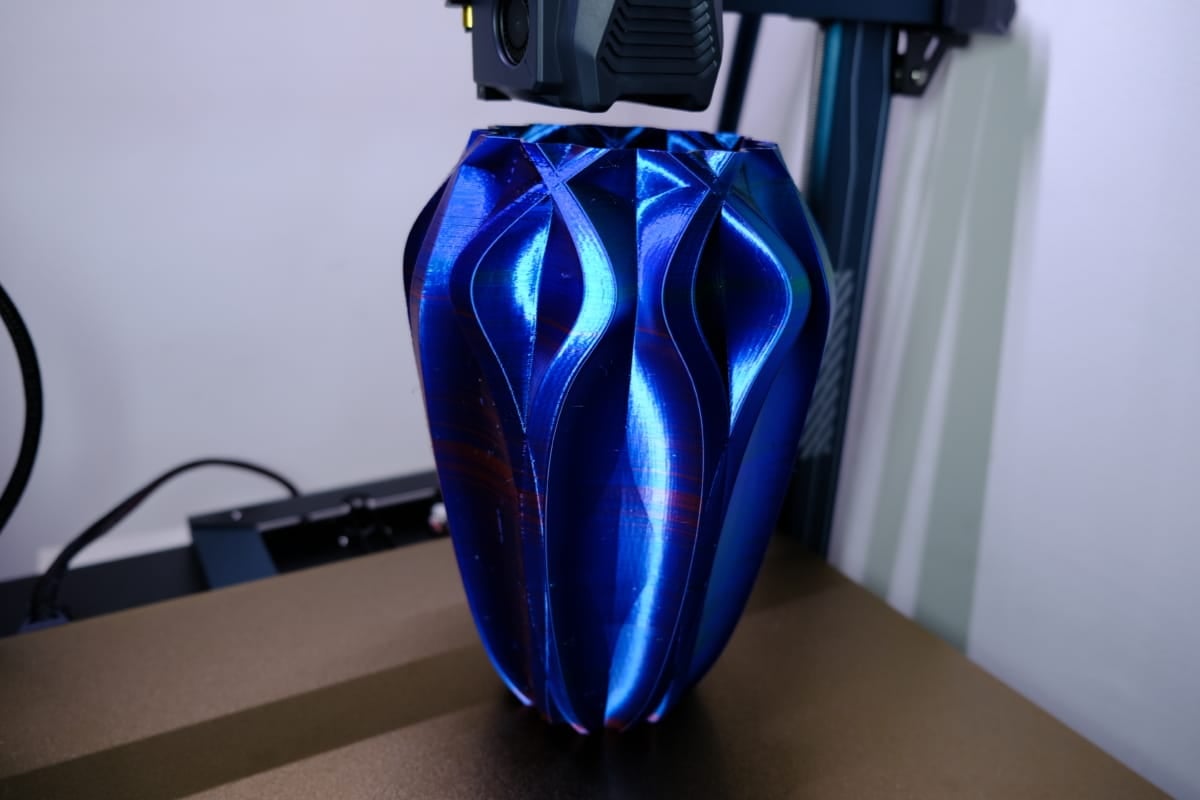
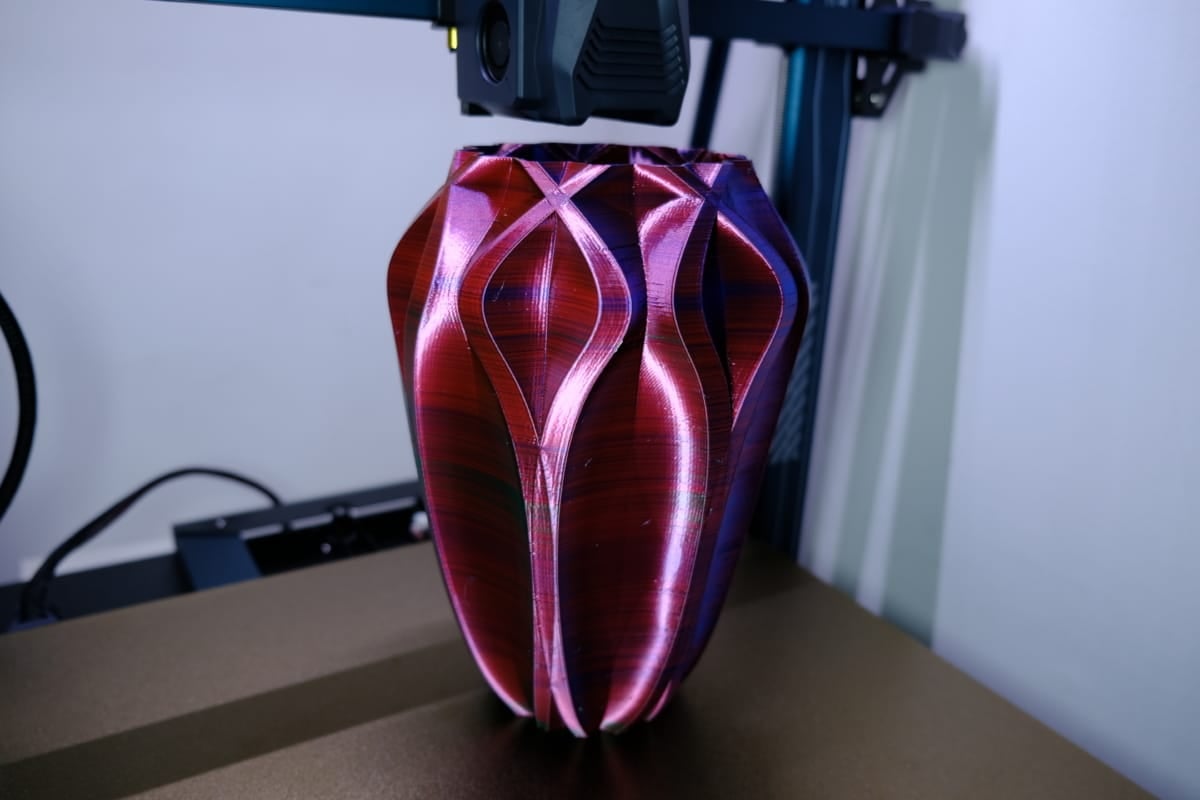
Vase V689
This multi-colored vase came out really well on the Elegoo Neptune 3 Max. You can see the lovely color changes as the vase spins around, giving a lively effect to it.
There are a few visible layer lines on this, but nothing too large.


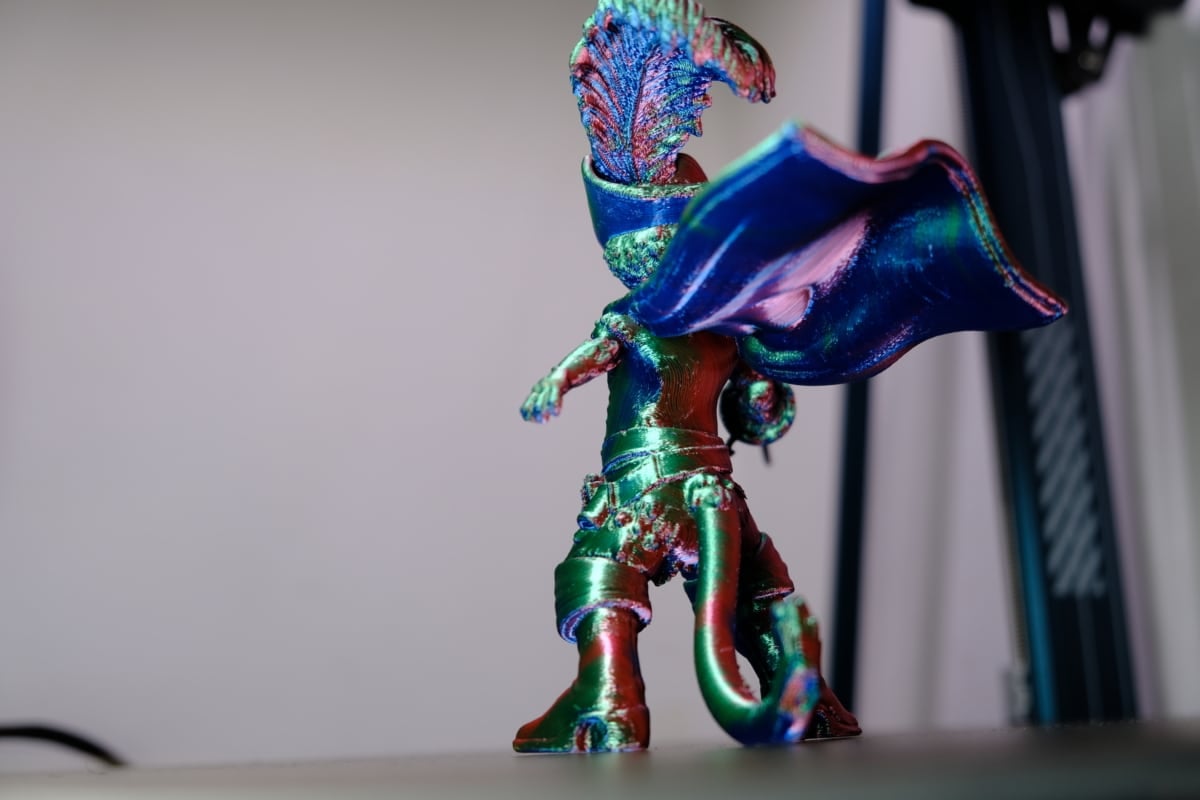
Puss in Boots
I enjoyed making this model, a popular character that many people know of from the Puss in Boots movie. There was a 2022 version of this movie so I thought I’d try to 3D print this model and see how it turned out.
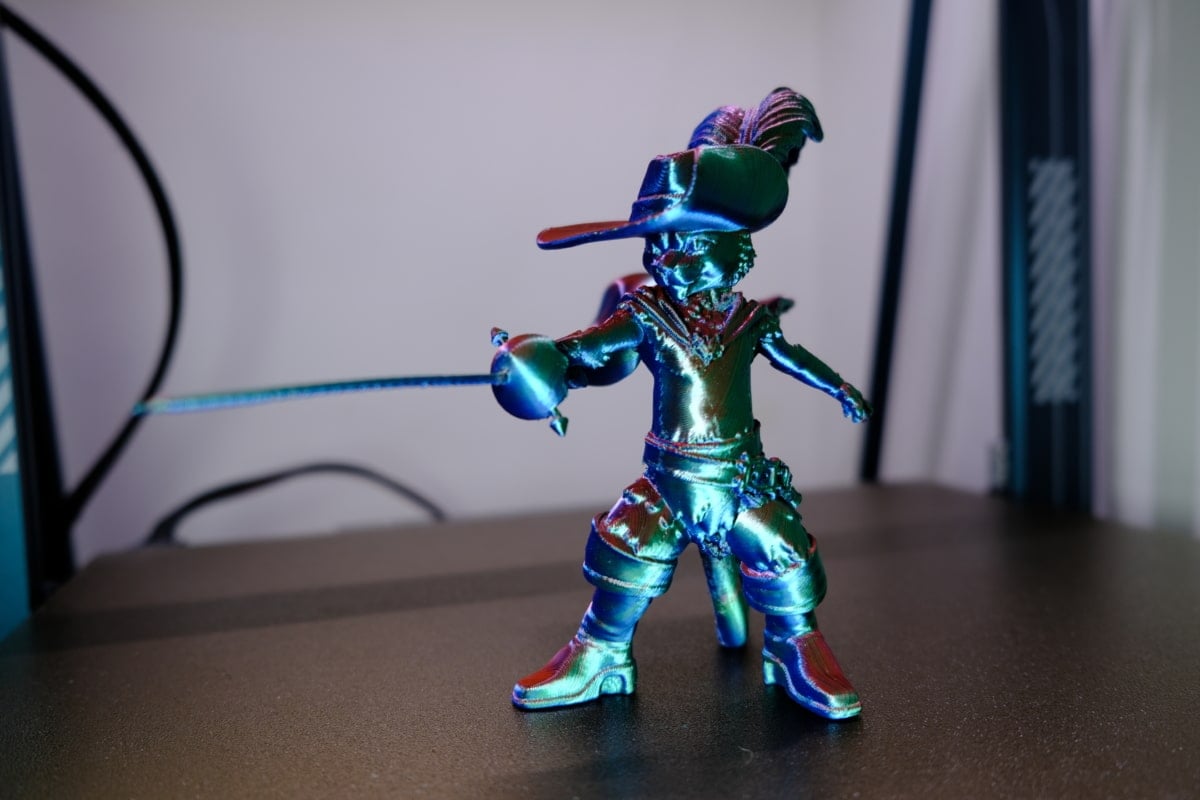
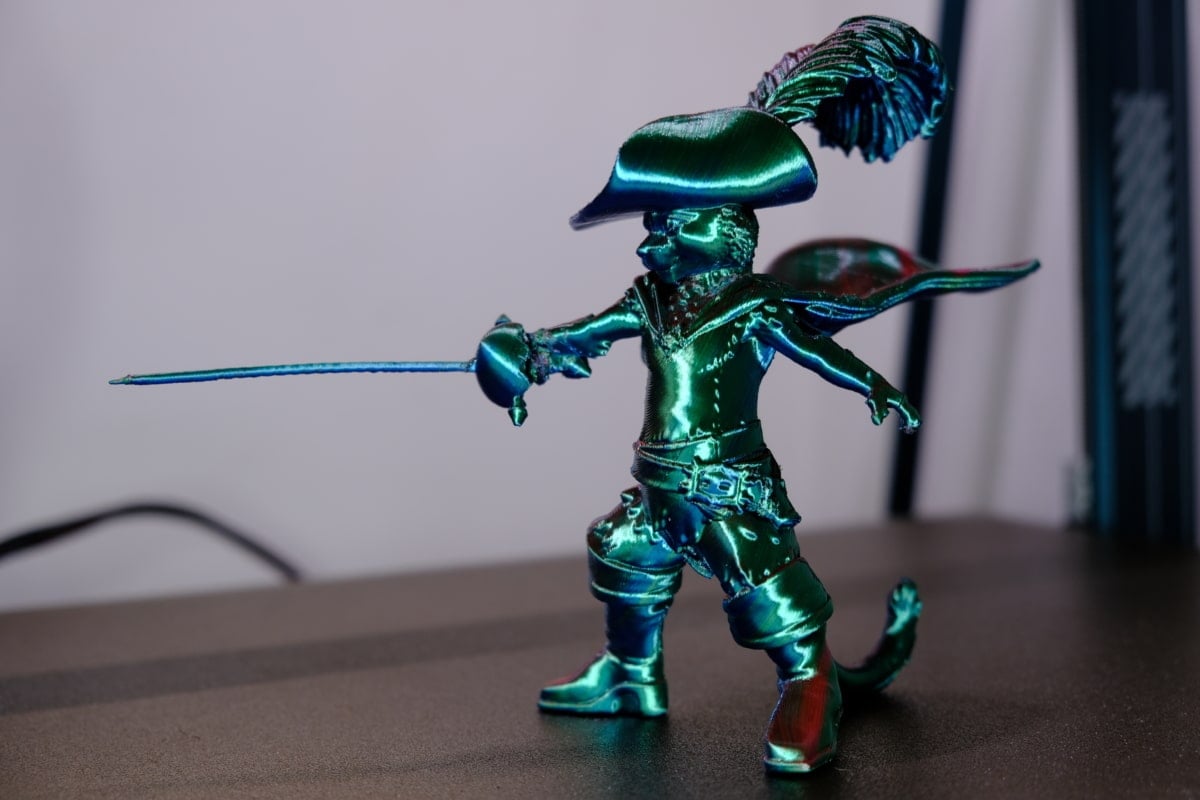
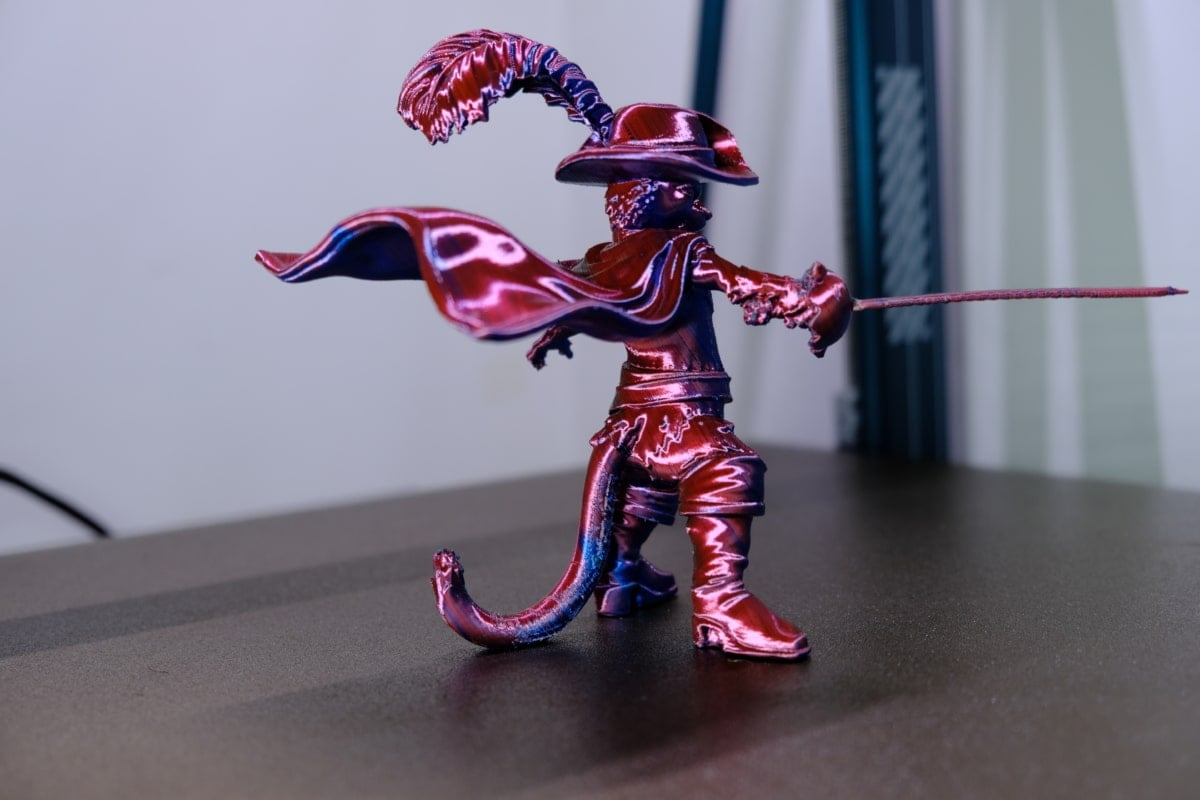
Seeing this model at different angles makes it much more vibrant.
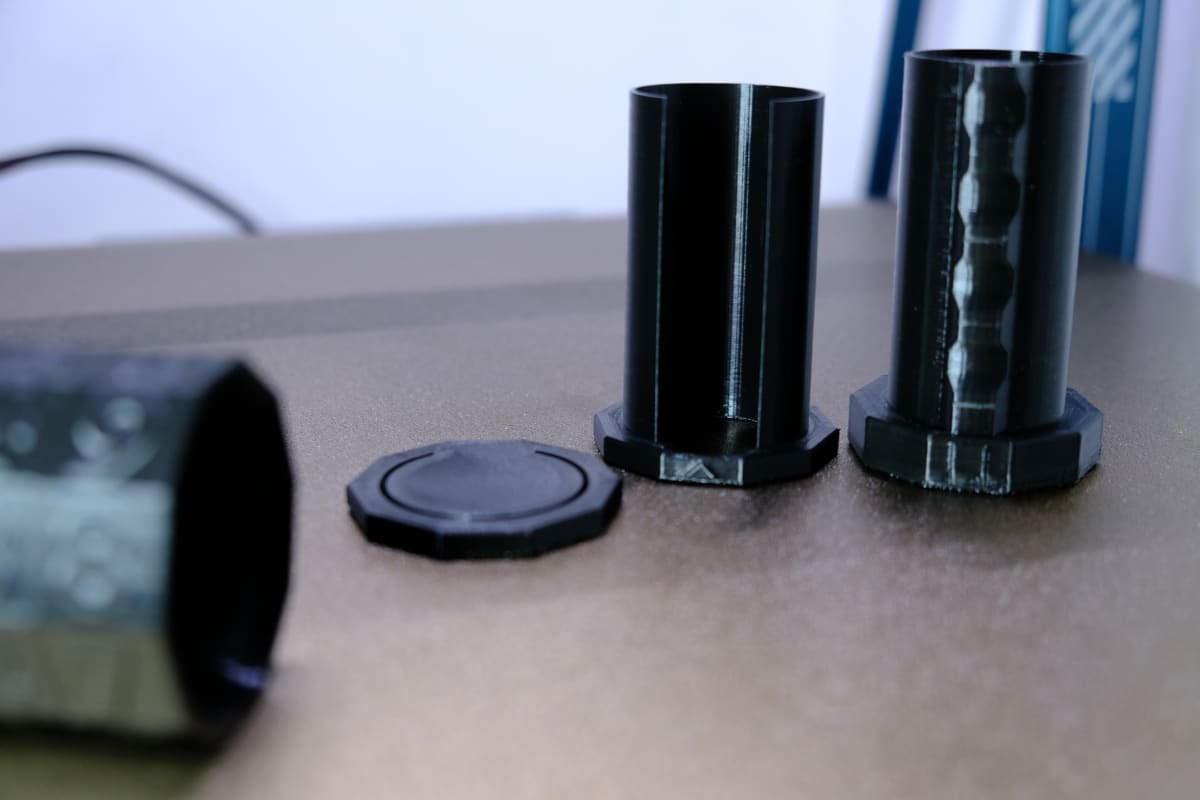
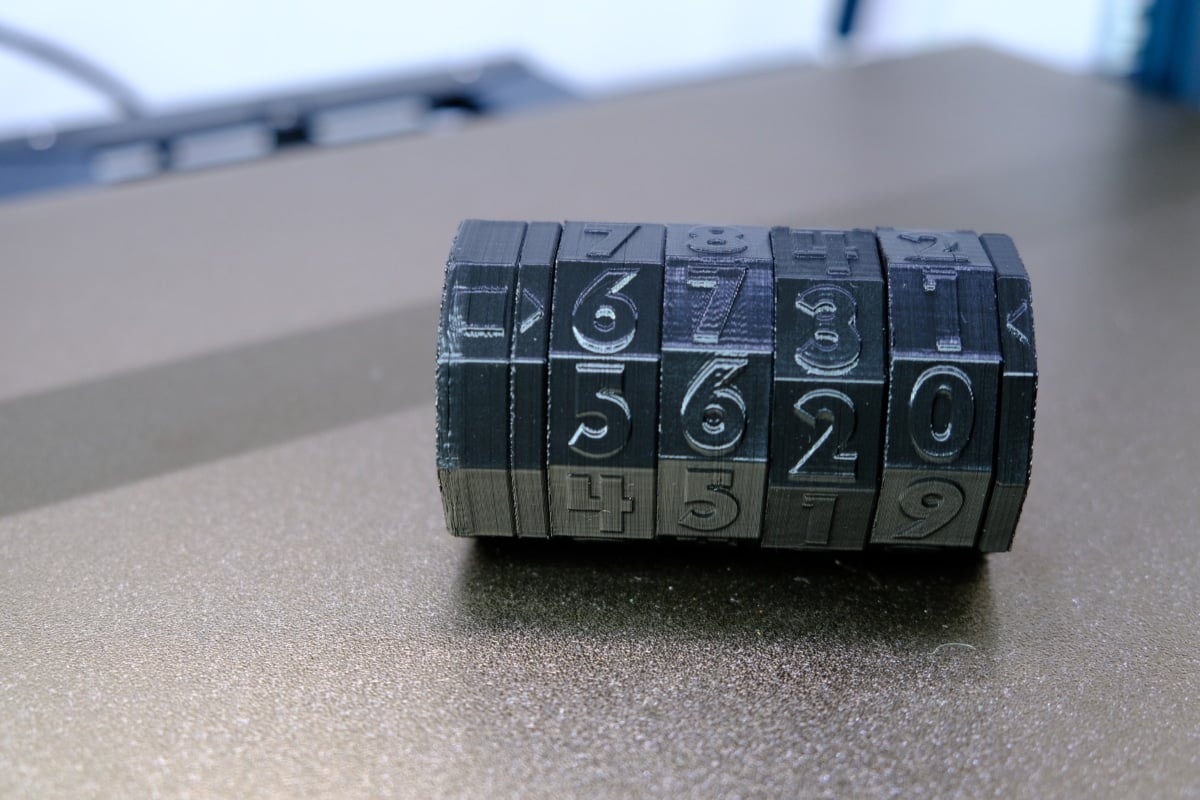
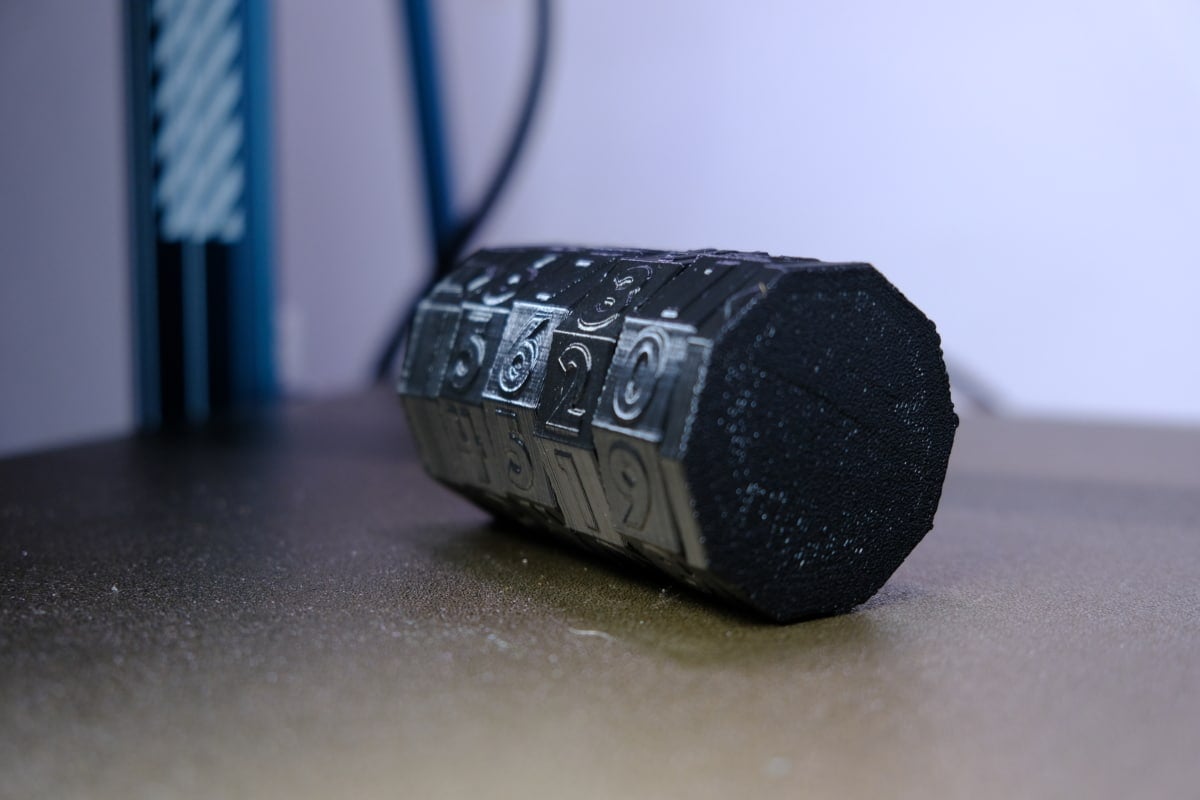
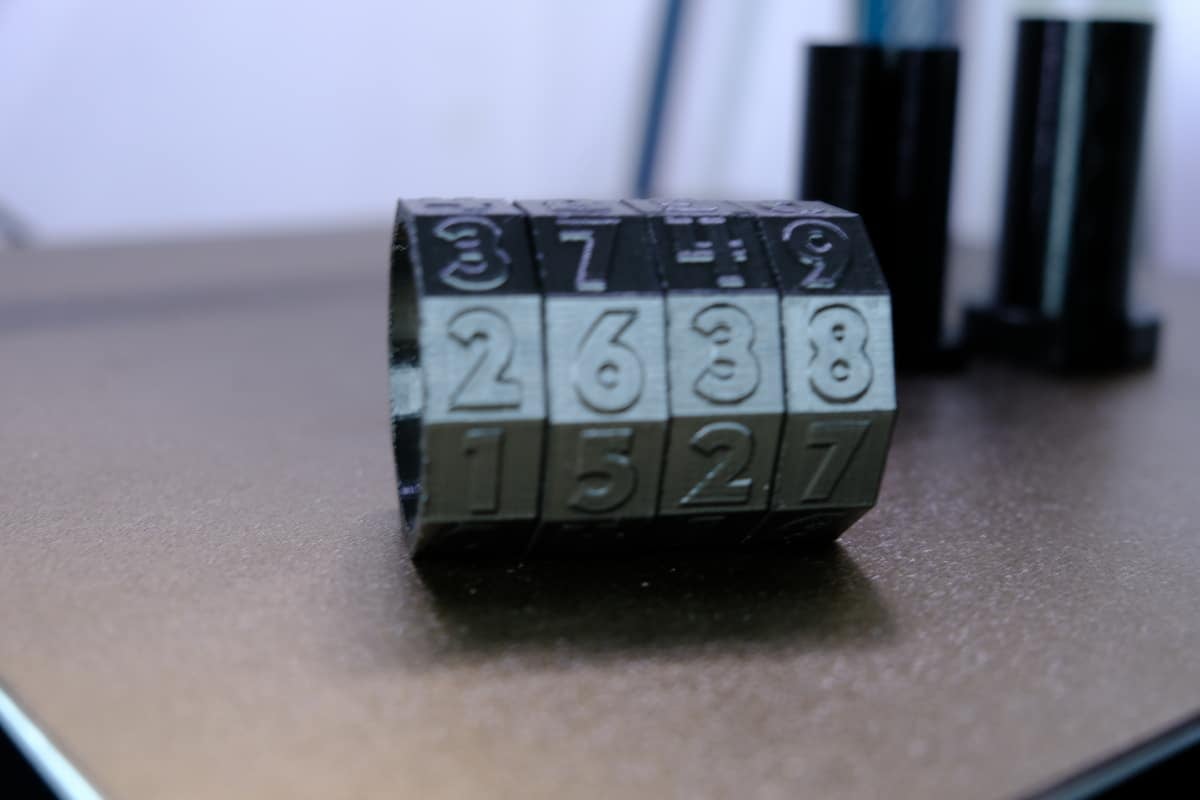
Cryptex
Here’s an interesting puzzle model called Cryptex which allows you to store things inside the model. It has a 4-digit code that you can create yourself by choosing the models before printing.
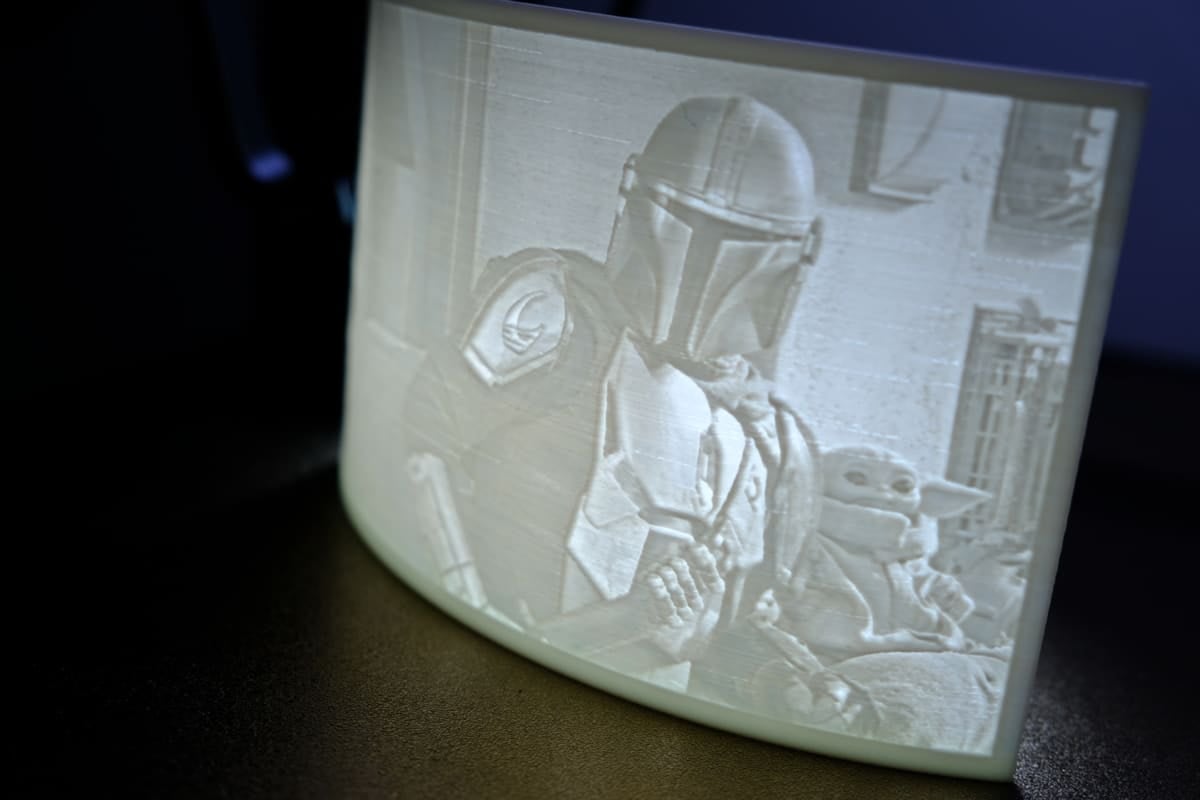
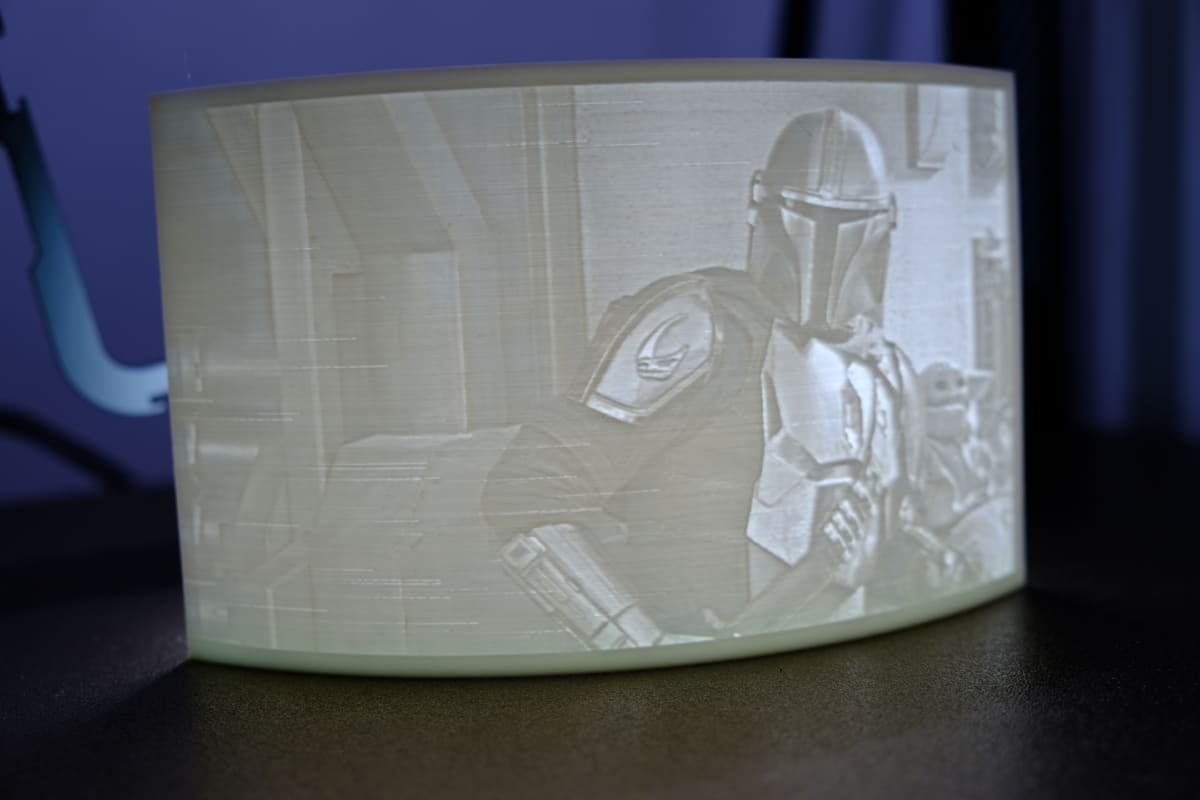
Mandalorian Lithophane
Finally, we have a Mandalorian lithophane. This one came out really well as you can see below. Once you place a light behind the lithophane, it shows a detailed image through the model.
There were some layer lines showing a little, but this can usually be fixed by placing the 3D printer on a more stable surface and slowing down the print speed.
You can check out my article on how to create your own lithophane.

Verdict – Worth Buying or Not
The Elegoo Neptune 3 Max is a welcome addition to the Neptune 3 lineup. It is basically a Neptune 3 Pro with a larger build volume. It is the dream machine for anyone who wants to build life-sized models and props.
The price point hits a sweet spot, especially when you consider what you are getting in return.
If you want to maximize your build volume, this printer is for you. However, if you want to print miniatures or other smaller functional prints, it would be advisable to get any of the other Neptune 3 printers available.