How to Use Anti-Aliasing for Resin 3D Printing – Best Settings
Anti-aliasing is a unique feature that can help you get even better print quality than usual from your resin printer! When used right, anti-aliasing softens the print’s edges and reduces the staircase effect, leading to a smoother, more continuous surface.
To use anti-aliasing, simply go into your resin slicing software and check the box besides Anti-Aliasing to turn it on. There are more settings that you can adjust but the default values usually work quite well. You can set the level of Anti-Aliasing as well as the Grey Level and Image Blur to achieve a better surface.
In this article, I’ll explore anti-aliasing features in several slicers and show you how to use them. Keep on reading to learn more about how this feature works.
What is Anti-Aliasing?
Anti-aliasing removes or blends the jagged, pixelated edges of resin models to help achieve a smoother surface. These jagged edges are a result of something called the staircase effect.
In resin prints, these jagged, pixelated edges are most visible along curved surfaces. This happens when successive layers in the 3D model are not the same size, leading to mismatched layers.
This might not be visible in most resin models since the layer heights are quite small. However, on curved surfaces, this staircase effect becomes more visible.
How Does Anti-Aliasing Work?
The edge of each model layer is a border with black pixels on one side and white pixels on the other. The dark pixels form the dark zone on the LCD screen, while the white pixels are the parts that light up to create the layer’s shape.
Anti-Aliasing introduces gray pixels at the model’s edge between the light and the dark zone. These gray pixels ease the transition from light to dark pixels.
This gives the edges of the print a (blurry), rounded look, making it look better and smoother. You can see an example of these two Benchy prints.
The one with anti-aliasing has a smooth surface, while the one without has lines and artifacts on its surface.
Anti-Aliasing is just like any other slicer setting, and you can easily integrate it into your printing workflow. First, you’ll need a slicer that offers anti-aliasing if you want to use this feature for your model.
Also, the slicer has to be compatible with your resin 3D printer. Slicers with anti-aliasing features include ChiTuBox, Lychee Slicer, and Formware 3D.
We’ll be looking at how to use anti-aliasing in ChiTuBox and Lychee slicer below.
How to Use Anti-Aliasing in ChiTuBox
ChiTuBox is one of the most popular slicers for resin printers. It also has some of the best anti-aliasing features you can find on free resin print slicers.
Here’s how you can use it:
- Open up ChiTuBox’s advanced settings
- Activate the anti-aliasing setting.
- Set the Anti-Aliasing Level, Image Blur, and Gray Level Values
- Slice the model.
Let’s take a deeper look at this:
Step 1: Open Up ChiTuBox’s Advanced Settings
To access the anti-aliasing settings in ChiTuBox, you must enter the slicer’s advanced settings. Here’s how you can do it:
- Make sure you are done editing the model (raft, supports, orientation, etc.)
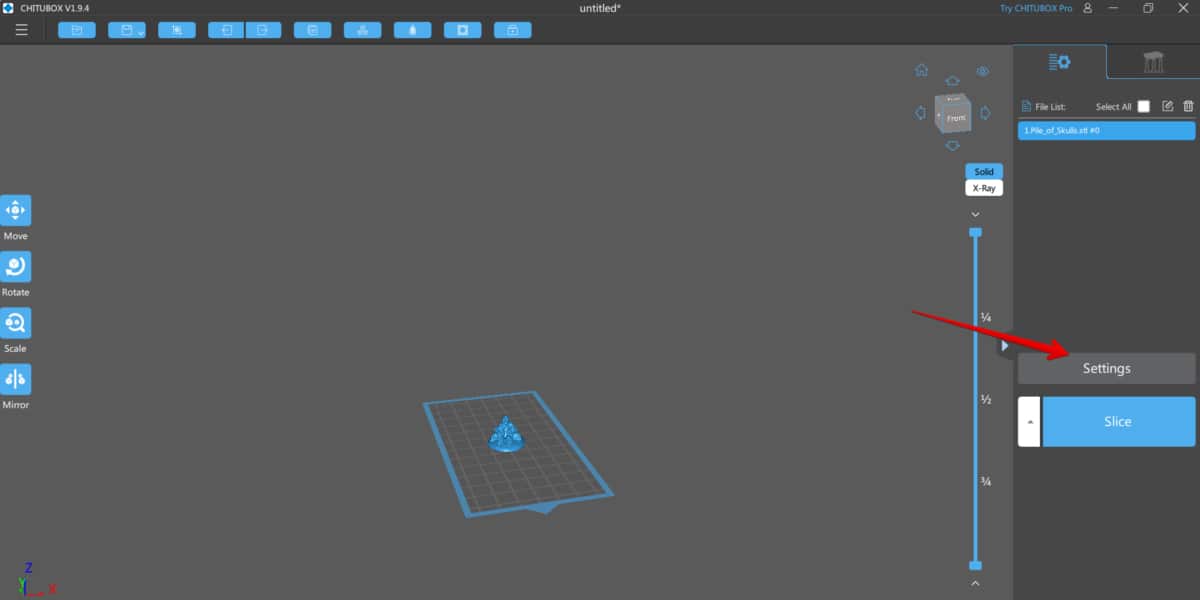
- Click on the Settings tab just above the slice button.
- In the menu that comes up, click on the Advanced tab.
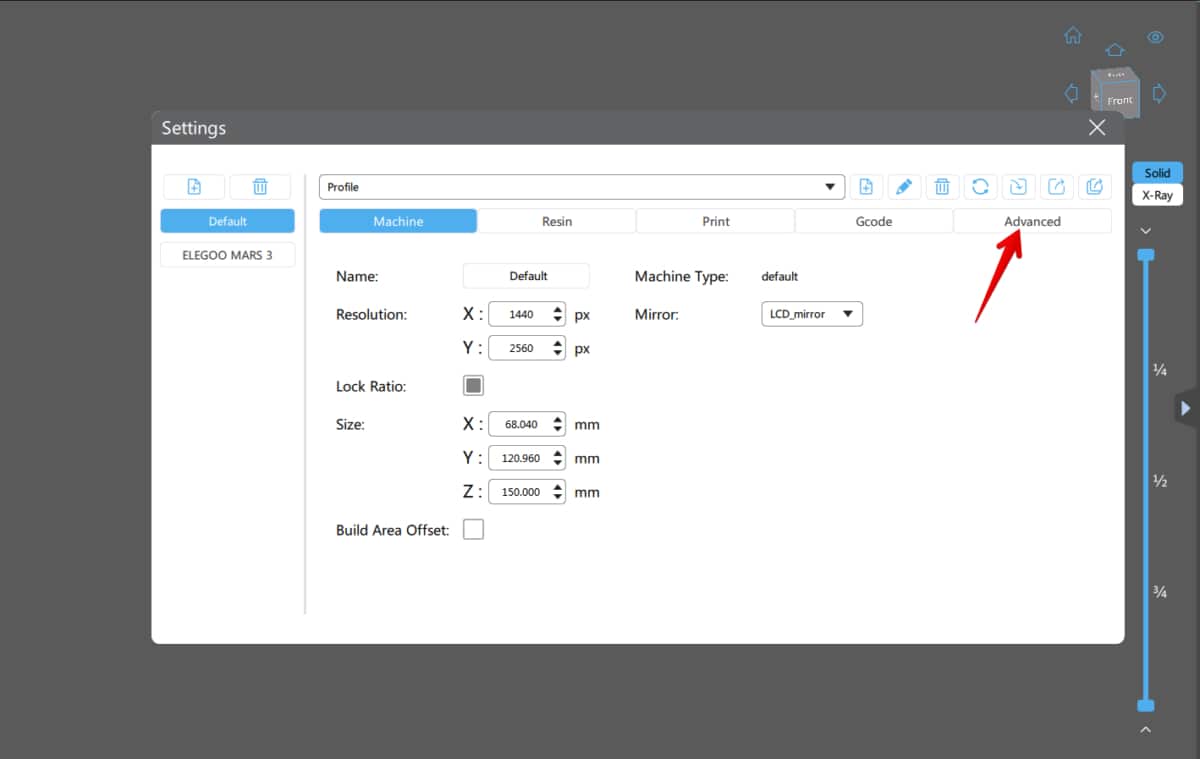
- You should see the anti-aliasing setting in the menu that comes up.
Step 2: Activate the Anti-Aliasing Setting
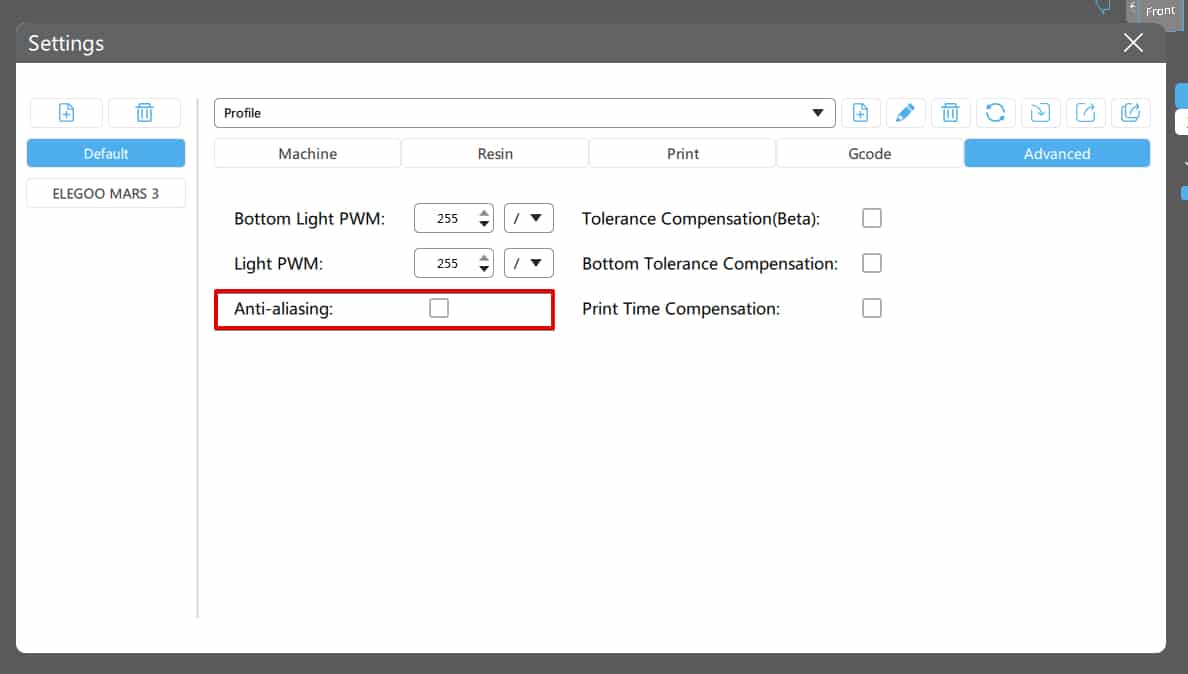
On the page that pops up, the anti-aliasing box should be blank. Click on the box to activate the setting.
Once you activate it, some new settings will pop up. These settings are:
- Anti-aliasing level
- Grey level
- Image blur

Step 3: Set the Anti-Aliasing Level, Image Blur, and Gray Level Values
Once you activate anti-aliasing, you will need to configure its settings. You should know that the optimal anti-aliasing settings vary depending on materials, printer, exposure time, etc.
So, you might need some experimentation to figure out your optimal settings.
Here are some of the settings and what they do:
- Anti-Aliasing Level
- Grey Level
- Image Blur
Anti-Aliasing Level
The anti-aliasing Level controls the level of smoothing the slicer software applies to your model’s edges. It controls the width of the transition zone of gray pixels from the white to the black pixels.
This setting has three levels: 2, 4, and 8. At level 8, no anti-aliasing is applied, and the model’s edges are pixelated with no transition zone.
On the other end, level 2 offers the highest anti-aliasing with the widest transition zone of gray pixels from the white to the black pixels.
Most people recommend a level 2 anti-aliasing as it produces the best surface.
Note: Depending on your printer’s profile, this setting might not be available. For example, ChiTuBox doesn’t offer this setting for new printers like the Elegoo Mars 3.
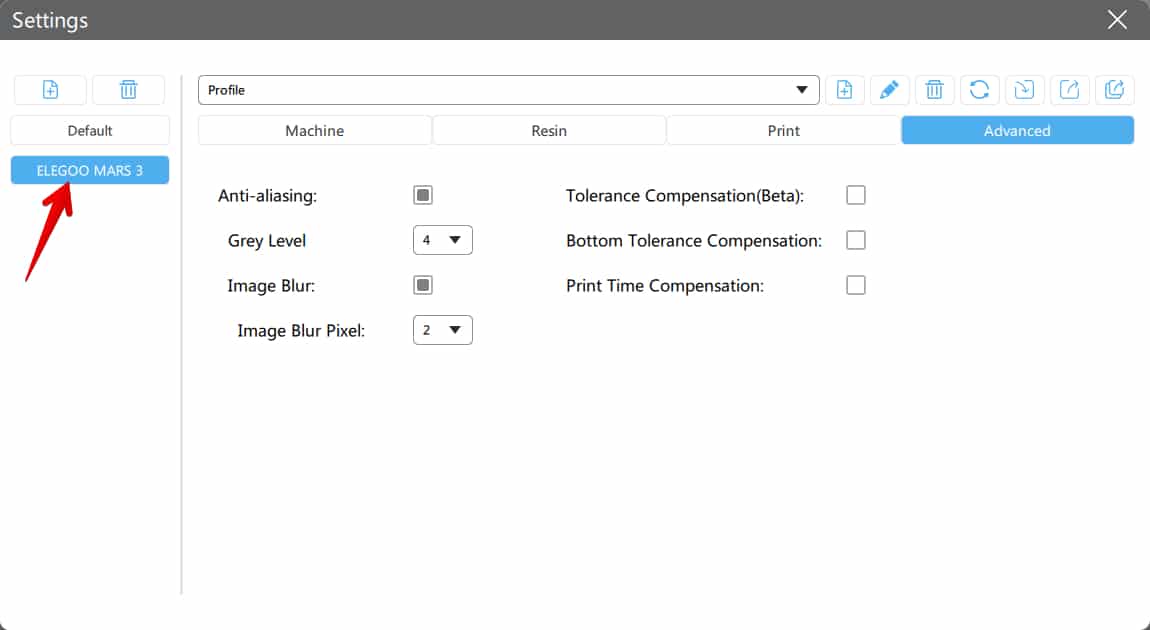
Instead, you might have to use the next setting, Grey Level.
Grey Level
The Grey Level setting controls the brightness of the gray pixels in the anti-aliasing zone. The setting ranges from 0-8.
The default level of this setting is 0. At level 0, the gray pixels are at their lowest brightness. The pixels get brighter as you increase the level.
Once you reach level 8, there are no gray pixels again, and all the pixels in the anti-aliasing zone are solid white. From the tests that ChiTuBox ran, a Grey Level of 0 is the best if you aren’t applying any Image Blur.
However, if you’re applying Image Blur, you should bump it to 4.
Image Blur
The Image Blur setting uses a technique called feathering to smooth out the edges of the print. It does this by gradually blurring out the pixels on the model’s edges so they can blend in together.
ChiTuBox offers three levels of image blur – 2, 3, and 4. The default value here is 2. Increasing the value increases the zone in which the image blurring occurs.
For example, at level 2, the blurring might cover only two edge pixels, while at level 4, it might cover about 6 pixels on the model’s edge. You can leave this setting at the default 2.
Step 4: Slice the Model
Once you’ve applied the anti-aliasing settings, you can slice the model. Depending on the settings you use, slicing can be slow.
Once the model finishes slicing, save it to your USB stick and print it out. For more information on slicing prints with ChiTuBox, you can check out this video.
How to Use Anti-Aliasing in Lychee Slicer
Lychee Slicer is another popular platform that offers anti-aliasing features for your resin model. In fact, with the software’s latest overhaul to version 5.0, more anti-aliasing features are now available.
Let’s look at how you can use these features:
- Navigate to the export tab
- Choose the anti-aliasing methods you want to use.
- Configure the anti-aliasing settings
- Slice the model
Let’s take a close look at each step.
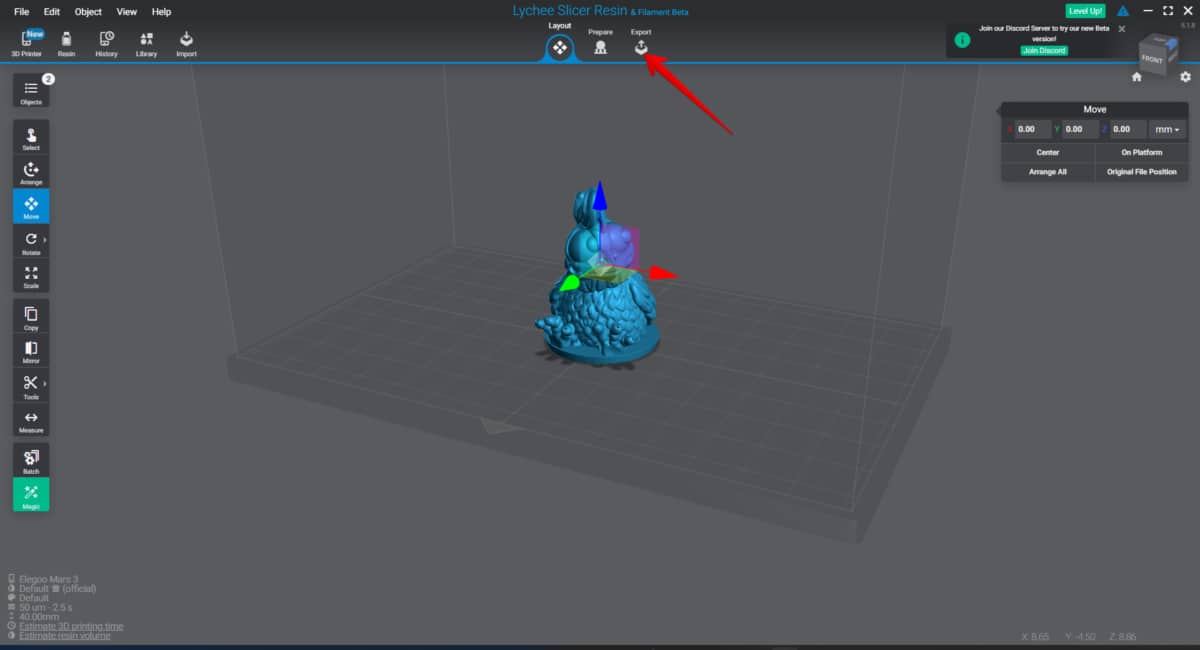
Step 1: Navigate to the Export Tab
Once you’ve imported your model into Lychee slicer, configure its position orientation and print settings in the Layout and Prepare tabs. After you’ve done this, navigate to the Export tab on the screen.
On the export tab, you’ll see a sidebar on the right with the anti-aliasing and several other printing options. The name of the sidebar is Export Slicer.

Step 2: Choose the Anti-Aliasing Method You Want to Use
On clicking the anti-aliasing tab, several options will appear on the screen. These options include:
- Off (default)
- Smooth surfaces
- Sharpen details
- Contrast blur
Let’s quickly see what each one does:
Off (Default)
This is the default setting in the slicer. Here, the anti-aliasing feature is turned off for the model.
Smooth Surfaces
As the name says, this anti-aliasing setting optimizes and smoothens the print’s surface. It is perfect for models with smooth, continuous surfaces and curves.
However, you might not want to use this setting if the model has any sharp or minute details. It can lead to a loss of detail.
Sharpen Details
The Sharpen Details option lets you retain the sharp details in the model while applying anti-aliasing. If you have a model with sharp features and details, this is the best setting for you to use.
Contrast Blur
The contrast Blur option is like a combination of the two options above. According to Lychee Slicer, it keeps a sharp boundary for the model while applying an extra blur.
This means the edges of the print are still well-defined if only slightly blurred.
Step 3: Configure the Anti-Aliasing Settings
After choosing the anti-aliasing settings you want to use, you still have to configure its settings. Here are the settings for each option:
Smooth Surfaces
- Radius: This defines the region or area you want the anti-aliasing effect to cover. It is measured in pixels.
- You can set it between 1-20px. The higher the value, the larger the region the anti-aliasing will cover.
- Grey Offset: This controls the intensity of the gray pixels. The higher the value of the gray offset, the whiter the pixels.
- Some people recommend keeping this to within 20-30%. However, if you’re using a pigmented resin, you should experiment within the 20-50% range to find what works for you.
Sharpen Details
- Level: This controls the sharpness level the anti-aliasing software will apply. You can choose between various levels, with 2 being the lowest and 16 being the highest sharpness. Most people recommend using level 8. According to them, anything below that has no effect.
- Grey Offset: Same as the setting on the smooth surfaces.
Contrast Blur
The contrast blur sub-menu has the same settings as the Smooth Surfaces sub-menu.
Additional Settings
There are also some additional settings that apply regardless of the anti-aliasing option you choose. They are:
- High-Definition Anti-aliasing: Enabling this setting gives the model a higher-quality surface. However, it requires a lot of computing resources to run.
- So, using it can lead to slower slicing times.
- Anti-Aliasing on Supports: You can use this option to run the anti-aliasing presets on your model’s supports and rafts. This can increase slicing time and also printing time.
- However, it’s advisable to keep this setting off. Leaving it on can result in weak supports that may fail while printing.
This is how Anti-Aliasing on pre-supported STL files affects your support thickness
byu/Br_Des inresinprinting
You can check out this in-depth video below for a more in-depth explanation of Lychee Slicer’s anti-aliasing features.
Should I Use Anti-Aliasing for 3D Printing Miniatures?
Yes, you can use anti-aliasing for 3D printing miniatures. It can give your miniature a smoother look, reduce voxel lines (Banding) and also help save time on post-processing.
However, you have to be very careful with the settings you use while using anti-aliasing. Using settings like image blur in Lychee Slicer and ChiTuBox can lead to a high loss of detail.
So, if you’re using Anti-aliasing on resin prints, make sure you’re using the right settings. For example, this user was able to achieve a smooth surface while preserving details by using the Sharpen details setting on Level 2 in Lychee Slicer.
Here are some additional quick tips you should know to achieve the best results:
- Make sure your exposure time is properly calibrated. If your exposure time isn’t well set up, you will have poor prints with a high loss of detail.
- Check your printer’s firmware to make sure it is up-to-date. Some printers can have trouble printing out the gray anti-aliasing pixels properly due to the old firmware.
Some users have experienced this bug in Anycubic printers. They seem to have fixed this in recent firmware updates.
I wrote an article called How to Calibrate Resin 3D Prints – Testing for Resin Exposure.
Finally, remember that while anti-aliasing is a great feature, it’s not necessary for all prints. In fact, some people with high-resolution (8k and 4k) resin 3D printers say they barely use it.
So, feel free to experiment with the feature to find what works for you!