How to Use a 3D Printer Step by Step for Beginners
Learning how to use a 3D printer can be tricky at the start, but with advice, tips, and practice, you can get the hang of things pretty fast. To help people get more used to 3D printing, I put together a step-by-step guide on how to use a filament printer.
This article will give you the details behind how to successfully use a 3D printer in a step-by-step fashion with plenty of pictures and details so you know exactly how it works.
How to Use a Filament Printer (FDM) Step by Step?
- Choose a 3D printer
- Assemble the 3D printer
- Put your desired filament on a spool holder
- Download a model to 3D print
- Add 3D printer to slicer
- Import model to slicer
- Input settings for your model
- Slice the model
- Save file to USB or memory card
- Level the print bed
- Print the 3D model
1. Choose a 3D Printer
The first step is to choose a 3D printer that suits you the best.
It should have all the necessary features that can help you as a beginner to print 3D models with ease and efficiency.
You should search for the terms like; “Best FDM 3D printers for beginners” or “Best 3D printers for beginners”. You may get big names such as:

Once you have got a list of some of the best, now it’s time to search for each one’s features and properties to compare them with different options.
Choose the one that has all your desired features and falls in your budget as well.
Some things to look for in a 3D printer that makes it a beginner-friendly option include:
- Pre-assembled
- Compatibility with different software/slicers
- Easy navigation – touchscreen
- Auto-features
- User-friendly interface
- Build volume
- Layer resolution
2. Assemble the 3D Printer
Unbox your 3D printer and if it is pre-assembled, you are well and good as you only need to plug in some extensions and a few pieces of equipment to get things going.
But if it is not much pre-assembled, make sure to take your time with assembly so you don’t make any significant mistakes since they can cause issues in the future.
Look for the user manual and firstly verify if you have all the equipment, parts and tools you need.
The quality control of most 3D printer companies is known to be pretty good, but if you do find something missing, get into contact with the seller and they should send the relevant parts out to you.
- Take a look at the user manual and do the process step by step as mentioned on it.
- Set the voltage for the 3D printer between 115V to 230V, depending on the region of the world you are living in.
- Once you have assembled all the equipment, verify all the bolts again and see if they are tightened perfectly.
- Plug-in main voltage wire to the power supply and other extensions to the main part of the 3D printer as they will transfer the transformed current of about 24V.
I’d highly recommend following a reliable video tutorial on YouTube so you can get a nice visual of the real assembly process, like the video below.
3. Put your Desired Filament on a Spool Holder
The filament is the material that is actually used to build up models layer-by-layer into a full 3D print.
While some 3D printers send a tester spool of maybe 50g with their products, you may need to buy filament separately (around $20 for 1KG) for printing purposes if there aren’t any.
An example of some good PLA filament that you can get for yourself is the TECBEARS PLA 3D Printer Filament from Amazon, with a 0.02mm tolerance which is really good. It has plenty of positive reviews, and should provide you with a smooth, consistent 3D printing experience.

It may vary depending upon the type of models or different 3D printers brand. Most of the 3D printer brands provide you with a filament loading and unloading option in the controller menu which can be adjusted on the printer’s display screen.
- One thing to keep in mind is that almost all brands check their 3D printers at their factory and there are slim possibilities that the extruders may have some filament stuck inside.
- Although there are very slim chances, you have to remove the plastic before moving forward. It can easily be done simply by squeezing the spring arm and taking it out.
- Many 3D printers have a loading filament option which allows users to load the filament directly. This means you can insert the filament through the extruder and let the 3D printer extruder move the filament through, or just manually push it through.
- Simply push the sprung arm near the extruder and insert the filament through the hole using your hands.
- Keep on inserting the filament until you feel resistance from inside the tube leading towards the nozzle.
- Once you see that the filament is flowing through the nozzle, you are ready to go for the next step.
4. Download a Model to 3D Print
As you need to have a file of a model to 3D print just like we have text or images for printing on a 2D printer.
Your 3D printer should come with a USB stick that has a test model on it that you can start out with. After that, you’ll want to learn where to download models from and maybe even how to create your own.
As a beginner, the best suitable option is to download the model from different websites and 3D models archives such as:
These files usually come in a type called STL files, but you can also make use of OBJ or 3MF file types, though much less common. You can even import .jpg and .png file types into Cura to create a Lithophane model.

If you want to create your own model, you can start with a software called TinkerCAD as it is beginner-friendly and once you have gained enough knowledge and skills, you can move on to some advanced platforms such as Fusion 360 or Blender.
5. Add 3D Printer to Slicer
There is a main processing software used in 3D printing called a slicer to convert those downloaded STL files into files that a 3D printer can understand.
It basically breaks down models into commands that make your 3D printer move, heat up the nozzle/bed, make fans turn on, regulate speed and so on.
These files that they create are called G-Code files which your 3D printer uses to move the print head to specific locations on the build surface to extrude material through.
There are many slicers out there that you can use, but most people stick with one called Cura, the most popular one.
You also have other options such as:
- Slic3r
- PrusaSlicer
- Simplify3D (paid)
Although they all are good in their respective area, Cura is considered the most efficient and optimal slicer for the beginner as it is compatible with pretty much all filament 3D printers.
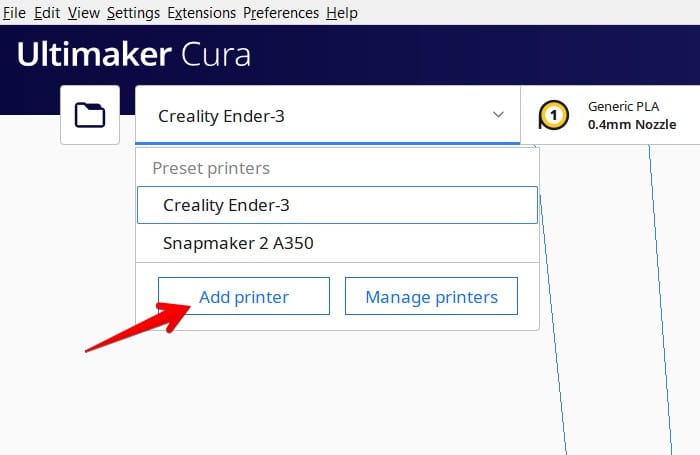
Once you have downloaded and opened the Cura 3D slicer, you want to select what 3D printer you have so it can know the dimensions of the bed and where the model will be printed.
There are two ways to add a 3D printer to Cura. The first is the simplest, just by selecting “Add printer” with the dropdown menu from selecting a 3D printer, or by going into Settings > Printer > Add Printer…
When you click “Add printer” you’ll have the choice to add a networked or non-networked printer, usually being non-networked unless you have something connected up already.
Under non-networked printers, you’ll find several brands and types of 3D printers that you can scroll through until you find your machine.
In the unlikely scenario where you don’t find your machine, you can add either a custom machine and input the dimensions, or find another 3D printer with the same dimensions as your 3D printer.

Pro Tip: If you are using Creality Ender 3, you can change the Width (X) and Depth (Y) from 220mm to 235mm as it is the actual measurement if you measure it on the 3D printer with a scale.
6. Import Model to Slicer
Importing a model to a slicer is just as simple as importing a picture in MS Word or any other platform.
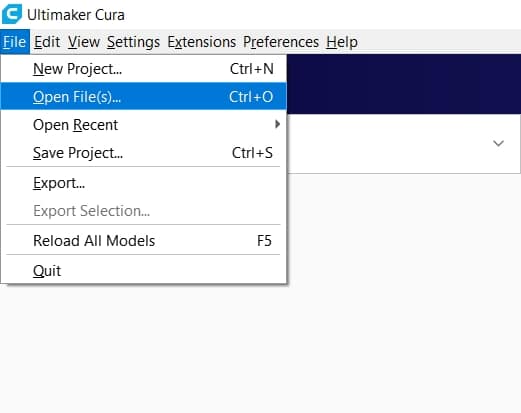
- Simply click on “Open” or the folder icon located in the top-left corner of the slicer’s window.
- Select the 3D print file from your drive or PC.
- Click “Select” and the file will be imported directly onto the print bed area in the slicer.
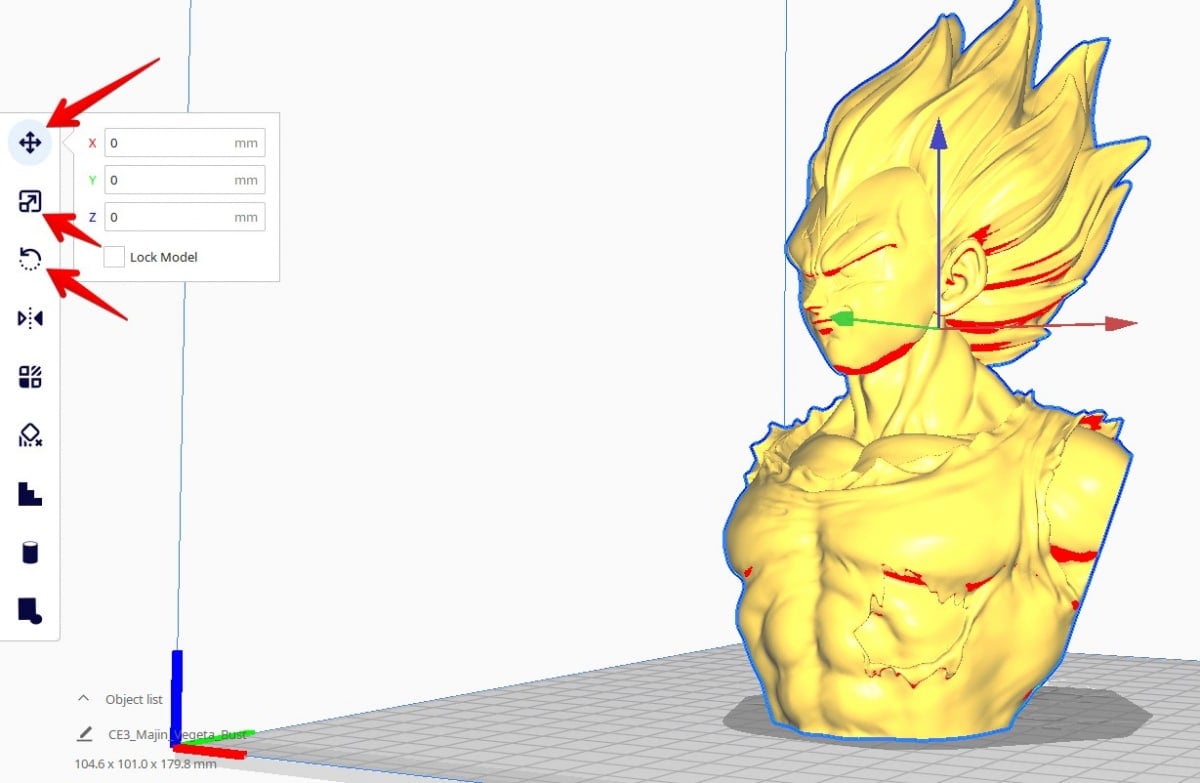
You can also simply find the file in your computer, have Cura open, and drag the file from the File Explorer straight into Cura. Once the file has been displayed on the screen, clicking on the object model will show a toolbar on the left side of the screen.
This toolbar allows the user to Move, Rotate and Scale the object on the print bed for their convenience and better positioning. There are also other options like Mirroring, Per Model Settings, Support Blockers, Custom Supports (enabled by plugin in Marketplace), and Tab Anti Warping (plugin).
7. Input Settings for Your Model
Simply printing a 3D model without calibrating its settings with respect to your 3D printer probably won’t bring the best results.
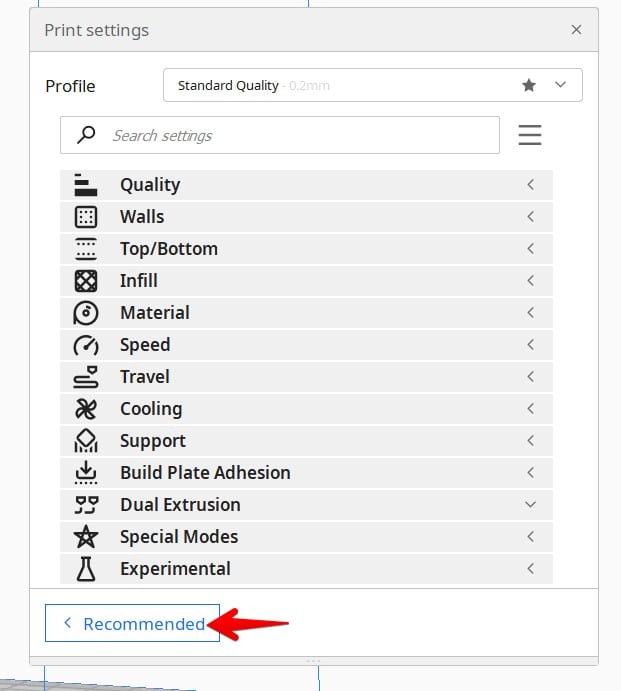
You need to input different settings by clicking on the option in the top-right corner of the screen in Cura.
There are two main choices to input the settings for your model. You can use the simplified recommended settings to put in some basic settings to get you started.

Or you can get into the more advanced and customizable part of Cura settings where you can change several types of settings, along with special experimental settings and more.
You can flick back and forth between the two by hitting the “Custom” or “Recommended” box at the bottom right, but most people use the more customizable screen.
Some of the most prominent settings to calibrate according to your 3D model include:
- Layer height
- Printing temperature
- Bed temperature
- Supports
- Retraction settings
- Printing speed
Layer Height
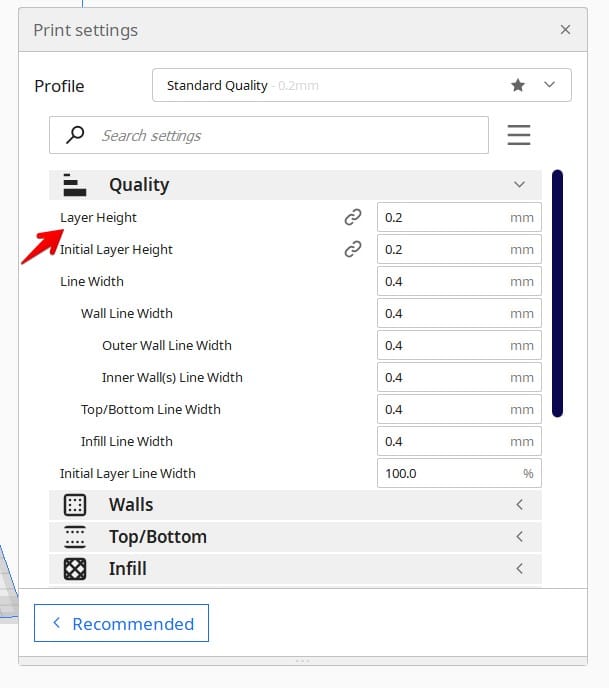
Layer height is the thickness of each layer in your 3D model. It can be said that layer height is the resolution of your 3D model just like the pixels of a picture and video.
Thicker layer heights will decrease the smoothness of the 3D model but will boost the printing speed. On the other hand, thin layers will make the model look more smooth and detailed but will take a longer.
- Best Layer Height for Average 3D Print (Ender 3): 0.12mm to 0.28mm
Printing Temperature
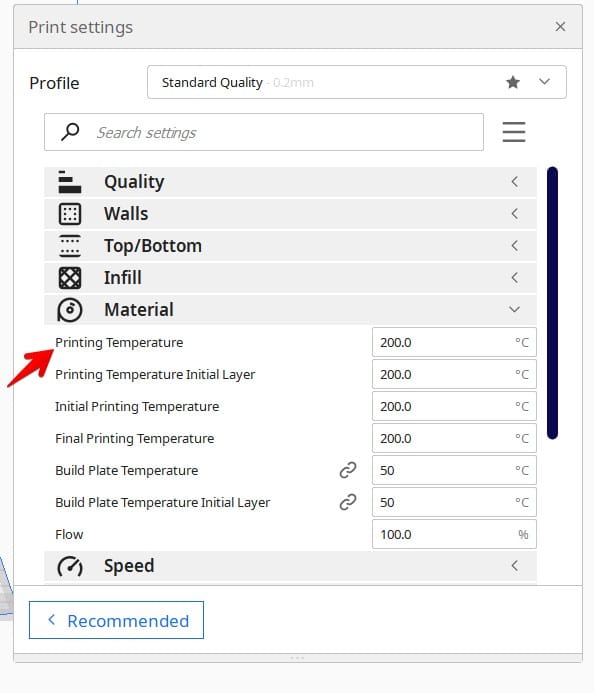
Print temperature is the level of heat required to soften the filament coming through the nozzle.
It varies a bit depending on the type of filament as some require extreme heat while others can be melted at a minor temperature.
- Best Print Temperature for PLA: 190°C to 220°C
- Best Print Temperature for ABS: 210°C to 250°C
- Best Print Temperature for PETG: 220°C to 245°C
- Best Print Temperature for TPU: 210°C to 230°C
Bed Temperature
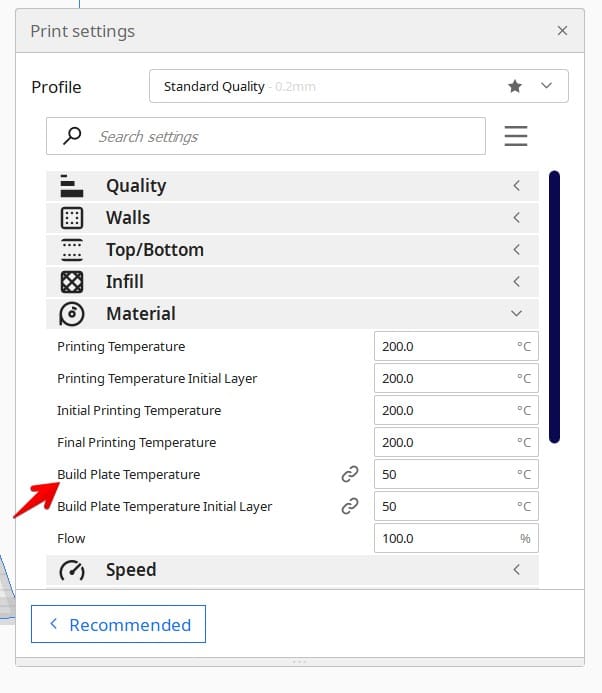
The build plate temperature is simply the temperature of the bed on which the model will be formed. It is a small plate-like platform that takes filament on itself and allows the layers to form and become a complete 3D model.
This temperature also varies according to different filaments:
- Best Bed Temperature for PLA: 30°C to 60°C
- Best Bed Temperature for ABS: 90°C to 110°C
- Best Bed Temperature for TPU: 30°C to 60°C
- Best Bed Temperature for PETG: 70°C to 80°C
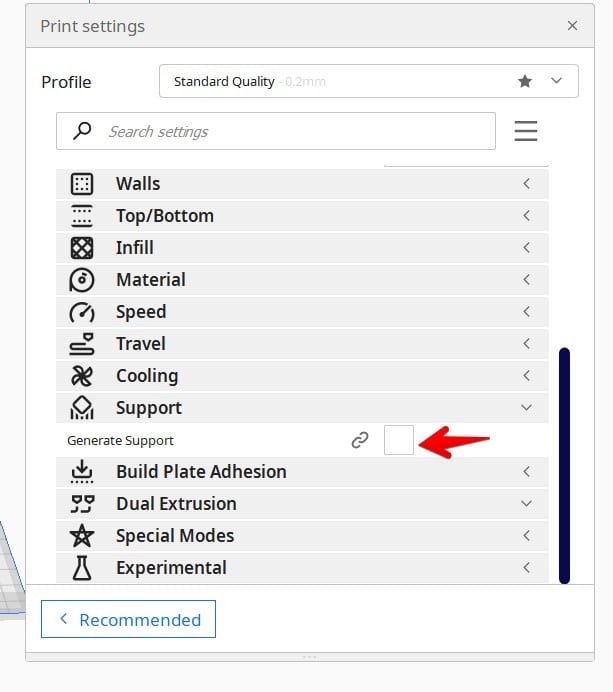
Generate Supports or Not
Supports are the pillars that help in printing the parts that are overhanging or aren’t connected to a grounded part. You can add supports by simply checking the “Generate Supports” box in Cura.
Below is an example of Custom Supports in Cura to hold up a model.
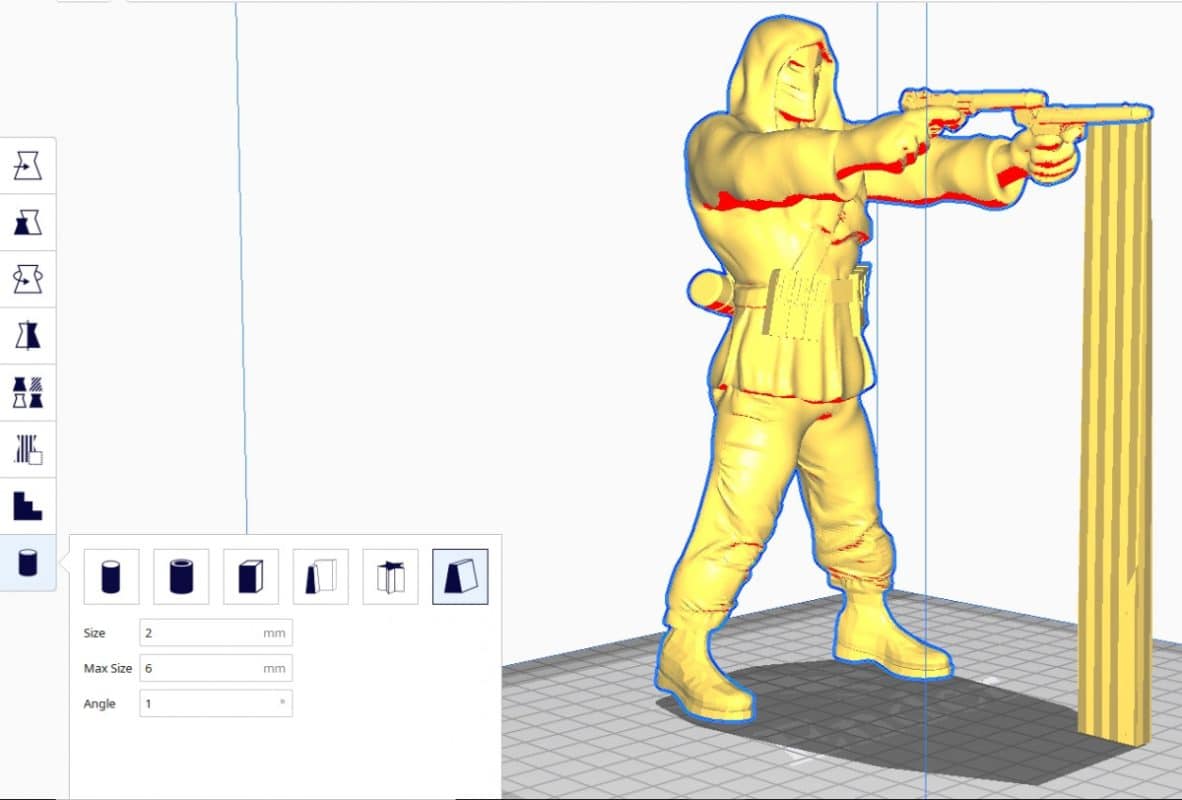
The video below shows you how to create Custom Supports, which I prefer over normal supports since it creates a lot less and is easier to remove.
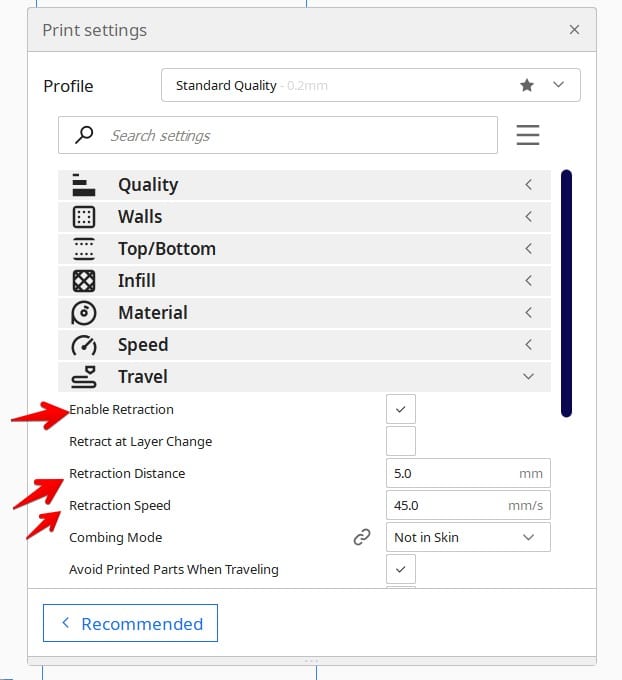
Retraction Settings
Retraction settings usually help in mitigating the stringing effect while printing. These are the settings that will determine that when and where the filament coming out of the nozzle should be pulled back. It is actually a combination of different settings mainly including retraction speed and distance.

Printing Speed
Print speed is the setting that will tell the extruder motors about how fast they should move between the X and Y-axis. Print speed may also vary depending upon the type of filament as well as the 3D model.
- Best Print Speed for PLA: 30 to 70mm/s
- Best Print Speed for ABS: 30 to 60mm/s
- Best Print Speed for TPU: 20 to 50mm/s
- Best Print Speed for PETG: 30 to 60mm/sec
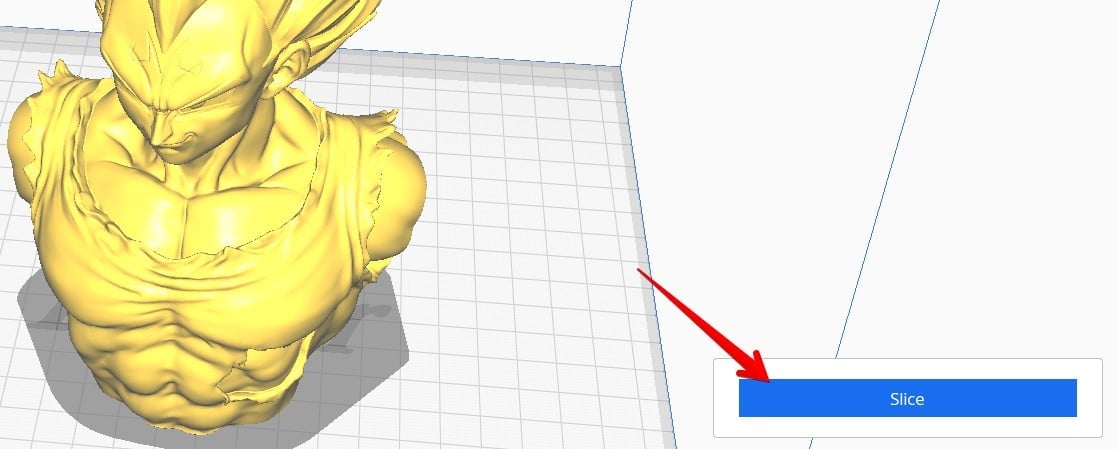
8. Slice the Model
Once you have calibrated all the settings and design, now it’s time to convert the 3D model file into a thing that can be understood by your 3D printer.
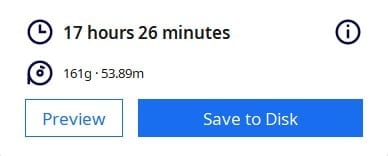
Now simply click on the “Slice” button and then hit on the “Save to Disk”, or if your SD card is plugged in, “Save to removable disk”.
You can even “Preview” your model to see how each layer looks and to see if everything looks good. You can see how long the model will take, as well as how much filament will be used.
9. Save File to USB or Memory Card
Once you have sliced the 3D print, now it’s time to simply click on the “Save the File ” button in the bottom-right corner usually highlighted in blue color. You can directly save the file on an external storage device or go the other way round which will save the file into your PC.
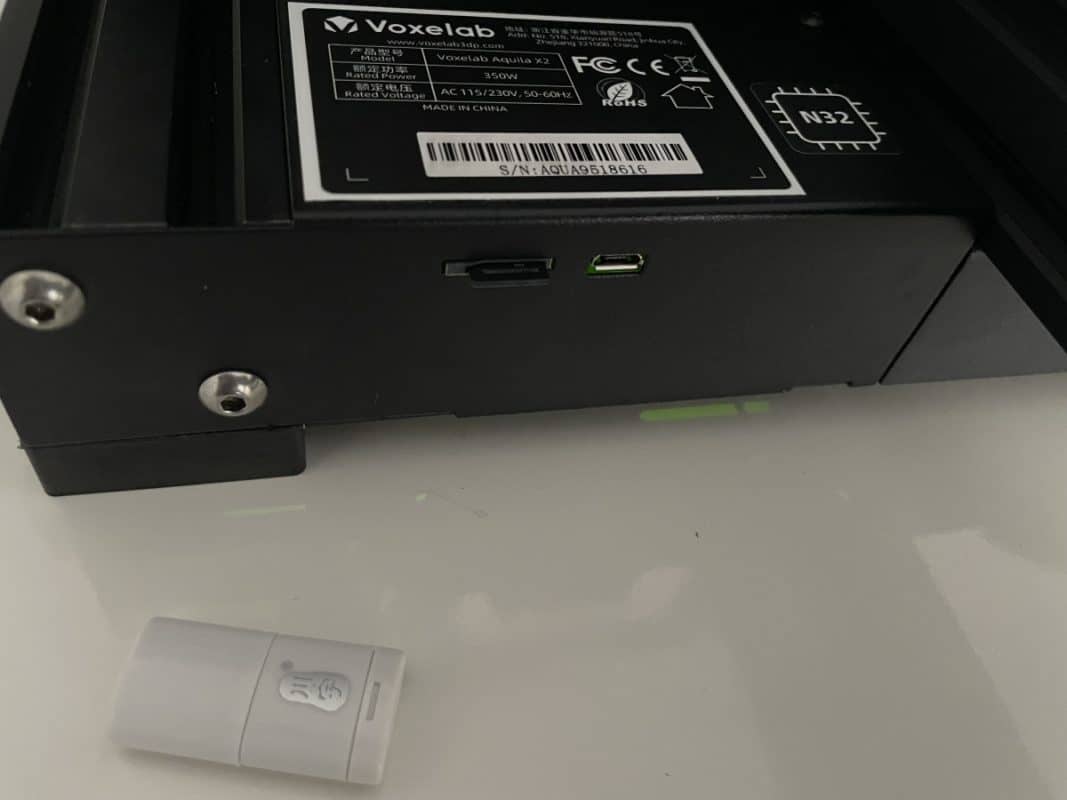
Now you need to copy that file to a USB drive or Micro SD Card that can be inserted in the 3D printer’s port.
10. Level the Print Bed
Bed leveling is one of the most important and crucial aspect of any 3D printing process. Even a slight difference can cause issues while sometimes ruining the whole of your 3D print model as well.
You can level the bed manually or if you have an auto-bed leveling feature, then use that.
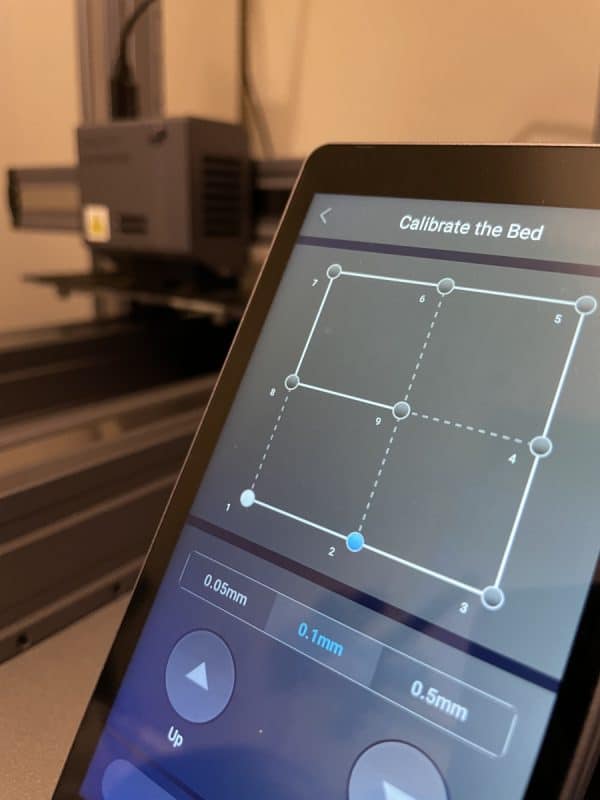
For manual bed leveling, there is the paper leveling process which has you heat up your bed to a temperature like 40°C, auto-home, disable your steppers so you can move the print head, and lift/lower your build surface with the paper on there to create enough space for the nozzle to extrude.
You want the nozzle to press on the paper but not be too tight or loose for each four corners and the middle of the print bed. The bed should be heated because it can warp with heat, so if you do it when it’s cool, it may come out of level when you actually use it.
Check the video below for a simple visual of this process.
The process may take time but it will definitely be worth it because it significantly increases your print success. After you do this a few times, it gets really easy to do.
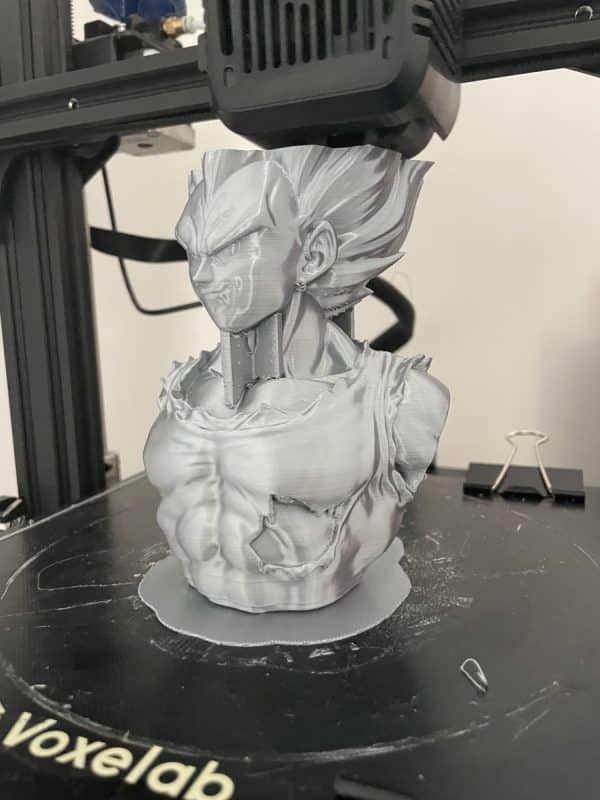
11. Print the 3D Model
As you have gone through all the necessary steps, now it’s time to go for the print button and start the actual processing. Depending upon your settings and 3D model, printing may take minutes or most commonly hours.