How to Fix Cura Wrong Time Estimates – Ender 3 and More
Being able to estimate the time it takes to 3D print is a cool feature in slicers like Cura, but they aren’t always accurate. I decided to write an article showing you how to fix wrong time estimates in Cura and similar slicers.
To fix Cura’s wrong time estimates on your 3D printer, you have to ensure that your values for acceleration and jerk settings in Cura match that on your firmware settings. Once they are matching, you should get much more accurate time estimates for your 3D prints.
Keep on reading to learn more about fixing wrong time estimates in Cura.
How Accurate is Cura Time Estimate?
Cura time estimates can be very accurate, but in other cases they can be slightly off or significantly off. Some users have stated that their print time estimates have been really accurate, down to the minute. Others have had print time estimates be 1.5 hours, but the actual print time being almost double.
You can have differences of a few minutes, up to several hours in terms of accuracy when it comes to Cura, though they do try to improve this in updates as time goes on.
Cura time estimates are accurate for just the Cura settings, but your 3D printer sometimes has default parameters that are used instead of the slicer, meaning the actual printing times differ.
Other factors can contribute to bad accuracy in Cura such as having incorrect machine settings such as build volume, nozzle size, flow rate, and filament diameter.
How to Fix Cura Time Estimates Being Wrong
When you discover that the time estimates from your Cura slicer are always inaccurate, the following are the solutions available to fix them.
- Ensure that Cura Settings match firmware settings.
- Flash new firmware to the printer
Ensure That Cura Settings Match Firmware Settings
One way to fix your Cura time estimates being wrong is to ensure your Cura settings are the same as your default printer/firmware settings.
The main settings that tend to differ are the jerk and acceleration settings between your slicer and your 3D printer.
You want to find out what your 3D printer’s jerk and acceleration settings are, then input those values into your slicer so they match up.
It’s possible to adjust jerk and acceleration settings within your 3D printer’s control screen, depending on what firmware it has. It’s usually in your “Control” settings or something similar.
In Marlin firmware, you can find the jerk setting in the Configuration.h file by looking for the following:
- #define DEFAULT_XJERK
- #define DEFAULT_YJERK
- #define DEFAULT_ZJERK.
Different axes can have different jerk values, so keep this in mind. You can sometimes just search for the default values online and find them for your specific 3D printer.
In Cura, you can search for “acceleration” and check the “Enable Acceleration Control” setting, then the same for “jerk” with the “Enable Jerk Control” setting, then input these values.
One user said he changed his jerk and acceleration settings in Cura to match what the printer settings were and it significantly improved time estimates within 15–20 minutes on longer prints and within 5 minutes for shorter prints.
Teaching Tech has a video on 3D printer time estimates being wrong, which has a section on Cura about 10 minutes in.
Flash New Firmware to the Printer
Another way to fix Cura time estimates being wrong is to flash new firmware to your 3D printer.
It’s also related to the jerk and acceleration settings, where you give your 3D printer the ability to view and change these values. These settings are key for making accurate time estimates for 3D prints.
This method gives you better control, especially for delicate prints that can benefit from adjusting these settings.
One user stated that after defining her acceleration and jerk settings on Cura, she had her printing time come from being 25% off, to just within minutes of the estimates. She also had prints that were a little faster than the estimates by a few minutes.
How to Find Cura Material & Cost Estimation
You can get the estimated material length and weight for your prints on Cura when you slice your model. Once you slice your model, a dialogue box pops up in the bottom-right corner showing the length (in meters) and the weight (in grams of the model).
Cura’s material estimates have fairly good.
One user stated that Cura’s material estimate is about 5% more than the actual weight of the model. He also stated that it is virtually impossible to use more material than Cura’s estimate except if you use the wrong filament diameter.
Another user said that Cura’s estimate has always been accurate to within a gram for them. He said that he saves empty spools and weights them, then he can figure out how much weight is left on a partially used spool of the same brand by weighing it.
You can get the cost of the material needed to complete the print.
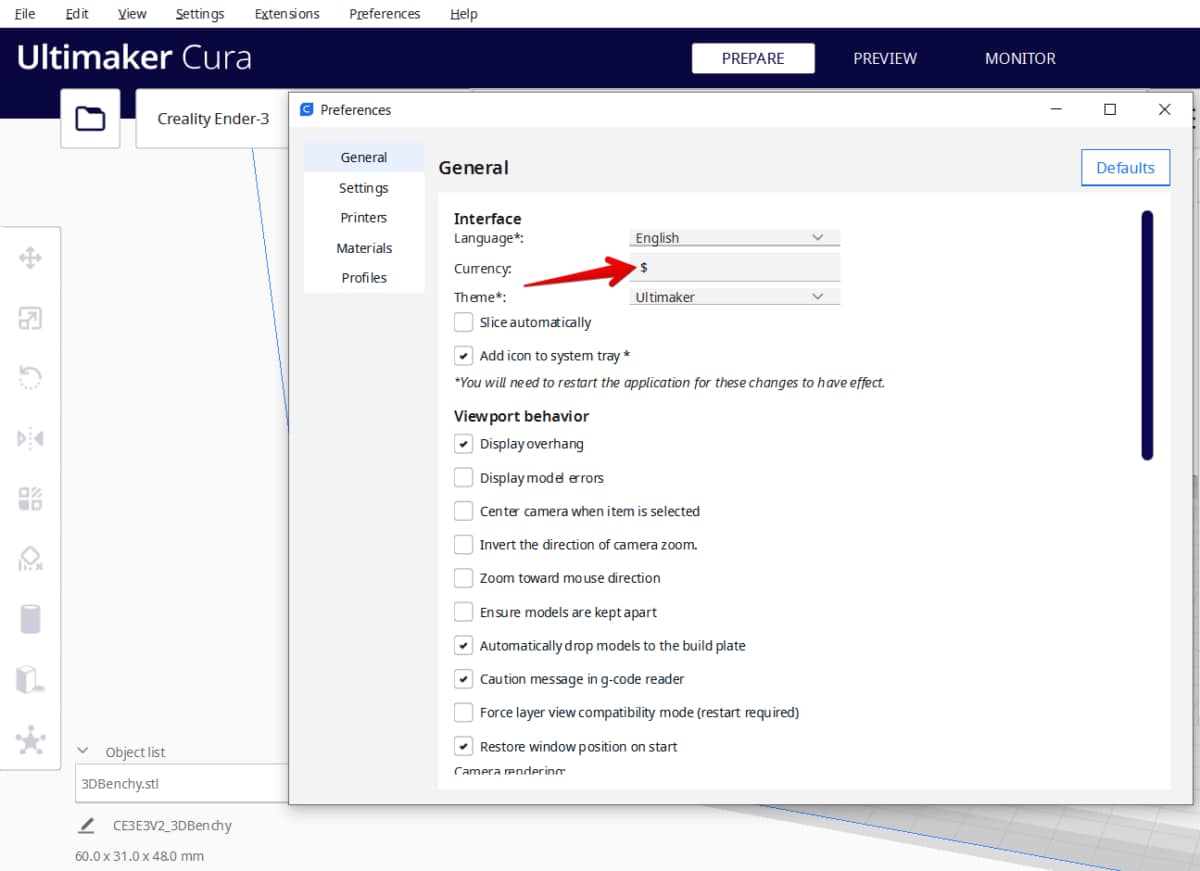
To view this, click on “Preferences” on the top navigation bar and select “Configure Cura…”. You can also press CTRL + K as a shortcut to open up the box.

In the box that pops up, click on “General” on the side menu, then select your preferred currency.
Once you have selected your preferred currency, select the type of material you want to print with and input its cost and weight (usually 1,000g for a roll).
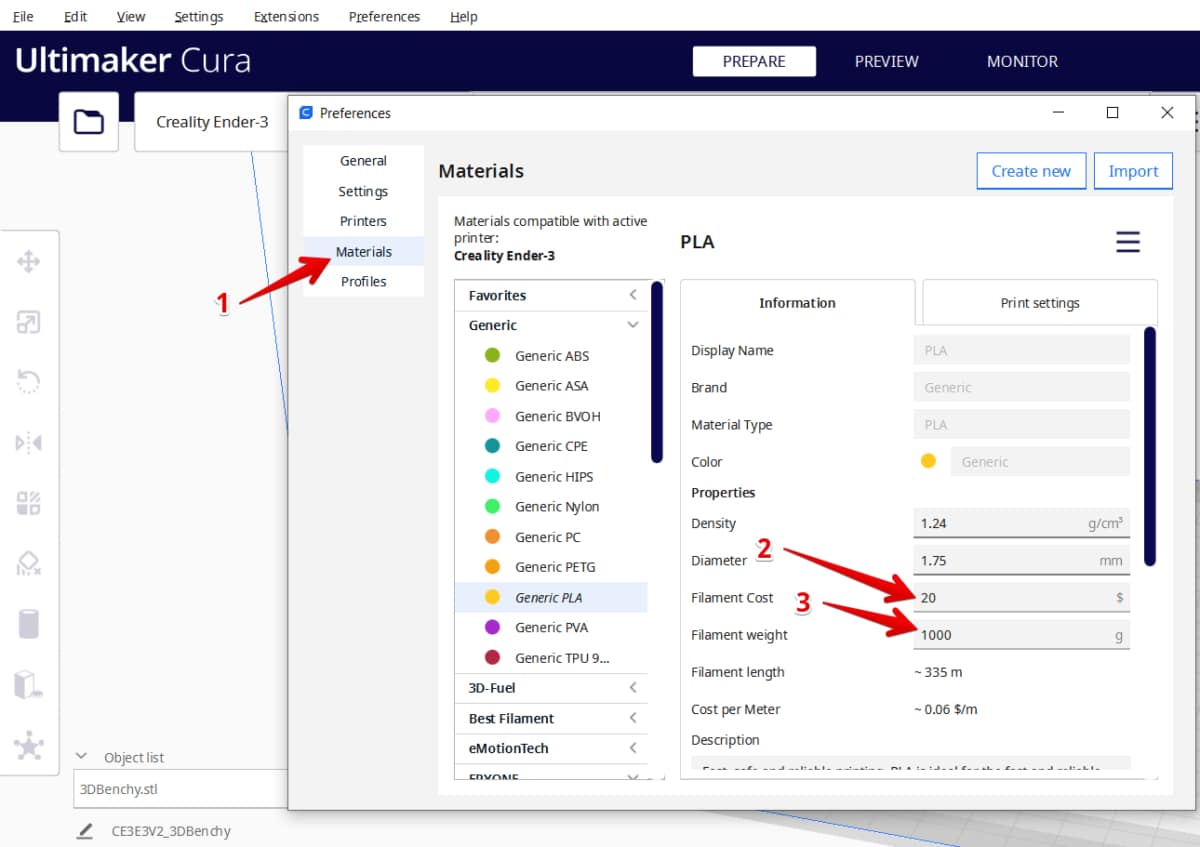
After this, you can close the box since it saves automatically, and just re-slice your model to see the estimated cost of your models.
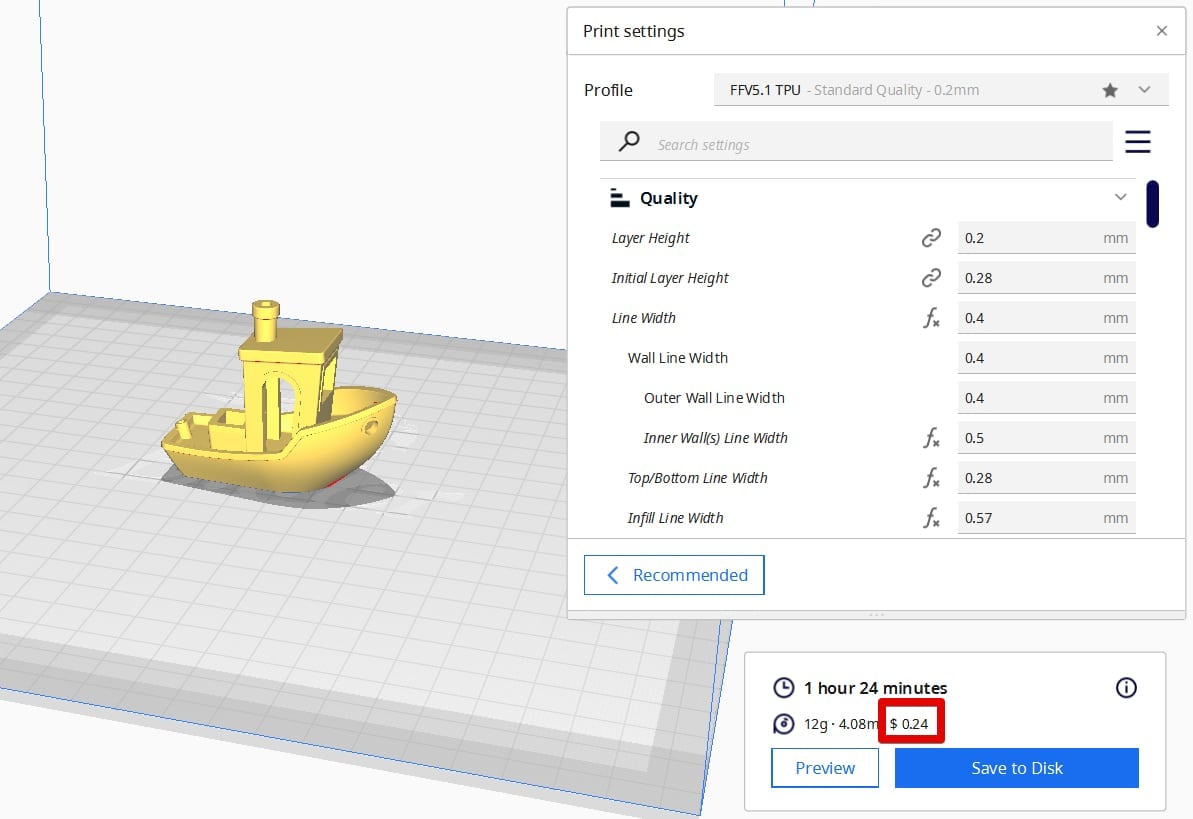
Save the settings and re-slice the model. The cost of material for the filament will be included in the dialogue box that pops up.
Check out this video from Create with Tech that demonstrates how to get the material estimate of your model on Cura.