How to Fix Cura Not Printing Holes or Filling Up Empty Space
A successful print should have the correct geometry and design of the model. Sometimes users face the problem of Cura not printing holes or filling up empty spaces. So, I decided to write an article detailing how to fix this problem.
To fix Cura not printing holes or filling up empty space, turn off the “Remove All Holes”, “Union Overlapping Volumes”, and the “Make Overhangs Printable” settings. Turning on the “Optimize Wall Printing Order” can also help. You can change part thickness and modify/repair the STL file in Blender or Meshmixer as well.
Keep reading to learn the detailed solutions and related information that will help you fix the problem of Cura not printing holes or empty spaces.
How to Fix Cura Not Printing Holes & Filling Up Empty Space
Here’s how to fix Cura not printing holes and filling up empty space:
- Uncheck the Remove All Holes setting
- Turn off Union Overlapping Volumes setting
- Disable Extensive Stitching setting
- Turn off the Make Overhang Printable setting
- Turn on the Optimize Wall Printing Order setting
- Try changing the Wall Thickness
- Check models in different modeling programs for 3D printing
1. Uncheck the Remove All Holes Setting
One efficient method to fix Cura not printing holes and filling up empty space is to ensure that the “Remove All Holes” setting under the “Mesh Fixes” section is unchecked. When this setting is enabled, it can remove holes in the model even if they were part of the design.

One user said that if you are facing this problem, make sure that the “Remove All Holes” setting is unchecked.
cura bug. when the object is straight there are no holes and side ways there are holes (there are supposed to be holes)
byu/drunkjoshua inCura
Another user said that this is a specialty setting in Cura that isn’t used every day but can be very handy to resolve such issues.
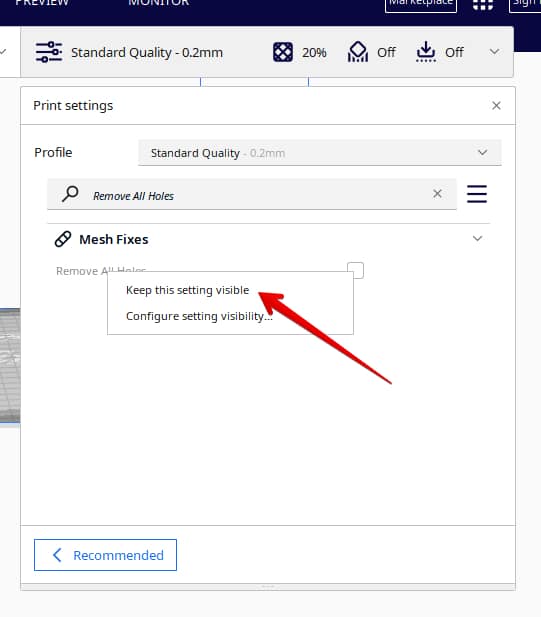
One user also said that if this setting is not there, you can make it visible:
- Go to the Custom settings in Cura.
- Type “Remove All Holes” in the search box.
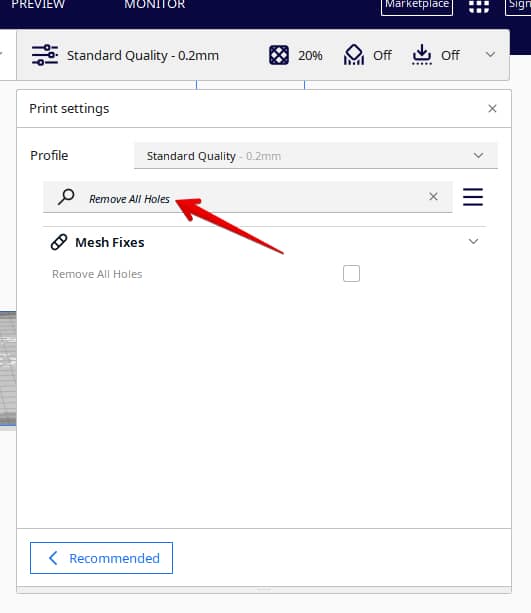
- Right-click on the settings and click “Keep this setting visible”.
Here is a video on how enabling or disabling the “Remove All Holes” setting can affect your 3D model.
2. Turn Off Union Overlapping Volumes Setting
One method that works for fixing Cura not printing holes is to disable the “Union Overlapping Volumes” setting under the “Mesh Fixes”.
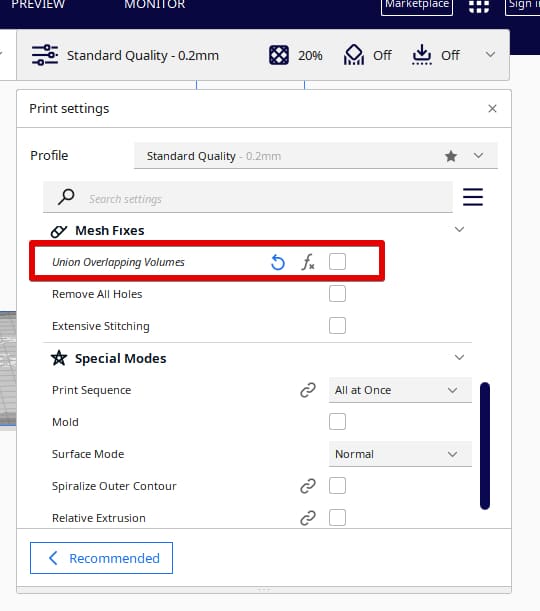
This setting is handy when your model has two or more volumes overlapping each other. This setting is enabled by default and it ignores the overlapping and slices the model as one volume.
Disabling this setting will ensure every volume is considered separate. This makes sure that Cura doesn’t slice and fill the internal empty cavities or required holes.
One user said that he is facing an issue with Cura filling up the holes in one of the Star Wars blaster parts. Tweaking support settings and changing print orientation led to the same failures.
However, disabling the “Union Overlapping Volumes” setting, as suggested by another user, worked for him.
Another user said that he tried printing a soap holder but Cura was filling up the three slots at the bottom that are necessary for the water to drain out. After poking Cura settings, the user disabled the “Union Overlapping Volumes” setting which solved the problem for him.
3. Disable Extensive Stitching Setting
Another setting that can fix Cura, not printing holes, is “Extensive Stitching”. Disabling this setting under “Mesh Fixes” can restrict Cura from stitching up the open holes in the mesh.
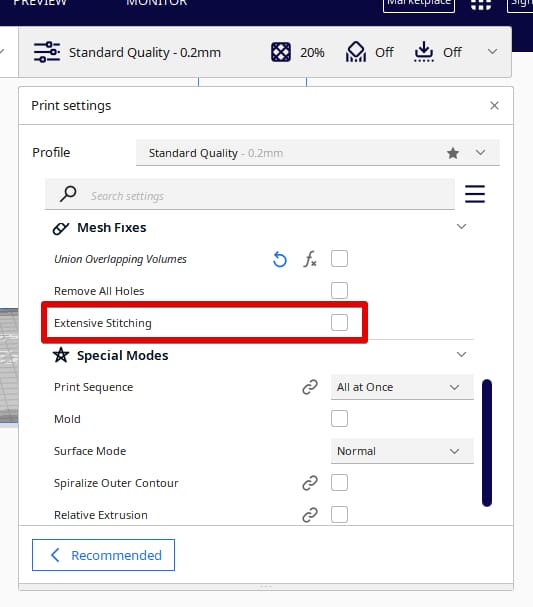
This setting is to stitch up the open areas using the touching polygons. This makes the print more solid while increasing the processing time as well. Aside from this, it can also fill up empty spaces that should be open in the model.
One user said that he faced this problem mostly when “Extensive Stitching” and “Remove All Holes” settings were enabled. Turning them off fixed the issue except if the model itself has errors in the design or geometry.
4. Turn Off the Make Overhang Printable Setting
You can fix Cura filling up empty space by turning off the “Make Overhang Printable” under the “Experimental” settings. Disabling this setting can ensure that the Cura does not modify the geometry and that all holes and empty spaces stay in their original design.
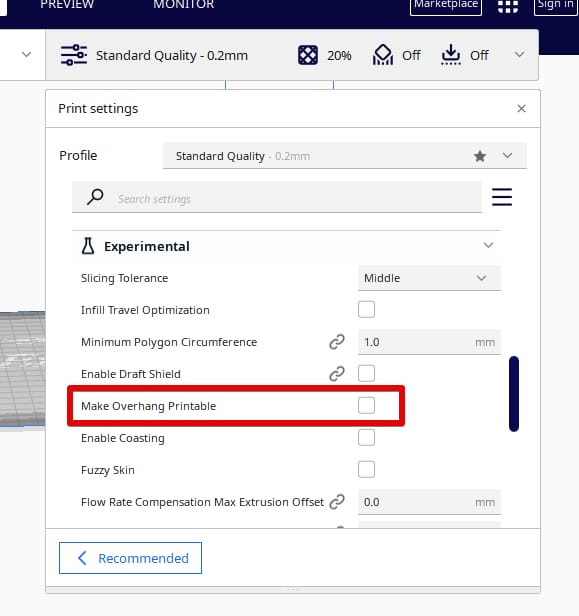
If this setting is enabled, it will modify the model geometry in a way that requires minimum support. As this setting can make the steep overhangs shallow while making such areas more vertical, it can sometimes fill empty space as well.
One user said that Cura is filling an empty space while he is trying to print a lid for a box. All “Mesh fixes” settings are disabled, the model has no errors either in Cura or the Meshmixer.
Another user recommended turning off the “Make Overhangs Printable” settings. Doing so fixed the problem and the user got the correct 3D-printed model.
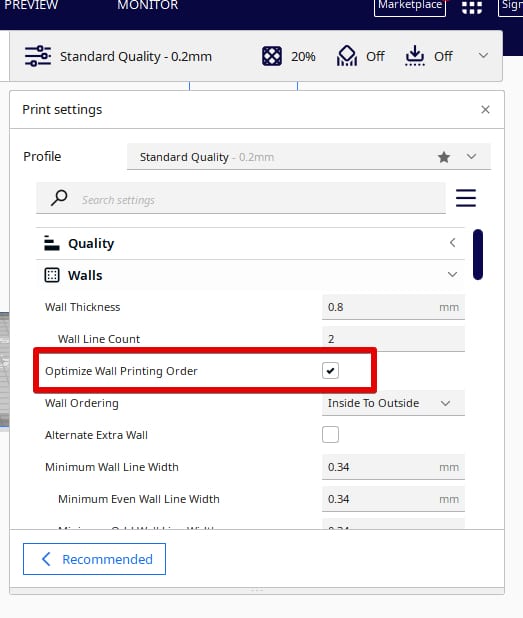
5. Turn On the Optimize Wall Printing Order Setting
Another good way suggested by users to fix Cura, not printing holes, is to turn on the “Optimize Wall Printing Order” under the “Walls” settings. Enabling this setting will change the order in which walls will be printed.
One user said that generally, Cura instructs 3D printers to print walls by wall layer. This can sometimes affect the holes because if you have 2 holes in a model, it may print one wall from the 1st hole and then move to the other hole to print its wall.
When you turn on this setting, all walls will be printed according to holes instead of wall layers. The user said that this setting is very handy if you are facing such a problem, especially with the model’s top and bottom layer walls around the holes.
The user said that the setting is there to reduce printing time by going object by object rather than traveling back to the same object multiple times in a single layer. Sometimes, it can fix the problem of Cura filling empty spaces as well.
If you’re using Cura and having issues with holes, you should check out Optimize Wall Printing Order
byu/takeshikun in3Dprinting
6. Try Changing the Wall Thickness
One way suggested by some users to fix Cura, not printing holes, is by increasing the thickness of the wall around the holes.
One user said that Cura can sometimes ignore the vertical wall/covering if it is too thin. In such cases, you can simply increase the wall thickness in your Cura slicer settings.
cura bug. when the object is straight there are no holes and side ways there are holes (there are supposed to be holes)
byu/drunkjoshua inCura
Another user faced the same issues while printing a 0.5mm thick wall using a 0.6mm nozzle. One user said that a 0.5mm thick wall won’t be printed if the nozzle size is >=0.5mm. Changing the wall thickness to 0.4mm fixed the problem for the user.
7. Check Models in Different Modeling Programs for 3D Printing
One way suggested by many users to fix Cura not printing holes or filling up empty spaces is to check your model in different programs such as Blender and Meshmixer.
A really good one is Microsoft’s 3D Builder. Simply add the STL file into the program and it will automatically scan for mesh issues and repair it for you. After that, you can export the STL file and upload this new file back into Cura.
One user said that the problem of Cura, not printing holes, can sometimes arise because of the program you are using for 3D modeling. The user recommended using the manual procedure in Blender.
It is open-source software that allows you to fix faults in models and can handle almost every mesh.
Another user said that he is facing the problem of Cura not printing two open gaps. The user drew the model in Google SketchUp.
One user replied that the problem is most probably in the STL file created by SketchUp. SketchUp is not that reliable for creating 3D models because of the aspect that it results in non-manifold models that have some kind of flaws in them.
The user recommended checking the STL file in some other reliable program such as Meshmixer that he personally uses. Some other 3D printing modeling programs suggested by users include:
One user said that Cura can also have a bug that may be causing the problem. So, it is better to check models in other slicers such as Slic3r, Craftware, or others.
Another user recommended checking the orientation of the faces of your model before starting to repair the STL file in some software.
One user also said that if the holes aren’t there in the Cura layer view, it indicates that the error is in the Cura or where you have created the 3D model. In such cases, it is better to save the original STL file and upload its copy into different software such as Tinkercad or Fusion 360 to verify and repair the flaws.