How to Fix Cura 100% Infill Not Being Solid
Cura 100% infill not being solid is an issue that many users experience when it comes to 3D printing, so I decided to write this article detailing how to fix this. Keep on reading for details on how you can solve this problem.
How to Fix Cura 100% Infill Not Being Solid
Here’s how to fix Cura’s 100% infill not being solid:
- Change infill pattern to lines, zigzag or concentric
- Set the number of bottom layers to Its initial value
- Add support blockers to the model
Change Infill Pattern to Lines, Zigzag or Concentric
One method that works for fixing the Cura 100% infill not being solid is to change the infill pattern to non-overlapping patterns like Lines, Zigzag, and Concentric.
These are infill patterns that don’t have a specific order of layers or overlapping patterns which can create issues for 100% infill.
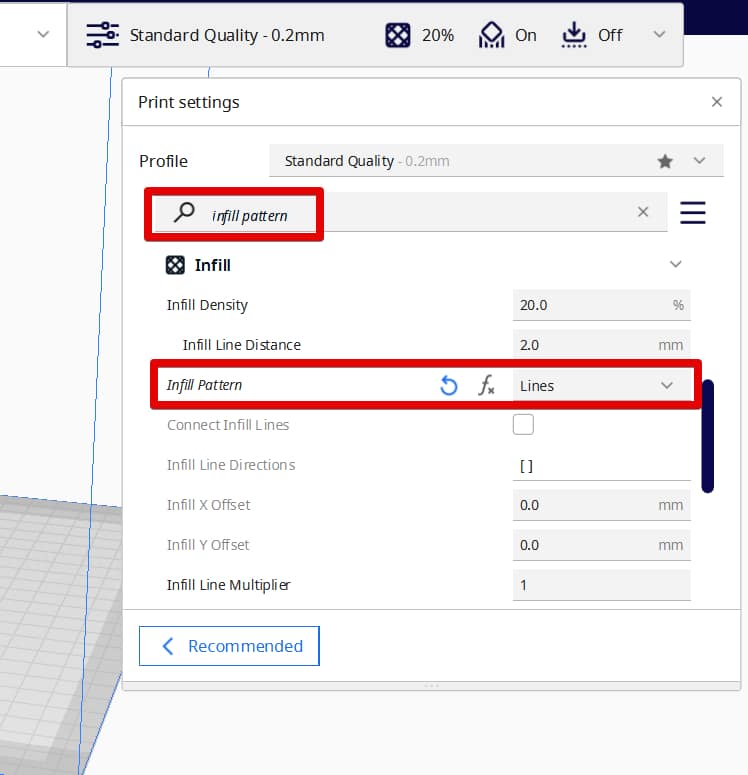
To change the infill pattern of your model on Cura:
- In the search box, search for “infill pattern” or click the “Infill” column in the settings
- Find the Infill Pattern setting and in the drop-down menu and select the infill pattern.
One user explained that an overlapping pattern such as the cubic pattern creates three sets of lines in different directions, which causes overlaps between the infill lines.
These infill lines overlap at their crossings, resulting in gaps between the infill lines and reducing how solid the model should be.
When printing over this crossing, the nozzle experiences back pressure, which interrupts the material flow. This results in a print that has less than 100% density.
Set the Number of Bottom Layers to Its Initial Value
Another fix for Cura 100% infill not being solid is to set the number of bottom layers of the model to its initial value.
This issue arises because during printing ignores the number of bottom layers when the infill of the model is set to 100%.
To set the number of bottom layers of your model on Cura to its initial value:
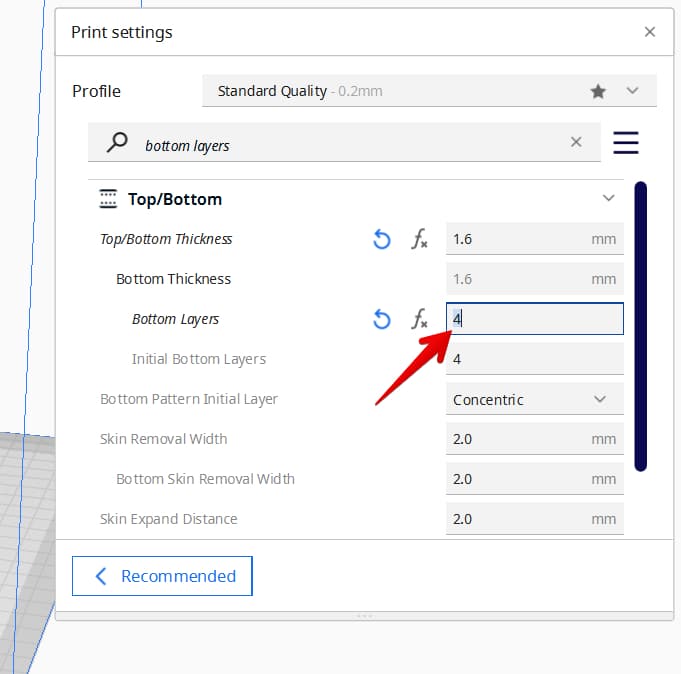
- Click the drop-down menu at the top right of the screen to display the settings panel
- Change the infill to the initial value such as 4.
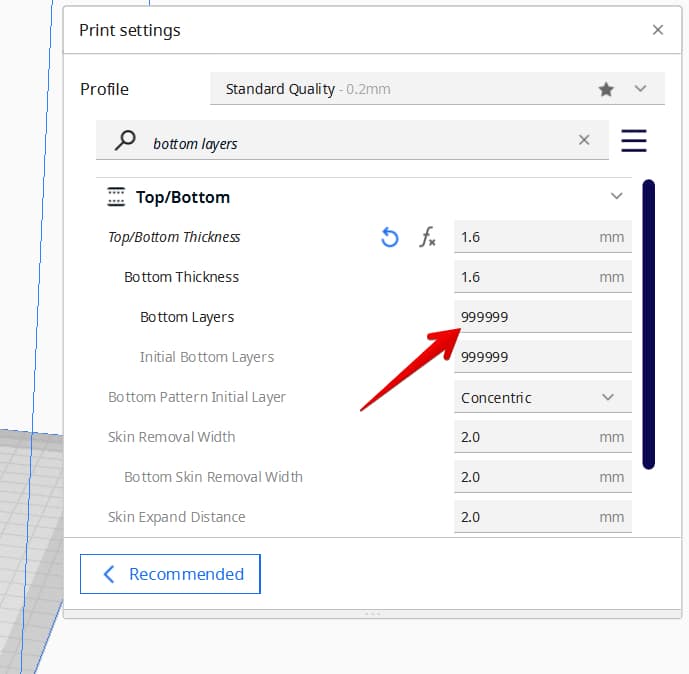
- Click the Top/Bottom drop menu and note the number of Bottom Layers of the model
- Set the infill back to 100%
- Set the number of Bottom Layers back to its initial value
Add Support Blockers to the Model
There is a unique method of using support blockers to change the infill percentage or other modifiers to your model.
One method is to use support blockers in certain parts of your print, and adjust the infill percentage just for that part of the print. This is great for models that have large areas which don’t need 100% infill, then has smaller areas which need strength and a higher infill percentage.
In order to do this, here are the main steps:
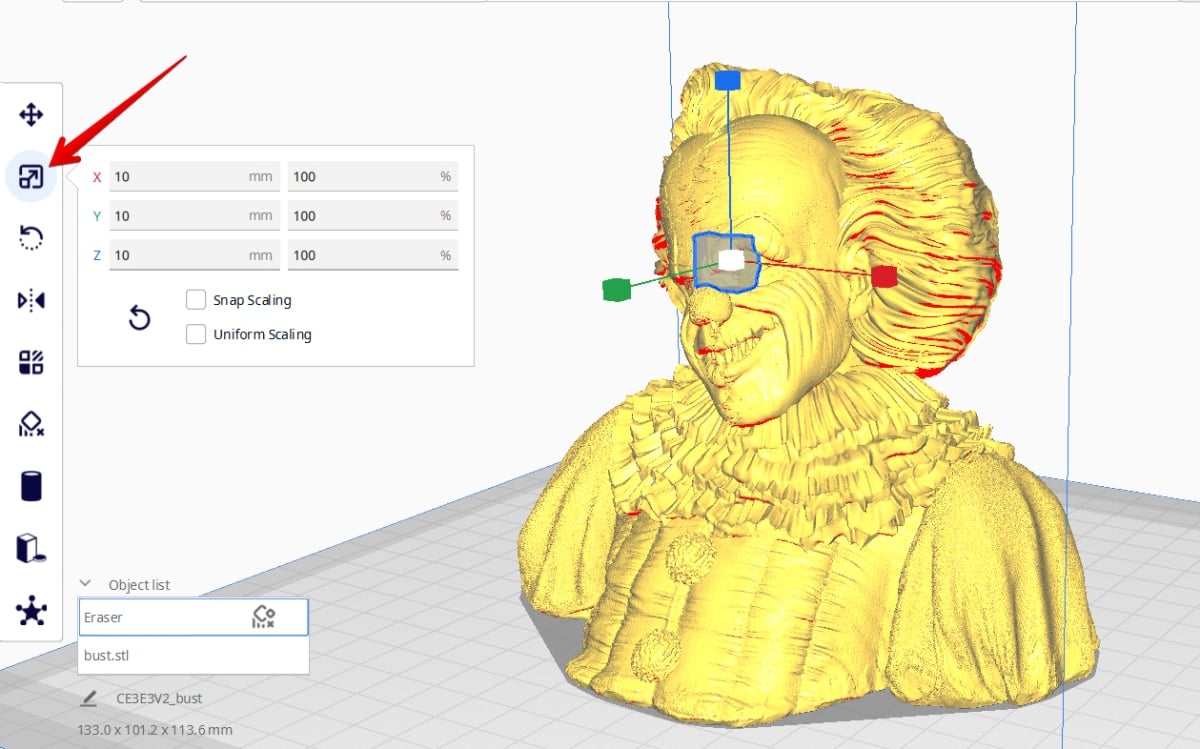
- Select the model which you want to add support blocker to
- Click the Support Blocker tool on the sidebar to the left
- Click the area of your model where you want to add the block.
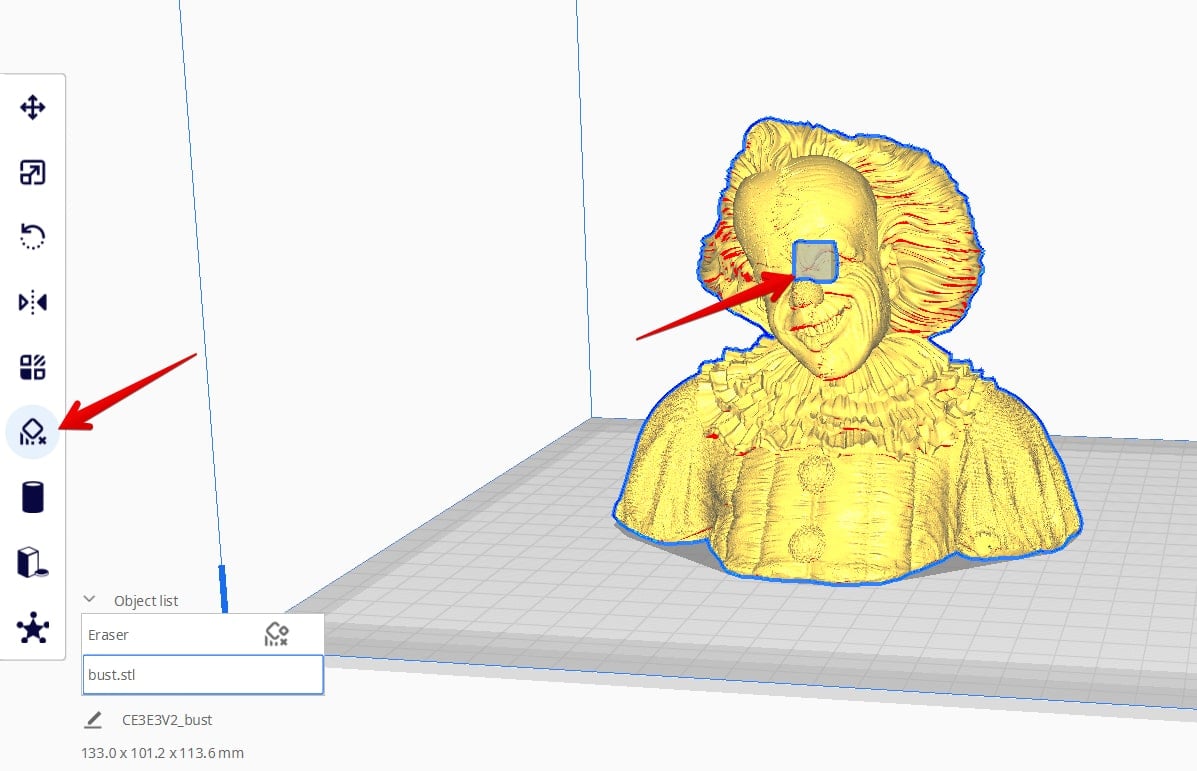
- Select the gray box that appears and scale it to the desired area.
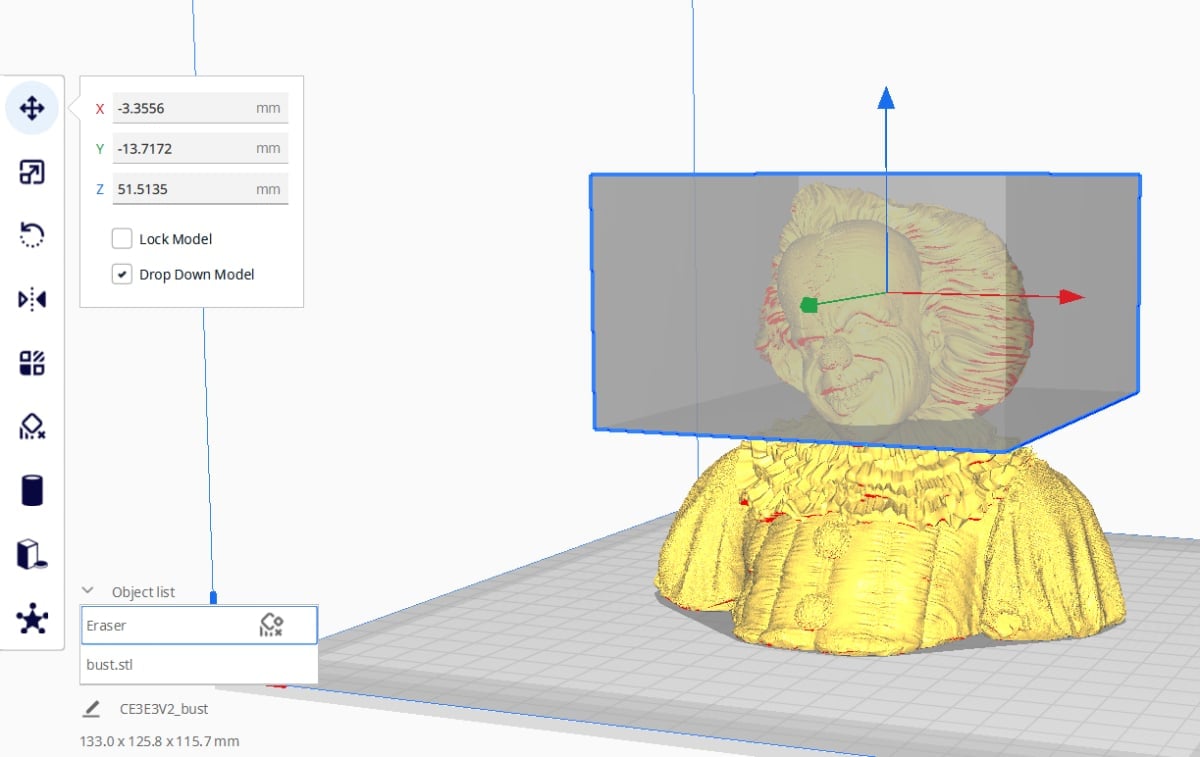
- After scaling, move the support block to the desired area. In this case, the head of the model.
- Click on “Per Model Settings” then select “Modify setting for overlaps”
- Click on “Select settings” at the bottom of the box
- Then you can select your custom settings, which is Infill Density & Infill Pattern
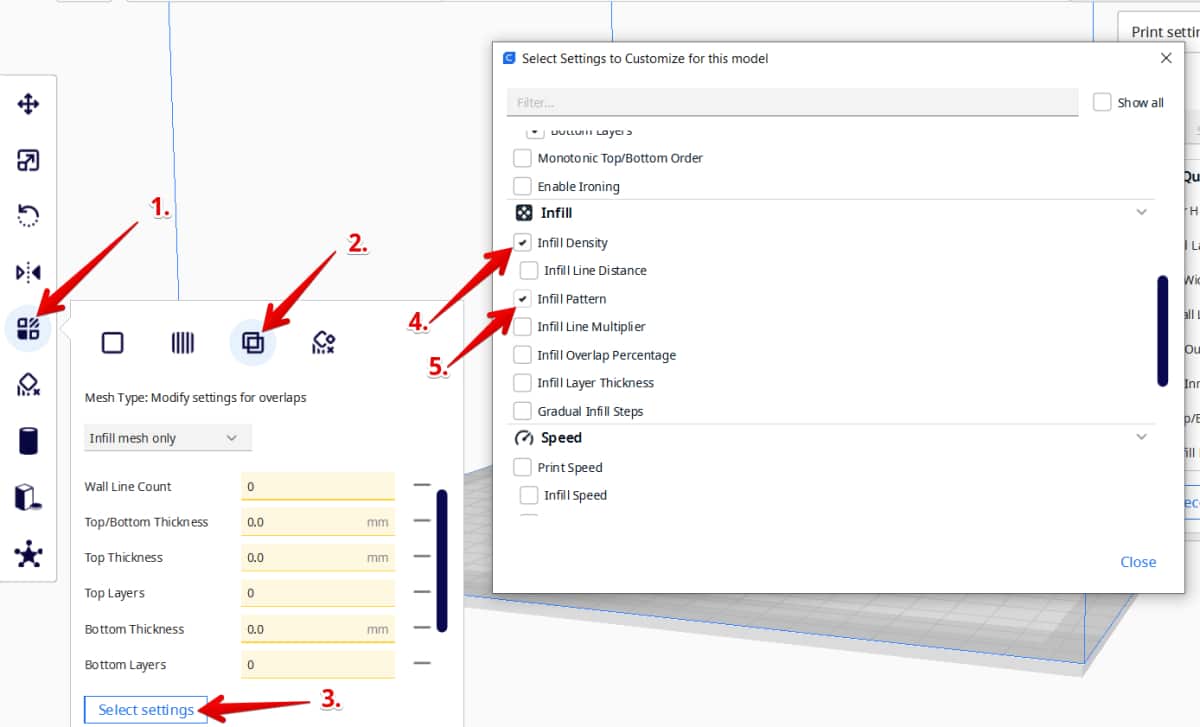
- Now you can set your Infill Density & Infill Pattern to your desired values, which would be 100% & Lines for example.
- Slice the model and check the Preview to see if it looks good

Check out this article I wrote for more information on How to Use Cura Support Blockers Properly.
The video below shows you how to add support blockers to your model.