How to 3D Print a Mask – 7 Steps
Many users often want to 3D print masks of their favorite characters but they don’t know how to go about it. This could eventually lead to failed prints amidst other 3D printing issues. So, I decided to write this article explaining how to 3D print a mask.
To 3D print a mask, you need to get a high-quality model of the mask from Thingiverse or MyMiniFactory. Then, you need to select your filament material and tweak your slicer settings with respect to it. Once you are done printing the models, you add a nice finish on its surface to enhance its appearance.
In this article, I’ll guide you through a step-by-step process of 3D printing any mask of your choice. So, keep reading to find out more information on how you can bring your favorite mask to life.
How to 3D Print a Mask
- Select your preferred mask
- Prepare the model
- Prepare your 3D printer
- Adjust your slicer settings
- Print your mask
- Assemble the pieces
- Post processing
1. Select Your Preferred Mask
Before you can begin printing a mask or any model, you need to get a model of what you want to print. You can source these models from online repositories like Thingiverse or MyMiniFactory.
When selecting your model, one thing you want to keep in mind is to ensure the model is of high quality and can be easily printed.
To be on the safer side, you can also get high-quality models from Etsy, Cults3D, and Patreon, however, it comes with a caveat. To get these models, you have to pay for it. While this may be steep, you’ll rest assured that you’re getting your money’s worth.
Since the masks vary in size and shape, you have to consider the size of your bed when selecting your preferred choice.
If your printer doesn’t have a large build volume, you will need to source for models that have been split so that you can easily print the individual pieces on your printer.
If you have a large-size printer, you can decide to print the fused model in one go or print models that have already been split.
Here is a list of popular masks you can download and print.
![]()
The Blue Spirit mask is based on the mask used by one of the characters from the popular cartoon series Avatar. The model is scaled to fit a 6.5-inch-wide head. So, you may need to measure your head and scale it to fit from your slicer software.
Also, you don’t need to assemble it since it’s not split into smaller parts.

Another mask you can print is the head of Rick Sanchez character from the popular cartoon series, Rick and Morty. The model is split into smaller pieces that you need to assemble once you’re done printing.
So, if you have a printer with a small build volume, then this one is for you.
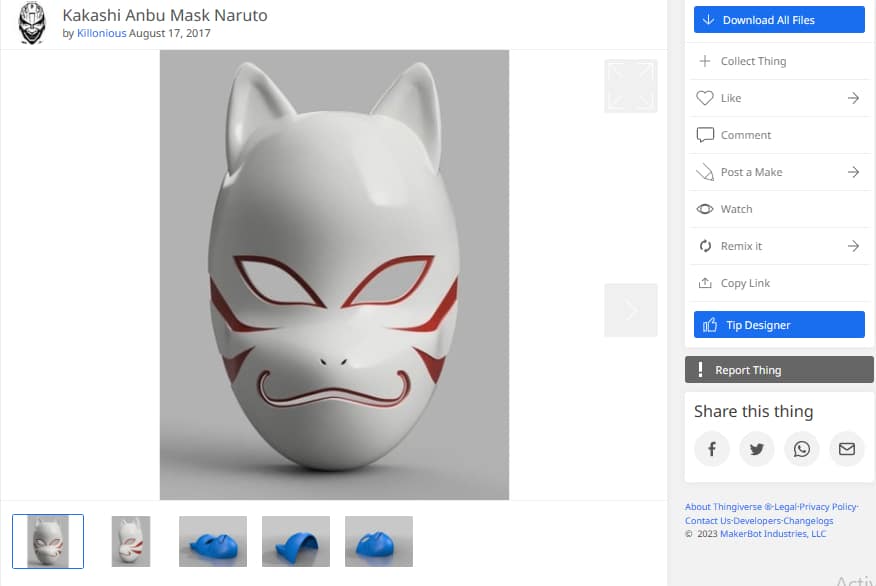
The Kakashi Anbu Mask is another amazing mask you can print. The model is available as a whole and also split into two for people with smaller printers. Before you begin printing, ensure you compare the dimensions and your face to verify if it fits.
Another way you can source for 3D models is to model them yourself. You can create a 3D model of your favorite mask, or you can just let imagination and creativity run wild.
To achieve this, you can use popular 3D modeling tools like Blender, Houdini, TinkerCAD, Maya, etc., to create the 3D model. One advantage of creating your model is that you won’t need to make adjustments later on since the parts are modeled to fit you.
The downside to this is that the model you may design may not be printable. Your 3D printer may struggle to interpret the geometry of your model, which may ultimately lead to failed prints, over and over again
However, this should not be a setback because even if you get failed prints, you can tweak the design, until you can print the model successfully.
Check out this video from THIS DUDE DRAWS to see how he created the Black Panther mask with Blender from start to finish using images of the model.
2. Prepare the Model
After deciding on the model you want to print, the next step is to prepare the model for printing. To prepare your model, you’ll need to import the model into your slicer software so that you can begin to make some tweaks before printing.
Some of the tweaks you can make to your model include the following:
- Rescale the model
- Reorient the model
- Split the model
Rescale the Model
Since you intend to wear the mask, you may need to scale up or scale down the model so that it fits your head perfectly when you wear it.
First, you have to get accurate dimensions of the width and length of the widest part of your head if the mask covers your entire head. If it would just sit on your face, you can just measure the width and length of your face.
Once you get this measurement, you can now input your values in your slicer software along the X, Y, or Z-axis to scale it up or down.
![]()
You can take measurements with this tool called the Cosplay Caliper to measure body dimensions. You can also scale the model using the Meshmixer software.
You can check out this video from Frankly Built that shows how to measure dimensions and scale the model accordingly in Meshmixer.
Another way to get an accurate measurement of your head is to get a 3D scan of your head with your phone or a 3D scanner. Once the 3D scan is generated, you can upload the file to Meshmixer, together with the 3D model of the helmet.
Then place the 3D scan of your head into the mask to confirm if it fits properly. If there are no protrusions, you can now rotate the model to check the amount of clearance there.
This method of taking measurements is only necessary if the mask is one that completely covers your head.
Here is a video from Uncle Jessy on how to get a 3D scan of your head.
Reorient the Model
Once you import your model into your slicer software for printing, you need to reorient the model properly to ensure you get the best results. Since masks usually have very complex geometry, they often require adequate supports to ensure that they print successfully.
While you may want to randomly generate supports, you’ll still need to tweak the position of the model to ensure that the model requires the least number of supports to print successfully.
This is to ensure that the model prints much faster and doesn’t waste filament to generate supports in areas that are not needed.
Also, you need to ensure that the orientation of the model doesn’t cause supports to be generated on the exterior part of the mask. This is to prevent marks or dents that may occur when getting rid of the supports once you’re done printing.
For masks that don’t have a wide base, ensure you add a raft or brim to provide a larger surface area for the print to adhere to.
Once supports are automatically generated by your slicer software, you may still need to verify if the supports are adequate so that your prints don’t fail.
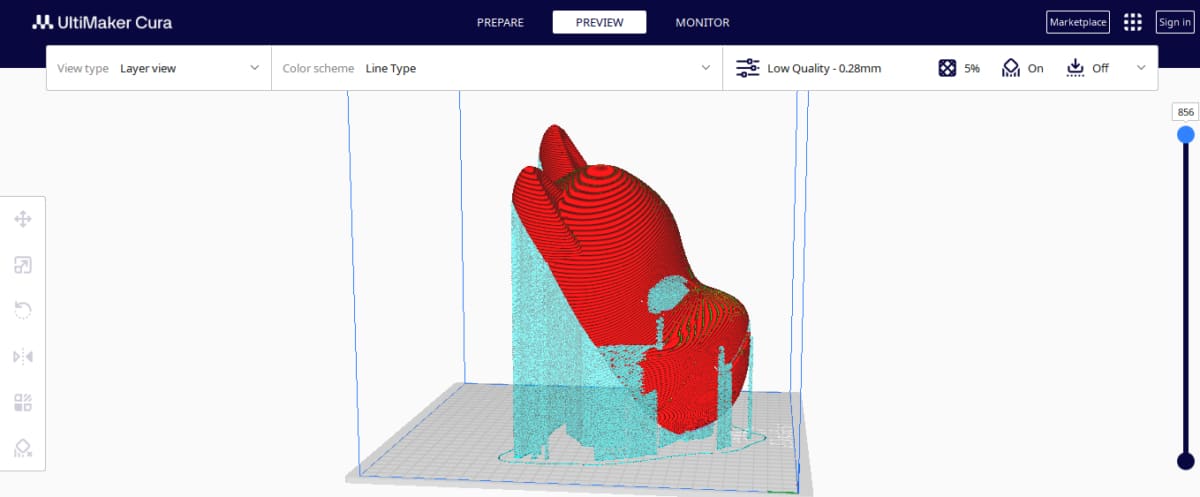
Here is a great example of how to orient your mask on Cura slicer. I ensured that the supports were mostly generated on the interior parts of the mask.
As a result, when taking the supports off the mask, it doesn’t leave dents or marks on the important details or features of the mask.
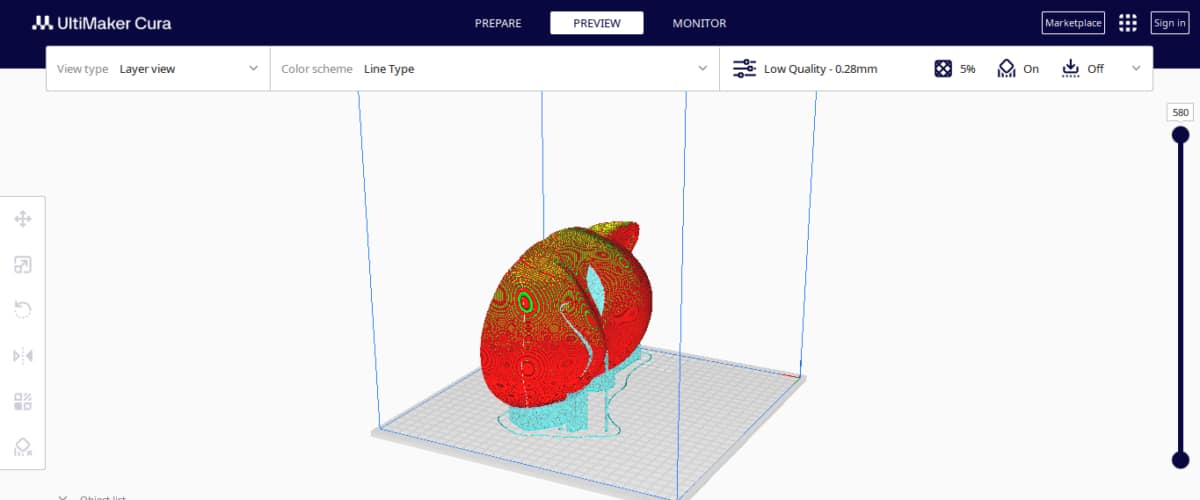
For this orientation, the supports are generated on the exterior part of the mask and its exterior also on the buildplate of the printer. This orientation or anything similar to this will severely compromise the quality of the print.
Check out this video from Frankly Built on how he positioned the Batman Hellcat Mask on his slicer before printing.
Split the Model
Another tweak you can make to your model is to split it into smaller pieces when printing. However, this is only required if the mask you’re printing is way larger than the build volume of your 3D printer. So, if you have a smaller printer, you do not have to worry about printing large models.
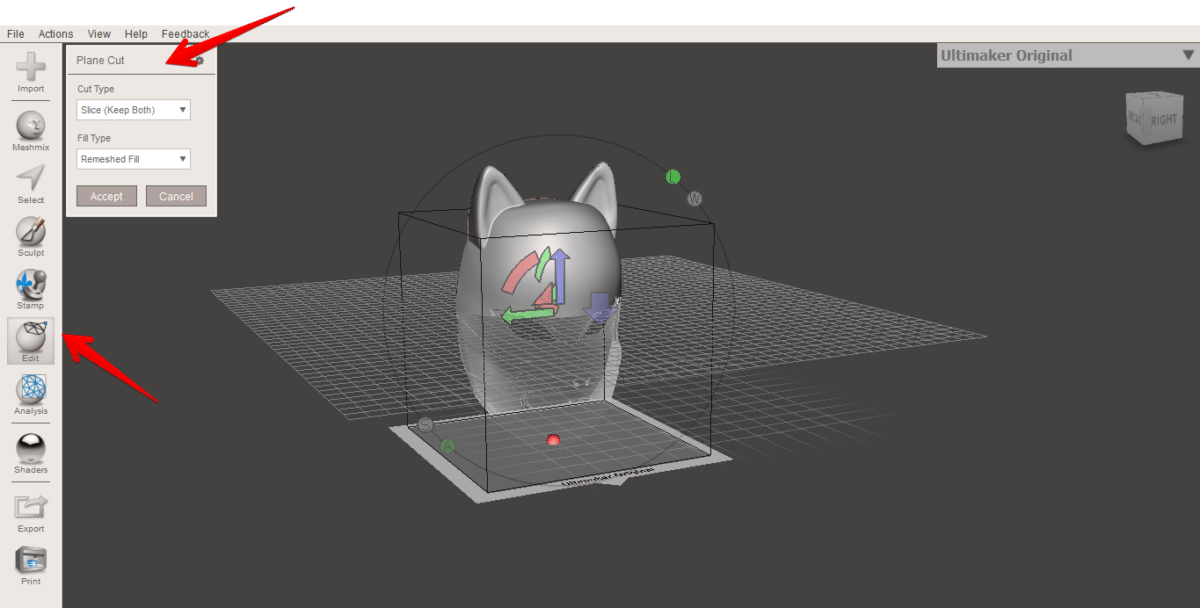
Simply place the model in the popular 3D model editor known as Meshmixer to chop the model into smaller pieces.
When splitting, ensure that you don’t cut across the important details on the mask, this is to prevent blemishes or dents on these areas upon joining the parts.
Before splitting, ensure that you have a backup of the original file in case something goes wrong when splitting the model.
Also, you may want to split the model into smaller pieces to prevent starting all over when an error occurs during printing. Instead of having to start the whole process, you only need to reprint that particular part if failure occurs.
Here’s a video from Frankly Built on how to split models into smaller pieces.
3. Prepare Your 3D Printer
The next step is to prepare your 3D printer. Depending on the size of the mask you want to print, you should be able to print it on both an FDM printer and a Resin printer. Resin printers are not well known for their large build volume or for printing large models.
But for a mask that wouldn’t completely cover the whole head or just the face of the wearer, you should be fine printing it with a resin printer. On the resin printer, you get much better print results due to the high-quality details on the finished model.
Before you begin printing on a resin printer, ensure that there’s sufficient resin to complete the print, since the final prints would be very large.
If you decide to print on an FDM printer, ensure you select a high-quality filament that can withstand lots of wear and tear due to constant physical touch. For example, filaments like ABS, PETG, and PLA+ are all known for their high durability.
You can get the OVERTURE PLA+ Filament from Amazon.
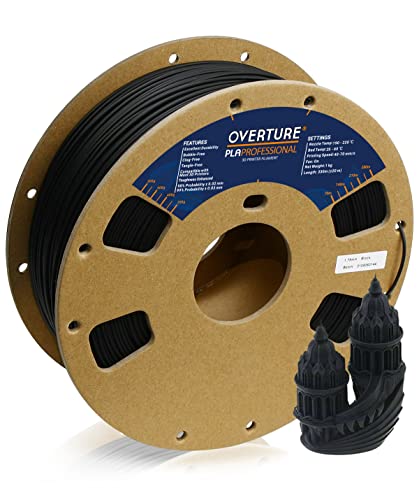
- 【Toughness Enhanced PLA filaments】OVERTURE PLA Professional is an advanced PLA filament with similar stiffness as regular PLA and dramatically improved fracture toughness (Charpy Impact Strength 13.4+/-1.2 kJ/m2, 5 times tougher than regular PLA). Optimized printing quality, high purity with low shrinkage and superb layer bonding, meeting your demands for printing projects of functional parts with higher toughness
Prices pulled from the Amazon Product Advertising API on:
Product prices and availability are accurate as of the date/time indicated and are subject to change. Any price and availability information displayed on [relevant Amazon Site(s), as applicable] at the time of purchase will apply to the purchase of this product.
Also, you must make sure that your printer’s bed is level and clean since a well-leveled bed reduces the likelihood of printing errors. Since the models are very large, even the smallest hindrance on the bed may completely disrupt the print.
4. Adjust Your Slicer Settings
The next step is to adjust your slicer settings for your 3D printer. Your slicer settings play a huge role in the success of your print.
Whether you’re using an FDM printer or resin printer, there are lots of settings available for you to tweak, but only need to adjust a few. Some of these settings include the following:
- Infill Density: For your mask, you can set your infill density between 5-10% without any noticeable decrease in quality. It would also help to make the mask lighter, especially if you plan on wearing it for long periods.
- Layer Height: Depending on the size of your mask, a layer height of about 0.2-0.28mm should be sufficient for your mask. At lower values, you only waste more time printing and still eventually need to sand it.
- Print Speed: I’ll recommend a print speed of about 50-70mm/s to save time when printing your mask.
One user stated that he printed his Oni Mask at a print speed of 60mm/s facing the sky, with supports. He then sanded it and added a primer filler with more sanding and eventually gave it a black base coat then red.
Another user printed the Sub-Zero and Scorpion masks. He said it took a little over 50 hours each on a Longer LK4 printing at 60mm/s with a 0.12mm layer height, with most of the print time being the supports.
Although, he said the supports were not perfect, but held the model well enough to do the job.
Here is a video from Frankly Built that dives into detail on his slicer settings for his Iron Man Mask.
5. Print Your Mask
Now that you’ve dialed in your slicer settings, the next step is to print your mask. Simply slice your model using your slicer program, then export the G-code for printing.
To print the file, you may either copy the resulting G-code to a USB stick or connect your printer directly to your computer.
Make sure you check on the print often while it is running to make sure everything is going according to plan. As a result, you will be able to solve any issue as soon as it arises, rather than waiting until it has escalated significantly.
One user shared his print results for his Dare Devil Mask. The mask came out pretty good after he sanded and painted it.
Another user shared his print results for the Loki mask he printed. He printed it on his Ender 3 Pro, at a 0.12mm resolution and the details on the model were crisp.
Since everyone seems to be making the Loki mask lately, here’s my finished version.
byu/AnomalousAvocado in3Dprinting
Check out this video from Frankly Built to see how he printed the Blue Beetle mask.
6. Assemble the Pieces
After completing the print, you can now begin to assemble the parts, if you printed the model in parts. For FDM prints, you can fuse the prints together using superglue, soldering iron, epoxy, or any other form of adhesive.
But for resin prints, the best form of adhesive is epoxy. You could also make use of superglue or acrylic, but the bond is not as strong as that of epoxy. Another method to join resin prints is to brush some resin between the parts and cure them together.
However, you need to wash the resin prints with IPA and cure them before assembling the parts.
When joining the parts, ensure that the models align properly so that you get a nice finish. Also, ensure that you take off the supports before you begin assembling them.
7. Post Processing
Post-processing is a very important aspect of printing masks or any other aesthetic model. This is because it determines the final outlook of the prints and their physical properties, e.g. durability and functionality.
Post Processing an FDM Mask
If you printed your mask with an FDM printer, you’ll want to sand it, to give it a much-polished look and a smoother feel when touched. You can start sanding from a 100-grit sandpaper and gradually work your way up to a 2000-grit sandpaper.
Sprinkle a little bit of water on the model so that the heat generated while sanding does not deform the print. When sanding, ensure that you wear a facemask so that you don’t inhale the particles from the print.
After sanding the model, you can now observe the model for any dents or marks that didn’t come off during sanding or ones that arose during sanding. If the dents are deep, you can add a filler and sand again once it’s dry.
Now you can apply paint on the mask to further elevate its appearance.
You can get the Rustoleum Primer Filler from Amazon.
- Filler and sandable primer is suitable for use on wood, metal and fiberglass surfaces
Prices pulled from the Amazon Product Advertising API on:
Product prices and availability are accurate as of the date/time indicated and are subject to change. Any price and availability information displayed on [relevant Amazon Site(s), as applicable] at the time of purchase will apply to the purchase of this product.
Check out this video from Uncle Jessy to see how he printed the Wolverine Mask.
Post Processing a Resin Printed Mask
For a mask made with resin, its post-processing is much more tedious. First, you need to take off all the supports and dip the model in Isopropyl Alcohol (IPA). This helps to remove the excess resin left on the model.
Then you can proceed to cure the mask under a UV light source for a certain period. Curing your resin print helps to harden your models, making them much stronger and less susceptible to cracks or breaking under impact.
After curing, you can now sand the mask with a low grit sandpaper like a 200-grit or 400-grit sandpaper. Since it’s a resin print, you don’t need to sand it for long because the layer lines are not as visible as those on an FDM print.
You can now apply your desired paint color to enhance its appeal.
Here is a video from Above WongArt on how to process a resin-printed mask.
Once you’re done painting your mask (FDM or Resin print), you may also need to decide on how you want to wear it.
You can either attach a string or some leather straps to both ends of the mask, or you could use magnets to hold them in place when you wear it on your head.