How to 3D Print a Logo Easily – Cura, TinkerCAD, Meshmixer & More
3D printing a logo seems like a very difficult task, but once you learn the basics and use the right software, it’s not too difficult. After going through this article, you’ll learn how to 3D print a logo like the pros do.
To 3D print a logo, you can easily import a .png or .jpg file into Cura, adjust a few settings and create a 3D model that can be 3D printed. You can also choose to use CAD software like TinkerCAD or Fusion 360 to create a logo that can be 3D printed. Many people create .svg files to create 3D printed logos.
This is the basic answer on how to 3D print a logo, so keep on reading for the more detailed information, along with some cool tips and tricks.
Can You 3D Print a Logo?
Yes, you can 3D print a logo by using the relevant software such as Fusion 360, Meshmixer, or even Photoshop. There are different ways to 3D print a logo. One popular method is to convert the logo into a vector image and create an STL file based on that vector image. You can directly import it into your slicer.
It’s even possible to add your logo to existing 3D prints, even if they have curved surfaces and complex geometries. You can emboss or deboss your logo into models with the right software.
Microsoft’s 3D Builder is a popular software that is free and easy to use.
For example, you can easily embed your logo into something like a phone case and get that 3D printed.
Many people use FDM 3D printing with filament to create 3D printed plastic logos, but you can also use SLA 3D printing to get a higher level of detail with smooth surfaces.
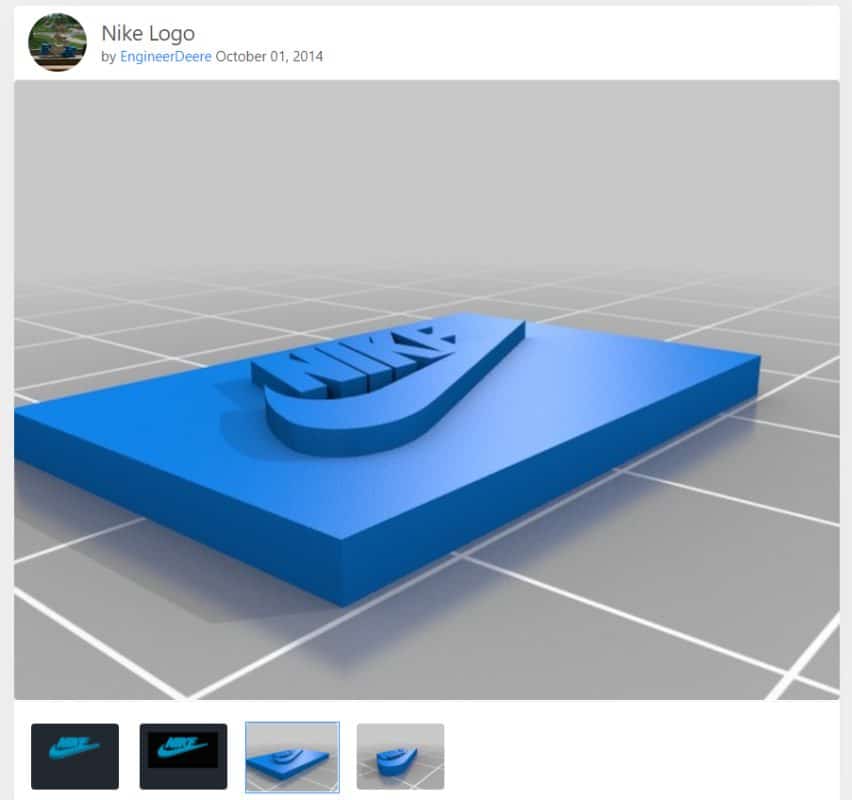
You can find many examples of 3D logos directly from Thingiverse for example, which you can download directly and 3D print yourself.
Here’s a Nike Logo that someone designed which you can get from Thingiverse. It has two files, one with just the Nike Logo & one with the baseplate behind it.
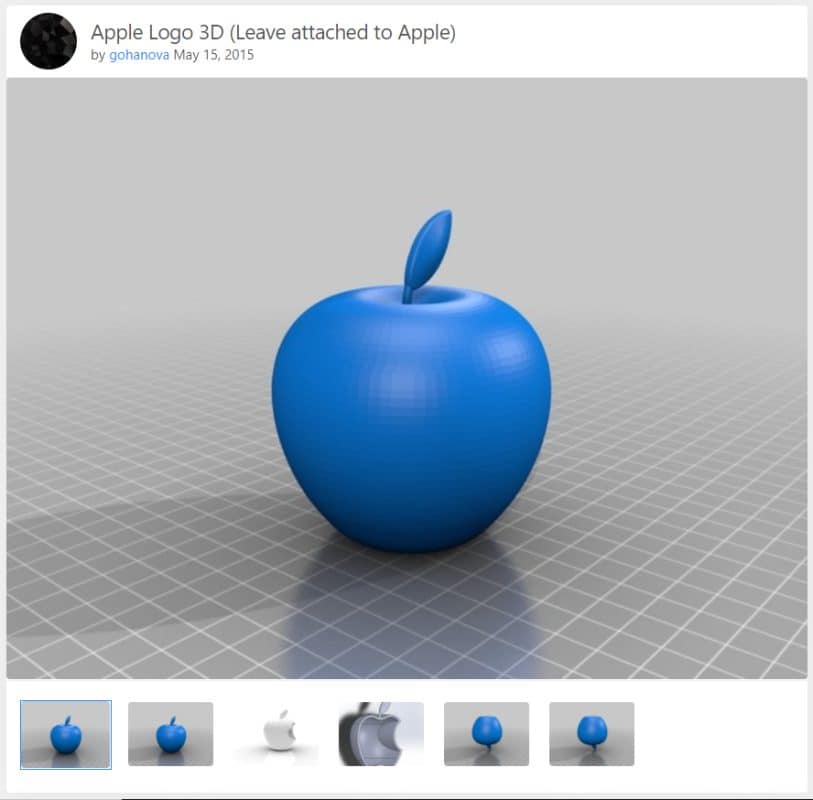
Another example is the Apple Logo. Some people even made it multicolored by inserting pause scripts in the G-Code in the slicer, then changing filament.
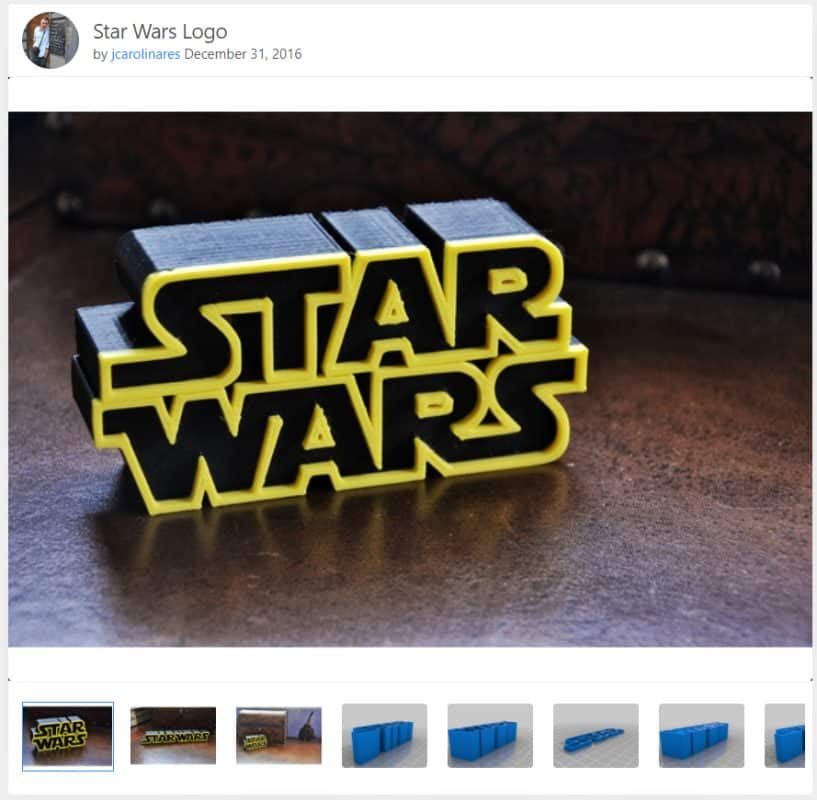
One last example I’ll show it the Star Wars Logo, with an option to download split versions and stick them together.
It’s possible to create your own 3D logos from scratch on software like OpenSCAD, FreeCAD, Blender, or Fusion 360.
How to Create a 3D Printed Logo
There are various image processing software and design software that you can use to create a 3D logo. You can simply work with a .png or .jpg image for a 3D logo since these image formats can handle transparency, allowing users to remove the background from a logo for a clean 3D print.
Here are some examples that I’ll take you through below:
- TinkerCAD
- Inkscape
- Cura
- Adobe Illustrator
- Photoshop
How to Create a 3D Printed Logo Using Vectors & TinkerCAD
The first thing you want to do is get your image and convert it into a vector or a workable file with a black and white image palette.
I figured out that you can first use VectorMagic which is a paid software, but you can basically convert the vector for free, screenshot the converted file, then convert the screenshot into a vector image using Convertio (free software).
When you directly convert your logo with the free convertor, a lot of details get lost, but doing it this way creates a better vector. It does depend on how simple or complex your logo is.
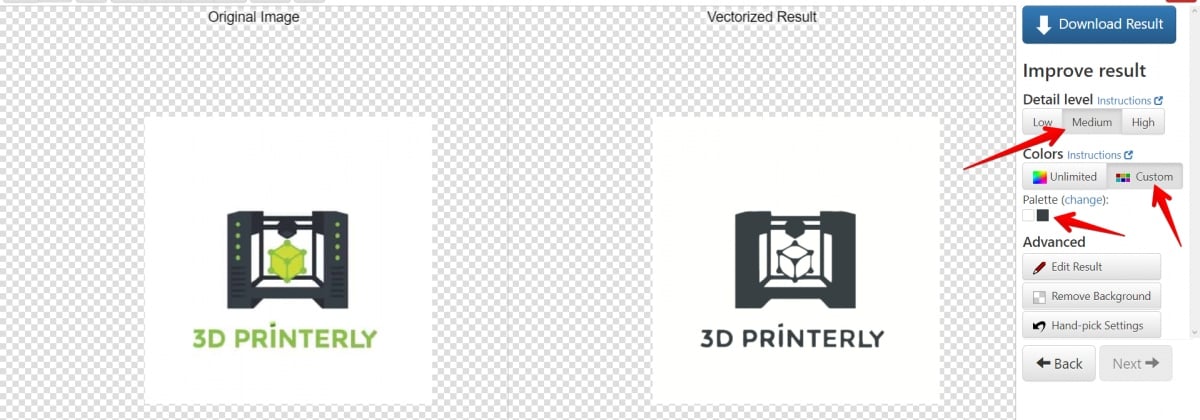
Here is the screenshot of the logo from VectorMagic.
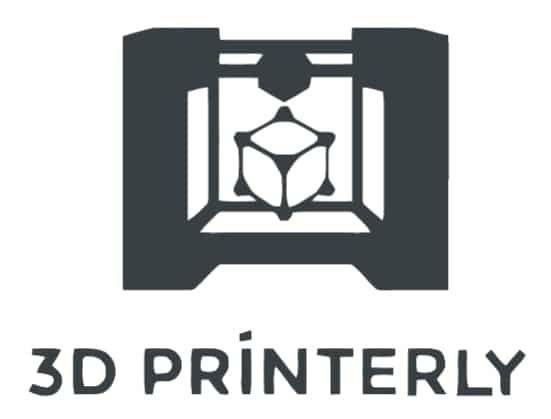
You then use a conversion software like PNGtoSVG or Convertio to convert the image to a vector file using 2 colors so you can get a nice outline of the model.
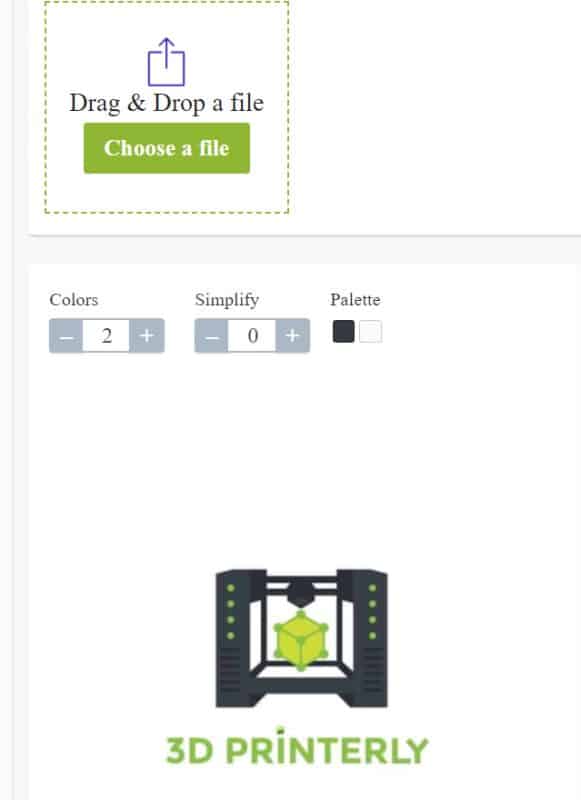
Here is the final vector SVG file which you can download.
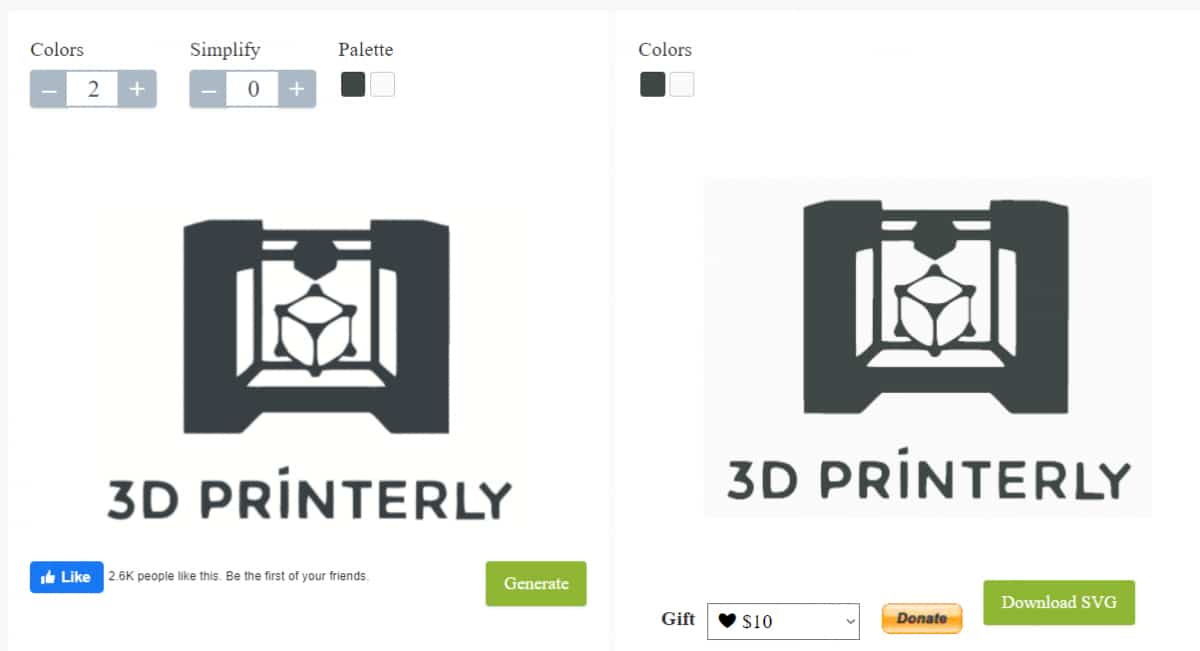
Now that you have the SVG file, you can import this into a CAD software like TinkerCAD to make any edits to the logo if you want, then export the file as a .stl file.

Make sure to select Center on “Art” then import your model. You can adjust the dimensions before putting it on the build plate.
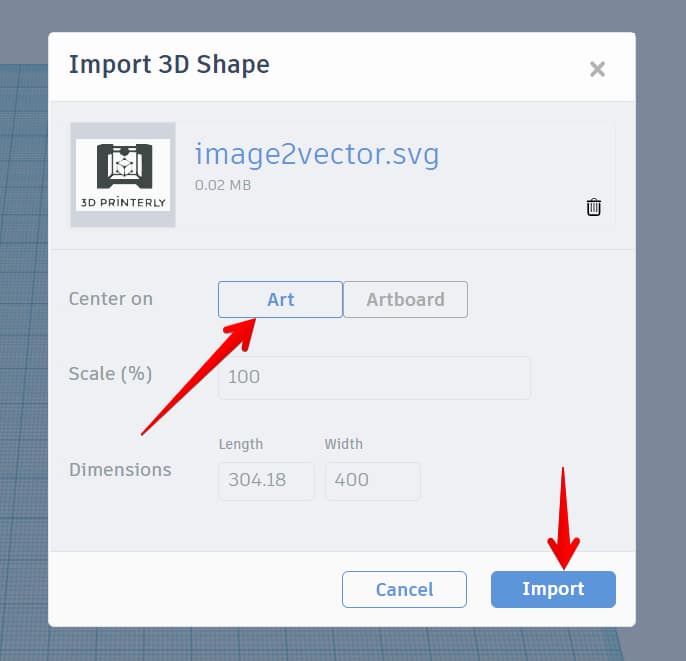
I forgot to adjust the dimensions but simply did that afterwards!
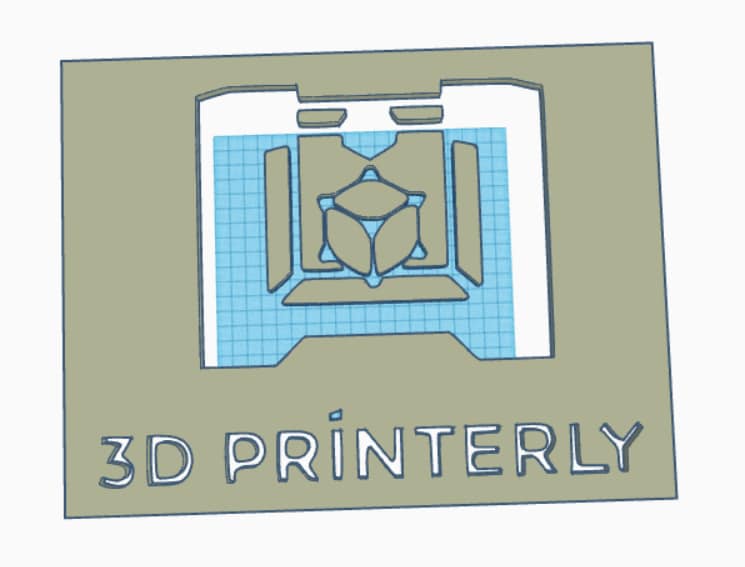
I added a baseplate underneath the logo because there were some gaps that would 3D print separately, so this way, it will be attached. You simply add in a cube from the “Basic Shapes” area and scale the dimensions to fit under the logo.
The logo was extruded up by 10mm so I extruded the baseplate up by 7mm so it’s attached nicely, but you can reduce this so there is more of a contrast between the heights which would be down to preference. You can group the two models and scale it as well.
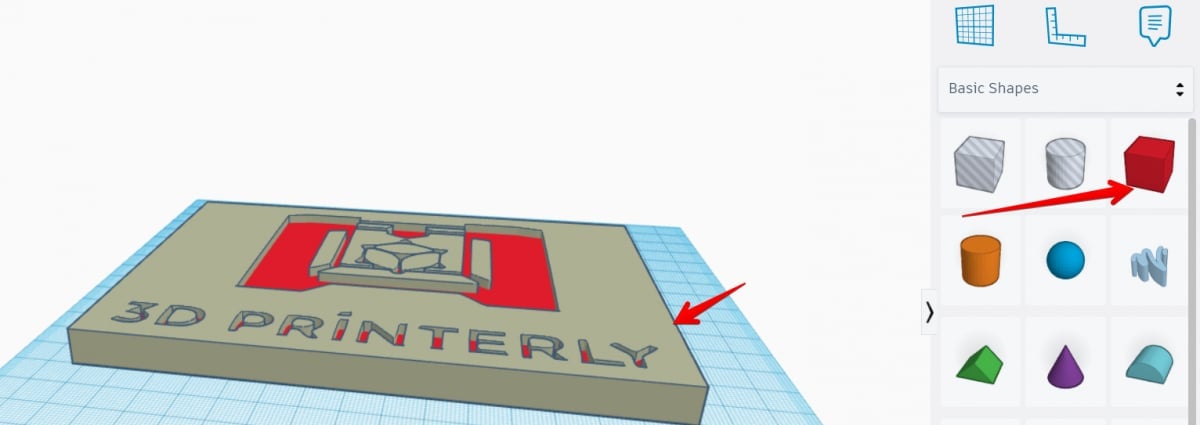
Here is the file in Cura which you can scale to your desire. It could be a better idea to 3D print it vertically since 3D printers give the best accuracy in the Z direction. Doing it with a raft would make sense to give it good stability, especially if the baseplate is thin.
You could actually adjust the raft to make it a stand, reducing the Raft Air Gap so the model is better attached to it.
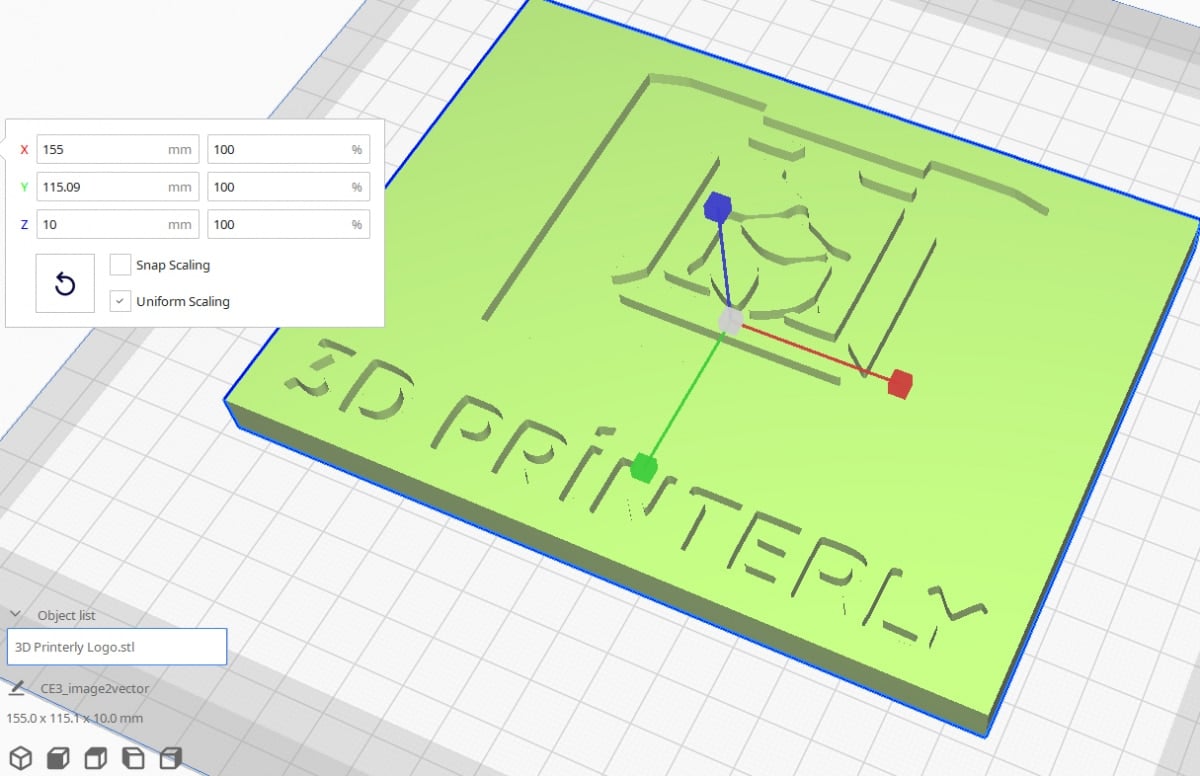
Now you can simply slice the model with your usual settings or with a higher quality if desired, then transfer it to your 3D printer to create the logo.
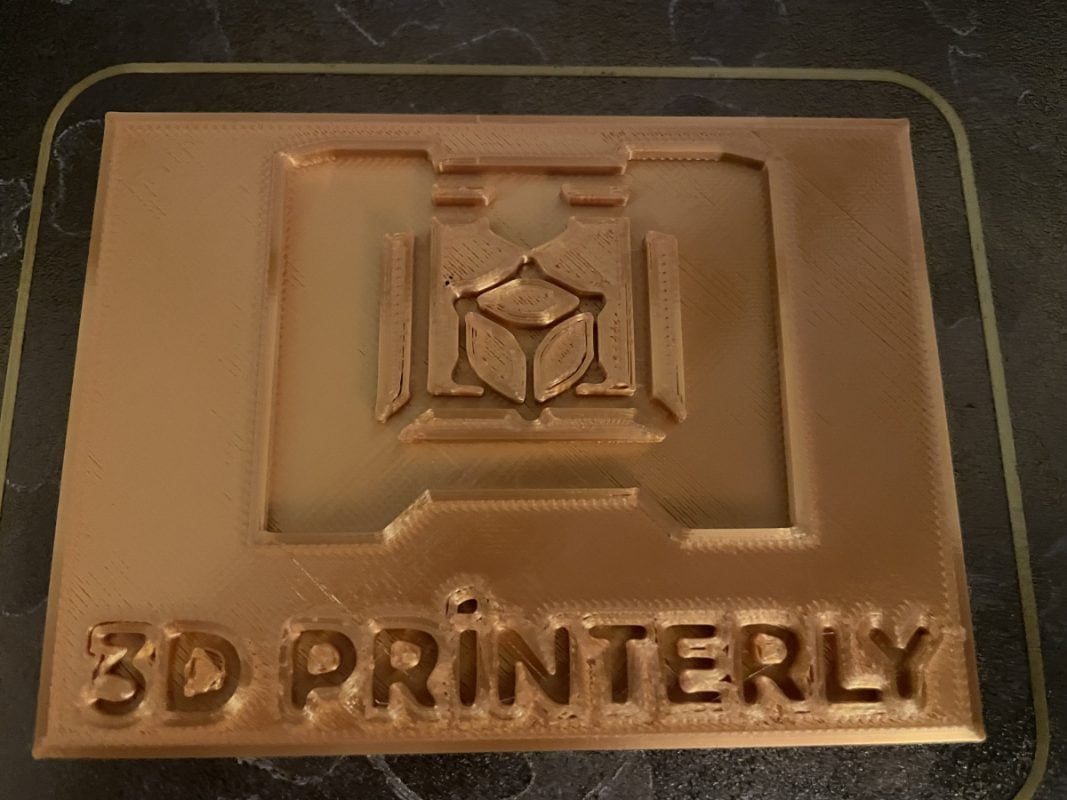
Here’s the result. It looks like there are some imperfections in some of the walls maybe from slight under extrusion or wall line width settings. With a vertical orientation, it would probably come out better.
Check out the video below for a great example of working with an SVG file in TinkerCAD.
Alternatively, 3D logos can also be created by importing a .JPG logo file to TinkerCAD then converting it to a .svg file, creating a 3D logo.
- Scale the 2D logo to a workable size
- Add a depth of about 10mm (which is adjustable to get a good-looking 3D logo).
Here is a 3D hot dog logo created using TinkerCAD.
How to Create a 3D Printed Logo Using Cura
Creating a 3D printed logo in Cura is very simple.
- Simply drag and drop the 2D file into Cura
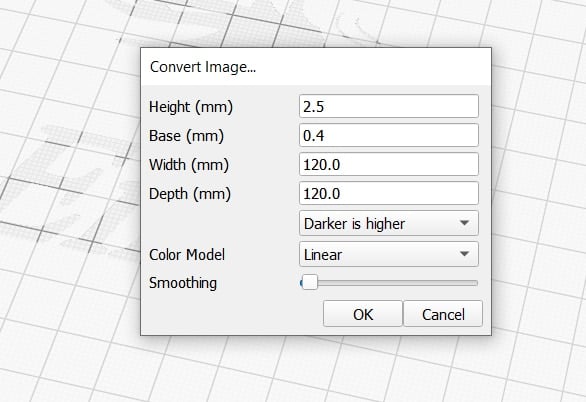
- You can choose to adjust some of the settings such as height, base, width, to see if you can get better quality.
- Use the smoothing scale to change the accuracy for a detailed 3D print.
This is how the model looks at first without changing any of the settings.
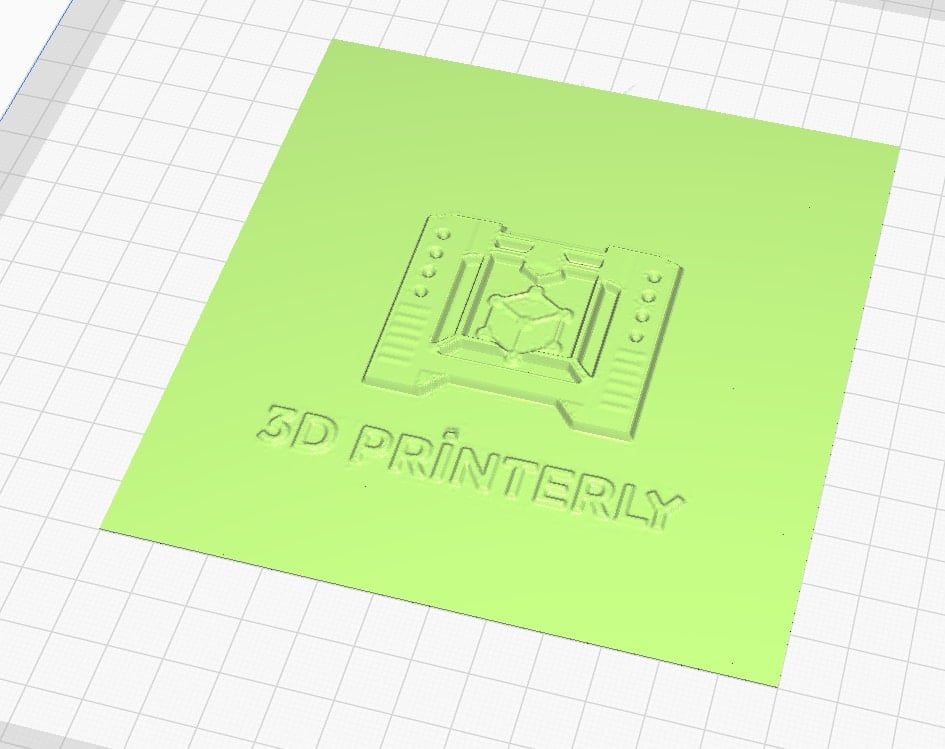
I scaled up the model simply using the Cura scaling tool. I made sure to uncheck “Uniform Scaling” and scale the Z-axis measurement to increase the baseplate size.
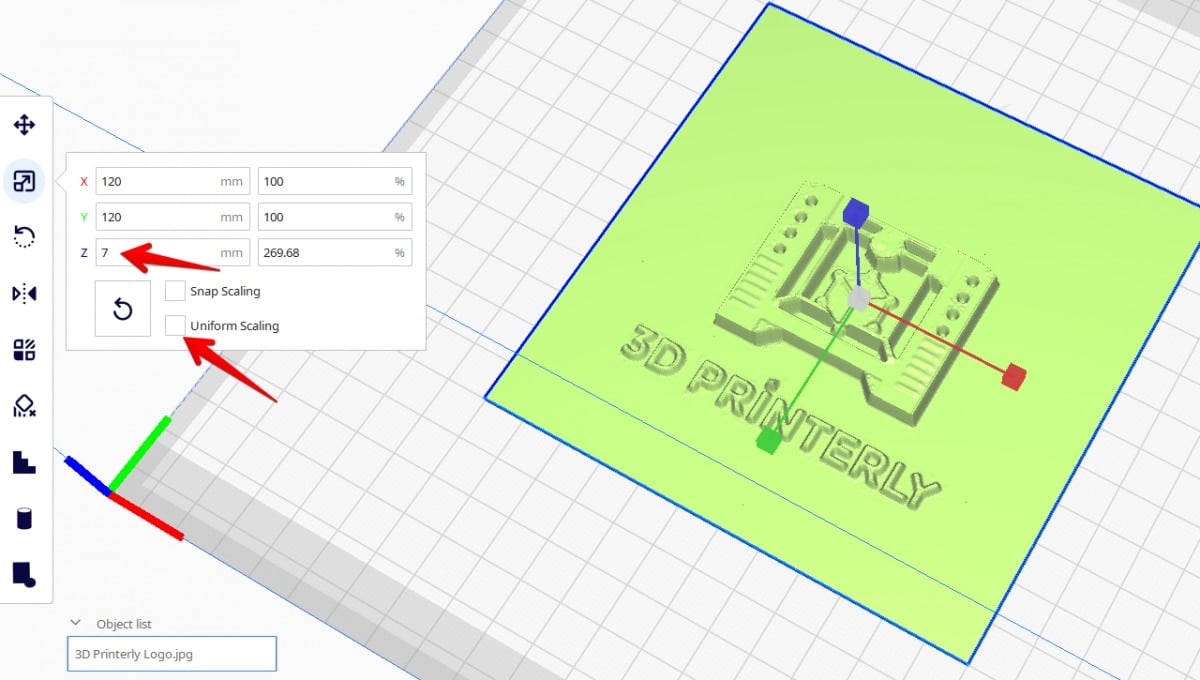
The higher I scaled the Z-axis (up to 13mm), the more I saw the logo raise up which made it look pretty detailed.
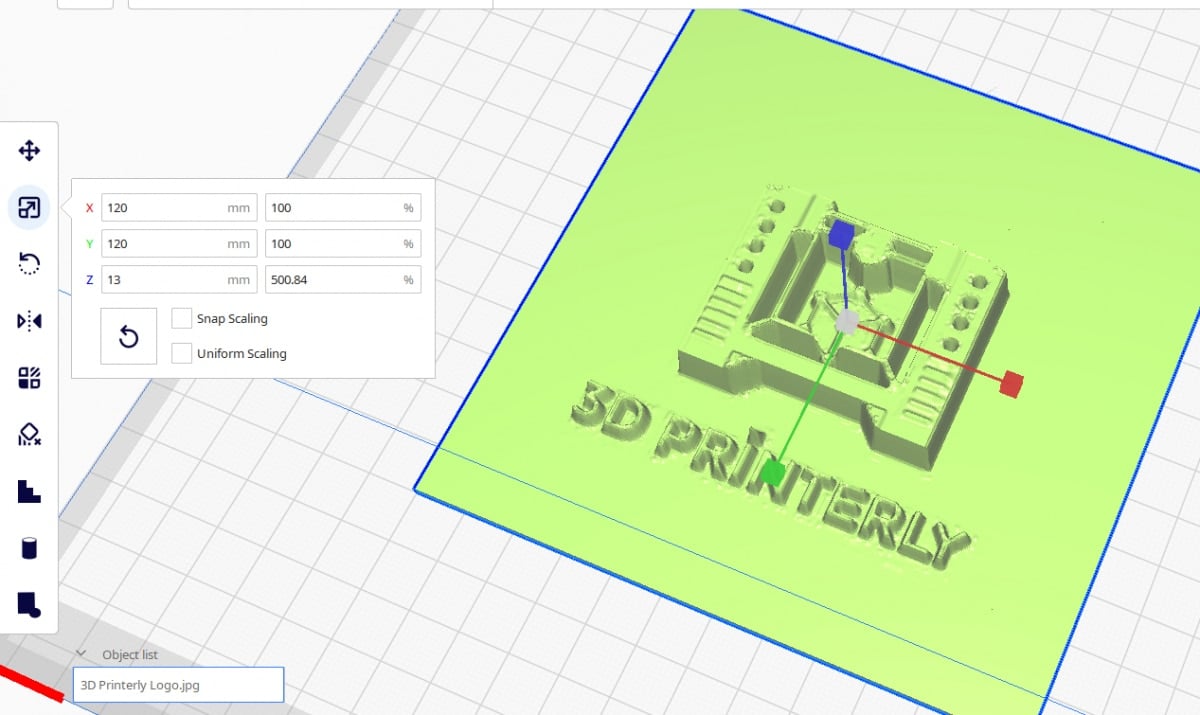
This method captures a lot more detail than converting the file into an SVG since it gets all the grooves and curves from the model based on the color depth.
I’d recommend printing something like this vertically to try and capture more of those details, but you can try both orientations and compare.
I tried adding some Support Blockers to specific sections since it would be hard to remove supports there. My 3D printer should be able to handle the bridging and overhangs in those areas. I also changed my Raft Air Gap to 0.1mm so it can be used as a stand for the logo.
I increased the Wall Thickness to 1.6mm with 4 walls to strengthen those thinner areas, so they are more durable, especially when removing the supports. Looking at the Preview, I noticed the infill was quite lacking, so I boosted it up to 50% for even more strength.

The sliced time with a 0.12mm layer height is 11 hours, using 60g of PLA filament which is around $2. A standard 0.2mm layer height would take around 7 and a half hours.
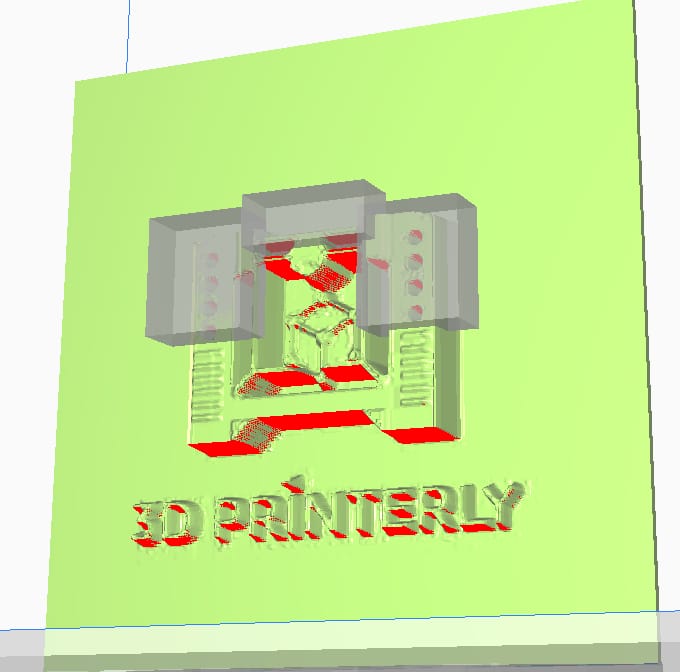
Here is the full Preview of the model. The light blue areas are the supports and you can see they aren’t in the holes in the logo due to the Support Blockers.
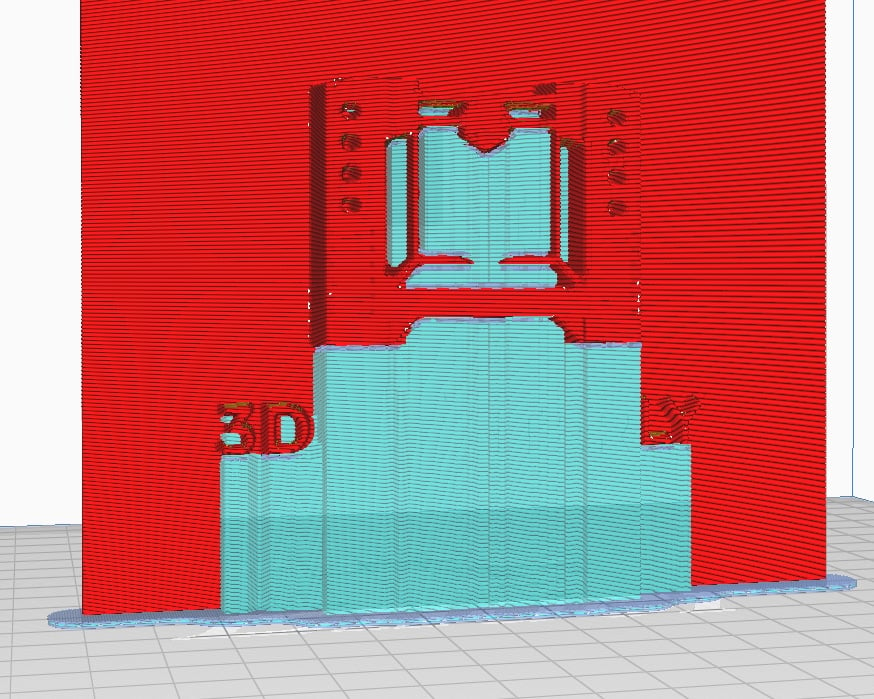
Here’s the result. This one captures a lot more detail since it isn’t lost in the vector conversion. I had to do some cleanup of the supports between the gaps in the middle. The raft still ended up coming off as I removed the print so I superglued it back on.
There was some layer separation in the baseplate which could potentially be fixed by having a thicker baseplate, controlling drafts (use an enclosure or draft shield in Cura), or increasing the printing temperature.
I’d recommend using a thicker raft by adjusting your raft settings also.
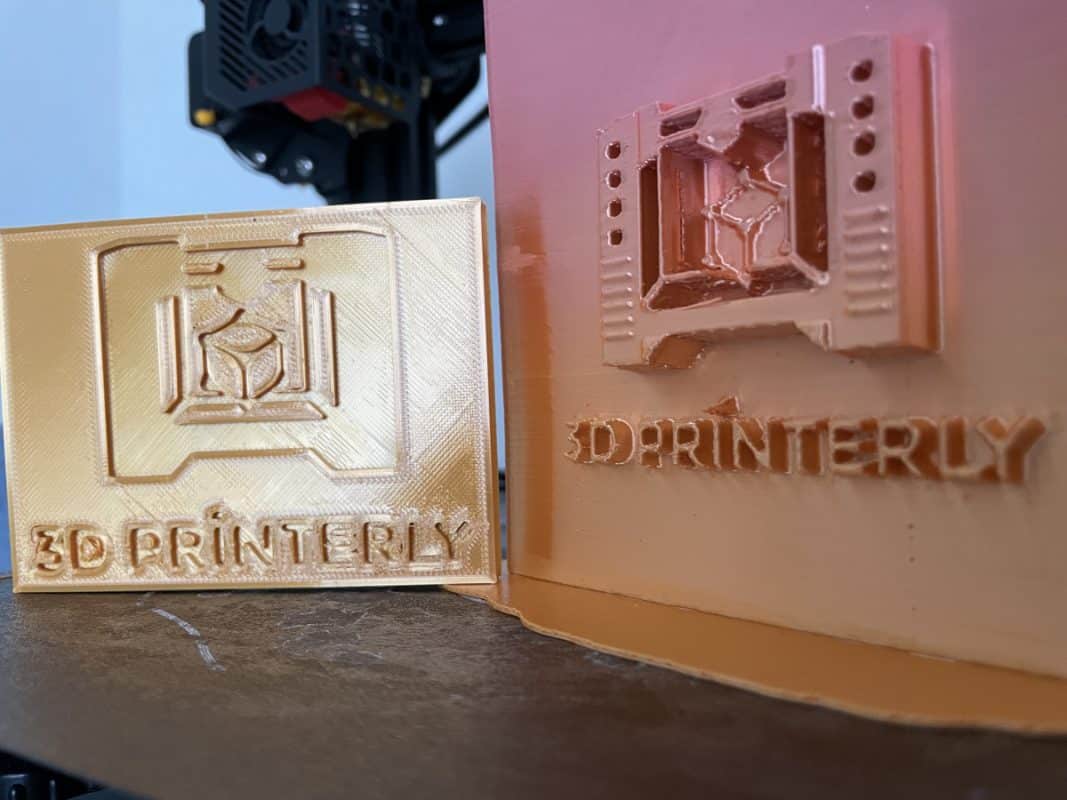
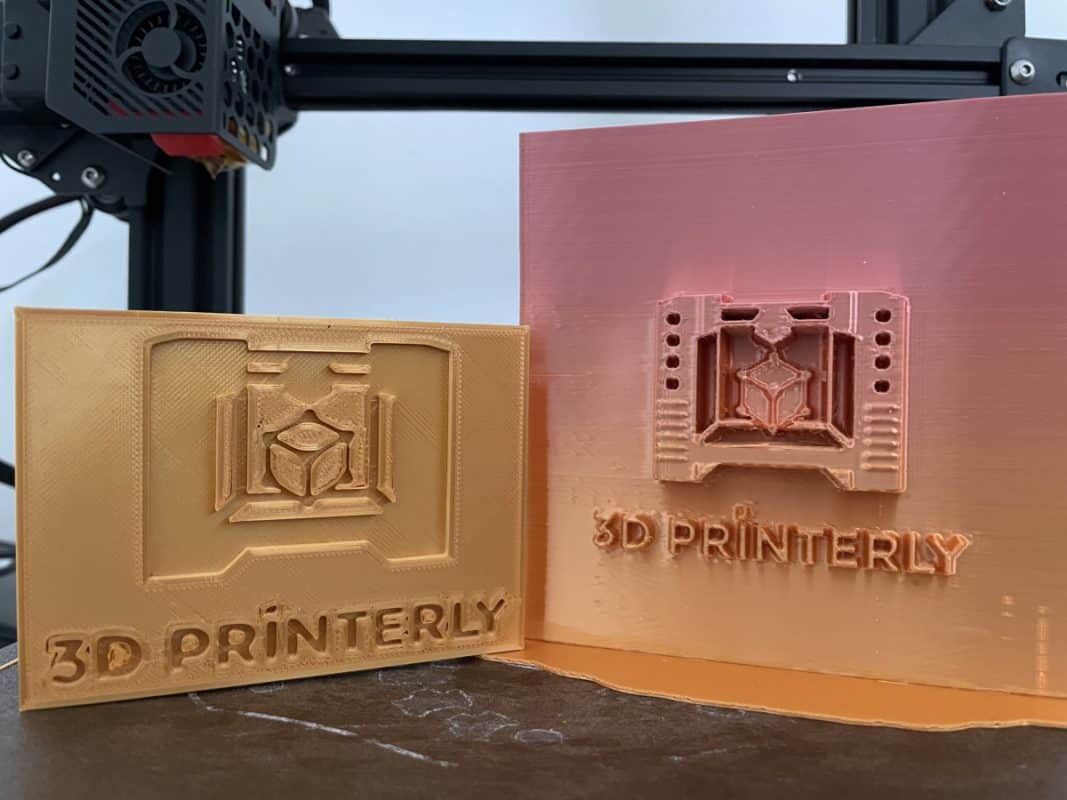
Here’s a comparison of the vector 3D printed logo on the left and the image import 3D printed logo on the right.
How to Create a 3D Printed Logo Using Inkscape
Creating a 3D printed logo using Inkscape is fairly simple. It’s a CAD software where you can build 3D objects from scratch using various shapes, text and other useful features.
Depending on what logo you are using, you might have to import the logo into Inkscape then use a tool to outline it so you can use it for 3D printing. There are different ways of getting your logo traced and usable for 3D printing.
The video below imports a bitmap of the logo into Inkscape, then uses Edge Detection by going to Path > Trace Bitmap > Edge Detection. Once he has the trace, he saves the file as an SVG, then imports it into his chosen CAD software which is 123D Design.
You can clean up the logo with some basic edits, then you can choose to overlap the logo so it becomes once piece which can be 3D printed nicely.
Another example of creating logos in Inkscape is this really cool detailed visual of a user creating some Justice League Coasters. This method looks more complex with more steps, but it’s great if you want to create a logo with more details.
How to Create a 3D Printed Logo Using Adobe Illustrator & Photoshop
A 3D model of a logo can be created using Adobe Illustrator, but it is a paid software. They have a 7-day free trial then the full program is around $25 per month. Photoshop is also around $20 per month, so I’d recommend using them if you have them already.
Here is a video on how to create a 3D logo using Adobe Illustrator.
The 3D Print General also did a video on 3D printing a logo using just Photoshop which you can check out below. He said it took him around just 10 minutes to create the logo.
https://www.youtube.com/watch?v=ShwSz8qhuN4
How to Add a Logo to a 3D Print or 3D Object
How to Add a Logo to a 3D Object Using TinkerCAD
To add a logo to a 3D object with TinkerCAD, you want to firstly have your logo as an STL file already so you can import it along with the file you want to put it on.
I chose to do an example with an Easter Island Head and the 3D Printerly Logo. The logo still had the baseplate on it so after importing both models, I had to scale and drag them both to put it where I desired.
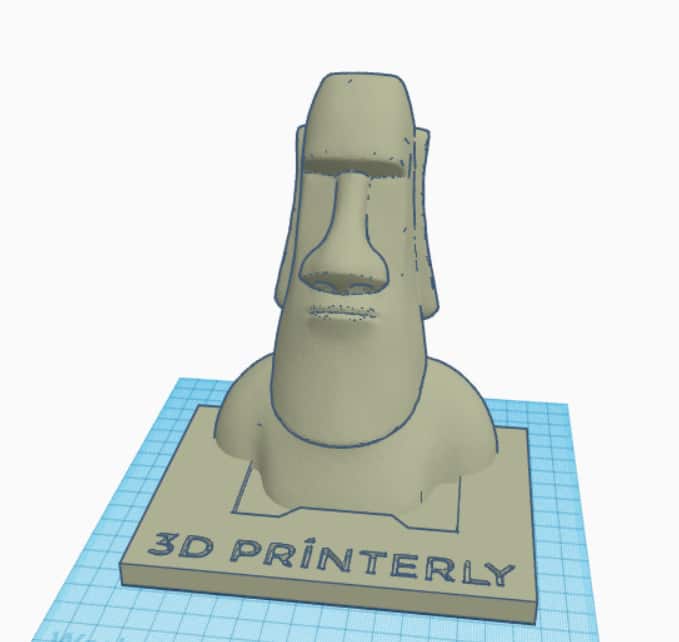
Here is the resulting image.
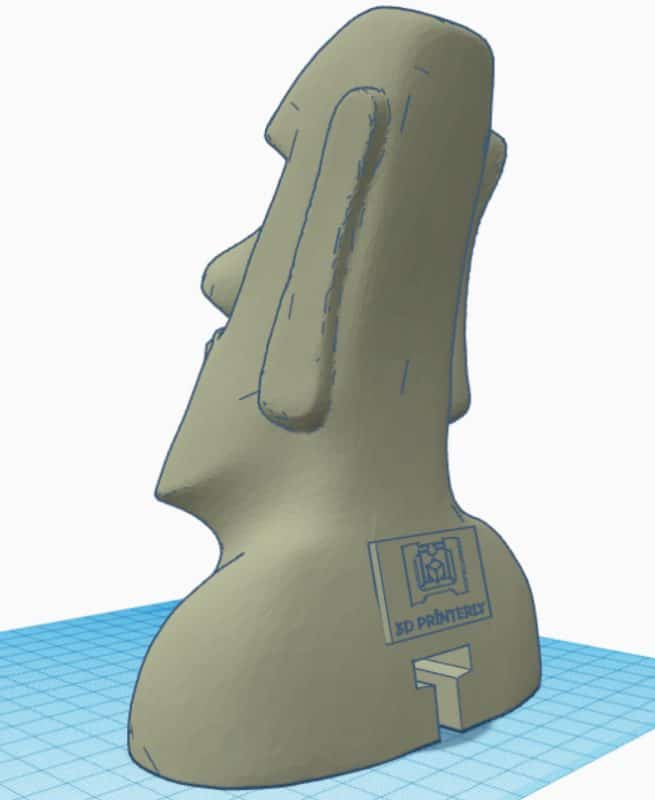
It’s not the most professional, but it works. I’d probably recommend using a more precise CAD software like Meshmixer or Fusion 360. There’s quite a lot of dragging, scaling, and angling needed to do something like this. Ideally, you are working with a flat surface.
How to Add a Logo to a 3D Object Using Fusion 360
Fusion 360 is a useful program for adding a logo to 3D print.
Check out the video below to be shown how to create your 3D logo, then import it into Fusion 360 so it can be attached to an existing model. He also uses Convertio as mentioned previously to create the logo.
How to Emboss a Logo on a 3D Object – Meshmixer & 3D Builder
How to Emboss a Logo on a 3D Object with 3D Builder
Many users consider 3D builder pretty useful and convenient for editing STL files. A logo can be embossed for 3D printing by following the video below.
You basically want to import your models, then select the emboss tool. Open your .png file, ideally with a transparent background. You can then use rotating tools to align the 3D logo to your desirable position.
After that, change the Z-axis setting to a negative number to emboss the text or logo inside the model, or using a positive number to emboss the text for an outward project of the text.
How to Emboss a Logo/Text on a 3D Object in Meshmixer
Meshmixer can also be used to emboss a logo with text or image. It is important to re-mesh the surface to increase the solid accuracy and mesh density when embossing text or images for 3D printing.
Here is a guide video on adding text/logo to a 3D ‘bunny’ model.
Here is another video on embossing a 3D model, using the example of adding to teeth for a dental company.
