How to 3D Print a Helmet Successfully – Best Practices
3D printing has made it possible for people to create customized helmets for cosplay, personal protection, or even professional use. However, it can be challenging to get the printing process right, especially if you’re new to 3D printing.
That’s why I wrote this article, to guide you through the step-by-step process of 3D printing a helmet successfully.
How to 3D Print a Helmet Successfully
These are the main steps to 3D print a helmet successfully:
- Find a 3D Model
- Download the 3D Model
- Prepare the 3D Model
- Configure the Slicing Settings
- Start the Print
- Post-Processing
Find a 3D Model
The first step in 3D printing a helmet is to find a 3D model of the helmet you want to print. There are a variety of websites where you can download free or paid 3D models, such as Thingiverse, MyMiniFactory, or Cults.
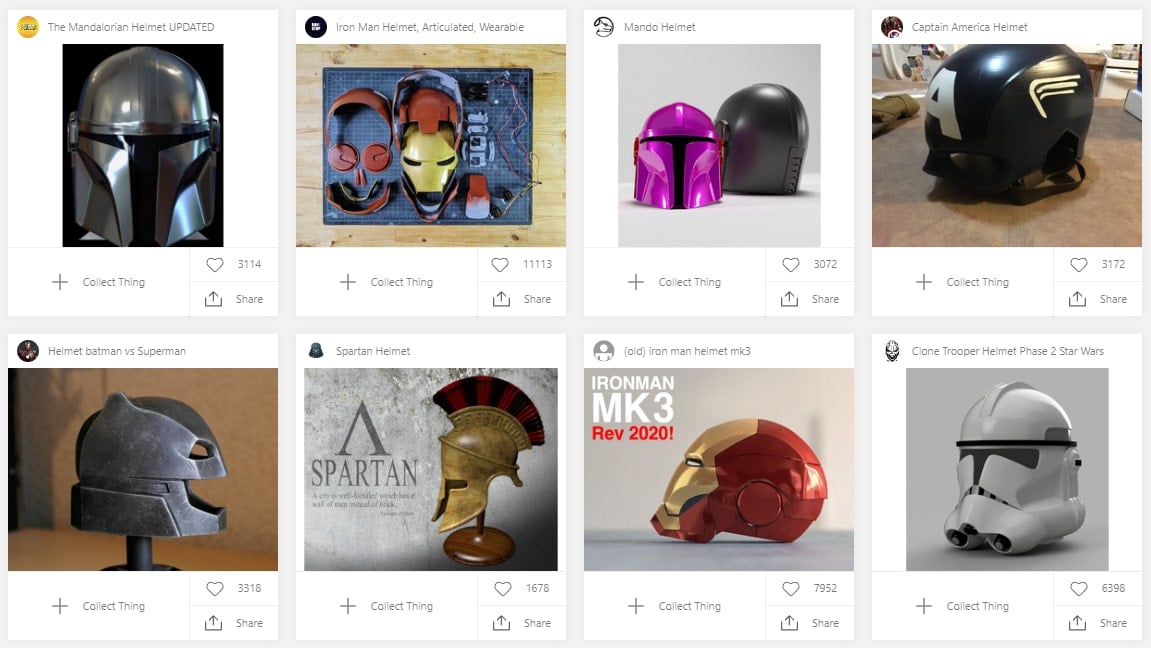
When selecting a 3D model, it’s important to select a high-quality model that has been thoroughly tested and reviewed by other users to make sure that it will print accurately and without issues.
Another option is to create your own 3D model using CAD software. This option requires more time and skill but can give you complete control over the design of your helmet.
Besides creating your own, you can edit existing helmets as well. There are a variety of CAD programs available, such as Fusion 360, Tinkercad, and Blender that can help you create a helmet from scratch or edit an existing one.
Users recommend measuring your own head and sculpting the helmet based on this measurement if you’re creating your own 3D model. That will ensure that the model will fit when it’s printed.
Download the 3D Model
After finding a 3D model of the helmet you want to print, the next step is to download it.
To download the 3D model, simply click on the download button provided on the website where you found it. The file will then be saved to your computer, usually in STL format.
Prepare the 3D Model
After you have downloaded the 3D model, the next step is to prepare it for 3D printing. To do this, you can use slicing software such as Cura, or PrusaSlicer.
To prepare the model, you will first need to import it into the slicing software. Once you have done that, you want to orient the model so that it prints correctly.
This means that you’ll position it in such a way that it will have the fewest possible overhangs and supports, and that it has a better chance to print smoothly. You may also want to adjust the scale and position of the model to fit your 3D printer bed.
Uncle Jessy is big on cosplay and made a video teaching you how to scale your helmets properly.
Some slicing software programs, like Cura, have features that automatically adjust the scale and position of the model for you, while others may require you to do this manually.
Check out the video below for more details about 3D printing helmet orientation.
Configure the Slicing Settings
Configuring the slicing settings is another important step in 3D printing a helmet. You should have already calibrated your filament’s printing temperature, bed temperature and other settings to get the ideal 3D printing results.
If not, I’d recommend printing a temperature tower so you can get the ideal temperature for your material.
You can use the video below by Slice Print Roleplay.
Next, adjust the layer height. A smaller layer height produces a smoother surface, but it also increases print time. A good starting point for layer height is 0.2mm which is the default usually.
One user stated that 0.2mm is a good layer height to print with as it is a good middle ground between the print time and ease of sanding.
The infill percentage determines how much material will be used to fill in the interior of the helmet. A higher infill percentage will make the helmet stronger but also increase print time and material usage. A good starting point for infill percentage is 15% to 20%.
Another user stated that he’s found success in 3D printing helmets with an infill percentage of 10% and wall thickness set to 2 layers.
Print speed and temperature will depend on the material and 3D printer you are using. Most slicing software will provide recommended settings for these parameters, but you may need to adjust them based on your specific setup.
Users recommend using the default speed for most slicers, which is 50mm/s, as that seems to work well for helmets.
Once you have adjusted all the slicing settings, you can save the configuration as a custom profile for future use. This will save you time when you want to print additional helmets in the future.
Start the Print
Once you have configured the slicing settings, save the sliced file to an SD card or send it directly to your 3D printer.
Start the print and monitor it closely to make sure that the print is progressing as expected.
Post-Processing
Once the print is complete, it is time to do the post-processing. To start, remove the helmet from the 3D printer bed and remove any support structures if necessary. The helmet may have some rough or uneven areas that need to be smoothed out, and this can be done through sanding.
Take your time and use fine-grit sandpaper to avoid damaging the helmet. I have a section later in this article on how to sand a 3D printed helmet. If you want to give your helmet a more finished look, you can apply primer and paint to it.
This can be a fun and creative part of the process, allowing you to add your own personal touch to the helmet.
Check out the video below for detailed instructions on how to 3D print a helmet successfully.
Best Cura Settings for Helmets
When it comes to choosing the best Cura settings for your helmet, it’s important to consider the specific needs of your 3D printer and the type of material you’ll be using.
Here are the best Cura settings for helmets.
- Layer height: 0.2mm to 0.3mm
- Infill density: 15% to 20%
- Support structures: 45-degree support angle and 10% to 15% support density
- Print speed: around 50mm/s
Generally speaking, a layer height of 0.2mm to 0.3mm is a good choice for helmets, as this provides a good balance between print quality and print time. One user changed his layer height from 0.2mm to 0.3mm and managed to make his printing two days faster.
In terms of infill density, users recommend using 15% to 20%, as this will provide enough strength for the helmet while also reducing print time and material usage. Another user recommends going for 20% – 25% infill density as that makes them come out more sturdy and strong.
Support structures are often necessary for printing helmets, with 3D printing hobbyists recommending using a support angle of 45 degrees and a support density of 10% to 15% to ensure the best results. This will help to prevent the helmet from sagging or warping during the printing process.
Finally, when it comes to print speed, the recommended speed is around 50mm/s for helmets. This will provide a good balance between print quality and print time, and should help your helmet be as expected.
However, you may need to adjust this setting based on the specific needs of your 3D printer and the type of material you’re using.
Check out the video below for detailed instructions on what the best Cura settings for helmets.
How to Sand a 3D Printed Helmet
After you have 3D printed your helmet, the next step is to sand it to achieve a smooth finish.
These are the main steps in order to successfully sand a 3D printed helmet:
- Wear protective gear
- Remove supports or rafts
- Remove large bumps with rough-grit sandpaper
- Smooth the surface with finer grit sandpaper
- Sand hard-to-reach areas with a sponge or foam
- Wipe helmet clean
- Polish surface with compound and cloth
- Apply a clear coat for protection
Wear Protective Gear
Begin by wearing a dust mask and protective eyewear to protect yourself from the dust created during sanding.
There are a lot of options for safety glasses, such as the MAGID ANSI Z87+ Performance Anti-Fog Safety Glasses, over at Amazon with great prices and great reviews.
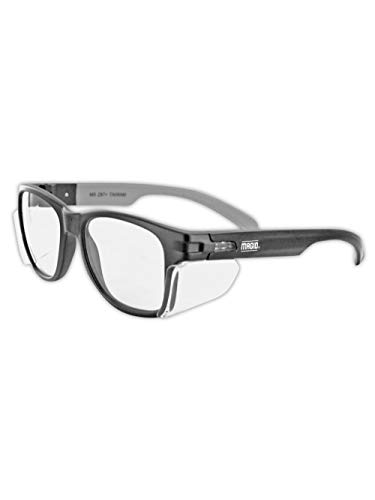
- Stylish, classic design promotes worker compliance
Prices pulled from the Amazon Product Advertising API on:
Product prices and availability are accurate as of the date/time indicated and are subject to change. Any price and availability information displayed on [relevant Amazon Site(s), as applicable] at the time of purchase will apply to the purchase of this product.
A dust mask, such as the 3M Personal Protective Equipment Particulate Respirator 8210, will help prevent inhalation of the dust, while protective eyewear will keep the dust from getting into your eyes. They are available at Amazon for great prices.
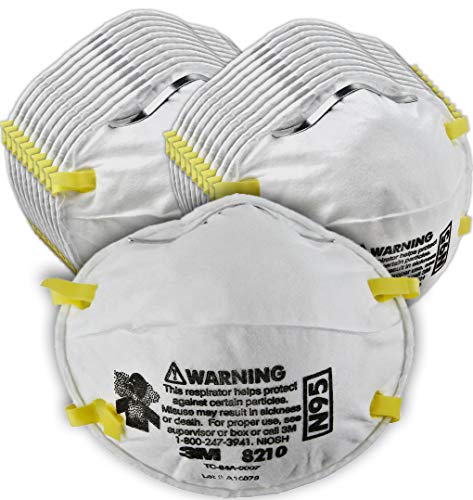
- NIOSH APPROVED: For at least 95 percent filtration efficiency against certain non-oil based particles
Prices pulled from the Amazon Product Advertising API on:
Product prices and availability are accurate as of the date/time indicated and are subject to change. Any price and availability information displayed on [relevant Amazon Site(s), as applicable] at the time of purchase will apply to the purchase of this product.
It’s also a good idea to wear gloves to protect your hands from sharp edges or any rough surfaces. You should also work in a well-ventilated area, such as a workshop or garage, to avoid breathing in too much dust.
Wet sanding with water is a good way to reduce dust from sanding.
Remove Supports or Rafts
The next step is removing any supports or rafts from the print. Use a pair of pliers or a craft knife to carefully remove the supports or rafts without damaging the rest of the print.
You can find craft knives, such as the DIYSELF 1 Pcs Craft Knife Hobby Knife Exacto Knife with great reviews and cheap prices over at Amazon. Be sure to take your time and be patient, as rushing this step can result in damage to the helmet’s surface.

- Valuable Package Content:1pcs hobby knife,10pcs hobby knife blades,1pc steel ruler(6inch/15cm long)
Prices pulled from the Amazon Product Advertising API on:
Product prices and availability are accurate as of the date/time indicated and are subject to change. Any price and availability information displayed on [relevant Amazon Site(s), as applicable] at the time of purchase will apply to the purchase of this product.
Remove Large Bumps with Rough-Grit Sandpaper
If the helmet has any large bumps or ridges, use rough-grit sandpaper (80 or 120 grit) to remove them. You can find YXYL Sandpaper of Assorted Grits for a great price over at Amazon.

- Meets All Your Needs: 48 pcs sand paper kit, 16 grits sandpaper assortment, including 3 sheets of each grit: 120, 150, 180, 220, 240, 320, 400, 600, 800, 1000, 1200, 1500, 2000, 2500, 3000, 5000 grit sanding paper
Prices pulled from the Amazon Product Advertising API on:
Product prices and availability are accurate as of the date/time indicated and are subject to change. Any price and availability information displayed on [relevant Amazon Site(s), as applicable] at the time of purchase will apply to the purchase of this product.
Begin by sanding in a circular motion to ensure that the helmet’s shape is not compromised. Take care to use even pressure when sanding, as applying too much pressure may result in uneven or jagged surfaces.
It’s a good idea to either use a sanding block or a sanding sponge like the BOSHCRAFT 10 Pack Sanding Sponge from Amazon, to create a more uniform sanding
Error: Unknown Link Type
Smooth the Surface with Finer Grit Sandpaper
After removing any large bumps or ridges with rough-grit sandpaper, switch to finer-grit sandpaper with 220 grit or higher.
Continue sanding the helmet in circular motions to smooth out the surface. It’s important to be patient and take your time, as rushing this process could result in damaging the helmet. Be sure to use even pressure and move the sandpaper evenly across the surface of the helmet.
Sand Hard-to-Reach Areas with a Sponge or Foam
The next step is to use a sanding sponge or sanding sticks to sand the harder-to-reach areas, such as the inside of the helmet. Simply wrap the sponge around your finger or a tool and gently sand the area until it is smooth.
I’d recommend going with something like the Keystone 100 Fine Sanding Twigs from Amazon. They are useful for reaching different areas of the helmet.

- Detail sanding can be very tedious work, especially when your sanding things like wooden toys, plastic scale models, wood turnings or most any small project. We often settle for a piece of sandpaper, fold it multiple times and struggle to get into tight spaces. With the perfectly sized Keystone Sanding Twigs, this becomes a thing of the past. With the 1/8 inch thick, flexible foam core, laminated with a double sided abrasive, you’ll be able to sand those hard to reach areas and more!
Prices pulled from the Amazon Product Advertising API on:
Product prices and availability are accurate as of the date/time indicated and are subject to change. Any price and availability information displayed on [relevant Amazon Site(s), as applicable] at the time of purchase will apply to the purchase of this product.
Be careful not to apply too much pressure or sand too vigorously, as this can damage the print or change its shape.
Wipe Helmet Clean
Once you have finished sanding the helmet, it’s important to wipe it clean to remove any remaining dust or debris. Use a damp cloth to gently wipe the surface of the helmet, taking care not to damage any of the details or shapes you have created.
This will ensure that the surface of the helmet is clean and ready for any further post-processing steps, such as priming or painting. Be sure to use a clean cloth and avoid using too much water, as excessive moisture can damage some types of 3D printing materials.
Polish Surface with Compound and Cloth
Once you are happy with the smoothness of the helmet, use a polishing compound and a soft cloth to polish the surface to a shiny finish.
For the polishing compound, one of the most recommended is the 3M Perfect-It EX Rubbing Compound, which is designed for removing scratches, swirl marks, and other surface defects. It is available at Amazon for great prices and features good user reviews.
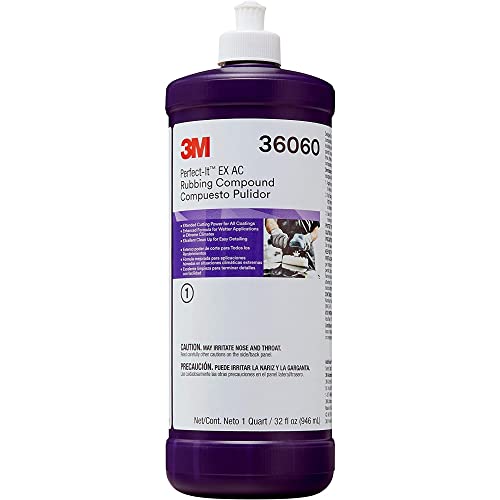
- EX rubbing compound is formulated for a broad range of user conditions without sticking or leaving residual film
Prices pulled from the Amazon Product Advertising API on:
Product prices and availability are accurate as of the date/time indicated and are subject to change. Any price and availability information displayed on [relevant Amazon Site(s), as applicable] at the time of purchase will apply to the purchase of this product.
Microfiber cloths, such as the HOMEXCEL Microfiber Cleaning Cloth, are another good choice for polishing 3D prints, as they are soft and won’t scratch the surface. You can find packs of these clothes online for a great price.
- EFFECTIVE CLEANING:Take these cleaning cloth in perfect size(11.5X11.5)to clean your worktop,kitchen,window or even your car or other delicate surfaces.With just water or cleaner,then you get streak-free and neat results.
Prices pulled from the Amazon Product Advertising API on:
Product prices and availability are accurate as of the date/time indicated and are subject to change. Any price and availability information displayed on [relevant Amazon Site(s), as applicable] at the time of purchase will apply to the purchase of this product.
To correctly polish your printed helmet, apply a small amount of polishing compound to a soft cloth. Rub the compound onto the surface of the helmet in circular motions until the surface is evenly covered.
Then, use a clean section of the cloth to buff the surface of the helmet, using a back-and-forth motion. Keep buffing until the surface is shiny and smooth.
You can use a separate cloth to remove any remaining compound residue. Be sure to take your time and buff evenly to avoid creating any new scratches or swirl marks on the surface.
Apply a Clear Coat for Protection
Finally, apply a clear coat to protect the surface of the helmet from scratches and wear. Applying a clear coat is a great way to protect the surface of the helmet from scratches and wear, especially if you plan on using it regularly or for extended periods of time.
The Krylon Clear Coat Spray is readily available at Amazon and can be applied in several thin coats, allowing each coat to dry before applying the next.
- Krylon COLORmaxx GLOSS CRYSTAL CLEAR
Prices pulled from the Amazon Product Advertising API on:
Product prices and availability are accurate as of the date/time indicated and are subject to change. Any price and availability information displayed on [relevant Amazon Site(s), as applicable] at the time of purchase will apply to the purchase of this product.
This will help ensure an even and durable finish. Once the clear coat is applied, let it dry completely before handling or wearing the helmet. Sanding is a really important part of the process if you want to have a nice-looking 3D printed helmet.
One user, who 3D printed Master Chief’s helmet, from the game Halo, stated that it took a lot of sanding to finally get the helmet to look good.
Check out the video below for detailed instructions on how to sand a 3D printed helmet.
Best Infill for 3D Printed Helmets
The best infill for 3D printed helmets is a higher infill percentage, which provides added durability and stability.
For cosplay helmets, it’s recommended to use an infill percentage of 20% or higher for added stability and durability. For display helmets, a lower infill percentage of around 10% – 15% may be enough to achieve the desired look without adding unnecessary weight.
You can also try printing with a low infill percentage, such as 5% – 10% if you use around 2 walls to achieve the necessary strength without needing much infill. The infill pattern can also affect the strength and weight of the finished product.
Honeycomb or Gyroid infill patterns offer increased strength and stability compared to other patterns like grids or lines. One user recommends the triangle infill pattern as it is the most time-saving pattern for 3D printing a helmet.
Experiment with different infill percentages and patterns to find the best fit for your project.
How to 3D Print a Star Wars Helmet
To 3D print a Star Wars Helmet go to Thingiverse and type in “Star Wars Helmet” then pick one you like.
The most popular Star Wars helmet available at Thingiverse is the Clone Trooper Helmet, which can be downloaded for free. Just be aware that the helmet was sized for an adult male.
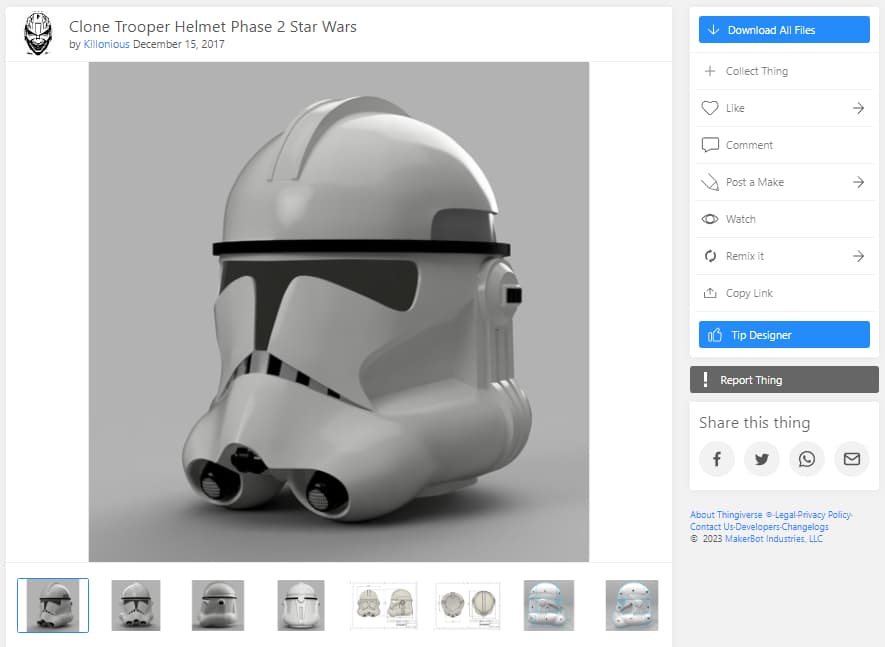
Import it to your slicer then scale the model and input your desired settings. Slice and 3D print the model, then once finished, do post-processing like sanding, priming, and painting to finish it.
Check out the video below for detailed instructions on how to 3D print a Star Wars helmet.
How to 3D Print an Iron Man Helmet
To 3D print an Iron Man Helmet, start by finding a model to download. One of the most popular options for an Iron Man Helmet is available at Thingiverse.
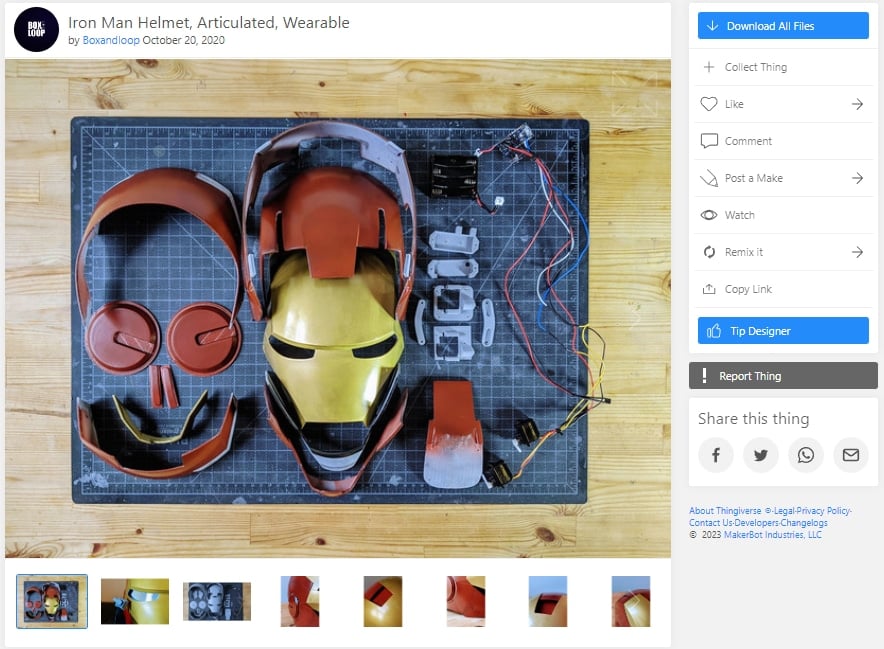
Once you have downloaded the design, import it to your slicer and adjust the Cura settings and infill as needed. Then, 3D print the helmet. After printing, sand and paint the helmet to achieve the desired finished look.
If you want to add an extra touch of authenticity, consider adding LED lights, such as the Keepsmile 100ft LED Strip Lights, to your Iron Man helmet. The lights can be purchased at Amazon for a great price.
- APP Control and Remote Control: Stick 100 ft led lights around the ceiling, under the cabinets, under the bed frame, and easily control these 100 ft led light strips using either the Keepsmile app or remote control.
Prices pulled from the Amazon Product Advertising API on:
Product prices and availability are accurate as of the date/time indicated and are subject to change. Any price and availability information displayed on [relevant Amazon Site(s), as applicable] at the time of purchase will apply to the purchase of this product.
There are many online tutorials available to guide you in adding lights to 3D printed helmets, so do some research and find the best method for your specific design and materials.
Check out the video below for detailed instructions on how to 3D print an Iron Man helmet.