3D Printed Threads, Screws & Bolts – Can They Really Work? How to
3D prints are very versatile and many people wonder whether you can 3D print threads, screws, bolts, and other similar types of parts. After wondering about this myself, I decided to look into it and do some research to figure out the answers.
There are a lot of details that you’ll want to know so keep reading through this article for more.
Can a 3D Printer Print Threaded Holes, Screw Holes & Tapped Parts?
Yes, you can 3D print threaded holes, screw holes and tapped parts, as long as the thread isn’t too fine or thin. Larger threads like on bottle caps are fairly easy. Other popular parts are nuts, bolts, washers, modular mounting systems, machine vises, threaded containers, and even thumb wheels.
You can use different types of 3D printing technology such as FDM, SLA, and even SLS to create threaded 3D prints, though the most popular ones are mainly FDM and SLA.
SLA or resin 3D printing does allow you to get much finer details with the threads compared to FDM or filament 3D printing since it operates at higher resolutions.
3D printers like the Ender 3, Dremel Digilab 3D45, or the Elegoo Mars 2 Pro are all machines that can 3D print threaded holes and tapped parts pretty well. Ensure you are printing with good settings and a dialed in 3D printer then you should be good to go.
The video below shows how one user taps 3D printed parts by embedding a hole within the model then using a tap and tap handle tool from McMaster.
Can SLA Print Threads? Tapping Resin Prints
Yes, you can 3D print threads using SLA resin 3D printers. It’s ideal because it provides high precision and accuracy with your chosen model, but I’d recommend using a resin that can handle screws well. Engineering or tough resins are great for 3D printing screw threads that can be tapped.
SLA is a great choice for designing the threads because it has high resolution and precision. It can 3D print objects at very high resolutions of up to 10 microns.
I’d recommend using a strong resin like Siraya Blu Tough Resin, which provides amazing strength and durability, perfect for tapping resin prints or 3D printing threaded objects.

How to Thread 3D Printed Parts
Making 3D printed threads is possible by using CAD software and using an in-built thread design within your models. An example would be the thread tool and coil tool in Fusion 360. You can also use a unique method called the helical path which allows you to create any thread shape you want.
3D Print Threads in the Design
Printing the threads is a great option as it reduces any damage that might occur from manually tapping a 3D printed part to create threads, but you’ll probably need to do some trial and error to get the sizing, tolerances and dimensions good enough.
3D printing has shrinkage and other factors involved so it may take a few tests.
You can print the threads of different dimensions depending on your need. Using a standard CAD software with a threading tools built within should enable you to 3D print a part with threading inside.
Here’s how to print threads in TinkerCAD.
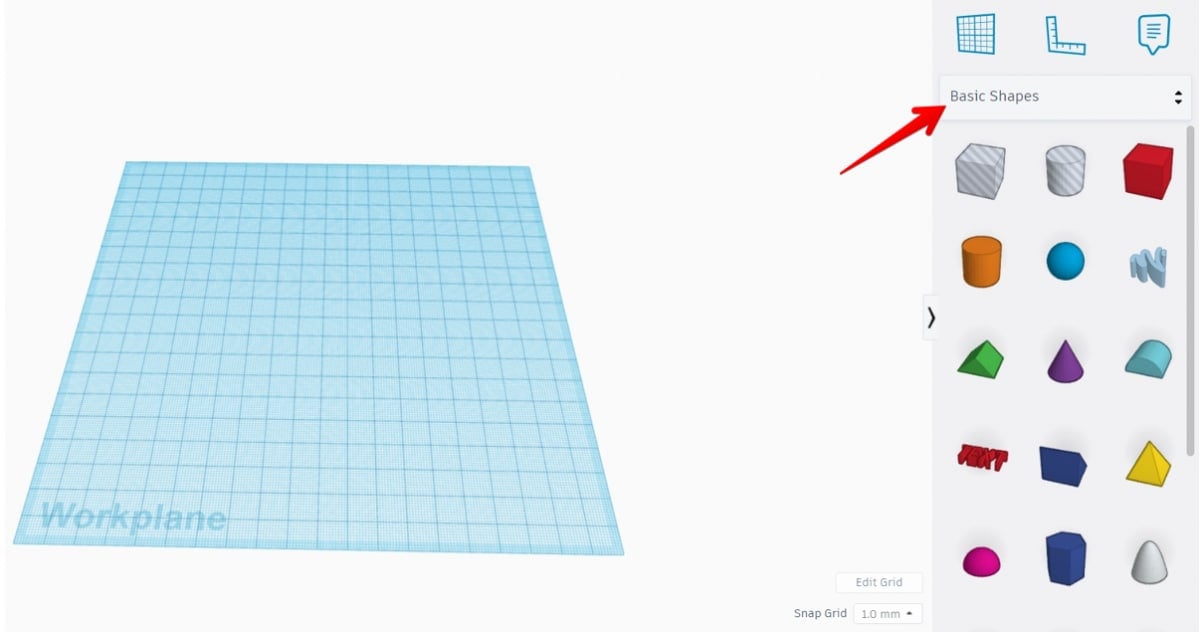
First you want to create a TinkerCAD account, then go to “Create new design” and you’ll see this screen. Check out the right side where it shows “Basic Shapes” and click that for a dropdown menu of plenty other in-built design parts to import.
I later imported a cube into the Workplane to use as an object to create a thread within.
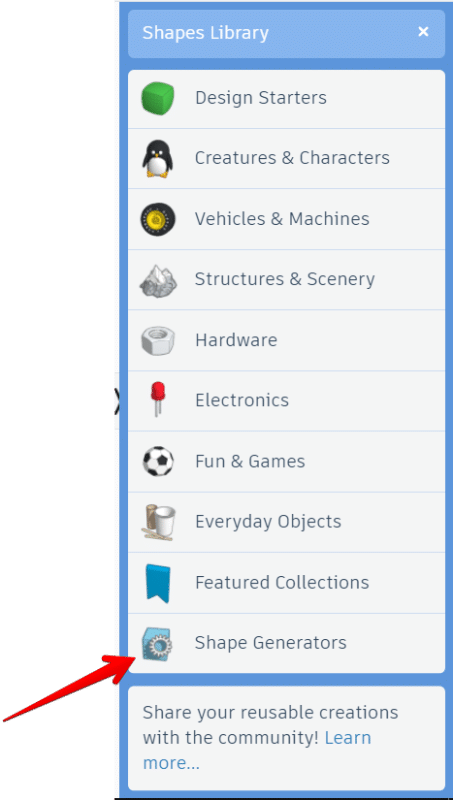
On the dropdown menu, scroll to the bottom and select “Shape Generators”
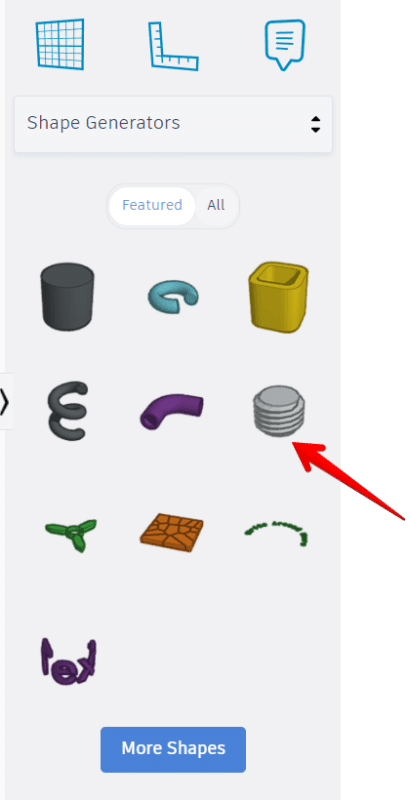
In the “Shape Generators” menu, you’ll find the ISO metric thread part which you can drag and drop into the Workplane.
When you select the thread, it will bring up plenty of parameters where you can adjust the thread to your desire. You can also change the length, width, and height by using the clicking and dragging the small boxes within the object.
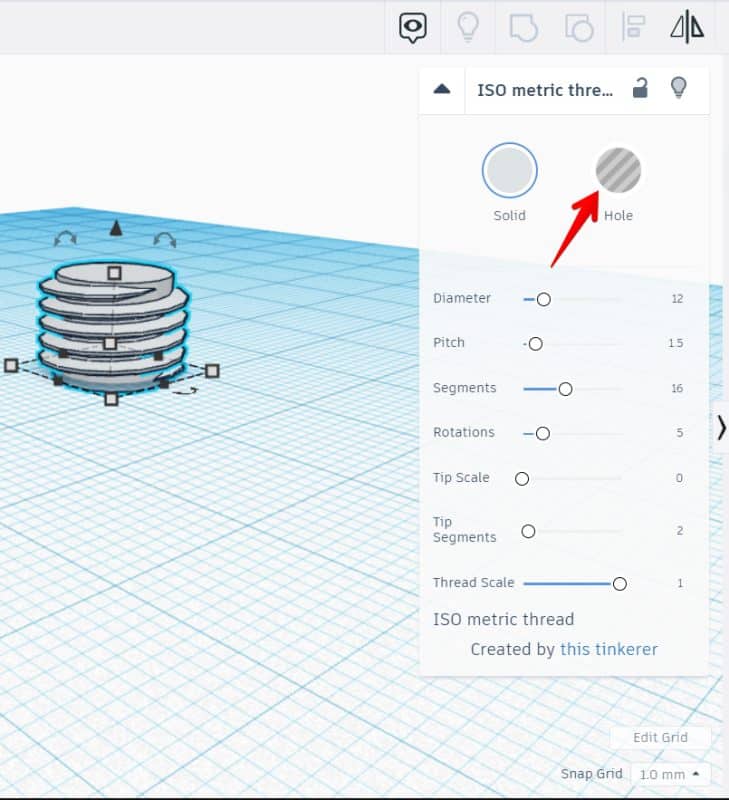
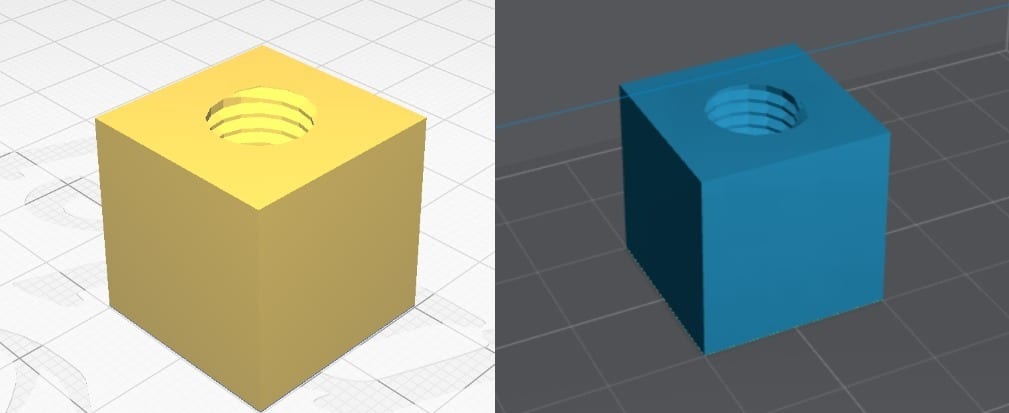
Here is how it looks when you import a cube as a “Solid” and move the thread into the cube after selecting it as a “Hole”. You can simply drag the thread to move it around and use the top arrow to raise or lower the height.

Once the object is designed how you want it, you can select the “Export” button to get it ready for 3D printing.

You can choose from .OBJ, .STL formats which are the standard used for 3D printing.

After I downloaded the threaded cube design, I imported it to the slicer. Below you can see the design imported into Cura for filament printing and Lychee Slicer for resin printing.
That’s the process for TinkerCAD.
If you want to know the process to do this in a more advanced software like Fusion 360, check out the video below by CNC Kitchen on three ways to create 3D printed threads.
Press-Fit or Heat Set Threaded Inserts
This technique for printing threads on 3D parts is very straightforward. Once the part is printed, the press-fit inserts are placed into the custom cavity.
Similar to press-fit inserts, you can use also use something like hexagonal nuts with heat to push and insert your threads directly into your 3D print, where there is a designed recessed hole.
It may be possible to do this without a recessed hole but it would take more heat and force to get through the plastic. People usually use something like a soldering iron and heat it up to the melting temperature of the plastic they are using.
Within seconds, it should sink into your 3D print to create a lovely inserted thread that you can put to use. It should work well with all sorts of filament such as PLA, ABS, PETG, Nylon & PC.
Are 3D Printed Threads Strong?
3D printed threads are strong when they are 3D printed out of strong materials like tough/engineering resin, or ABS/Nylon filament. PLA 3D printed threads should hold up well and be durable for functional purposes. If you use normal resin or brittle filament, the 3D printed threads might not be strong.
CNC Kitchen did a video testing just how strong threaded inserts are compared to 3D printed threads, so definitely check that out for a more thorough answer.
Another factor when it comes to 3D printed threads is the orientation that you print the objects in.
Horizontally 3D printed screws with supports can be considered stronger compared to vertically 3D printed screws. The video below shows some testing on different orientations when it comes to 3D printing bolts and threads.
It looks at strength testing, the design of the bolt and threads themselves, the level of stress it can handle, and even a torque test.
Can You Screw into 3D Printed Plastic?
Yes, you can screw into 3D printed plastic but it needs to be done carefully so you don’t crack or melt the plastic. It’s important to use the right type of drill bit and ensure the speed of the drill doesn’t create too much heat which can have a negative effect on the plastic, especially PLA.
Screwing into ABS plastic is said to be much easier than other filaments. ABS plastic is less brittle and also has a high melting point.
If you have some basic design skills, you should be able to incorporate a hole within the print so you wouldn’t have to drill a hole into the model. A hole that’s drilled wouldn’t be as durable as a hole that is built in to the model.
It is a good practice to print the hole during the printing of the model. If I compare the printed hole and the drilled hole, the printed hole is more reliable and strong.
Well, drilling may cause damage to the whole architecture. Here I have some of the useful tips for drilling the hole in the 3D plastic accurately without damaging the architecture:
Drill Perpendicularly
The printed plastic has different layers. Drilling in the printed plastic in the wrong direction will result in the splitting of the layers. While researching for this problem, I found that we should use the drilling machine perpendicularly to make the hole without harming the architecture.
Drill the Part While Warm
Warming up the drilling point before screwing into it will reduce the hardness and brittleness of that point. This technique should help to prevent cracks in your 3D prints.
You can use a hairdryer for this purpose, but try not to increase the temperature to the point where it starts to soften too much, especially with PLA since it has a fairly low heat resistance.
How to Embed Nuts in 3D Prints
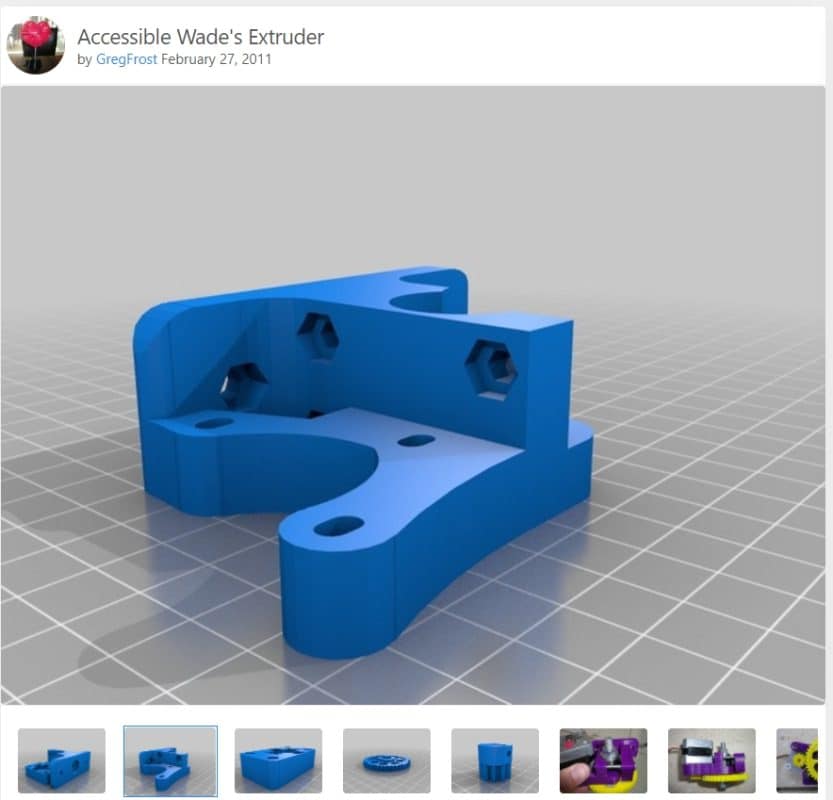
It’s possible to embed nuts into your 3D prints mainly by designing your model to be able to fit a captive nut in a recessed area. An example of this is from a Thingiverse model called Accessible Wade’s Extruder, which requires quite a few screws, nuts and parts to put it together.
It has recessed areas built into the model so screws and nuts can fit in better.
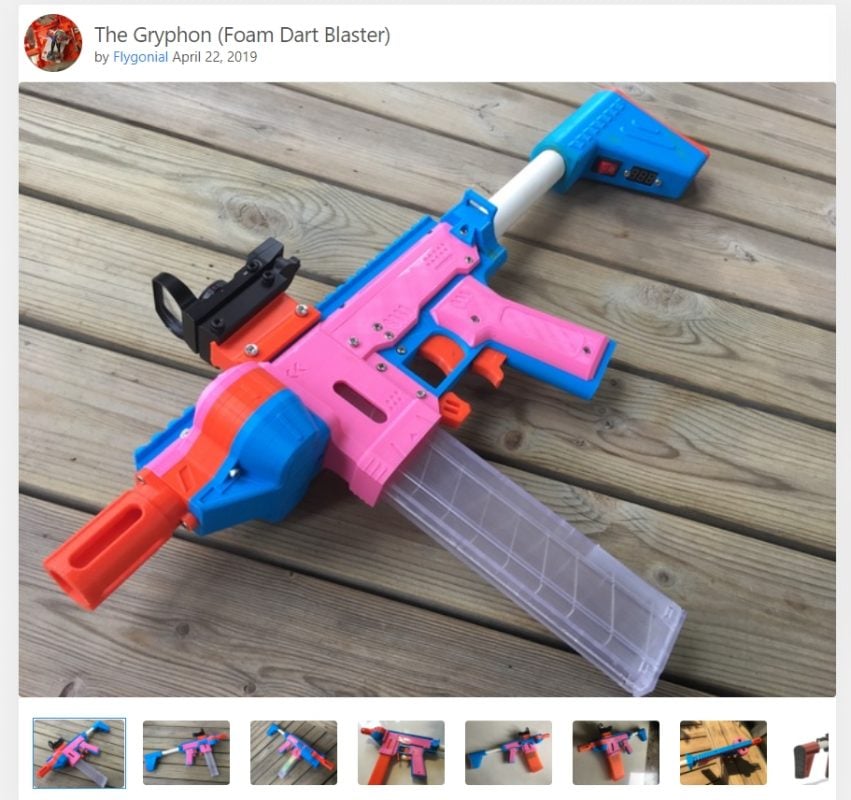
Another much more complex design that has several recessed hexagonal areas to fit captive nuts is The Gryphon (Foam Dart Blaster) from Thingiverse. The designer of this model requires many M2 & M3 screws, as well as M3 nuts and much more.
You can get plenty of ready-made designs on different online platforms, such as Thingiverse and MyMiniFactory where the designers have already embedded nuts in the 3D prints.
For more details, check out the video below.
How to Fix 3D Printer Threads That Don’t Fit
To fix 3D printer threads that don’t fit, you need to calibrate your extruder’s steps carefully so that your extruder is extruding the correct amount of material. You can also calibrate and adjust your extrusion multiplier to help get a more accurate flow rate for good tolerance. Over extrusion will cause issues here.
Check out my article on 5 Ways How to Fix Over-Extrusion in Your 3D Prints.