How to Make Your Ender 3 Bigger – Ender Extender Size Upgrade
Who doesn’t like bigger when it comes to 3D printing? If you have space, I’m sure you’ve thought about expanding your 3D printing capabilities, so it covers more ground. This is definitely possible, and this article will detail how to make your 3D printer bigger.
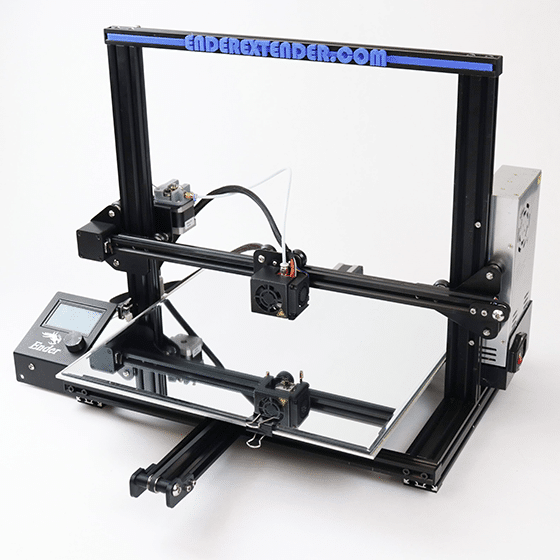
The best method to make an Ender 3 printer bigger is to use a designated conversion kit like the Ender Extender 400XL. You can upgrade the aluminum extrusions to larger ones, then refit the necessary parts to increase your build volume. Make sure to change your slicer to reflect your new print bed volume.
There are many options on increasing the size of your 3D printer, and it takes quite a bit of work to get this implemented. Throughout this article, I’ll state the options and size increases you can get, as well as link to installation guides.
This isn’t a simple process for some kits, so keep on reading to get a nice explanation on making your Ender 3/Pro bigger.
What Size Upgrade Options Are There for the Ender 3/Pro
- Ender Extender XL – Increases height to 500mm
- Ender Extender 300 – Increases length & width to 300mm
- Ender Extender 300 (Pro) – Increases length & width to 300mm
- Ender Extender 400 – Increases length & width to 400mm
- Ender Extender 400 (Pro) – Increases length & width to 400mm

- Ender Extender 400XL – Increases length & width to 400mm & height to 500mm
- Ender Extender 400XL (Pro) – Increases length & width to 400mm & height to 500mm
- Ender Extender 400XL V2 – Increases length & width to 400mm & height to 450mm
These kits are made to order, so they can take some time to process and ship. Depending on availability of required parts, they can take around three weeks to process.
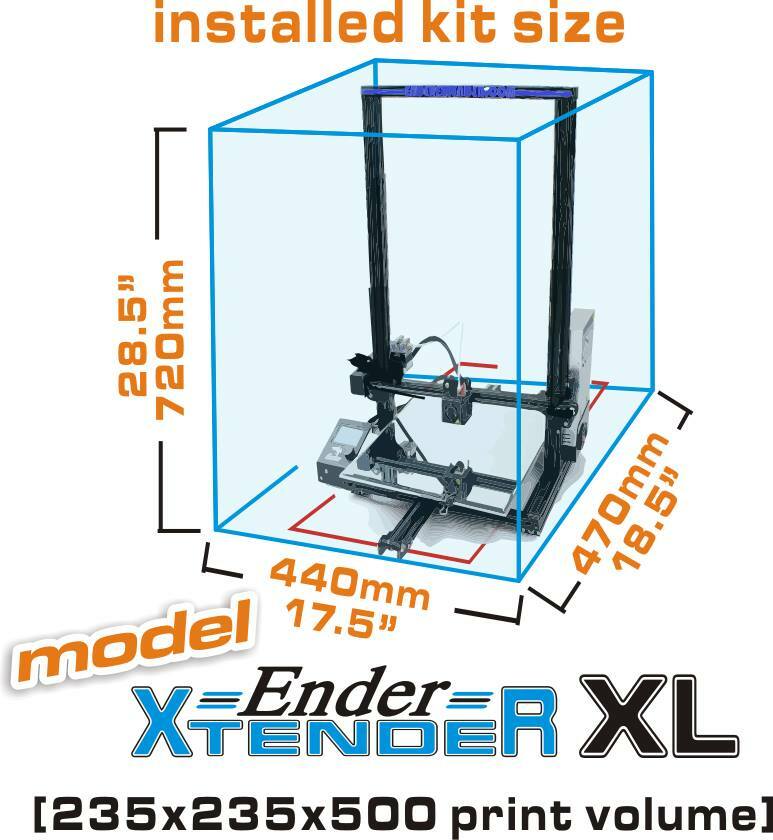
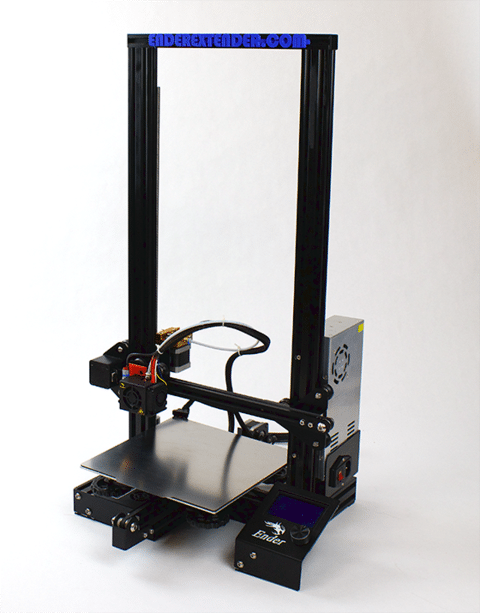
Ender Extender XL ($99) – Height Upgrade
This Ender kit upgrade option increases the height of your Ender 3 to a massive height of 500mm.
It comes with:
- x2 aluminum extrusions (Z axis)
- x1 lead screw
- 1x-meter length wiring harness for the extruder/X axis motors & X axis endstop
For an in-depth guide on how to install your Ender Extender XL you can check out the Ender Extender XL Installation Guide PDF.
There are also many enthusiasts in a Creality Ender 3XLBuilders Facebook Group, especially for upgrading the size of their Ender 3s.
It’s not a difficult process, and just requires a few tools and some steady hands to get right.
Ender Extender 300 ($129)
The Ender Extender 300 is made for the standard Ender 3 and it increases your build volume to 300 (X) x 300 (Y), while keeping the same height.
You can also purchase a 300 x 300mm (12″ x 12″) mirror from Ender Extender for just $3.99.
This has very similar parts to the Ender Extender 400, but just smaller.
Ender Extender 300 (Pro) ($139)
The Ender Extender 300 is made for the Ender 3 Pro and it increases your build volume to 300 (X) x 300 (Y), while keeping the same height.

This has very similar parts to the Ender Extender 400, but just smaller.
The 300 x 300mm mirror will still be usable with this upgrade.
Ender Extender 400 ($149)
This is for the standard Ender 3 and it extends your printing dimensions to 400 (X) x 400 (Y), leaving the Z height the same.

It comes with:
- x1 400 x 400mm aluminum plate; four holes drilled and counter-sunk for attachment to existing Ender 3 heated build plate
- x1 3D printed motor mount for Y axis motor (non-pro only)
- x1 3D printed Y axis belt tensioner bracket (non-pro only)
- x1 2040 aluminum extrusion (Y Axis; non-pro only)
- x3 2020 aluminum extrusion (top, bottom rear, bottom front)
- x1 2020 aluminum extrusion (X axis)
- x1 X axis 2GT-6mm belt
- x1 Y axis 2GT-6mm belt
- x1 bag of screws, nuts, washers
- x1 14 AWG (36″ / 1000mm length) silicone coated wire for power supply
- x1 24-inch flat LCD cable
- x1 500mm PTFE tube
For the extender upgrades which increase the size of the bed, it’s important to keep in mind that you are still going to be using the same A/C powered heated build plate which would require increased heat to better distribute, but not ideal.
The best solution would be to get a full-sized heating pad so you can properly heat the whole surface of your larger build surface.
Check out Ender Extender’s Guide on A/C Powered Heating Pad Installation.
Disclaimer: Installation is simple, but it does require interfacing with high voltage A/C power. You can mitigate possible failures with extra add-ons. The installation guide above also has disclaimers to make sure you are aware of the limitation of liability and more.
You should plan on getting yourself a 400 x 400mm (16″ x 16″) mirror or glass to use as a build surface.
Ender Extender 400 (Pro) ($159)
This is for the Ender 3 Pro and gives you printing capabilities of 400 x 400mm, also leaving the Z height the same.
- x1 400 x 400mm aluminum plate; four holes drilled and counter-sunk for attachment to existing Ender 3 heated build plate
- x1 4040 aluminum extrusion (Y Axis)
- x3 2020 aluminum extrusion (top, bottom rear, bottom front)
- x1 2020 aluminum extrusion (X axis)
- x1 X axis 2GT-6mm belt
- x1 Y axis 2GT-6mm belt
- x1 bag of screws, nuts, washers
- x1 14 AWG (36″ / 1000mm length) silicone coated wire for power supply
- x1 24 inch flat LCD cable
- x1 500mm PTFE tube
You should get yourself a nice surface which is 400 x 400mm or 16″ x 16″ to accompany your upgraded Ender 3. A good flat build surface that people use is either mirror or glass.
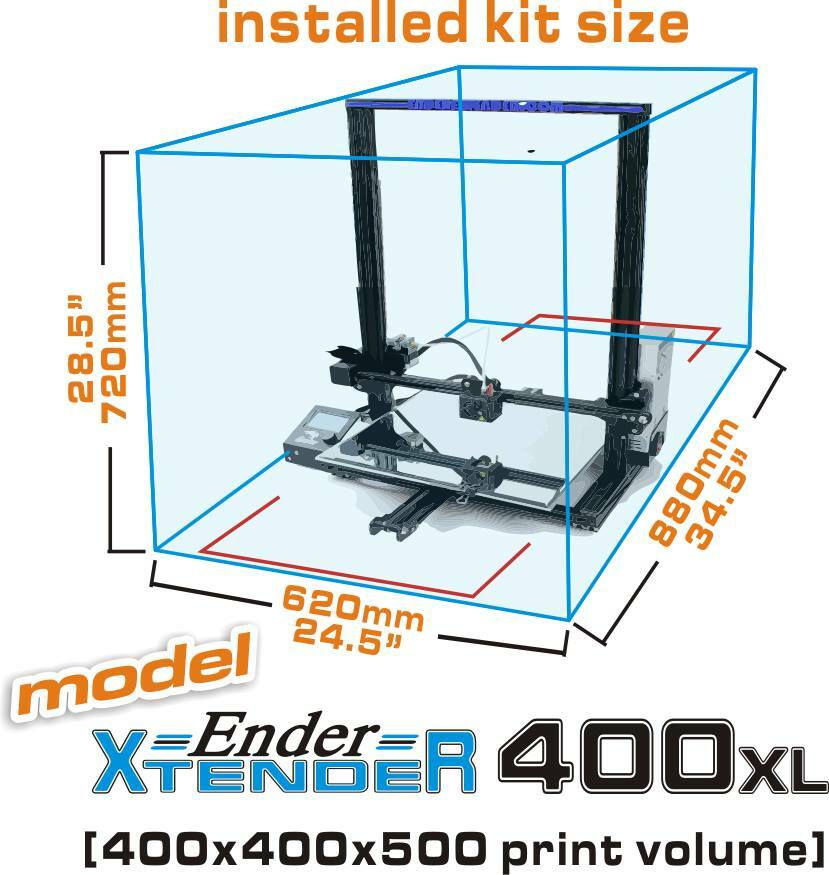
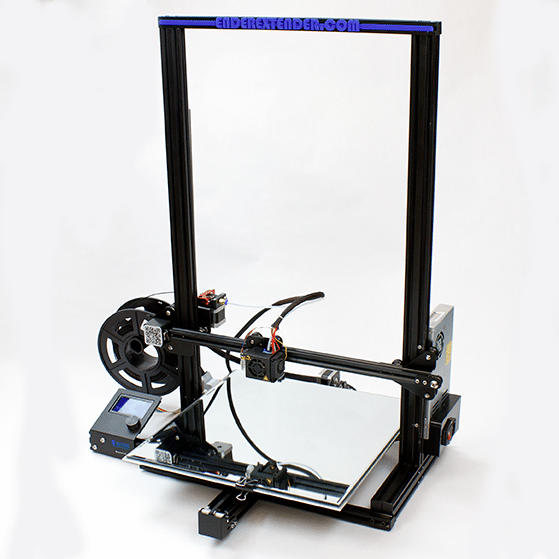
Ender Extender 400XL ($229)
This is for the standard Ender 3 and this kit extends the dimensions of your machine to a fantastic 400 (X) x 400 (Y) x 500mm (Z).
It comes with:
- x1 400 x 400mm aluminum plate; four holes drilled and counter-sunk for attachment to existing Ender 3 heated build plate
- x1 1-meter length wiring harness for extruder motor/X-axis motor/x-axis end stop
- x1 3D printed motor mount for Y axis motor (non-pro only)
- x1 3D printed Y axis belt tensioner bracket (non-pro only)
- x1 2040 aluminum extrusion (Y Axis; non-pro only)
- x2 2040 aluminum extrusion (Z Axis)
- x3 2020 aluminum extrusion (top, bottom rear, bottom front)
- x1 2020 aluminum extrusion (X axis)
- x1 X axis 2GT-6mm belt
- x1 Y axis 2GT-6mm belt
- x1 Lead screw
- x1 bag of screws, nuts, washers
- x1 14 AWG (36″ / 1000mm length) silicone coated wire for power supply
- x1 24-inch flat LCD cable
- x1 500mm PTFE tube
Get a 400 x 400mm build surface with this upgrade.
Ender Extender 400XL (Pro) ($239)
This is for the Ender 3 Pro and it also extends your dimensions to 400 (X) x 400 (Y) x 500mm (Z).

It comes with:
- x1 400 x 400mm aluminum plate; four holes drilled and counter-sunk for attachment to existing Ender 3 heated build plate
- x1 1-meter length wiring harness for extruder motor/X-axis motor/x-axis end stop
- x1 4040 aluminum extrusion (Y Axis; pro only)
- x2 2040 aluminum extrusion (Z Axis)
- x3 2020 aluminum extrusion (top, bottom rear, bottom front)
- x1 2020 aluminum extrusion (X axis)
- x1 X axis 2GT-6mm belt
- x1 Y axis 2GT-6mm belt
- x1 Lead screw
- x1 bag of screws, nuts, washers
- x1 14 AWG (36″ / 1000mm length) silicone coated wire for power supply
- x1 24-inch flat LCD cable
- x1 500mm PTFE tube
Again, you should get yourself a nice surface which is 400 x 400mm or 16″ x 16″ to accompany your upgraded Ender 3. A good flat build surface that people use is either mirror or glass.
Ender Extender 400XL V2 ($259)
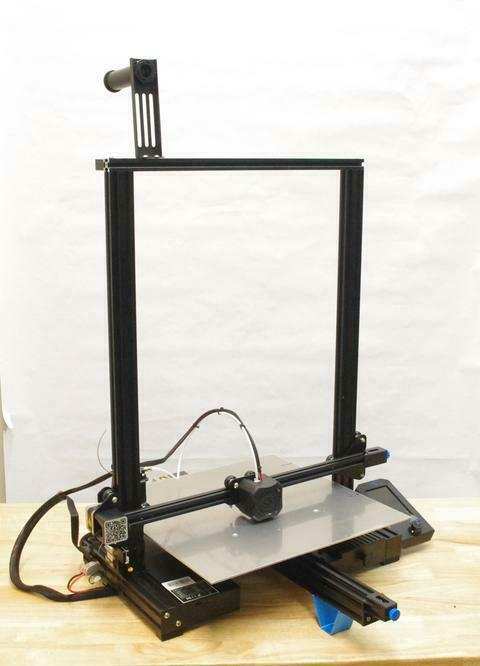
This is a later release of the kits which came after the growing popularity of the Ender V2. It increases your printing size to 400 (X) x 400 (Y) x 450mm (Z).
It comes with:
- x1 400 x 400mm aluminum plate; four holes drilled and counter-sunk for attachment to existing Ender 3 heated build plate
- x1 4040 aluminum extrusion (Y axis)
- x1 2020 aluminum extrusion (top)
- x2 2040 aluminum extrusions for the z axis
- x1 2020 aluminum extrusion (X axis)
- x1 4040 cross member
- x1 X axis 2GT-6mm belt
- x1 Y axis 2GT-6mm belt
- x1 bag of screws, nuts, washers
- x1 14 AWG (16″ / 400mm length) silicone coated wire extension for heated bed
- x1 26 AWG wire extension for bed thermistor
- x1 500mm PTFE tube
- x1 LCD extension wire
You can get your 400 x 400mm (16″ x 16″) Glass Bed directly from Ender Extender.
How Do You Make an Ender 3 Printer Bigger?
The Ender 3 has one of the biggest communities for 3D printers, and that also translates to mods, upgrades and tricks you can implement in your machine. After some time, you may start to outgrow your first printer, but if it’s an Ender 3 you can increase your build area.
In order to make your Ender 3 bigger, get yourself one of the kits above and follow the installation guide or video tutorial.
Note: Remember, all these Ender Extruder kits are not created by Creality, but a third-party manufacturer develops them. Upgrading the Ender 3 with the help of a kit will void your warranty and require extra firmware modification.
The video below is a great illustration and display of the Ender 3 conversion using an Ender Extender Kit.
Before getting started, you’ll want to have a nice large workspace which you can easily organize your parts.
As previously mentioned, there are many guides and tutorials you can follow, and even the standard Ender 3 assembly videos can be followed to a certain extent since the pieces are very similar, just bigger.
You can find the Ender Extender Installation Guides here.
Generally speaking, you’re going to be disassembling and reassembling your Ender 3 with larger parts. Firmware changes are going to be needed too, where you change the sizes of X & Y, as well as Z if you are using a taller kit.
You should also make these changes in your slicer too.