Is FreeCAD Good for 3D Printing?
FreeCAD is a software that you can use to design 3D models, but people wonder whether it’s good for 3D printing. This article will answer that question so you have better knowledge about using it.
Keep on reading for more information about using FreeCAD for 3D printing.
Is FreeCAD Good for 3D Printing?
Yes, FreeCAD is good for 3D printing because it is regarded as one of the top CAD programs available for 3D printing. It also possesses a wide range of tools for creating top-notch designs. The fact that it is completely free makes it a very popular option for anyone looking to create models for 3D printing.
You can create some unique models for 3D printing using FreeCAD, along with editing already-made models with the various tools available on the software’s interface.
Many users have said that it isn’t the most straightforward software to use and requires a bit of a learning curve before you can begin using it comfortably. Since there aren’t many available resources to learn from, there aren’t too many people that are proficient with it.
Although this number is bound to increase with time as more people tend to migrate into the FreeCAD ecosystem.
FreeCAD is an open-source software that has a quite outdated user interface compared to other CAD software, especially the premium ones.
Users do mention that FreeCAD is great for creating mechanical designs. One user who has been using it for years said it does everything he has wanted it to do, after getting over the initial learning curve.
This user made a great first model using FreeCAD of coat hanger for backpacks, then 3D printed them with PLA. They did mention that the learning curve was steep, but they could get the shape exactly how they wanted with it.
Another user who has 20 years of experience with CAD software like Solidworks and Creo said he didn’t like working with FreeCAD, so it really comes down to preference.
It’s possible to design things using a combination of FreeCAD and Blender like one user mentioned. She said that FreeCAD can be frustrating at times though. A few issues were things like topological naming doesn’t work well so parts may be limited to a single solid.
There isn’t a built-in assembly bench and the software can crash at the worst of times, containing error messages that don’t give much information.
Check out the video below of someone who used FreeCAD to model a trashcan lock that he could 3D print. His dog managed to get in there and make a mess.
FreeCAD offers you a wide range of tools, some of which are only accessible to premium users of other CAD software.
Another cool thing with FreeCAD is being able to choose from a range of navigation styles from different CAD software out there like Blender, TinkerCAD, OpenInventor and more.
Another one of the benefits of FreeCAD is that you can use the models commercially without having to worry about any licenses. You can easily save your designs on your storage device instead of the cloud so you can easily share designs with other people.
FreeCAD grants free access to premium CAD features, for example, 2D drafting. This particular feature comes in handy when you need to work directly from schematics, especially when working on complex projects and you need to confirm important details such as dimensions.
FreeCAD is also compatible with various operating systems, like Mac, Windows, and Linux.
Here’s a YouTube video review on the FreeCAD software.
How to Use FreeCAD for 3D Printing
If you want to get started with making models for 3D printing, you have to take the following steps:
- Download the FreeCAD Doftware
- Create a 2D Base Sketch
- Modify the 2D Sketch into a 3D Model
- Save the Model in STL Format
- Export the Model into Your Slicer Software
- 3D Print Your Model
Download the FreeCAD Software
Without the software, you basically cannot do anything. You need to download the software from the FreeCAD website. On FreeCAD’s webpage, download the software that is compatible with your device’s operating system.
After downloading, install the file and you are good to go. You do not need to subscribe to use the software since it’s free.

Create a 2D Base Sketch
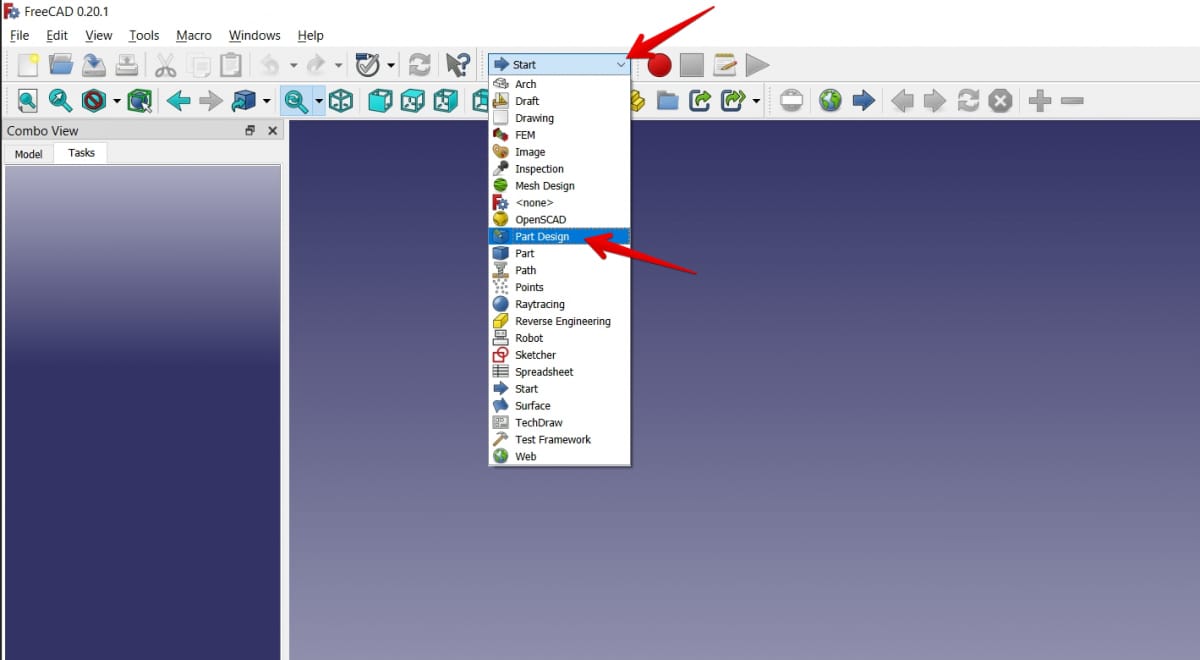
After you have finished installing the FreeCAD software, the first step is to go to the drop-down menu at the top middle of the software which says “Start” and select “Part Design”.
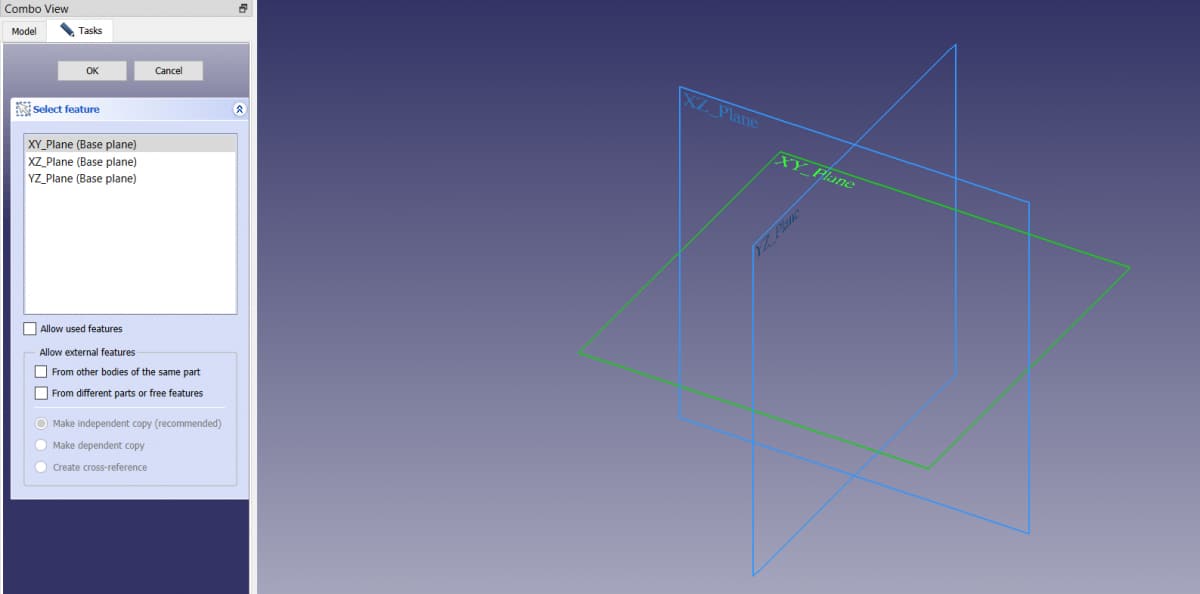
After that, we want to create a new file, then go to “Tasks” and select “Create Sketch”.

You can then select a Plane to work in, either the XY, XZ or YZ axis to create a new sketch.
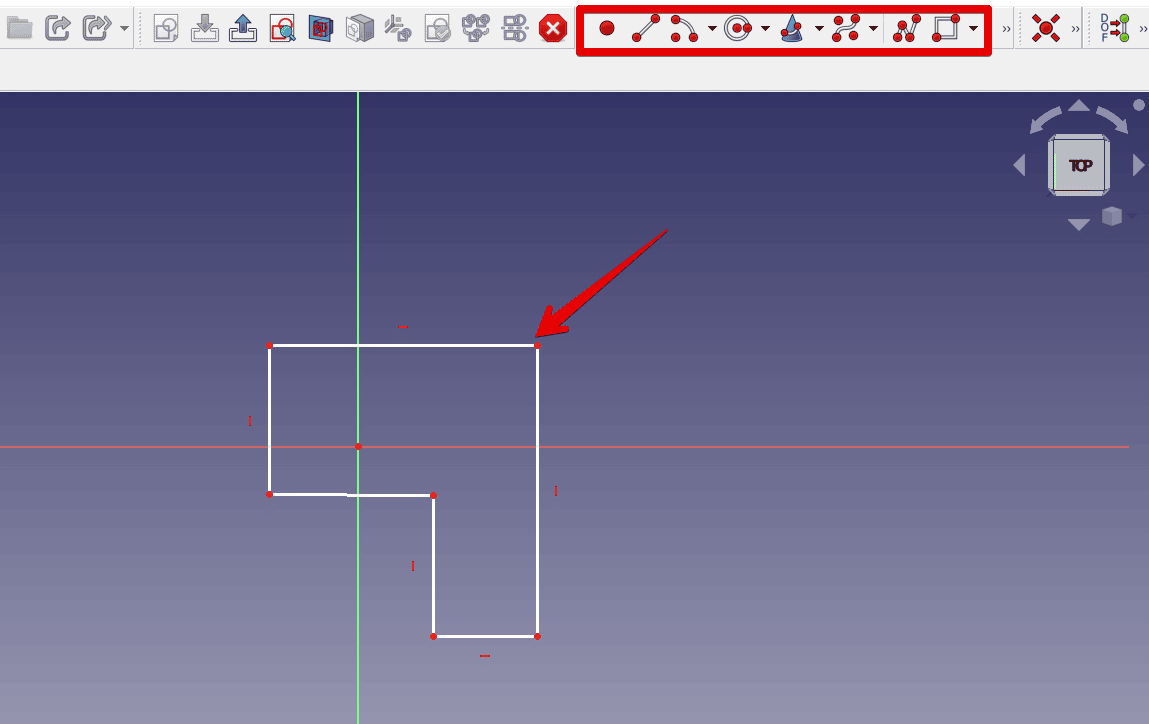
After you have selected a Plane, you can now start sketching with the various 2D tools available to create your desired sketch.
Some of these tools are regular or irregular shapes, linear, curved, flexible lines, and so on. These tools are on the top menu bar on FreeCAD’s user interface.
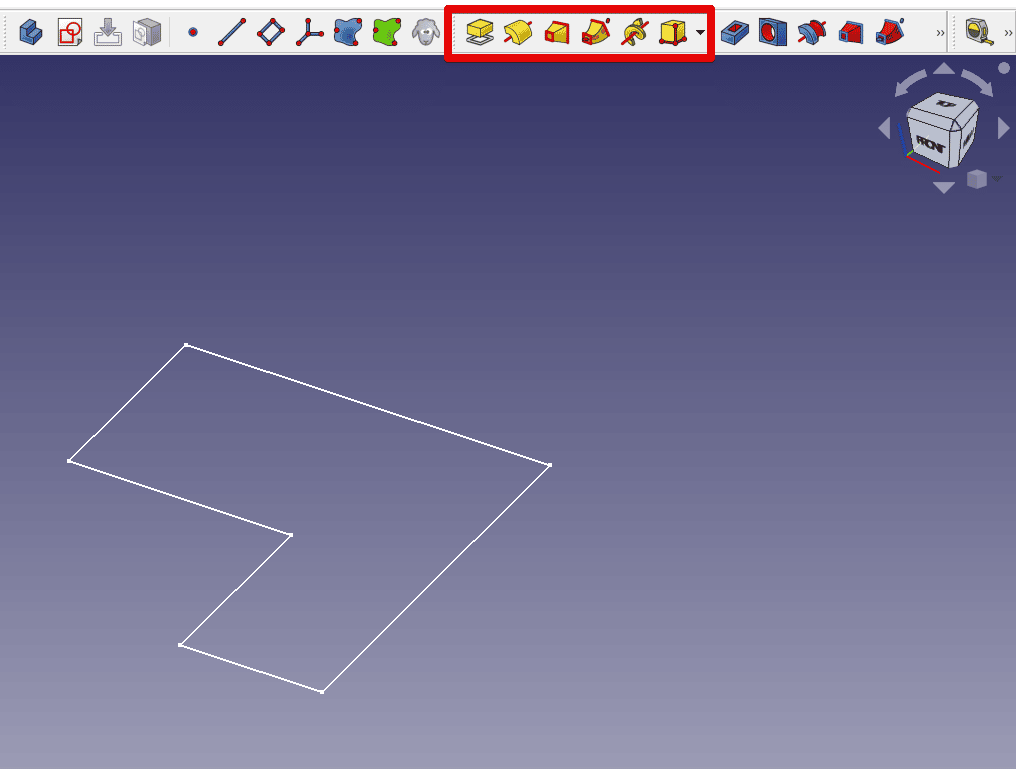
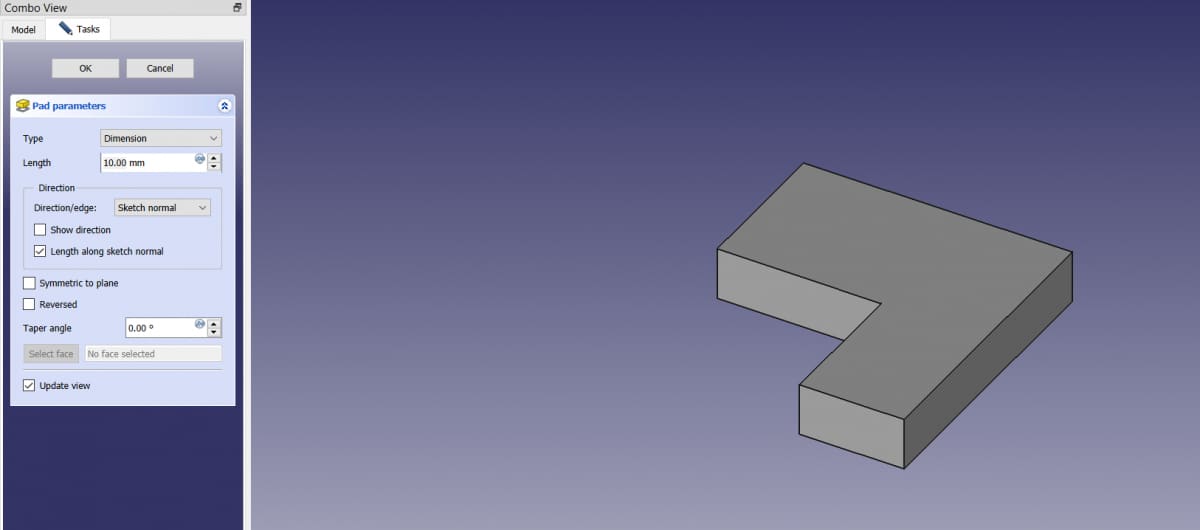
Modify the 2D Sketch Into a 3D Model
Once you complete your 2D sketch, you can transform it into a solid 3D model. Close the 2D sketch view, so that you can now have access to the 3D tools. You can now make use of the extrude, revolve, and other 3D tools on the top menubar to design your design to your preferred model.
Save the Model in STL Format
On completing your 3D model, you would need to save the model as an STL file. This is to ensure that your slicer software can read the file correctly.
Export the Model Into Your Slicer Software and Slice it
After saving your Model in the right file format, export the model into your preferred slicer software, for example, Cura, Slic3r, or ChiTuBox. On your slicer software, slice the model, and adjust the necessary setting and model orientation before printing.
3D Print Your Model
On slicing your model and adjusting the necessary printer settings and orientation layout needed for optimal printing, connect your PC to your printer and start printing. You can also save the file to an external storage device and insert it into your printer if your 3D printer supports it.
Here’s an introductory video for creating designs using FreeCAD.
This video shows you the whole process of downloading FreeCAD to creating a model, to exporting the STL file to 3D print in just 5 minutes.