How to Use Cura Post-Processing Scripts – Change Filament & More
There are many useful features in Cura, one of which is post-processing scripts. One of these allows you to change filament mid-print and plenty more.
You’ll want to keep on reading to learn how to use these post-processing scripts.
What Cura Post-Processing Scripts Are There?
Cura post-processing scripts are compiled instructions that users have created that you can use to do unique tasks, done within your model’s G-Code file.
Here’s a list of some available Cura post-processing scripts:
- Change at Z
- Color Mix
- Create Thumbnail
- Display Filename and Layer on LCD
- Display Progress on LCD
- Filament Change
- Insert at Layer Change
- Pause at Height
- Retract Continue
- Search and continue
- Time Lapse
- Use Previous Probe Measurements
To access them, click on the Extensions menu on the top toolbar. Next, navigate to Post-Processing > Modify G-Code.

On the menu that appears, select Add a Script.

With these scripts, you can modify your 3D model’s G-Code to perform a specific task during printing. For example, the Change at Z script modifies the settings of your print when it reaches a certain height.
The Pause at Height also stops the model at a certain height while waiting for a user action to resume.
Additionally, you have scripts that you can use to change the material properties of your model. An example is the Color Mix option which works with Dual Extruder single nozzle setups.
You can use it to blend different colors of filaments to achieve a different color. The Filament Change option also allows you to change your filament color mid-print.
Lastly, you also have scripts that let you monitor the progress of your print. Scripts like the Display Progress on LCD and Display Filename and Layer on LCD are examples of this.
If you have some programming knowledge, you can also modify these scripts. For example, this user modified the Display Progress on LCD script to display the time left for printing.
I added this post processing script in Cura to add the estimated time remaining and the layer number, this is incredibly useful
byu/AL_O0 in3Dprinting
You can even create your custom script and add it to Cura if you have the technical knowledge.
Here’s a cool example of a user who created their own script called the 3DPrintColorizer that uses multiple sharpies on a 3D print to color it in while printing.
How to Use Post-Processing Scripts
There are several post-processing scripts built into Cura that you can use in your 3D prints. I’ll go through some of the most commonly used ones in more detail:
- Change At Z
- Display Filename and Layer On LCD
- Filament Change
- Insert At Layer Change
- Pause At Height
- Retract Tower
- Speed Tower
- Time Lapse
How To Use The Change At Z Script
The Change at Z Script lets you change various print settings once the print reaches a specific layer or height. For example, this user used the script to change the temperature of their print at multiple points within the print.
You can run multiple instances of this script to change the printer’s settings at various heights.

To use it, click on it to add it to your script list. After adding it, you’ll have to modify its settings. Here are a few ones.
Enable
This helps you enable or disable the particular Change at Z scripts. It’s useful if you just want to turn that specific script off without deleting or erasing it.
Trigger
The Trigger option lets you choose the unit you want to use for the print’s height. You can choose between height (mm) or layer number.
Change Height/Layer
The Change Height/Layer setting sets the layer height or layer number where the changes you set in the script will take place. Depending on the option you choose in the Trigger setting, the slicer will either display Change Height or Change Layer.
The Change Height setting is in mm, while the Change Layer uses layer numbers.
Apply To
The Apply To setting determines whether the changes you select will be applied in a single layer or over multiple layers. It has two options; Target Layers only and Target Layer + Subsequent Layers.
Output To Display
The Output To Display options displays the changes you are making to the G-Code on your 3D printer’s LCD interface.
Change*
The Change * settings are the various print settings you can alter using the change at Z scripts. You can change the print speed, fan speed, bed temperature, etc.
For example, if you want to change the bed temperature at a certain height. First, you click the Change Bed Temp box.
Next, another menu will appear where you’ll input the new temperature you want.
Note: You can change multiple print settings using ONE script. But you can only change them at the same height.
You’ll need to use more than one script for changes at more than one Z-height.
Also, like one Cura developer said, changes on the scripts overlay each other. For example, let’s say you’re printing at 30mm/s and you reduce the speed by 50% to 15mm/s.
The new standard speed is 15mm/s. So, if you want to get it back to 30mm/s in a future layer, you’ll have to input 200% in the box, not 100%, since 100% of 15mm/s will still leave it at 15mm/s.
How to Use the Display Filename and Layer On LCD Script
The Display Filename and Layer script displays the 3D model’s filename and the layer number the printer is currently printing on the LCD.
CHEP on YouTube made a cool video on how you can use this script.
You can modify this by using the following additional sub-settings:
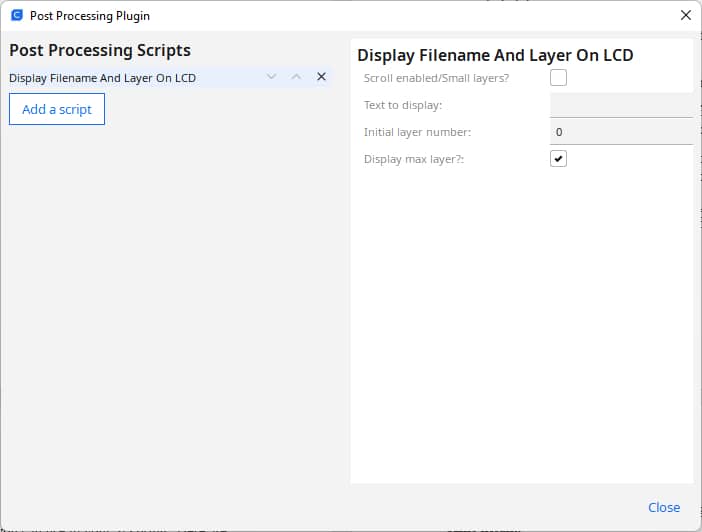
Text To Display
The Text to Display setting allows you to change the text the printer will display on the LCD. The default name is the 3D model’s filename. However, putting anything in the Text to Display box will automatically override the 3D model’s filename and display the text input.
Initial Layer
The Initial Layer option lets you choose how to start the numbering of your layers. If you select option 0, the layer numbering will start from Layer 0. Conversely, if you choose layer 1, the numbering will start from layer 1.
Display Max Layer
In addition to the file name and current layer number, the display max layer setting will display the total number of layers in the print.
Filament Change
The Filament Change script pauses the print so you can swap out filament mid-print. This is very useful when you want to create multicolor prints, and you have only one extruder and nozzle.
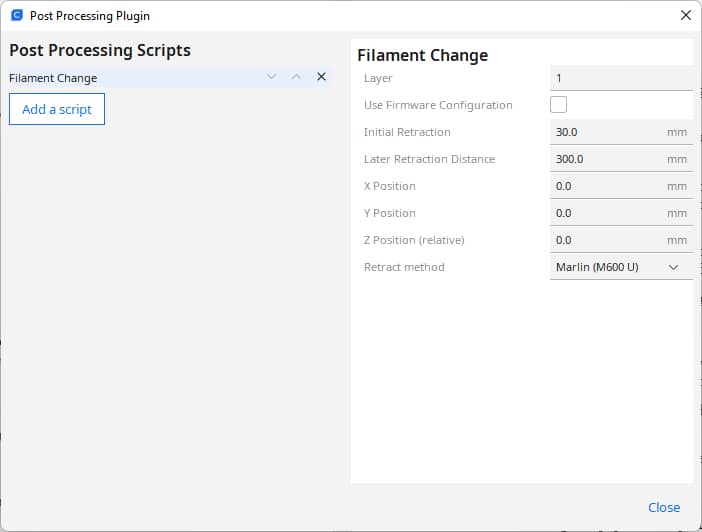
Here are some of its settings:
Layer
The Layer setting is where you specify the layer number you want your print to pause at so you can change the filament. You can specify multiple layer numbers to pause at.
Just make sure you separate them with a comma.
Note: The layer change starts before the layer you put in the box. If you want to change layers at the end of layer 20, you have to put 21 in the box.
Use Firmware Configuration
The printer uses the firmware configuration settings to handle nozzle parking after a pause. It also controls how the printer pulls the filament out of the nozzle when it’s time to change it.
You can check the box if your printer has firmware settings for doing this. If it doesn’t, you can specify your custom settings.
Z-Position Relative
The Z-Position relative setting lets you move up your printhead when the printer pauses for filament change. Just specify a height in mm in the box.
Note: It’s relative, so the printer measures the height from where the nozzle stops, not the bed.
How to Use the Insert at Layer Change Script
The Insert at Layer Change lets you put a G-Code command that’s executed every time your printer changes layers. For example, you can add an M240 command that triggers your camera to take a picture of the print after every layer.
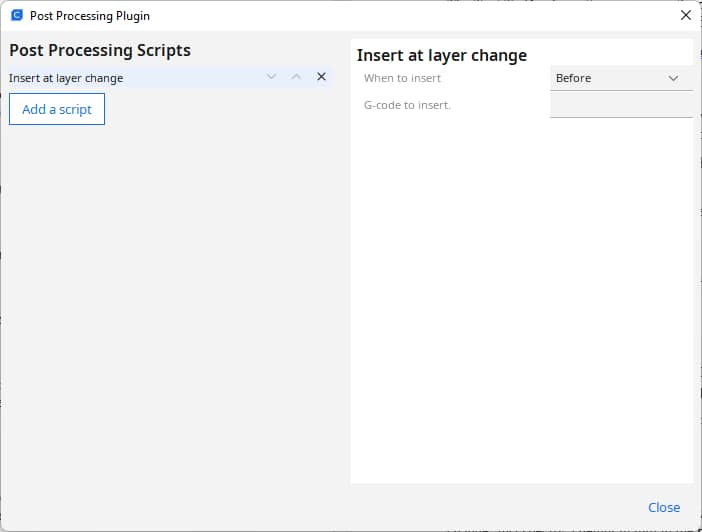
Here are its settings:
When To Insert
This tells the printer when to insert the G-Code. You can either insert it after or before the nozzle changes layers.
G-Code To Insert
This setting takes in the G-Code you want to insert at the end of every layer in the print.
How to Use the Pause at Height Script
The Pause at Height is a script you can use to pause the print at a set height. This is useful if you want to pause and add hardware like magnets, nuts, etc., to the print and resume it.
For example, this YouTuber used the script to pause at multiple positions in the print to stop and change filament colors.
The resulting product was a stunning multicolor 3D model. Here are some settings you can use to modify the script:
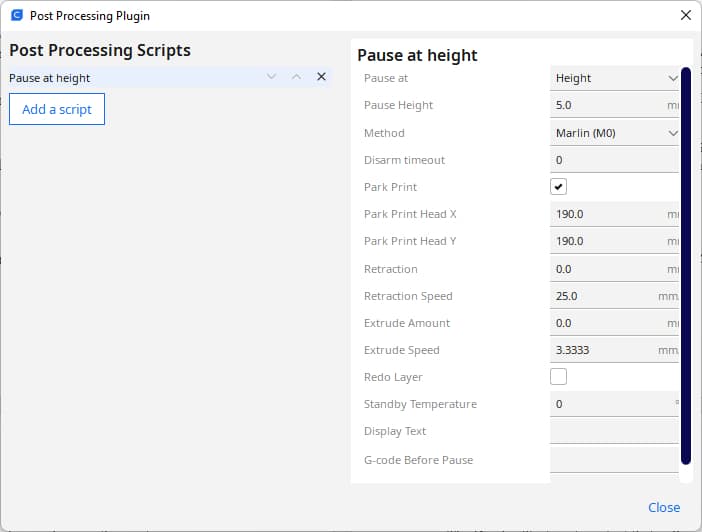
Pause At
The Pause At setting lets you choose the unit you want to use for the height. You can either select a layer number or a height in mm.
Pause Height
The Pause Height option lets you set where you want to pause the print. You can set it in mm or use a layer number depending on what you selected at the Pause At option.
Method
The Method option lets you choose the G-Code command you want to use for pausing the print. The G-Code command for pause varies across several printers and firmware.
So, you must choose the firmware variant your printer is running from the script’s dropdown menu.
Disarm Timeout
The Disarm Timeout setting turns off the stepper motor after a period of time (seconds) you put in the input box. If you leave it at its default zero, the motors stay on while the print is paused.
Park Print
The Park Print setting lets you move the printhead to a safe location after pausing the print if you check the box. You can specify the coordinates for this location using the Park X, Y, and Z settings.
Note: If your printer automatically handles parking, you can leave it unchecked.
Retraction & Retraction Speed
The Retraction setting specifies how much filament in mm the printer pulls back into the nozzle after the pause. This prevents the nozzle from leaking filament when it’s parked.
The Retraction speed controls how fast the extruder draws the filament back in.
Extrude Amount & Extrude Speed
The Extrude Amount setting sets the amount of filament the printer extrudes after the pause. This can help purge the old material from the nozzle and warm it up to resume printing.
The Extrude Speed determines how fast the printer extrudes the material after the pause.
Redo Layer
The Redo Layer setting prints the last layer before the pause to help get the filament flowing again.
Standby Temperature
The Standby Temperature controls the temperature of the nozzle while the print is paused. If you leave it at zero, the temperature remains unchanged.
Display Text
The Display Text contains text that will appear on your LCD while the print is paused.
G-Code Before Pause/ G-Code After Pause
The G-Code Before Pause runs a G-Code command before the printer pauses. The G-Code after Pause runs the command after the printer resumes.
How to Use the Retract Tower Script
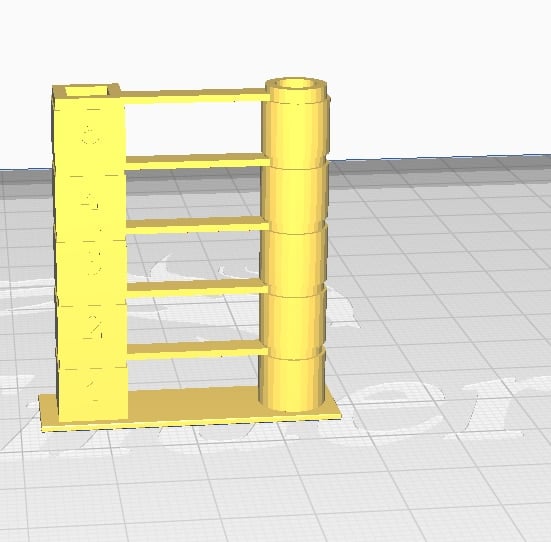
The Retraction Tower provides a way to dial in your retraction settings using a tower. The tower changes the retraction values in stages, so you can see which one is best for you.
The YouTuber CHEP made a great video to show how you can successfully calibrate your printer’s setting with this tower.
Here’s how you can use it:
- To use this, you must install the Cura Calibration shapes plugin. To install it, click on Marketplace in the top-right corner of the screen.
- On the menu that appears, scroll down until you see the Calibration Shapes plugin.
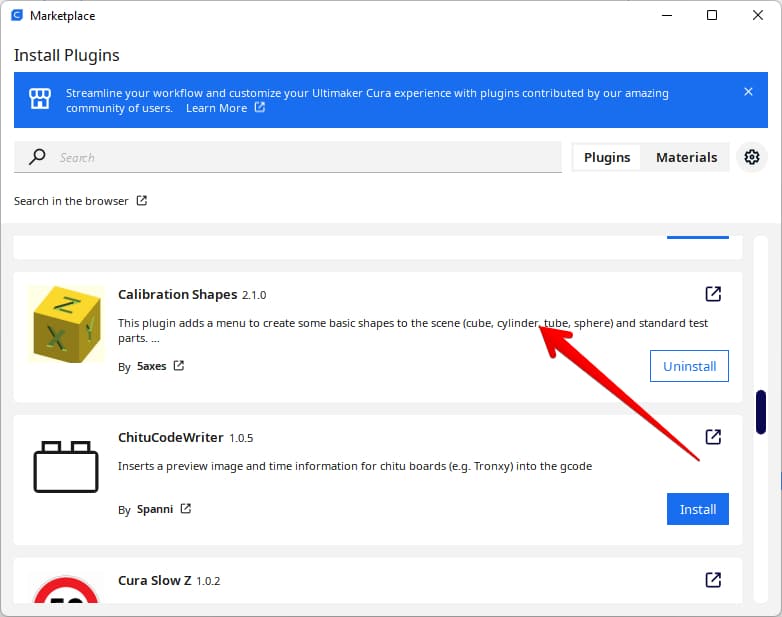
- Click on Install and accept the agreement. Once the plugin installs, restart Cura.
- Open Cura again and click on Extensions > Parts for calibration > Add a Retract test. This will place a retraction tower on your build plate.
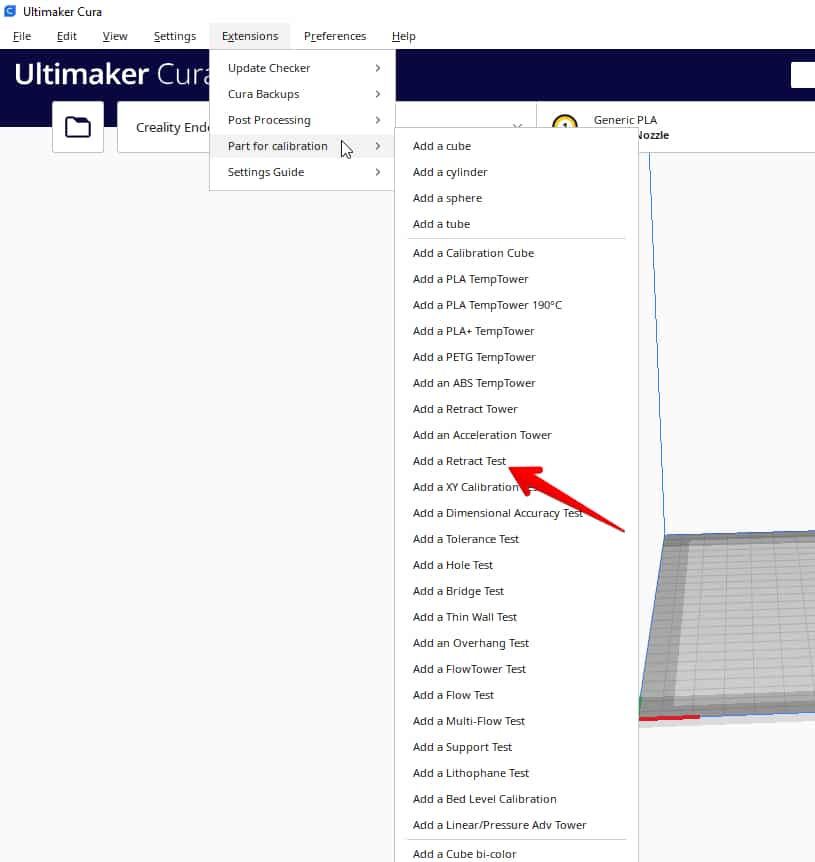
- You can now modify the tower’s settings using the Retract Tower script from the Add a Script menu.

Here are some of its sub-settings.
Command
The Command setting allows you to select which retraction value you want to test. You can choose between Speed and Distance.
Starting Value
The Starting value is the retraction speed or distance at which the tower starts from at the bottom.
Value Increment
The Value Increment is the increase in retraction speed or distance between subsequent tower sections in the print. It can be negative or positive.
Change Layer
The Change Layer setting sets how many layers should be printed in a particular block before applying the value increment.
Change Layer Offset
The Change layer offset is the number of base layers that aren’t part of the first block. The printer considers this when calculating the layers before the change in the first section.
How to Use The Speed Tower Script
The Speed tower is a calibration test that you can use to find the optimal speed for your prints. It prints a tower with different speeds for each section so that you can choose the best one.
Here’s how you can use it:
- First, ensure you have installed the calibration steps plugin from the previous section
- Next, click on Extensions > Parts for calibration > Add an Acceleration Tower. This will put an acceleration tower on your build plate.
Now, you can modify it with the speed tower script. The sub-settings in the Speed Tower script are pretty much the same as the ones in the Retract Tower script.
The only notable difference is the options in the Command setting.
Command
The Command setting lets you choose which value you want to calibrate. You can choose between acceleration, jerk, speed, etc.
How to Use the Time Lapse Script
The Time Lapse setting controls the camera to take a snapshot of the print at different time intervals. You can use this to create an interesting video of your print’s progress.
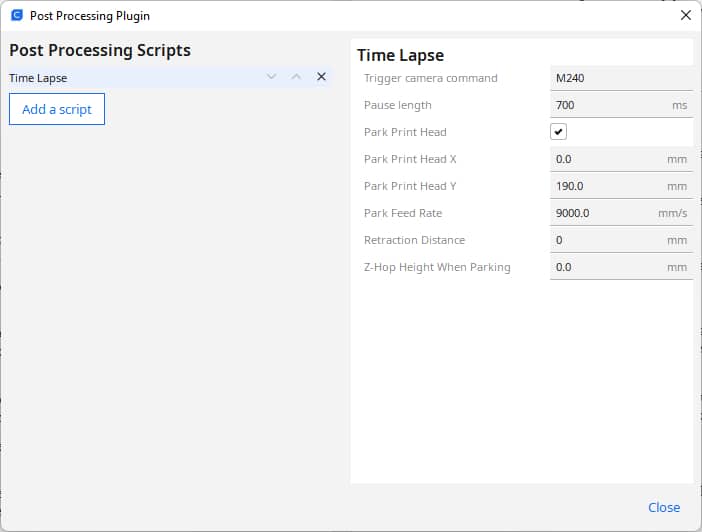
Here are some of its settings:
Pause Length
This controls how long the print will wait after the camera is triggered.
Park Print Head
The Park Print Head moves the print head to a different location after the M240 command is triggered. You can control the location it moves to by using the Park Printhead X and Y commands.
You can also control the speed with the Park Feed Rate command.
Retraction
The Retraction distance controls how far the nozzle pulls the filament in when going to the park for the camera shot. This helps reduce nozzle ooze and print defects like stringing.
A great example of nozzle oozing during printing can be seen in this Reddit post.
To help in combating this, another user suggested printing at a colder temperature, reducing the snapshot time and increasing the retraction a bit.
Z Hop Height When Parking
The Z Hop When Parking raises the nozzle of the print when it’s parking to avoid it hitting the print. You can set the hop height in the box.
How to Change Filament Color Mid Print – Change Script
You can change your filament’s color using the Filament Change script. All you have to do is to set up your print settings in the script and have your alternate filament ready to be loaded on the printer.
One user said the filament script change worked perfectly with their Ender 3 V1 running the stock 8-bit board. It paused, parked, beeped, and they were able to unload and reload filament to resume a black and white print.
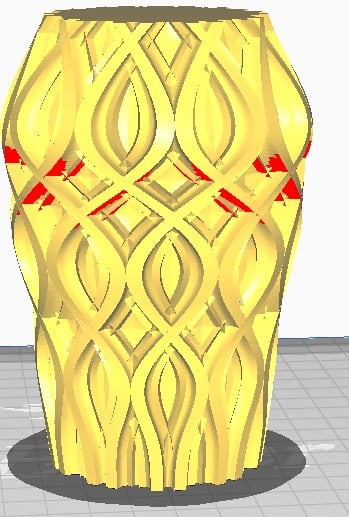
Let me walk you through the process with a vase print of mine. I want to print the bottom and the top part using different color filaments.
Let’s see how you can do it.
Step 1: Import the model into Cura
- You can import the model into Cura by dragging it into the app or pressing the CTRL + O shortcut.
Step 2: Process and slice the model
- After importing the model into Cura, you can optimize the print settings like supports or layer height anyhow you want.
- Once you’re done with these settings, click the slice button to slice the model.

Step 3: Preview and calculate the layer height
- After slicing, click on the preview tab.
- Using the layer view tool, go through your model layer by layer.
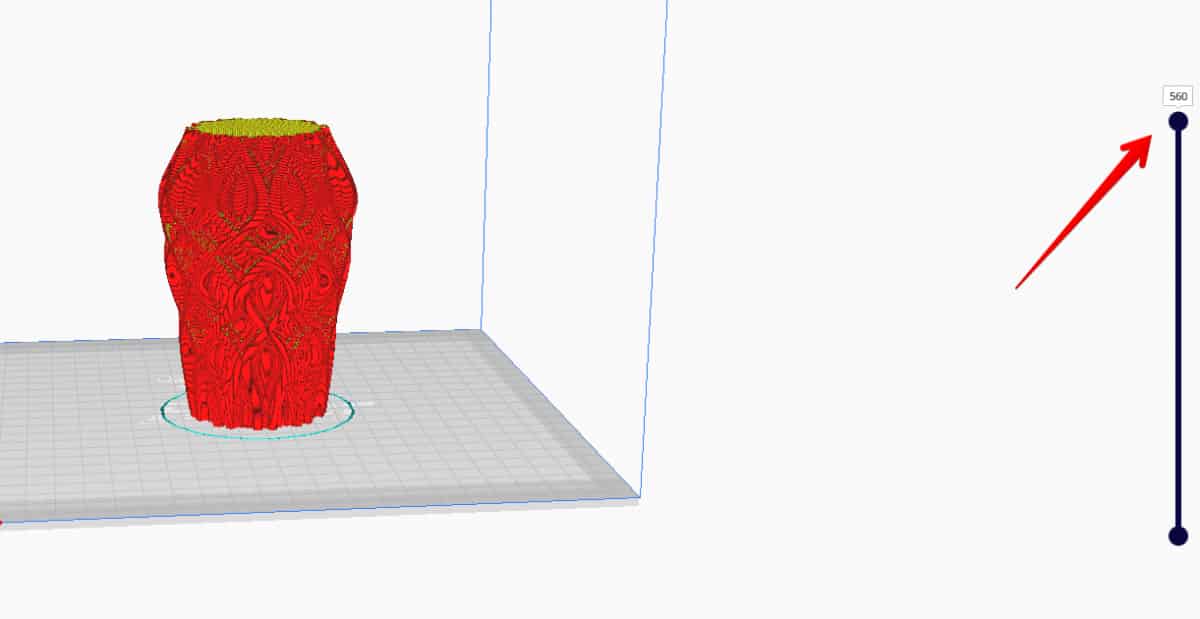
- Select the layer where you want the color change to start and note it down.
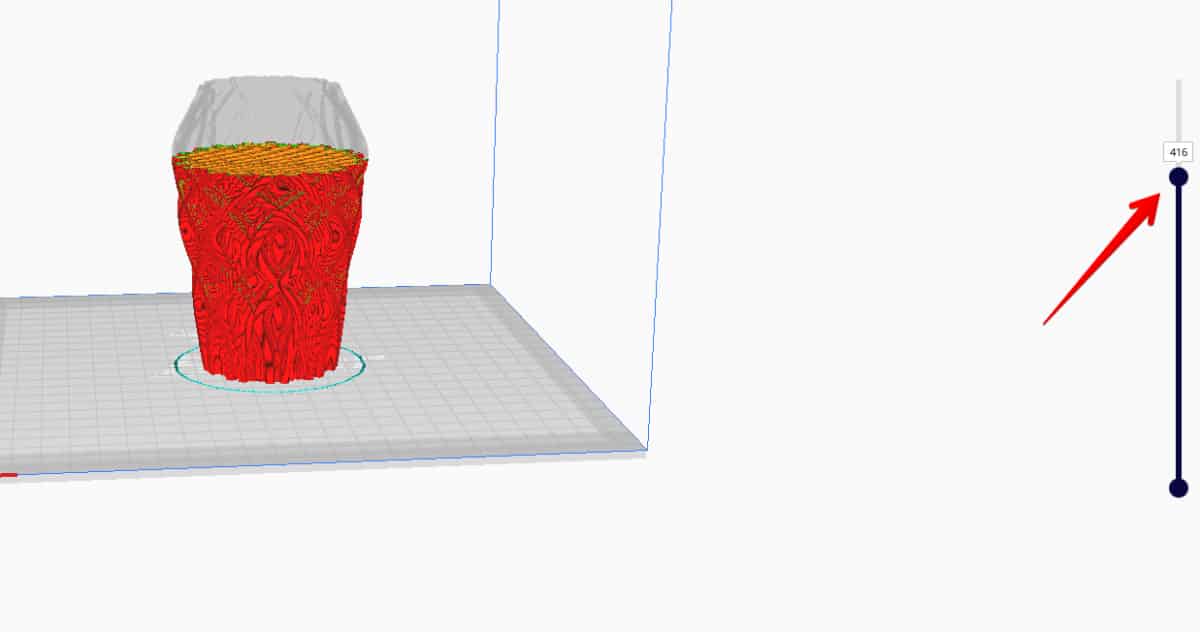
- In this case above, I want the new color to start from layer 416.
- If you want multiple colors, you should note the layer where you want each color change to start down.
Step 4: Add the scripts
- From the top toolbar, click on Extensions > Post-processing scripts > Modify G-Code.
- Click on Add a Script
- On the list of scripts, scroll down and click on Filament change.
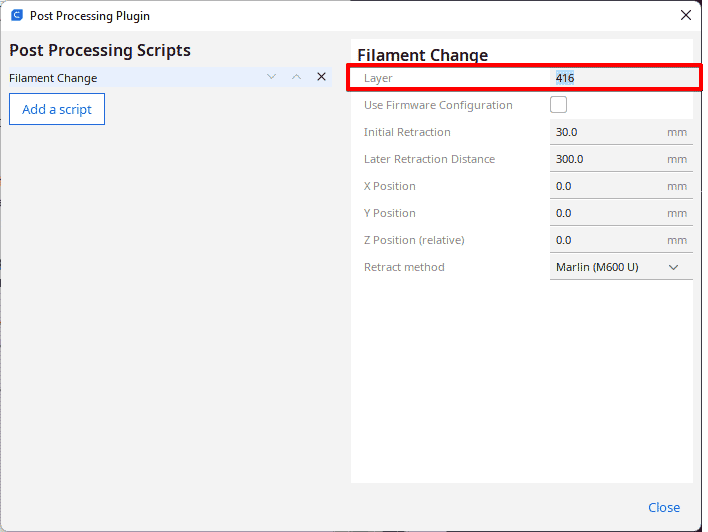
Step 5: Put The setting in the scripts.
- After clicking the script, you’ll see the list of settings you can change.
- In the Layer box, put the layer number you just noted. For example, I’ll put 416 in mine.
- If you’re putting multiple layer numbers, separate them by commas.
- You can tick the Use Firmware Configuration if your printer’s firmware handles nozzle parking and retraction after a pause for you.
- For the Retract Method, select your printer’s firmware variant. Most Ender printers use the Marlin firmware or a variant of it
Step 6: Re-slice the model.
- To make the changes permanent, you’ll need to re-slice the model.
- So, click on the Slice button again.
Step 7: Save and print the model.
- Next, save the model’s G-Code and send it to your printer for printing.
- Once the printer reaches the specified layer height(s), it will stop printing and ask you to change filaments.
- After loading the new filament, it will heat the nozzle back up and purge the old filament from it.
- After this, you can continue printing with the new color filament.
Cura’s post-processing scripts are handy, versatile tools that you can use to modify your G-Code on the fly. A little practice with them, and you should be creating pretty unique prints in no time.
Good Luck and Happy Printing!