How to Scale a Miniature for 3D Printing – Scale 3D Models
When 3D printing miniatures for tabletop games like D&D or Warhammer, size is very important. Printing the miniatures at the wrong scale can leave your board looking weird and unbalanced, ruining the entire game.
To scale your miniature properly for 3D printing, you can use a 3D model miniature scaler from Thingiverse. You can also use a similarly sized model like the Sir Scalesby miniatures to scale your miniature. Finally, you can scale your model by measuring it in your slicer and adjusting it as needed.
In this article, we’ll go through all the scaling methods above and show you more tips on printing miniatures. So, keep reading for more helpful pointers!
How to Scale a Model for 3D Printing
You can use several reliable methods to scale your miniature for 3D printing. Here are some key ways to scale a miniature for 3D printing:
- Use a Miniature Scaler
- Use a Similar-Sized Model to Scale It
- Use the Slicer’s Measuring Tool
Use a Miniature Scaler
A miniature scaler is an accurate 3D model of a ruler with a graduated scale on one side that allows you to accurately measure and size miniatures in your slicer.
It also has several base sizes, so you can easily measure and adjust your model’s footprint. You can download this ruler from Thingiverse.
This particular ruler has two scales on both sides; the standard 28mm scale and the heroic 34mm scale. On the 28mm scale, the height of a 6ft miniature is about 30mm, while on the heroic scale, the same height is represented by 36mm.
Note: Most designers and manufacturers use the absolute scale when creating miniatures for tabletop games. They do this by measuring the distance from the feet or base of the model to a fixed reference point on the model.
On humanoid miniatures, this reference point is usually the eyes. The standard distance between these points for most miniatures is usually 28mm (you can find some older miniatures using 25mm). The 28mm represents a standard 6ft tall human in miniature form.
For some “heroic” models, this distance increases to 34mm as it produces a larger model with more defined features. However, you should note that this distance differs between miniature models.
For example, the accepted absolute scale for Warhammer and Dungeons & Dragons models is 28mm. You can read more about the different sizes and scales for miniatures in this article.
To use the miniature scaler, all you have to do is to import the ruler’s STL file into your slicer and place your model right next to it. Then, you can use the ruler to scale your model up or down.
Let’s go through the steps in more detail using the ChiTuBox slicer:
Step 1: Import the Model into ChiTuBox
- Import the miniature scaling ruler into ChiTuBox and place it in the center of the virtual build plate.
- Make sure it is at 100% scale.
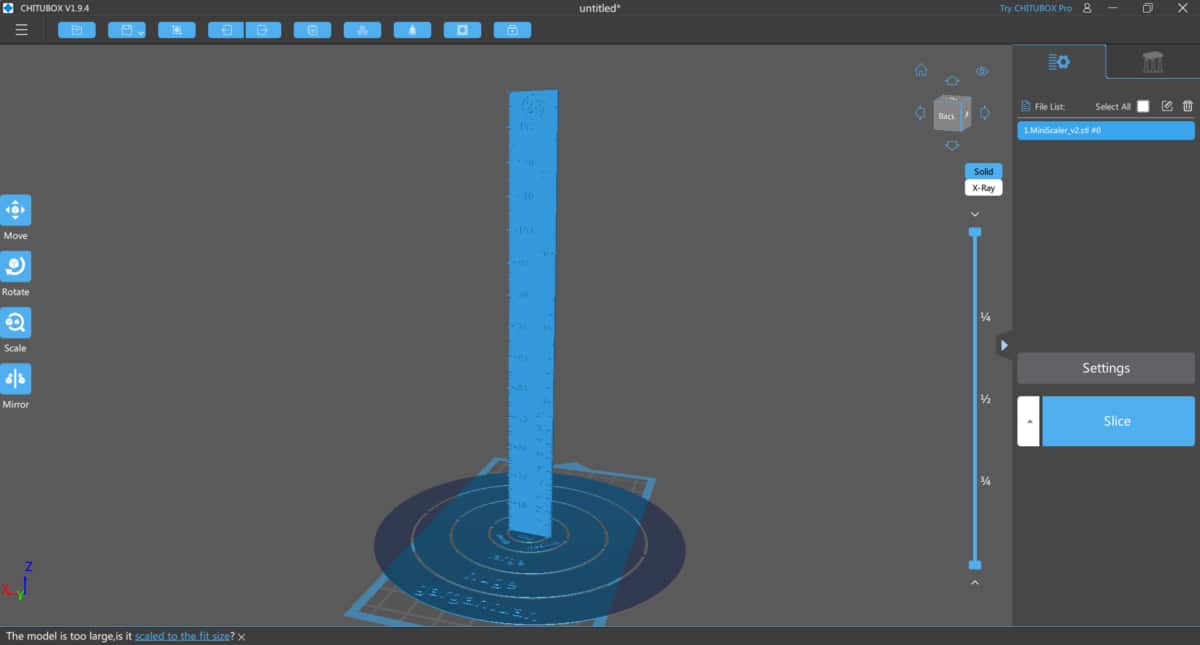
- Import the miniature you want to scale into the ChiTuBox software.
Step 2: Place the Model in Front of the Scaling Ruler
- Determine the side of the ruler you want to use (28mm or 34mm). In this, I’ll be using the 28mm side.
- Place your model in front of it.
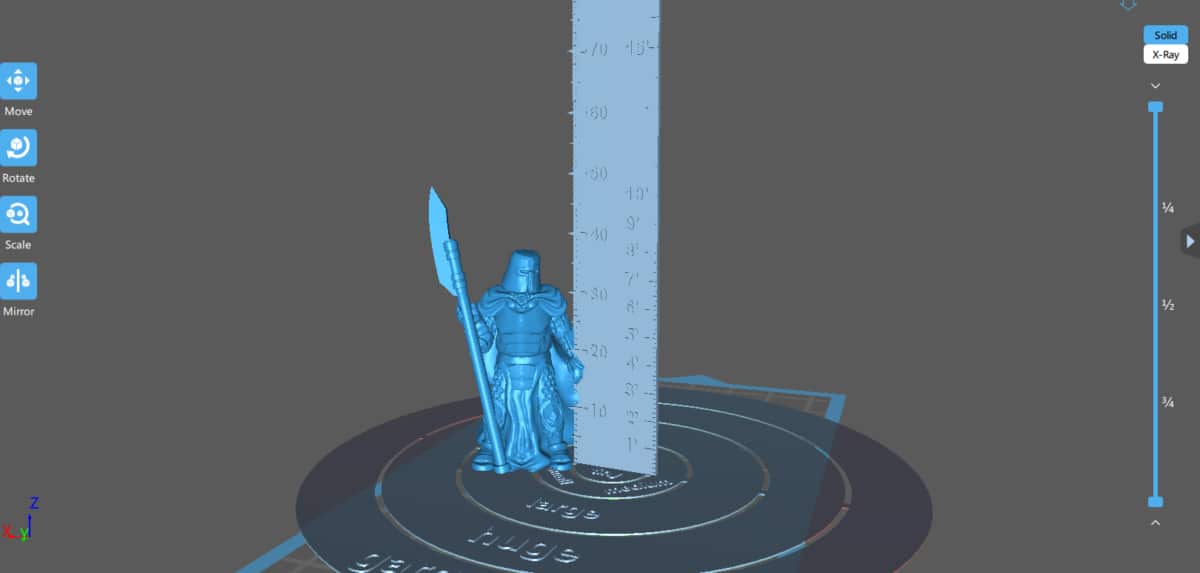
- This is a heroic model that has an eye to the base measurement of 34mm. I aim to scale this down to the standard 28mm size.
Step 3: Scale the Model
- Using the graduated scale on the ruler, locate the height you want for your model.
- Select the model and use the Scale tool in ChiTuBox to increase or reduce the model to the required height.
- Make sure the Lock Ratio button is on. This ensures that the model will scale uniformly in all directions.
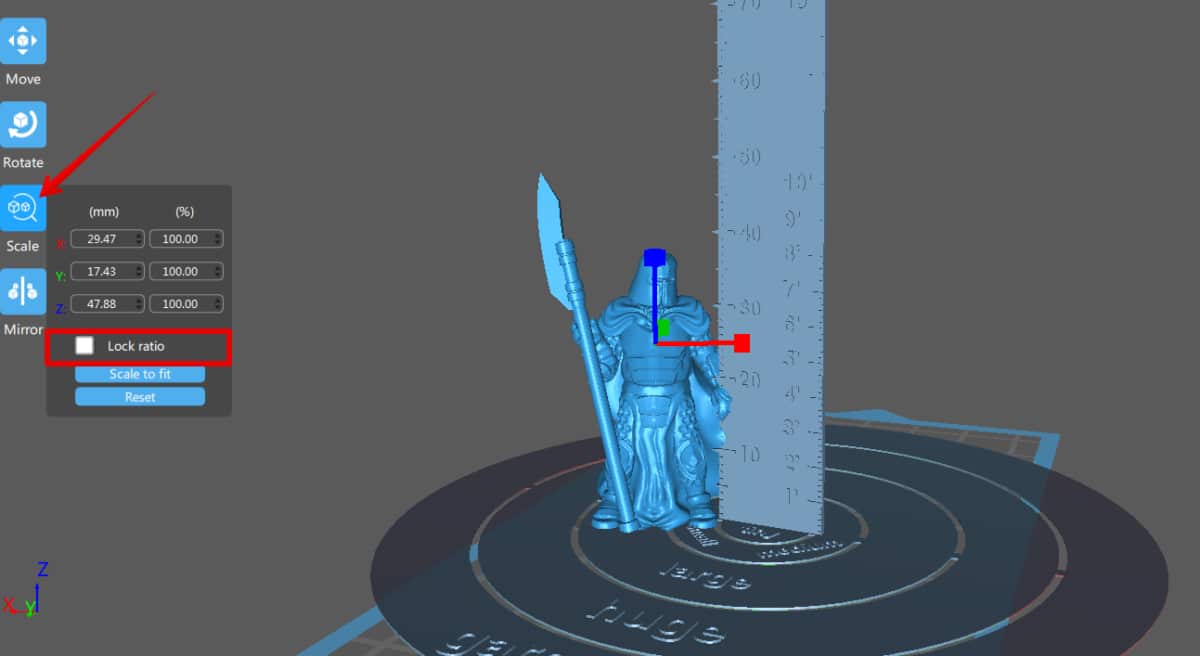
- Now, use the scaling arrows to reduce the model’s size.

- Now, we can see the eye level of the model is at the 28mm mark, which means it’s correctly scaled.
Step 4: Delete the Scaling Ruler
- Once your model is at the required size, click on the ruler to select it, then delete it.
- Your scaled model is ready for printing.
You can watch the video below to see how it works.
Use a Similarly Sized Model to Scale It
You can scale your miniature properly using another model. If you have a properly calibrated STL model, you can place both models side by side on the build plate and work from there.
Just increase or reduce your miniature’s size until it matches up properly with the calibrated model. Once you’re done, you can easily delete the calibrated model from your build plate.
You don’t have a calibrated model you can use? Don’t worry; a knight in shining armor is coming to the rescue. Sir Scalesby is a collection of calibrated models in different sizes that you can use to scale your models up and down accurately.
It even has a guide showing you the standard miniature sizes for popular tabletop RPG games.

Let’s look at how it works in the popular slicer Cura.
Step 1: Import Your Models into Cura
- Drag your miniature and drop it into Cura.
- Next, drag one of the knights and drop them into Cura. I want to scale my model down to 28mm, so I’ll select the 28mm knight.
- Place both miniatures side by side on the build plate.
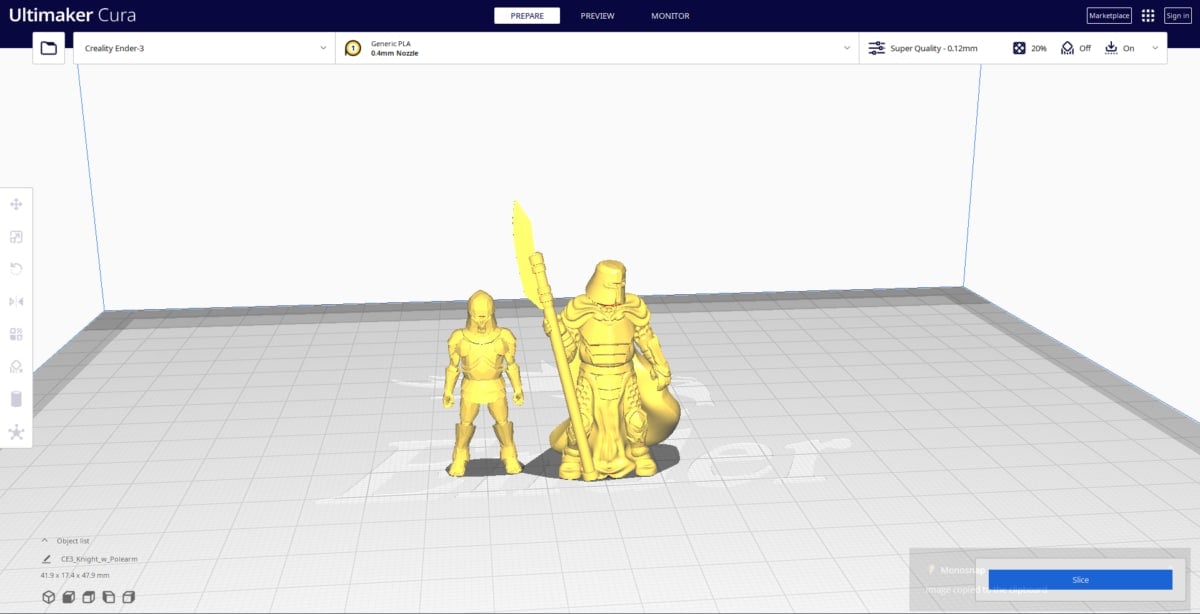
- As you can see, my 34mm Knight is noticeably bigger than the 28mm Sir Bixby.
Step 2: Scale Your Model
- Using the Scale command, increase or reduce the size of your miniature till it is the same size as the Sir Bixby model.
- Make sure the Uniform scaling button is enabled to avoid distorting your model.
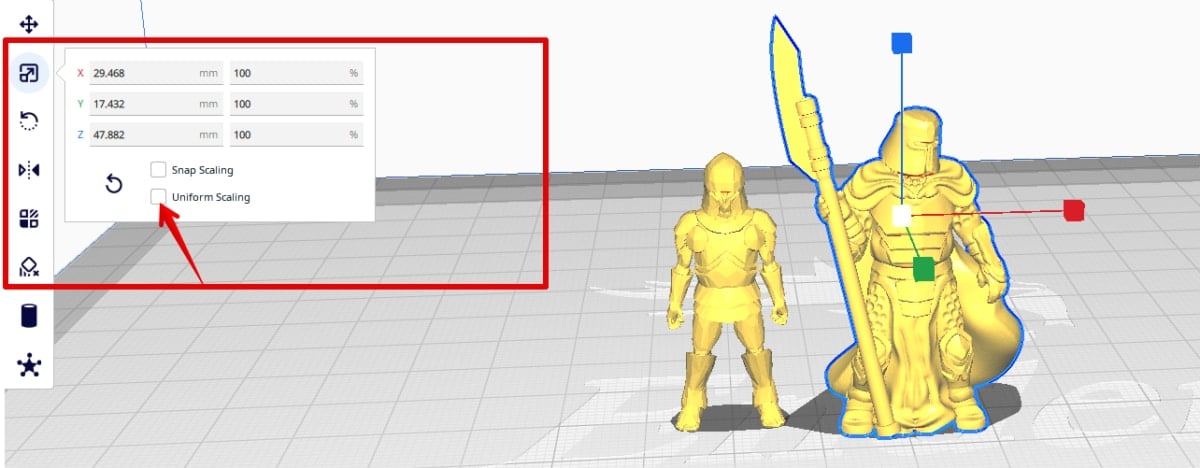
- Once they are at the same height, stop scaling.

Step 3: Delete the Sir Scalesby Model
- Once you’re confident that your model is at the correct scale, click on the Sir Scalesby model and delete it.
- Now, your miniature is ready for printing.
Slice Print Roleplay has a great video on how to resize your models below.
Use the Slicer’s Measuring Tool
Most slicers like Cura and ChiTuBox have measuring tools that you can use to scale your model. If you know the required model size, you can use the measuring tools in addition to the scaling tool to get the right size.
Let’s look at an example in Cura:
Step 1: Import Your Model into Cura and Measure It
- Import your model into Cura.
- Click on the Measuring tool.
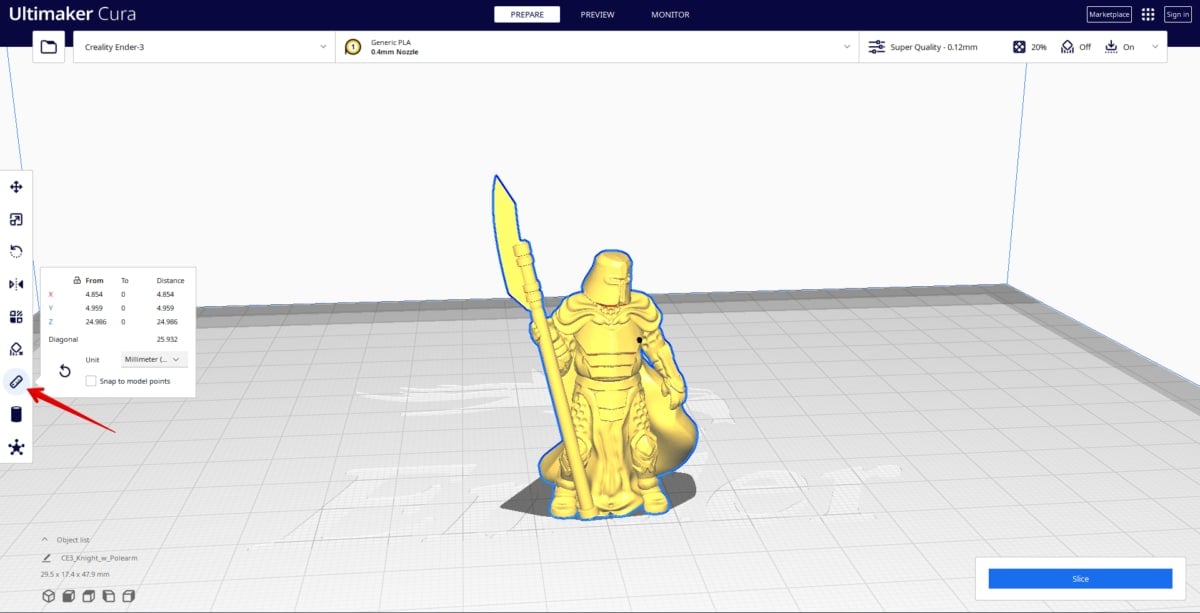
- Place one point at the foot of the model, then place one at the sight line of the model.
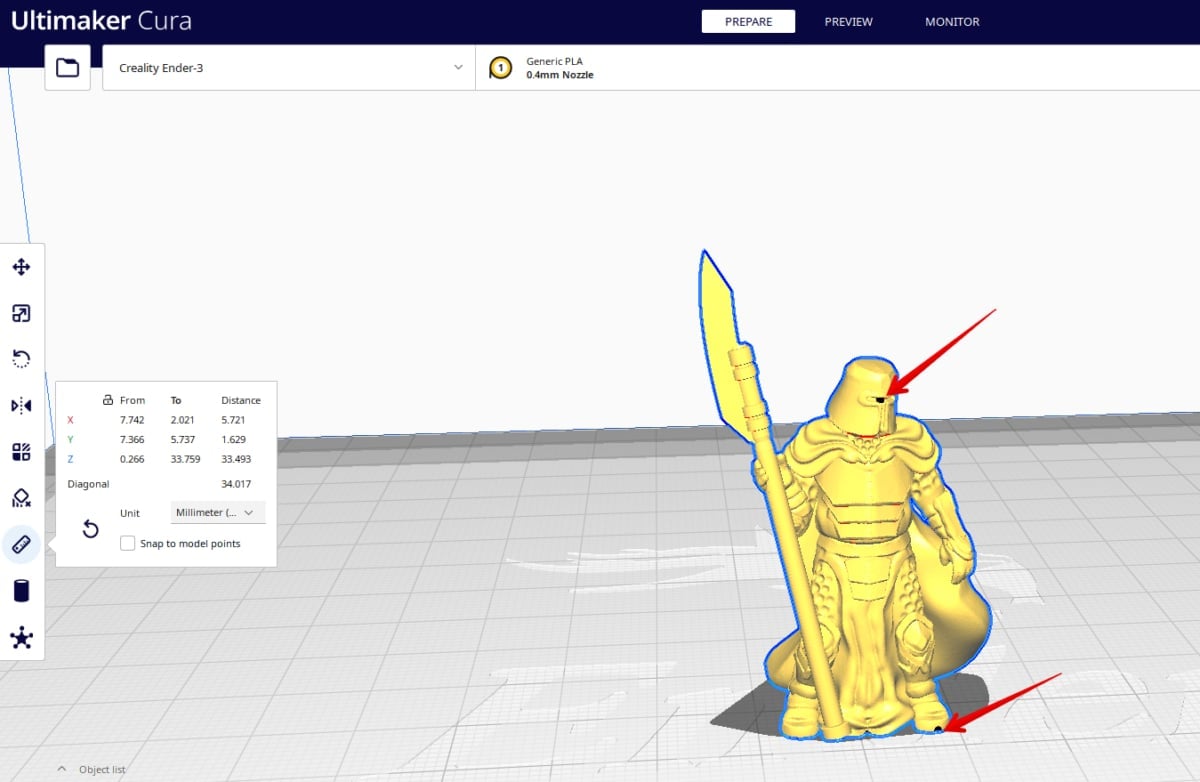
- Check the diagonal reading; this will give you the proper distance between the eye and the base.
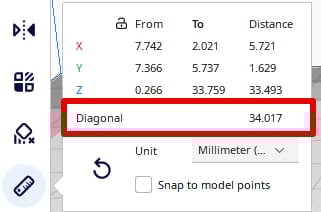
- In this case, it is 34.017mm.
Step 2: Calculate the Correct Scale.
- You can calculate the scaling percentage manually. However, one Redditor recommends using Digital Taxidermy’s conversion tool as it is way easier.
- You input your model’s current scale (34.01mm) and the scale you want (28mm). The website will give you the correct percentage to scale your model to.
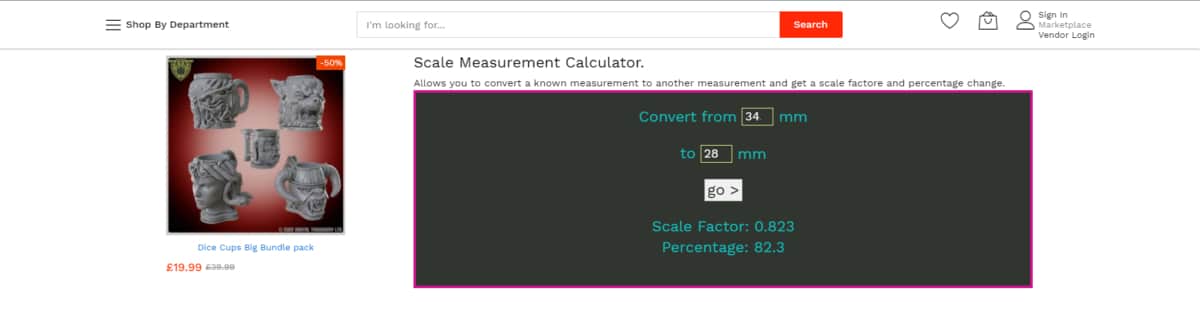
- The recommended percentage for this is 82.3%.
Step 3: Apply the Scale Percentage to Your Model
- Click on the Scale tool and input the percentage. Make sure you enable the uniform scaling button.

- Once you click enter, your miniature will be automatically scaled to the right percentage.
- You can measure it again to double-check.
Note: The measurement tool doesn’t come pre-installed in Cura. You’re going to have to install the extension from the Cura Marketplace.
Also, the Measuring tool in ChiTuBox is only available in the Pro version of the software.
Check the video below to see the visual process.
How to Scale Pre-Supported 3D Printed Miniatures
Some miniature files can have features like supports, hollowing, and drain holes already added. If you scale the model up or down and print it like this, it might fail.
This is because the pre-added supports might not be strong or thick enough to carry the model’s weight and can fail. Also, re-scaling the model can make other added features useless.
Fixing this is easy if the 3D file comes in the .lys or .CHITUBOX formats. Once you open up the miniatures in Lychee Slicer and ChiTuBox, respectively, you will be able to remove or add supports and other features.
So, most users recommend removing the supports, scaling the model, and adding them back appropriately.
You can also use the Re-Calculate support option Lychee Slicer offers to optimize your supports after scaling them. However, if the file is an STL file, you might be unable to do this since it doesn’t separate the supports from the actual model.
You can try to reduce print failure by reviewing the model and adding supports to strengthen the already present ones. Interestingly, some people also say they scale their models with supports, and they end up printing without any errors.
So, you can experiment to find out what works best for you.
So, there you have it! You can quickly and accurately scale your model using the tips and tools mentioned above. Final tip, when scaling models, avoid reducing their scale too much. If you go too low, the model can lose some fine details.
So, always try to scale to the recommended standard sizes. Good luck and happy printing!