How to 3D Print From Thingiverse to 3D Printer – Ender 3 & More
3D printing is a pretty simple, yet growing industry that many people are starting to get into, but the operation can be confusing at first. If you are wondering how to 3D print objects from Thingiverse down to your 3D printer, this article is for you.
In order to 3D print from Thingiverse to a 3D printer, you first need to download your chosen model from the Thingiverse website, then transfer the file to your slicer and slice the file.
This is the basic process, so keep on reading through this article to get more details and tips on 3D printing from Thingiverse to your 3D printer, whether an Ender 3, Prusa Mk3s and so on.
How To 3D Print Things from Thingiverse to a 3D Printer
To 3D print things from Thingiverse, download the file from the model’s page, then import that file into your slicer (Cura). After making any adjustments to settings, you click “slice”, which creates the main G-Code file. You then save this onto a MicroSD card and transfer it to your 3D printer.
Once you do this process a few times, you can start doing it in just minutes.
Let me explain what Thingiverse is so you can get an understanding of one of the most used websites for your 3D printing journey.
When I started 3D printing, I was confused as to how people got their models to 3D print, so after some research, I learnt about Thingiverse, a large online repository where you can find an array of 3D models that you can download, and transfer to your slicing software.
Thingiverse features many files created by brilliant designers, so you can definitely find some high quality objects that you can download and 3D print yourself.
To top it off, you don’t even have to sign up or pay to download anything.
After downloading a file, you then transfer it to a slicing software for it to be sliced. Cura is the most popular choice for slicing your files, along with PrusaSlicer and Slic3r.
When talking about slicing a file or the slicer software, it is the process in which your model, along with the settings you input such as printing temperature and infill, is translated into a language your 3D printer can understand.
Next, you then take your USB reader, along with the MicroSD card that should have come with your 3D printer, and you insert this into your computer or laptop.
You’ll usually get a prompt to save the file directly to the removable storage, so you don’t have to go and find the specific file or do a manual transfer.
After the quick process of saving the file onto your memory card, you press eject and then remove the USB reader with the MicroSD card, remove the MicroSD card from the USB reader and insert it into your 3D printer.
Once your 3D printer reads this memory card, it should show up the name of your file you just sliced, usually at the bottom of your list of items.
How Do I Download Stuff From Thingiverse?
To download stuff from Thingiverse, you simply find the file you want to download by searching for your desired term, then click the “Download All Files” box on the top right.
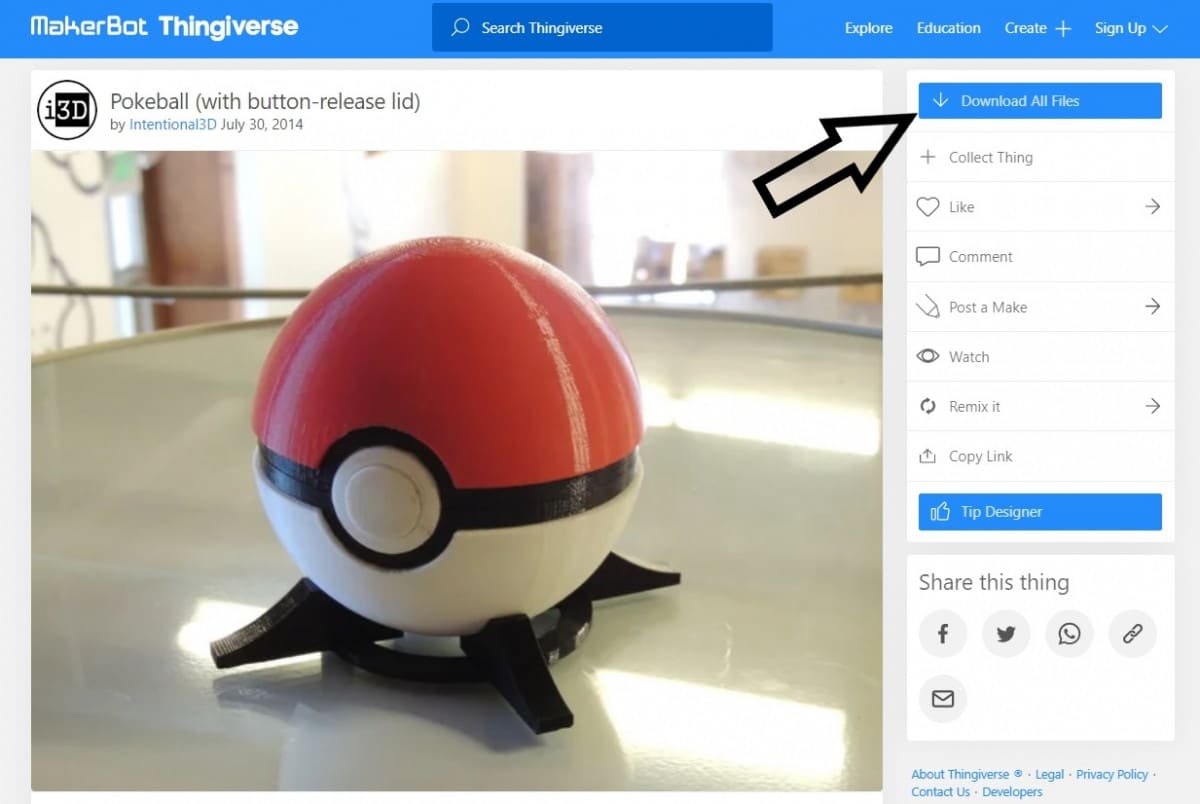
This will download a Zip folder that contains the STL models, as well as other useful information that the designer has given such as print settings and instructions.
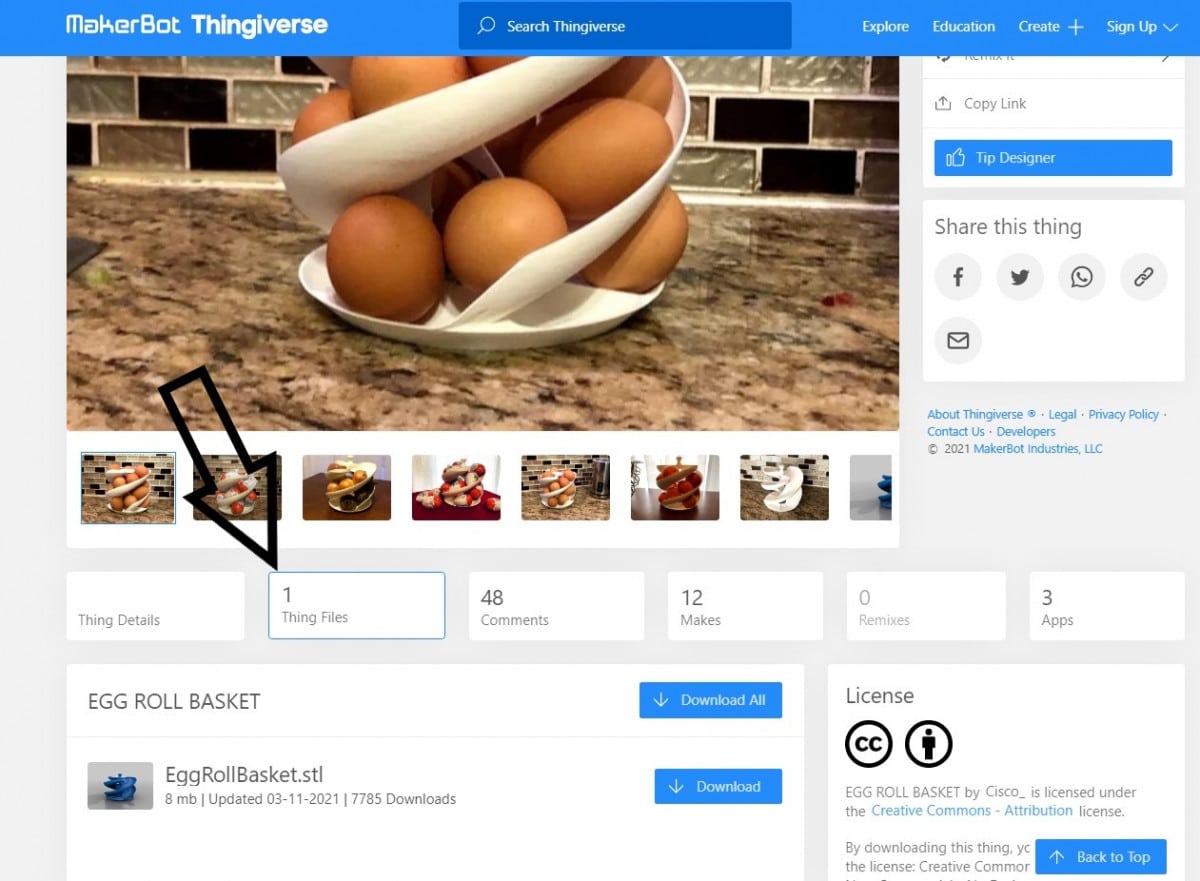
You can also go into a separate tab called “Thing Files” which contains just the STL files. You can either “Download All” or “Download” the specific STL file. This means you won’t download the folder, but the STL file on its own.
Searching for models in Thingiverse is an activity by itself, so check out this video by RCwithAdam. He illustrates how exactly to download and slice models from Thingiverse with the Cura slicer.
You want to start by going to Thingiverse using your preferred internet browser. Search for a model you want to print out, click on it, and download it to a folder on your PC using the process above.
On the homepage of the Thingiverse site, you will find a menu bar with a search field at the center.
You will also find other links to the right of the search bar.
This is where you can explore “Things”, “Designers”, “Groups” and “Customizable Things”, as well as go through the learning resources, create objects or sign up for a new account.
You can download the file for any model just after searching for it using the search bar, however, if you want to enjoy some other aspects of the site such as uploading, commenting, and customizing models, then I’d suggest that you sign up.
There are even options to have your own archive of your favorite STLs to save for 3D printing later.
Below are some of the core steps to follow when it comes to downloading 3D models online.
Exploring Models
You can scroll through the homepage to get a glimpse of some popular 3D model you might want to print out since they are well displayed in a grid layout.
The explore option also enables you to view a variety of “things” or go to more categorical designs from specific groups.
This usually saves me a lot of time when I try to search for designs from a specific niche e.g. engineering.
One Reddit user said that she liked to use the explore option to view “things” made by specific designers.
Searching for a Specific Model
If you already have something in mind, and you don’t need to explore, then it is pretty simple. Go to the search button and type the specific keyword you’re targeting. All the results from that search term will be displayed on the page.
On the top part of the result page, there are three buttons with dropdown menus which allow you to refine your search even further (that is if you haven’t found what you were looking for).
You can refine your search by popularity, makes, users, collections or groups. Select the design that pleases you the most.
Details of the Model
After selecting your desired model, you will be redirected to a page that contains the details for that design.
The photos of the models are displayed on the top left of the page. You also have a menu in the middle of this page which contains different tabs namely, the “Thing Details” tab, the “Thing Files” tab, the “Apps” tab, the “Comments” tab, and the “Collections” tab.
Most people find the “Thing Details” tab to be the most useful since it has a summary of the design. The “Thing Files” tab enables you to download the files.
The Apps Tab
Another tab that most people overlook is the “Apps” tab. I can’t stress how important this feature is. When you click the “Apps” tab you will have a couple of apps to choose from.
A cool feature is the “MakePrintable” app.
This app will analyze your model and notify you in case it has any defects or errors that would potentially affect the printing process or lead to the destruction of the printed object.
You just click the “Launch app” tab, then “authorize to begin”, and lastly “repair”.
These can model issues like thin edges or overhang boundary edges. When you click next, the app will fix these issues while showing you the progress on the 3D model.
You can save the changes it has made over the original model and it will be ready for slicing.
Downloading the Design
If the model doesn’t need any further rectifications, you can download it by clicking the “things files” tab. Ensure that you click on the right file from the list of individual files that appear.
The right file should be downloaded in STL format or have .stl at the end. Save it in a folder where you can retrieve it easily later on.
How Do I Convert STL to G-Code?
I found this YouTube video particularly useful when converting STL files to G-Code files for my Ender 3 machine.
To convert STL files to G-Code files that will be compatible with your printer, you will need a slicing software.
The most popular slicing software in use is the Ultimaker Cura, which you can download from the right vendor’s website at the click of a button. If you are having trouble finding it, you can download Cura for free.
Once you have installed it on your computer, you have to adjust the settings of the software to match those of your printer. I normally use the Creality3D Ender 3 printer.
There are other slicing software that you can use to convert STL files to G-Code such as:
- PrusaSlicer
- Slic3r
- Simplify3D (Paid)
- Repetier (Advanced)
- KISSlicer
- MatterControl (modeling & slicing)
A great beginner 3D printer is the Creality Ender 3 V2 from Amazon. Ever since Creality released this 3D printer, it has been receiving top praise and fantastic reviews from thousands of users all over the world.
The print quality out the box is excellent, it has that much-appreciated silent motherboard for quiet printing, and plenty of features that make operation very easy for most people.

After downloading the slicing software, follow the steps below to convert STL to G-code:
- Launch Cura to begin the process of converting the STL to G-code for your Ender 3 or 3D printer.
- Go to the default “Creality CR-10” printer on the top-left part of your page and select your 3D printer by navigating through the “Add a Printer” & “Add a non-networked printer”.
- Most of the time, the default settings will do just fine, though you want to learn about Cura settings.
- Retrieve the STL file from where you saved it. You can either import the file to Cura or just drag and drop it.
- The model will be displayed in Cura, but you will have to adjust its positioning accordingly. Click the standard quality button on the top-right to show a drop-down menu with print settings that you can alter before converting the STL file to a G-Code file.
- When you’re done, you can click the slice button in the bottom-right corner to slice the file into the G-Code file that your 3D printer understands.
- Once the file is sliced, you can insert your USB reader with the MicroSD card inserted, you’ll then get a prompt to “Save to Removable Drive”, click that and your file is now on your MicroSD card.
- Insert the MicroSD card into the printer and your file will be there on your Ender 3, Anet, Prusa 3D printer whatever machine you have.
- Click the file and your 3D printer will start to heat up to the correct temperatures and begin the printing process.