
Can You Mix Different 3D Printer Resins Together? How to Dye Resin
I was sitting here with my Anycubic Photon Mono X resin 3D printer and I wondered whether it’s possible to mix different 3D printer resins together, so I decided to look into it.
You can mix 3D printer resins together to change the color or mechanical properties of a 3D printed resin object. Some people will use clear resin and mix it with dye to create a custom color. Flexible resin works great as an addition to normal resin to give it tensile strength.
There’s some more interesting information within this topic, so keep on reading to find out more.
Can You Mix 3D Printer Resin?
Mixing 3D printer resin of the same type is fine, you can mix all types of colors and even brands as long as they are the same type of resin. Some people mix resins of different property types such as flexible or tough resins.
If you are making brittle resin 3D prints, then mixing in some tough resin can work really well. They are quite expensive compared to normal resin, so it’s not ideal to use 100% tough resin, so this is a great solution.
A good idea to not mess with the curing process is to use a tough or flexible resin that is transparent.
Do keep this fact in mind that different resin versions have different process sequences, therefore some mixed resins may not result as an ideal match. You will have to take care of the curing or exposure time after mixing two resins.
Some resin printers have a resin vat with a capacitive sensor, so when mixing two different resins together, it can disturb the proper sensing process.
The Anycubic Photon Mono X conveniently has a -Max- mark on there to ensure you know the top level you can safely fill it up to.
It is likely that you will have to change and calibrate your overall print settings according to the new mixture of resin you have created, especially if there is a change in color.
Once you adjust the settings accordingly, with longer exposure times with darker colors, you should do some tests to make sure you tune the settings in properly.
Treat it like a new bottle of resin that doesn’t have setting recommendations, although you could meet in the middle if mixed equally to recommended settings.
Transparent resins are known to take less time to cure compared to a very dark, or even black resin. Once you gain more experience in resin printing, you can start to get a good gauge on what would work and what wouldn’t.
I’d recommend asking people who do have that experience for a print setting range to start from.
You don’t want to have too many failures and waste all that time with trial and error, when you can get the answer in a more efficient way.
I’d advise you to mix your two resins outside the resin vat so you don’t cause any unnecessary issues with the process such as surface issues.
Can You Dye 3D Printer SLA Resin?
It is possible to dye your SLA liquid resin, giving you the ability to create beautiful custom colors. You need to use liquid dyes that are specially formulated to use with 3D printer resin, and they work really well.
I would advise against using powdered dyes unless they are finely ground, so it can properly mix with the resin without being too big for the precision of SLA printing.
Some users tried using food coloring for dying their resin, and they reported back saying it looked good at first, but as it actually started printing, the colors got weird and streaky. It also became brittle as they tried to remove it from the build plate, and broke in the process.
I’d avoid using food coloring for UV resin.
If you don’t want to dye the whole resin 3D print, but your desire is to dye only some specific parts of the print then you can dye your prints after the completion of the printing process.
All you have to do is to dip the required parts in the dyed resin or use a brush or something to put color on your prints.
Another thing you can do is actually create a color-change or gradual-change object with resin printing.
The best way to do this is to start the printing process with your main base filament for the bottom of the object.
About halfway through the resin print, you can add dye to the resin vat throughout the printing process, every so often to then have that gradual change in color.
View this post on Instagram
How to Dye Resin for 3D Printing
To make your own resin colors for 3D printing, will need your specially formulated dye colors and your liquid resin, as well as a cup to mix it. Get some wooden stirrers to help mix it, and you can even use scales to help measure.
The ideal 3D resin dye to color your own resin is the Monocure 3D CMYK Pigment Set for Resins from Amazon.

Once you have this beside you, I’d advise to use it with clear or white resin for the best results. Anycubic Clear Resin or Elegoo White Resin are popular resin choices for the task, both of which you can get from Amazon for a good price.


Below is list of items to use, as well as the step-by-step process to get this job done:
Tools to Make Your Own 3D Print Resin Colors
- Monocure CMYK Pigment Set (Amazon)
- Mixing Cup – Disposable
- Wooden Stirrers
- Mini Scales (Amazon)
Step to Step Process to Make Your Own 3D Print Resin Colors
- Take a plastic cup and place it on the mini scale.
- Pour exactly a hundred grams of rapid model resin into the cup.
- Now press the “reset” button on the scale to get the weight back to zero.
- Let’s talk about creating a transparent green color, add 2 drops of cyan, and 2 drops of yellow pigments in the resin.
- Add more drops and take note of how many drops are added until you get your desired color.
- Now pick up your wooden stirrers and start mixing the pigments and resin in the cup.
You can create any color by following this process, all you have to do is to change the combination of the dyes to form different colors. It is recommended to keep a record of resin weight and pigment drops so that you can create the exact shade of the color if you need it in the future.
Do keep in mind that adding a lot of dyes/pigment to your resin is going to have a significant impact on the curing times.
As previously mentioned, a darker color will take a longer time to cure as compared to light or transparent colors.
If you need a lot of resin to print then you can create your colors just by multiplying the above-mentioned formula. Watch the video below to get a visual and better understanding of the process.
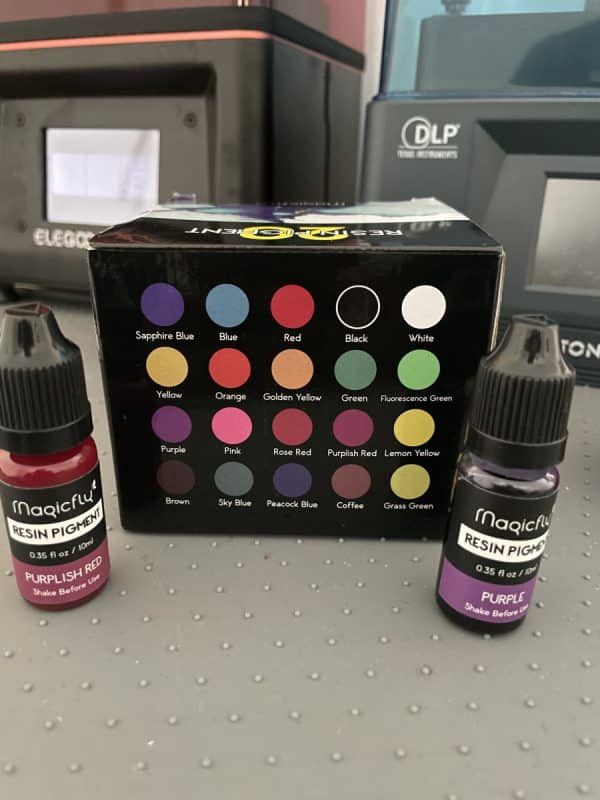
There are actually a few different sets of resin pigment/dye that you can get from Amazon. I already mentioned the Monocure dye, but you can also go for more variety.
Another good choice that you can check out is the DecorRom Epoxy Resin Pigment – 18 Color Liquid Dye from Amazon.
It consists of plenty of lovely colors and has a high concentration, so a little goes a long way! No extra preparation is required, they are long-lasting, and non-toxic.
With over 1,000 positive ratings, you can’t go wrong.

You can be assured that your resin will keep its integrity with these complementary liquids.
If you would rather do a simpler method, you can easily pour your white or clear resin into the vat and squeeze the drops of resin dye straight into the vat and mix it with your plastic spatula.
That’s what I did with the model below.

Can Resin be Stored After Mixing?
Resin can be stored in UV protected bottles even after mixing with the pigments. It is possible that the color of the mixture may change a bit with time, but shaking the bottle should re-mix the pigment settling at the bottom and get back the mixed color.
It’s a good idea to store them in Polyethylene or High Density Polyethylene plastic containers which are known to be dark and light-proof, similar to your average resin bottle.
The way to tell the difference between these bottles is to look at the bottom, where you should either see ‘PE’ or ‘HDPE’. You don’t want to make the mistake of storing your resin in the incorrect type of plastic, where the resin can eat through the bottle.
If you want to get a specific color just right, you can also use CMYKW (Cyan, Magenta, Yellow, Black, White) dye sets or pre-mixed CMYKW resin kits. Then its about finding the correct mixing ratios to get the color and opacity/translucency you want. Mixing in more white usually makes it more opaque.
When you want to avoid the trial-and-error process of finding the right recipe for your color, there is a free online tool (Additive Appearance Color Picker) that instantly gives you the right mixing ratios and warns you for colors that can’t be mixed.