Can You 3D Print With a Chromebook?
Many people who have a Chromebook wonder whether they can actually 3D print with it. I decided to write this article to help people figure out if this is something you can actually achieve without running into issues.
Keep on reading through this article for more information related to 3D printing with a Chromebook that you should find useful.
Can You 3D Print With a Chromebook?
Yes, you can 3D print with a Chromebook laptop by downloading slicer software such as Cura and slicing files which can be put onto a memory and transferred to your 3D printer. You can also use a browser-based service like AstroPrint or OctoPrint to slice STL files online and feed them to your 3D printer.
Chromebooks rely heavily on the Chrome browser for most of their functionality. You’ll be needing web-based applications and extensions from the Chrome Web Store to help you 3D print.
People who own a Chromebook usually use AstroPrint for 3D printing. This is a method that doesn’t require any downloads or anything complicated. It’s free to use and has a highly intuitive, user-friendly interface that makes printing a breeze on Chrome OS.
Other than AstroPrint, there’s another option called SliceCrafter that also gets the job done on Chromebooks. You simply load an STL file from your local storage and use the web application’s simply designed interface to tweak your model’s settings.
The following video briefly describes how to work easily with SliceCrafter on a Chromebook.
Most Chromebooks have a good port selection, so connectivity shouldn’t be a problem for people looking to 3D print with them.
The major concern used to be slicing STL files using these devices since they are incompatible with popular Windows-based software such as Cura or Simplify3D.
That isn’t the case anymore as you can now actually download Cura on a Chromebook. Though the process is lengthy, it’s definitely possible, and we’ll be getting to it in-depth later on in the article.
Another way to connect your 3D printer and Chromebook together is by using a USB connection.
Basically, instead of inserting the memory card in the printer, you can have the file on your Chromebook and have a USB connection to transfer the information to 3D print. Take a look at the video below to understand this method better.
If you consider yourself mechanically inclined, there is another way to make your Chromebook more approachable for 3D printing.
You can take out the hard drive and flash Zorin operating system on it that can easily download slicers such as Cura, Blender, and OpenSCAD.
What 3D Printer is Compatible with a Chromebook?
Most 3D printers such as the Creality Ender 3 and Monoprice Select Mini V2 are compatible with a Chromebook if you operate them through the Cura slicer software or AstroPrint.
The following is a list of some of the popular 3D printers that can be used with a Chromebook.
- Creality Ender CR-10
- Creality Ender 5
- Ultimaker 2
- Flashforge Creator Pro
- BIBO 2 Touch
- Qidi Tech X-Plus
- Wanhao Duplicator 10
- Monoprice Ultimate
- GEEETECH A20M
- Longer LK4 Pro
- LulzBot Mini
- Makerbot Replicator 2
You can comfortably use a memory card to transfer the sliced models from your Chromebook to your 3D printer. That is, of course, after you’ve sliced the STL file and converted it into G-Code format that your printer can easily read and understand.
Chromebooks usually have a decent amount of I/O ports, and some even have a MicroSD card slot. You’re going to have no issues in transferring files from one device to the other.
Best 3D Printer Slicer for Chromebooks
The best 3D printer slicer that works with Chromebooks is Cura. You can also download PrusaSlicer on Chrome OS along with the Lychee Slicer for resin 3D printing. Both of these work great and have many settings for you to tweak and make quality 3D models with.
Cura is the people’s favorite when it comes to choosing a slicer software that works reliably. It is made and developed by Ultimaker which is one of the leading 3D printer companies, so you’re backed up by someone highly credible here.
The software is free to use and has a wide variety of features that can help you make stunning 3D prints. The same can be said about PrusaSlicer which is also a frequently updated, feature-rich, and open-source slicer.
If you have a resin 3D printer, you need a similar slicer as well that handles SLA 3D printers. For this purpose, Lychee Slicer is an excellent choice that can be easily downloaded on Chromebooks through the Linux Terminal.
Linux is an operating system on its own. A small-scale version of it is built-in on every Chromebook.
It can be enabled and installed on these devices so you can get powerful desktop-based software like Lychee Slicer that wouldn’t be available otherwise on Chrome OS.
Can I Use TinkerCAD on a Chromebook?
Yes, you can easily use TinkerCAD on a Chromebook by downloading it from the Chrome Web Store which is available across all devices that use the Google Chrome browser.
TinkerCAD lets you design models in 3D without having to go through the tedious process of downloading any software. It uses the latest WebGL technology and works in the Chrome or Firefox browser effortlessly.
The interface is intuitive and it all operates seamlessly with Chromebooks. TinkerCAD also features game-like lessons that teach you 3D printing in a fun and creative way.
You can visit this link (Chrome Web Store) and simply download it to your Chrome browser on your Chromebook.

How Do I Download Cura on a Chromebook?
To download Cura on a Chromebook, you first have to get the Cura AppImage and run it using the Linux Terminal of Chrome OS.
Before we proceed any further, beware that this process works only on those Chromebooks that have either an Intel or an x86 processor. The following tutorial won’t work if you have an ARM-based chipset.
- Unsure what type of CPU you have in your Chromebook? Download Cog to view important system information such as this.
With the initial disclaimer out of the way, let’s get into this in-depth guide on downloading Cura on your Chromebook.
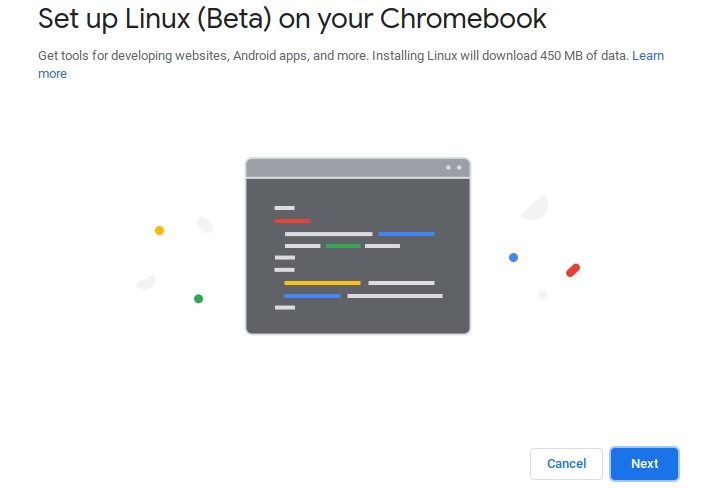
1) The first step is to make sure that you have the Linux Terminal enabled on your Chrome OS. You can do that by heading to your Chromebook’s “Settings” and finding “Linux development environment” under the “Developers” section.

2) If you don’t have Linux installed, you’re going to see an option to install it right away. Follow the easy on-screen instructions to get through the process.
3) Once you’re done, go to your Chromebook Launcher where all applications can be accessed from. Find the “Linux apps” folder and click on “Linux Terminal” to continue.
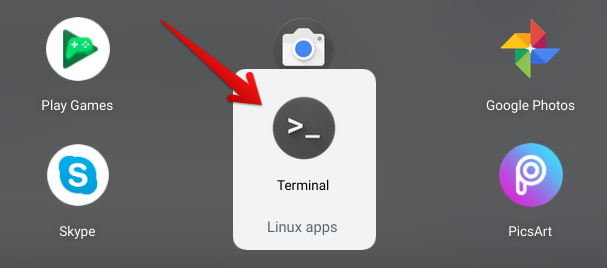
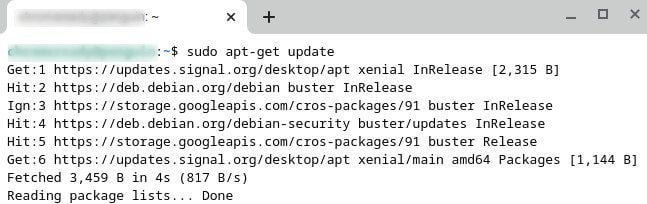
4) After clicking on “Terminal,” a window will open up. Here, you’ll be able to run commands and use them to install applications. The first thing you’ll do is update your Terminal to make any potential problems are eliminated from the get-go.
Use the following command to update your Linux:
sudo apt-get update
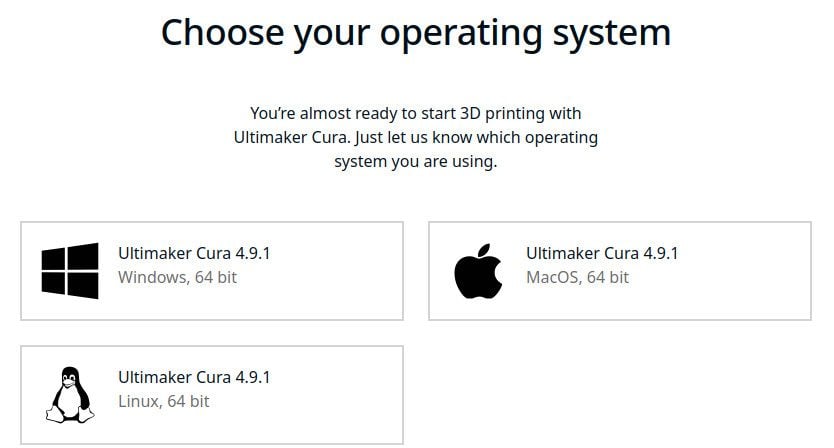
5) With the Terminal all ready and set, it’s time to download the Cura AppImage. You can do that by going to this Ultimaker Cura and clicking on the largely apparent “Download for free” button.
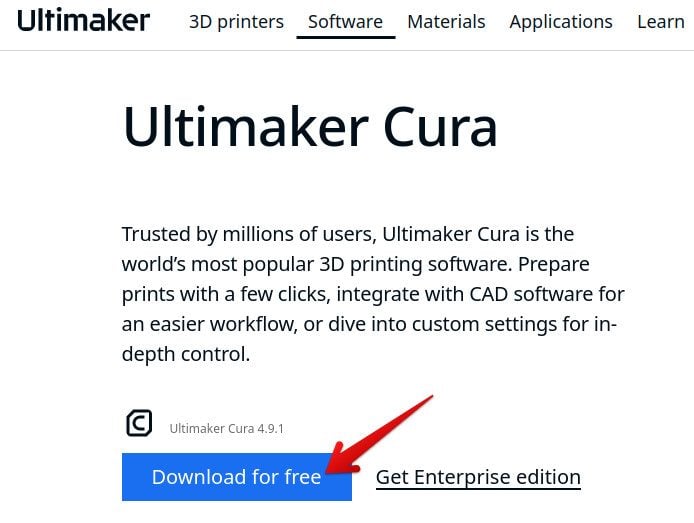
6) As soon as you do that, you’ll be asked to choose the operating system for the Cura AppImage. Select “Linux” here to proceed.
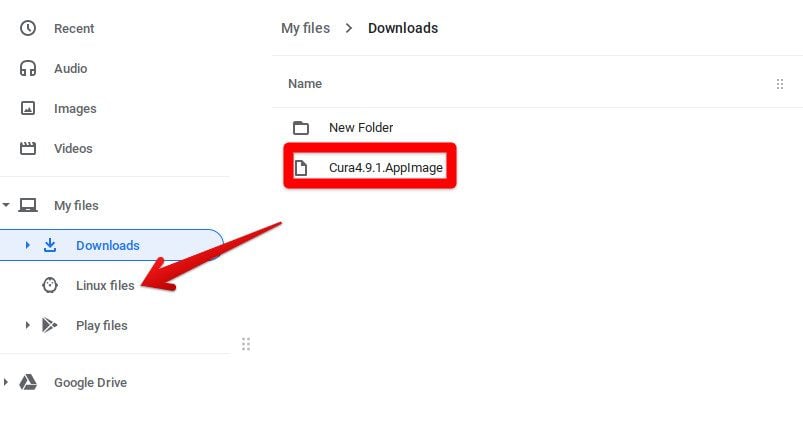
7) The download is going to take a while as it’s about 200 MB. After it’s done, you’ll have to rename the file to something simpler. At the time of writing, the latest version of Cura is 4.9.1 so it’s better to change your AppImage’s name to “Cura4.9.1.AppImage” so you can have an easier time incorporating it in the Terminal.
8) Next, you’ll move this newly-named file to the “Linux files” folder in your Chromebook’s “Files” app. This will allow the Terminal to run the AppImage.
9) Next, simply copy and paste the following command in the Terminal to allow Linux to make modifications to the Cura installer.
chmod a+x Cura4.9.1.AppImage
10) If nothing happens after this step and you see your Linux username appearing again, it means that the operation was successful. Now, you’ll have to execute the Cura AppImage to finally install it on your Chromebook.
The following command should do the trick for you. You’ll have to be patient here since the installation will take a while.
./Cura4.9.1.AppImage
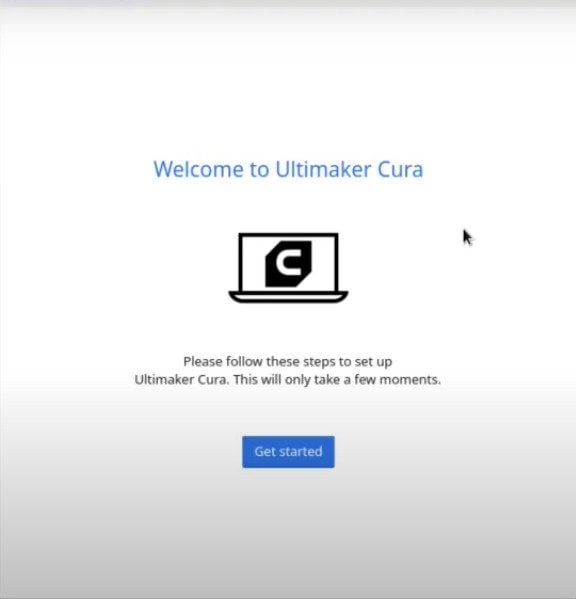
11) Shortly, Cura will be installed on your Chromebook and it’s going to launch as soon as it does. It’s going to have the same interface as you would remember from using it on Windows or macOS X.
One important thing to note is that you’ll always have to input the following command whenever you want to launch Cura again. Unfortunately, there’s no app icon in the Linux apps folder for Cura yet, but perhaps, the developers do something about this hiccup down the road.
./Cura4.9.1AppImage
Downloading Cura on a Chromebook can get tricky and requires a decent amount of attention. If you happen to get stuck somewhere, the video below can help you out.