Simple Anycubic Photon Ultra Review – Worth Buying or Not?
The Anycubic Photon Ultra is a 3D printer that is created to introduce more people to the DLP technology for resin 3D printing at a budget. It differs from the usual MSLA 3D printing technology, allowing for more efficient light utilization.
Anycubic have plenty of experience manufacturing popular printers, whether filament or resin, so hearing that they’ve created a modern machine that uses a different technology is great news. It’s the world’s first affordable DLP desktop 3D printer, co-engineered with Texas Instruments.
I decided to do a review of the Anycubic Photon Ultra DLP Printer (Kickstarter) so you can get a good idea of its capabilities and how it works. I’ll be taking you through the unboxing and setup process, actual prints with closeups, as well as the features, specifications, benefits, downsides, so stay tuned.
Disclosure: I received a free tester model of the Photon Ultra by Anycubic for review purposes, but opinions in this review will be my own and not bias or influenced.
This 3D printer is due to be released on Kickstarter on the 14th of September.
Unboxing the Anycubic Photon Ultra
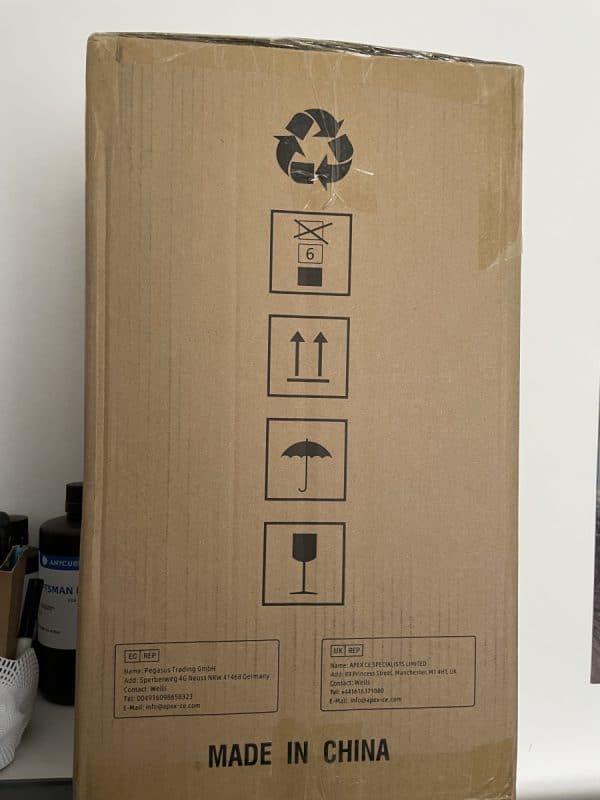
The Anycubic Photon Ultra came nicely packaged as expected from this reputable company. It was quite compact and simply put together.
Here is how the box looked from delivery.
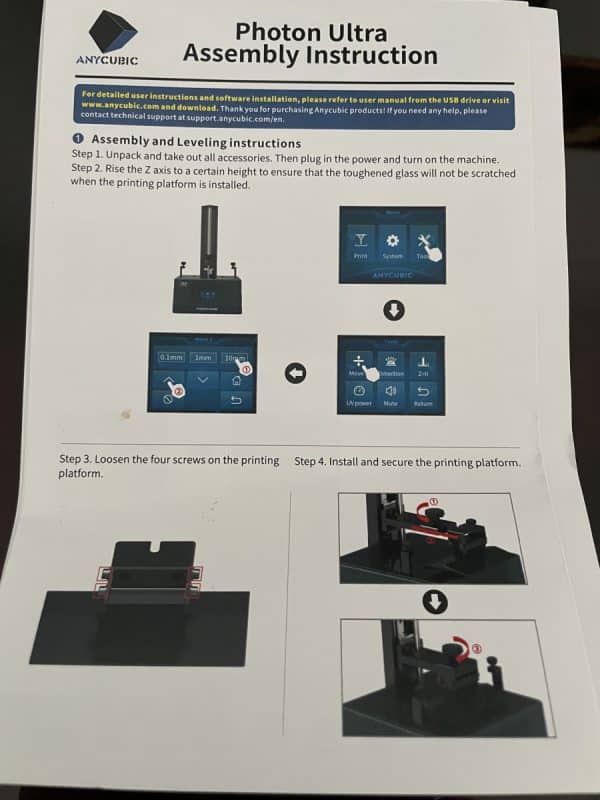
Here is the top of the package, showing us the manual for the Photon Ultra, as well as a box of accessories.
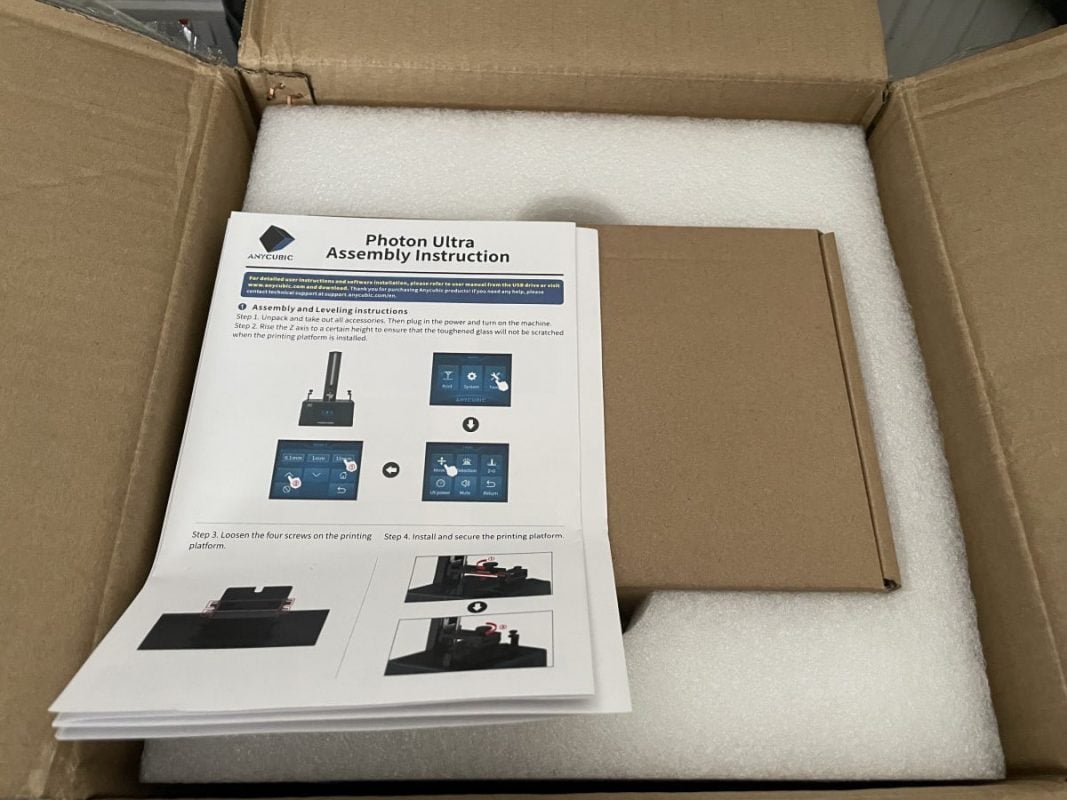
The manual is very straightforward and easy to follow, with nice visual pictures to help you along the way.
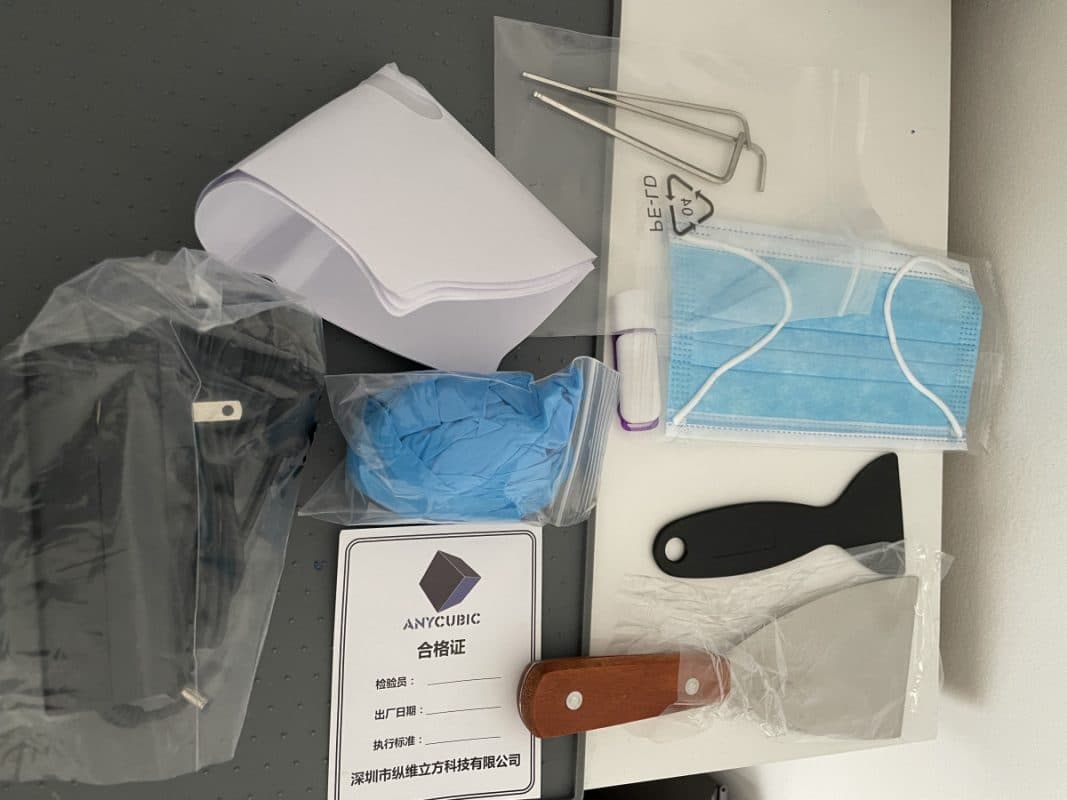
Here are the accessories in the box.
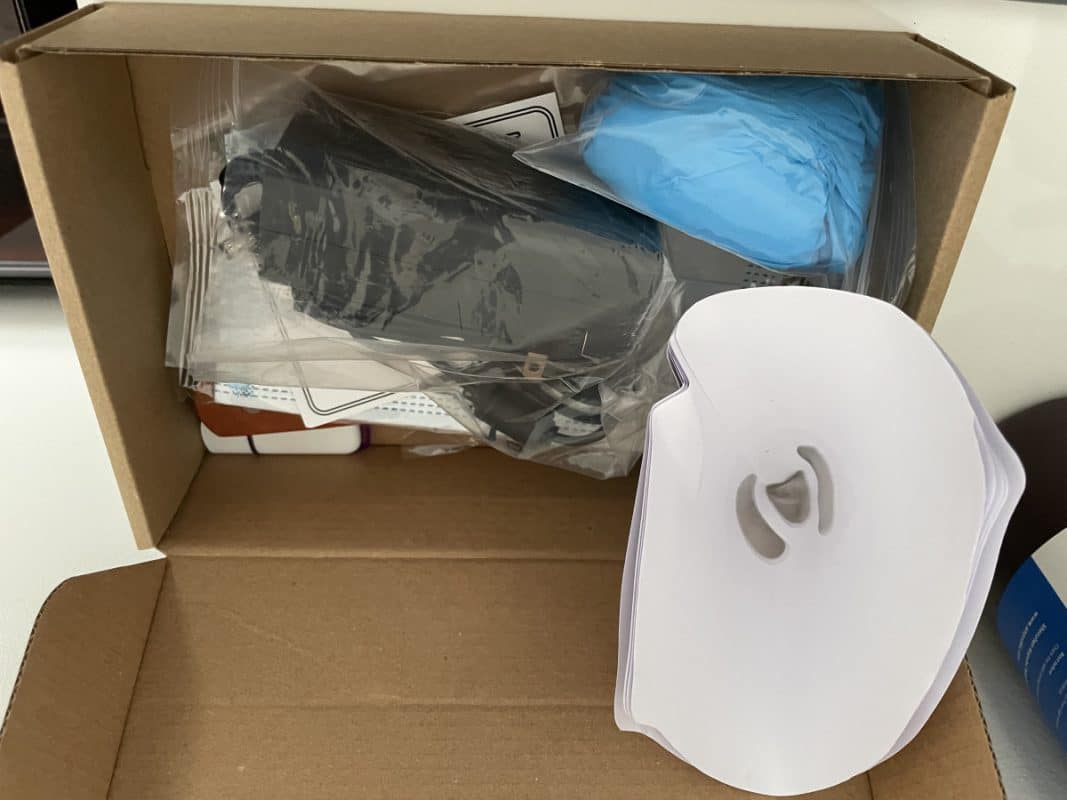
It consists of:
- Fixing kit (different size Allen keys)
- Power supply
- Facemask
- A few sets of gloves
- Filters
- Metal scraper
- Plastic scraper
- Warranty card
- USB stick
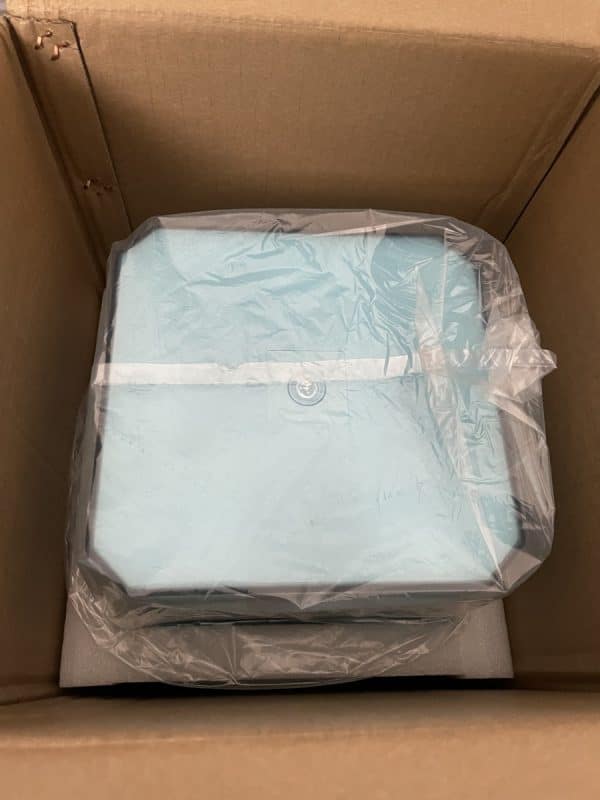
After we remove the first section of the package, we uncover the unique blue-colored lid. It’s packed nice and snug so it should be protected against movement in transit.
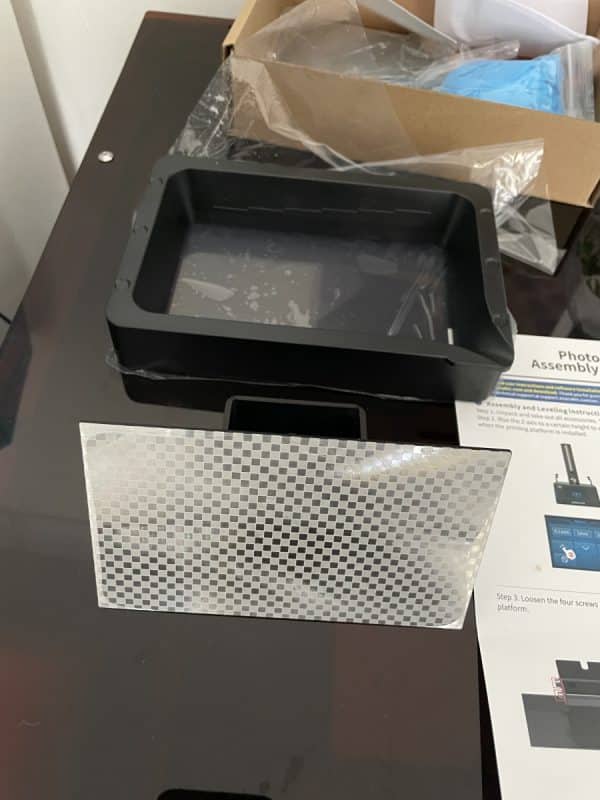
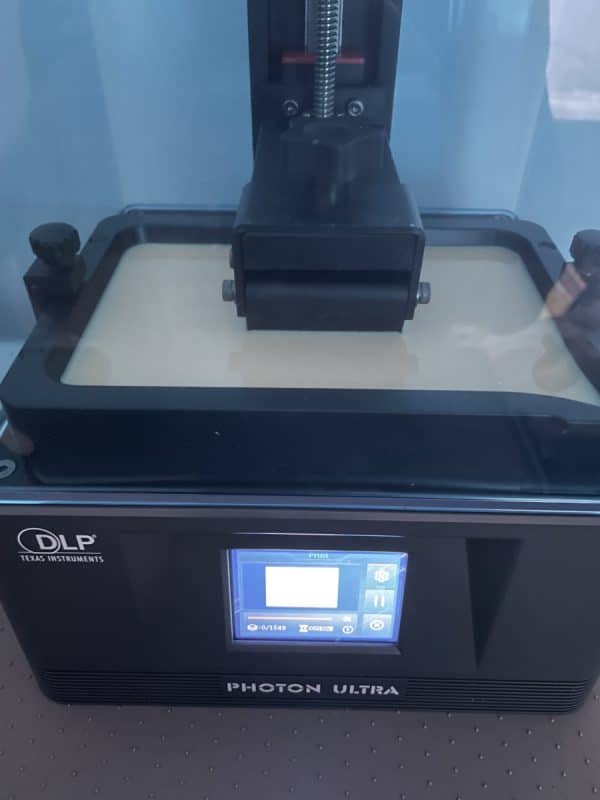
The next layer gives us the high quality and sturdy laser engraved build plate, the resin vat, and the top of the Photon Ultra itself.
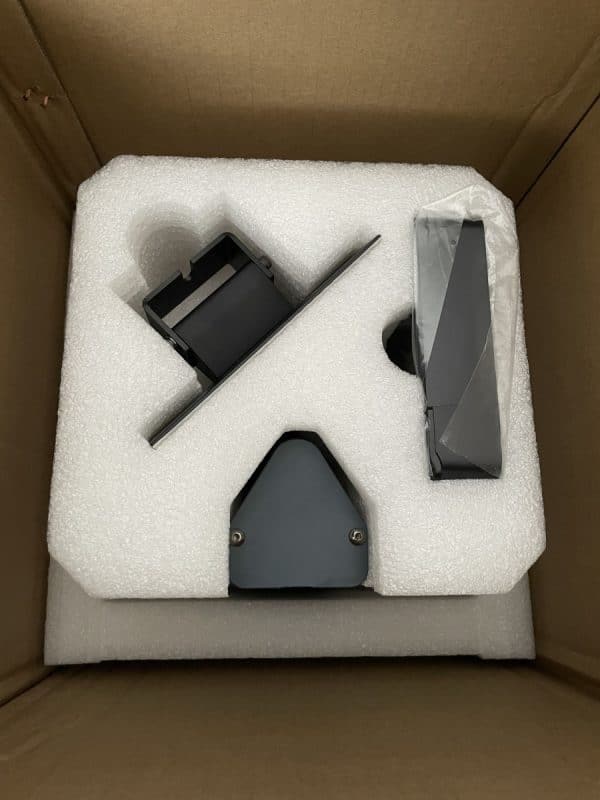
Here’s the resin vat and build plate, giving a build volume of 102.4 x 57.6 x 165mm.
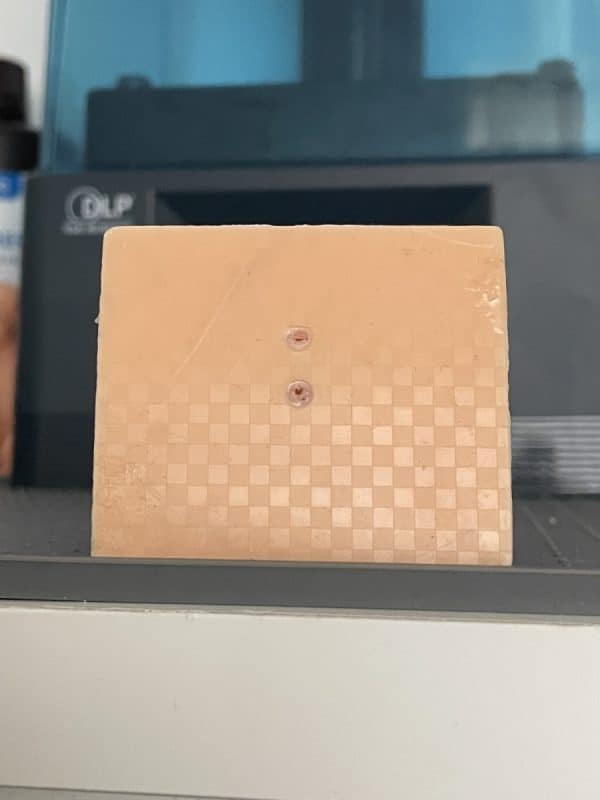
You can see the checkered pattern on the underside of the build plate. Also, the resin vat has measurements and a “Max.” point, so the resin doesn’t overfill, as well as a lip in the bottom-right corner to pour resin out.
The last section of the package is the Anycubic Photon Ultra itself.
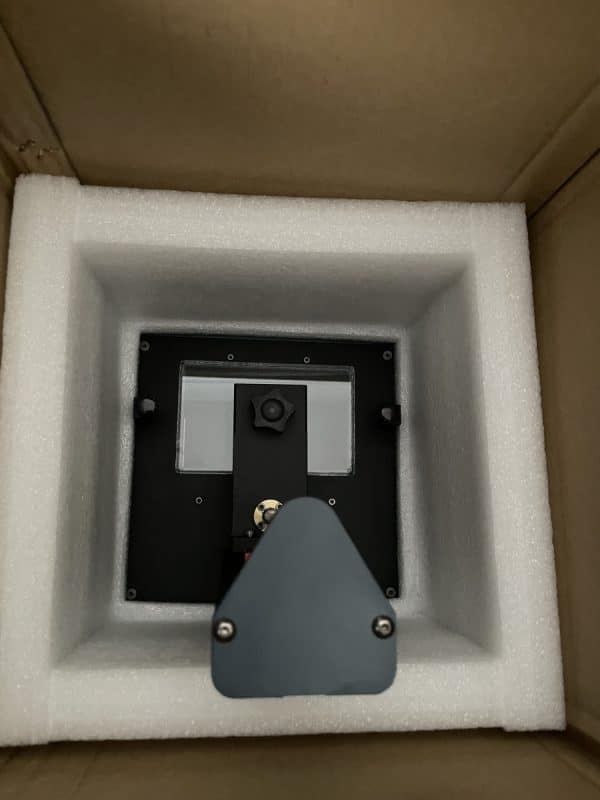
Here is the unboxed Photon Ultra in all its glory. You can see it has a single lead screw that controls the Z-axis movement. It’s very sturdy so it holds up well for stability and model quality.

It’s definitely a great looking resin 3D printer that would look great pretty much anywhere.
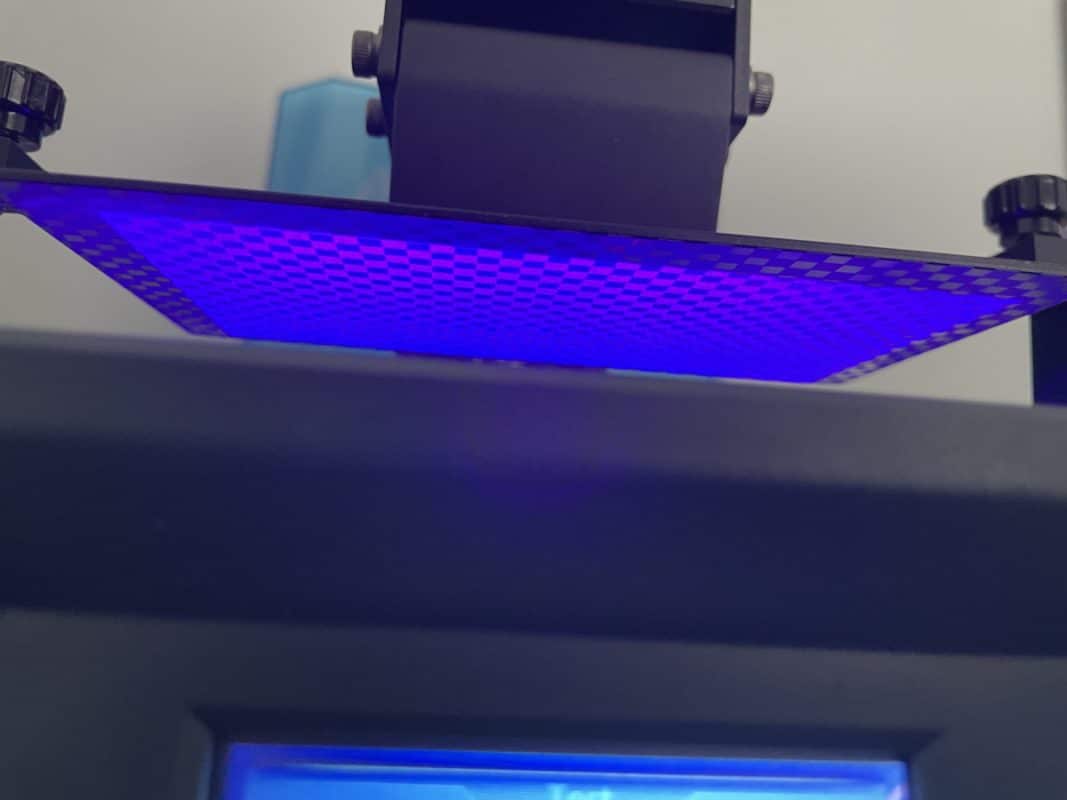
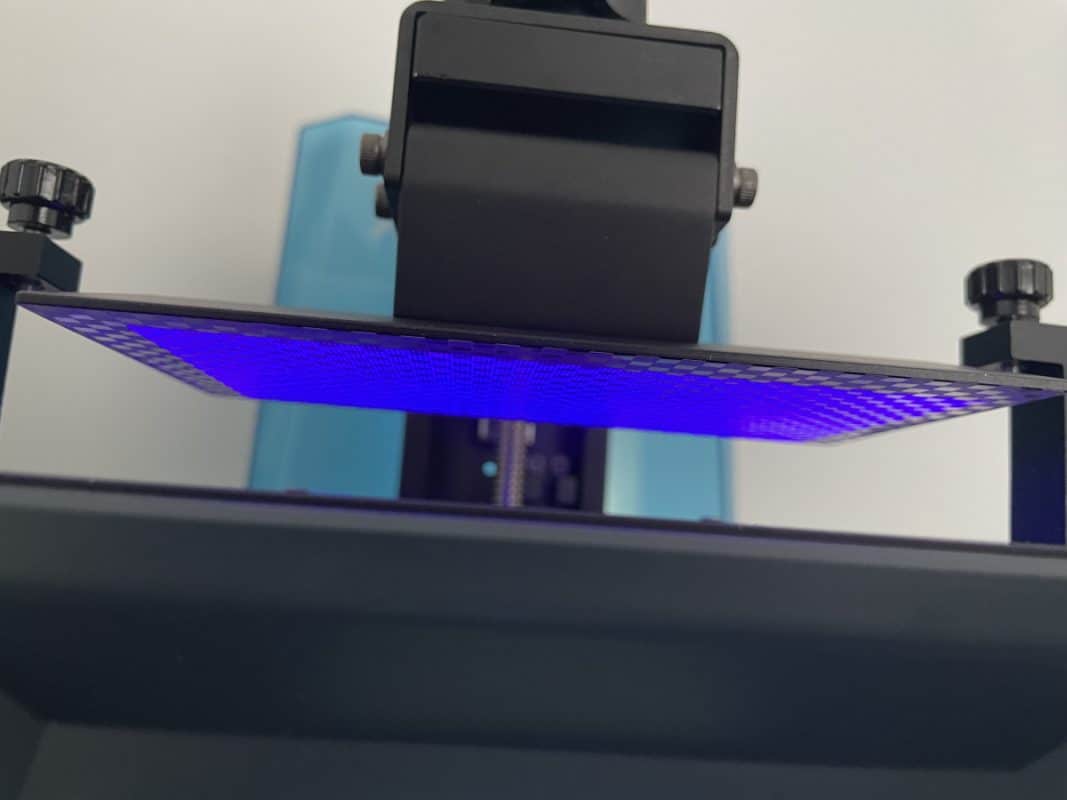
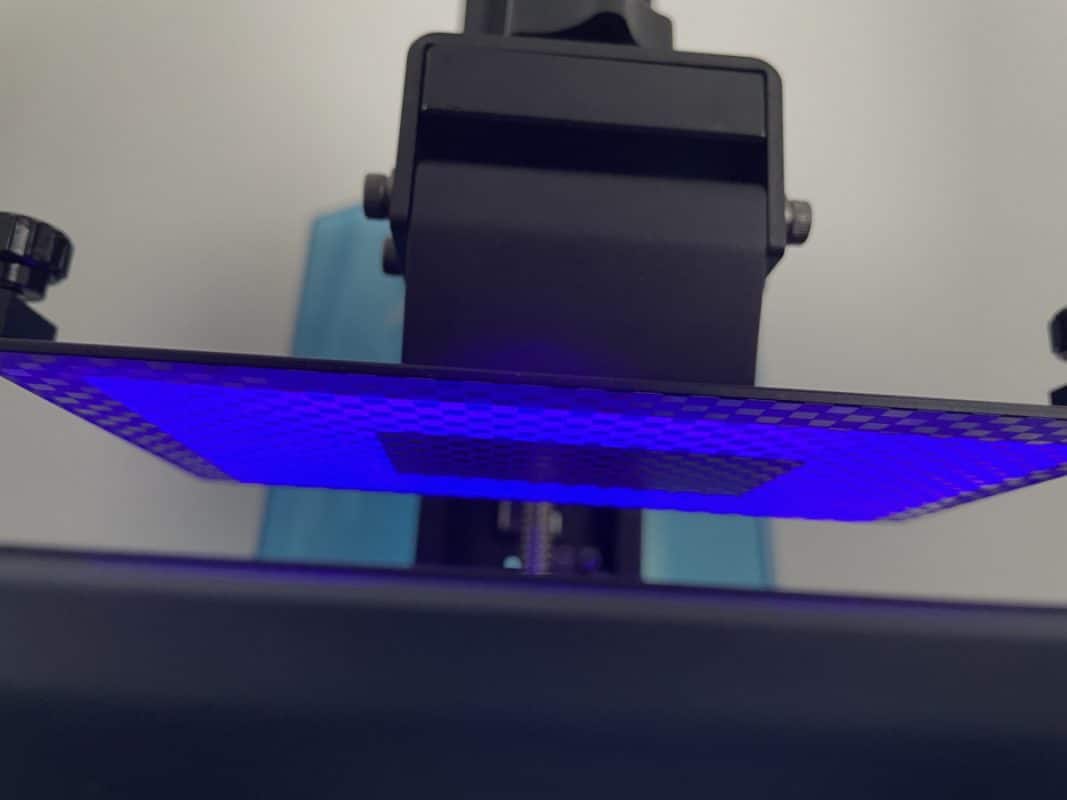
You can see the DLP projector beneath the glass. I have a closer picture of it further in the review.
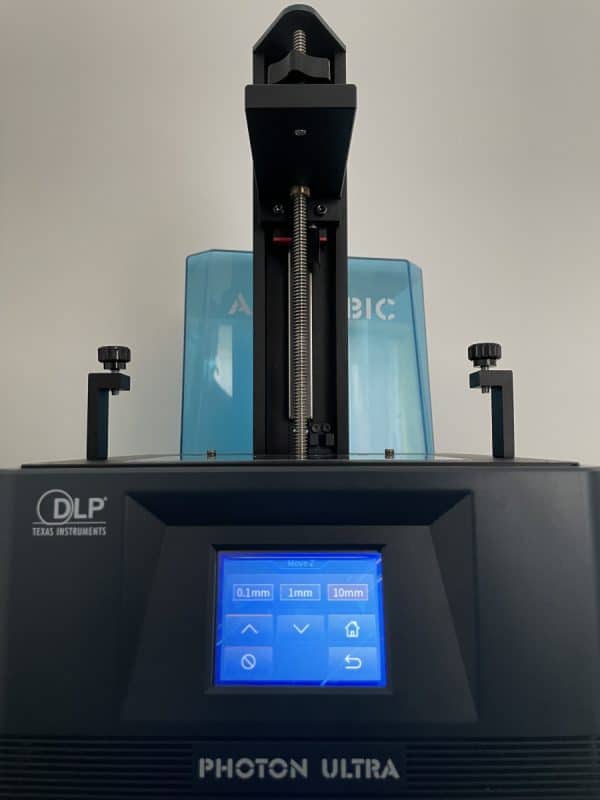
Here’s the user interface.
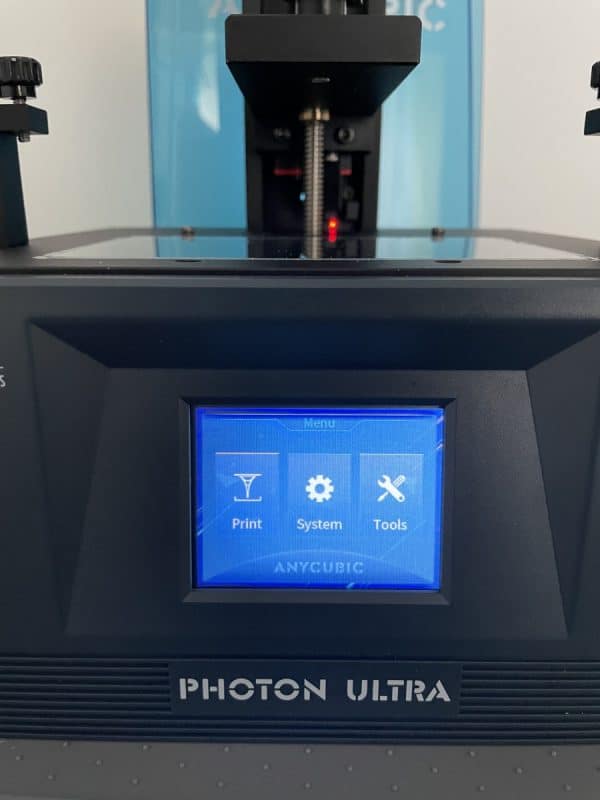
Here’s the side view (right side) of the Photon Ultra where you turn it on or off and insert the USB. The USB has a sweet test file that you’ll see further down in this review. It also has the manual and the Photon Workshop software.

You can check out the official Anycubic Kickstarter video below.
Setting Up the Anycubic Photon Ultra
Setting the Photon Ultra printer is a really simple process that can be done in less than 5 minutes. All we really need to do is to plug in the power supply, level the build plate, test the exposure lights, then get started with printing.
I’d recommend taking your time though and following along closely with the manual so you don’t make any mistakes.
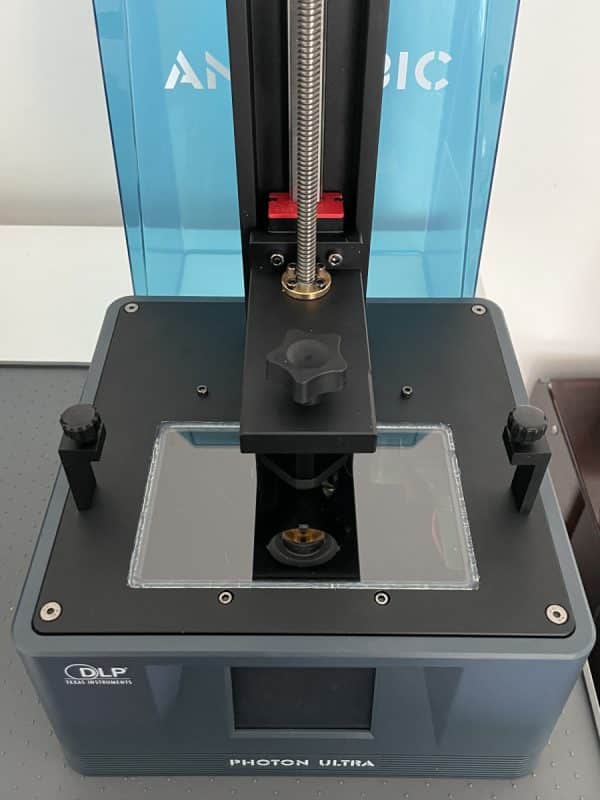
Below is the leveling process, after loosening the four screws on the sides of the build plate, then putting in the leveling paper on top of the printer’s screen. You simply lower the build plate to the screen, push the plate down gently, tighten the four screws and set Z=0 (home position).
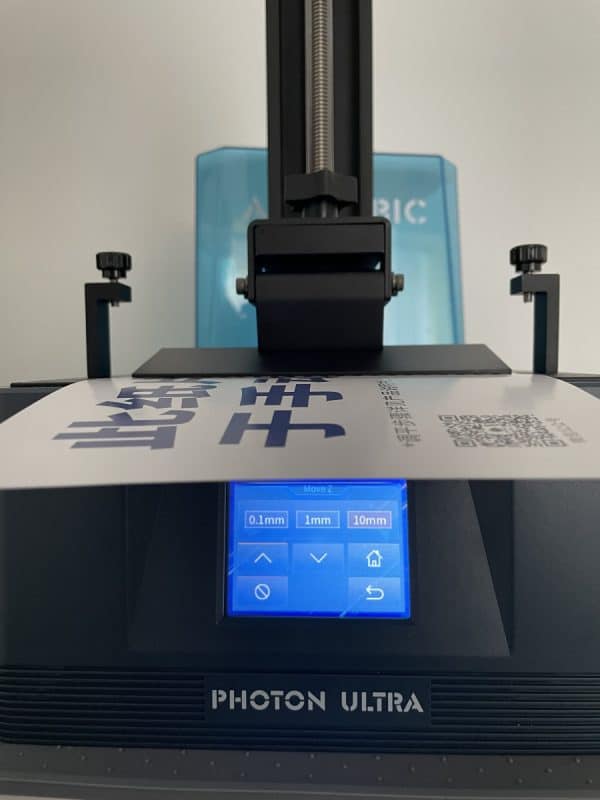
You are shown how to test your printer’s exposure to ensure it is working properly. There are three main exposure positions.
After everything looks good, we can slide the resin vat inside the printer, tighten up the thumbscrews on the side to lock it in place, then pour your resin in.
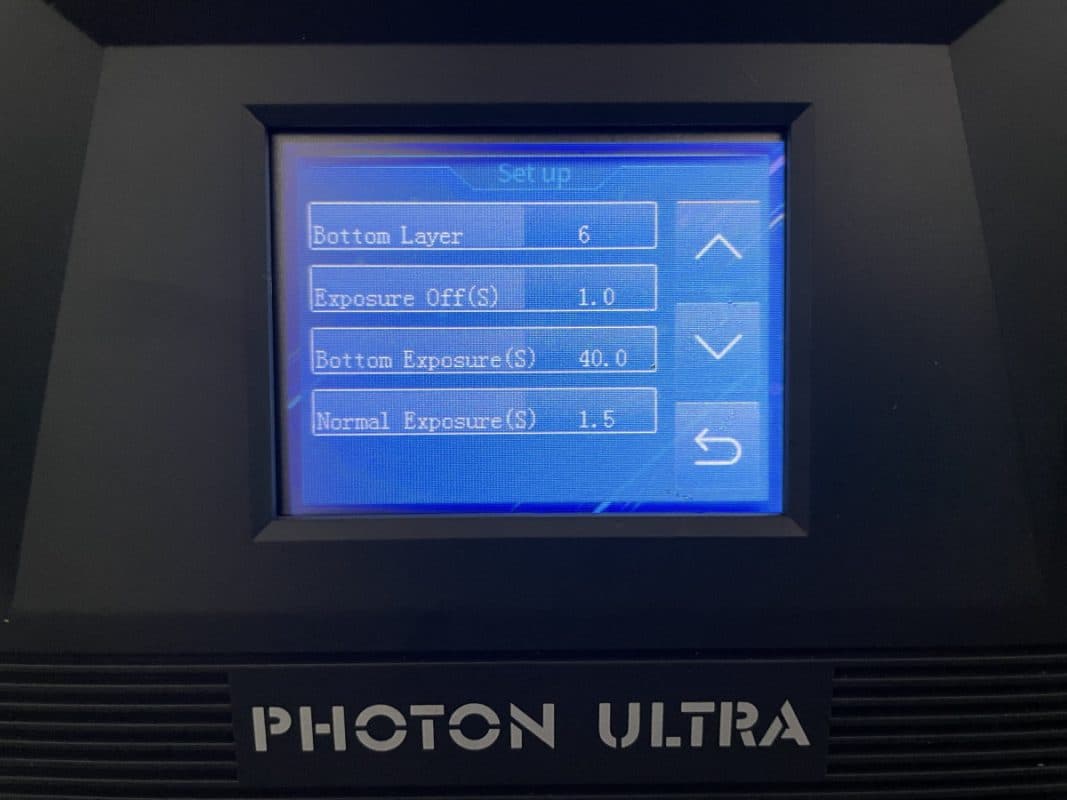
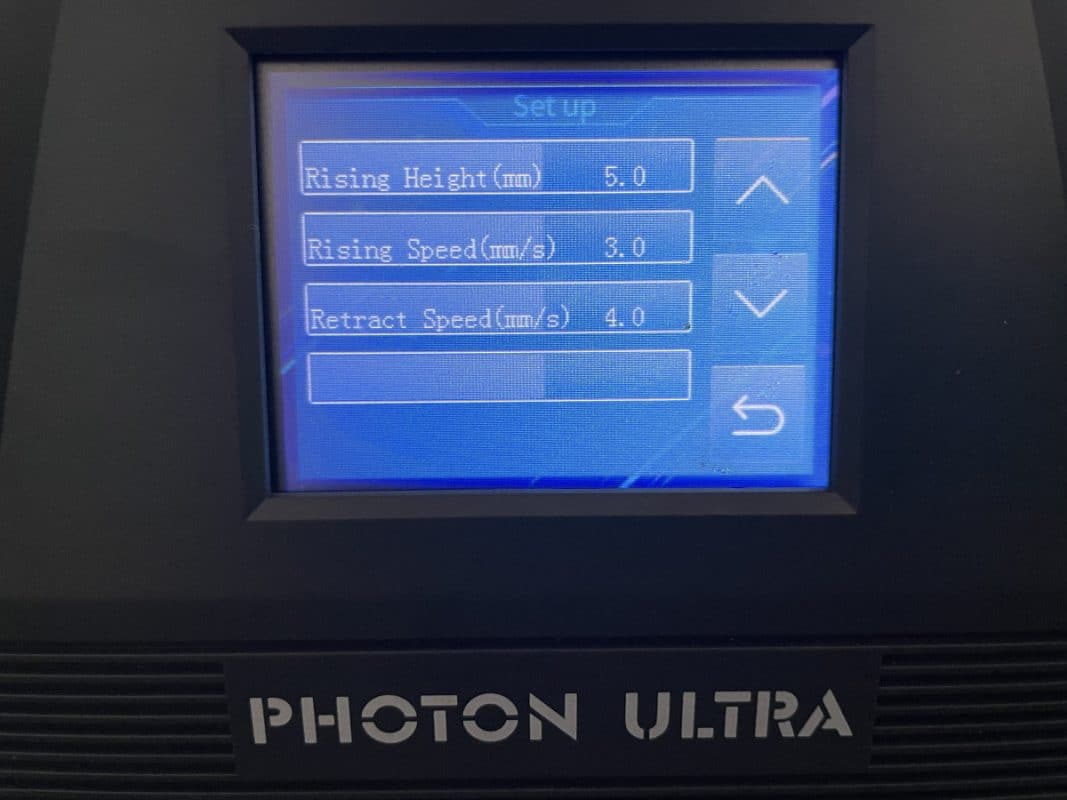
While you are printing, you can change multiple settings as you wish, giving you more control over your resin printer.
The settings you can change are:
- Bottom Layers
- Exposure Off (s)
- Bottom Exposure (s)
- Normal Exposure (s)
- Rising Height (mm)
- Rising Speed (mm/s)
- Retract Speed (mm/s)
Printing Results from the Anycubic Photon Ultra
Wolverine Test Print
The first print I tried unfortunately failed due to a poor USB connection. When I contacted Anycubic, they let me know that the tester units don’t come with the USB slots fully welded so that can happen.
With the actual Photon Ultra units, they should come properly assembled and sturdy, so we can put this down as a prototype error.
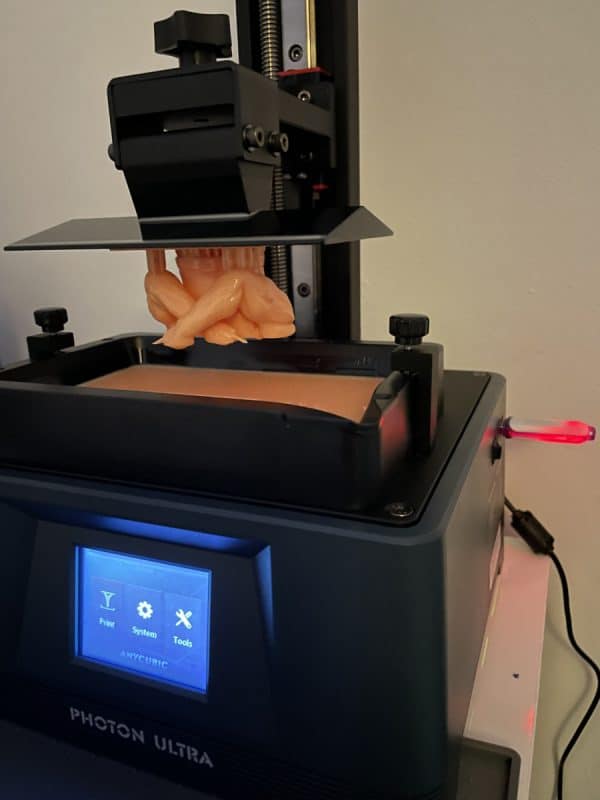
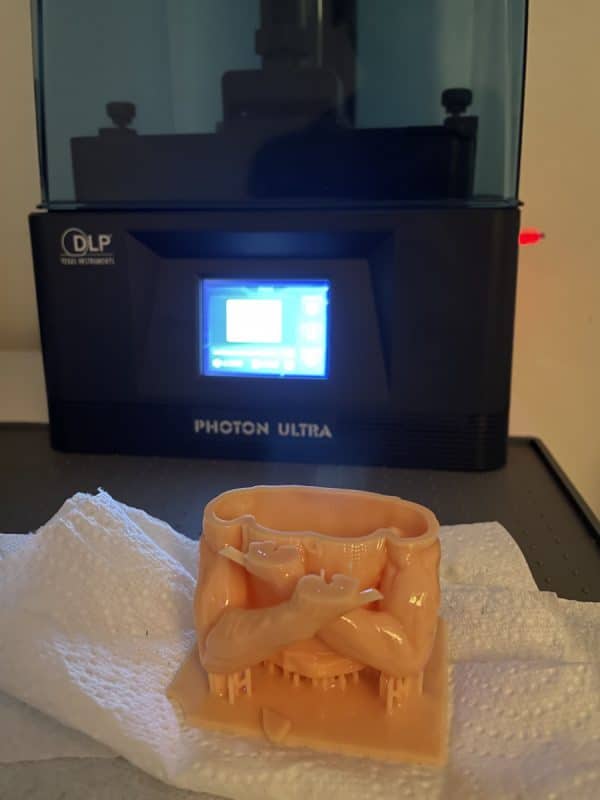
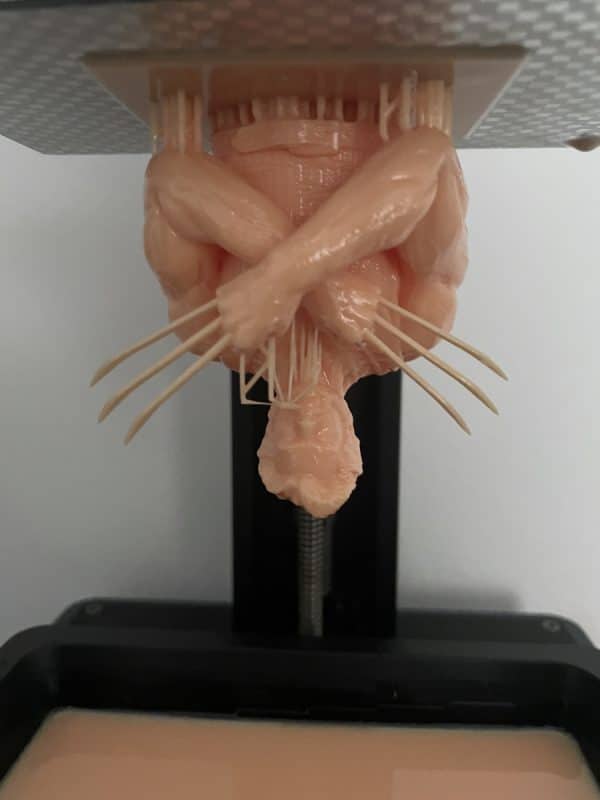
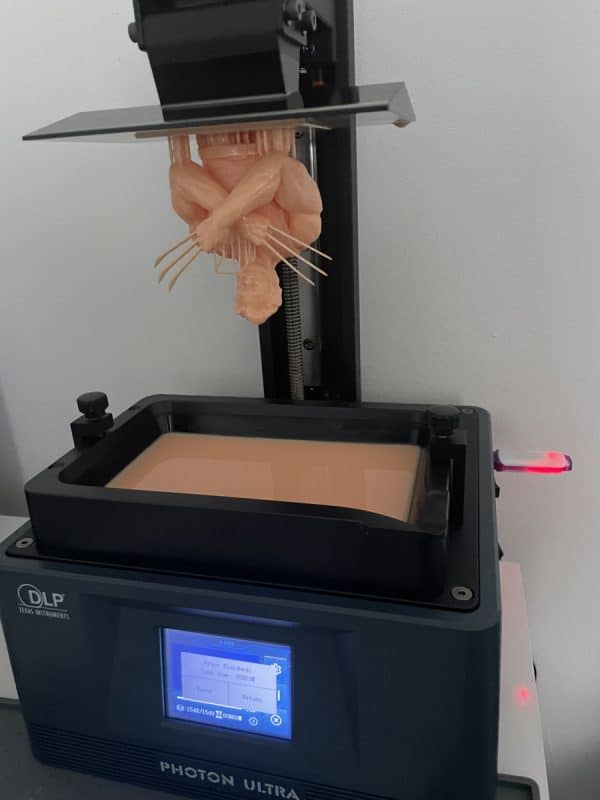
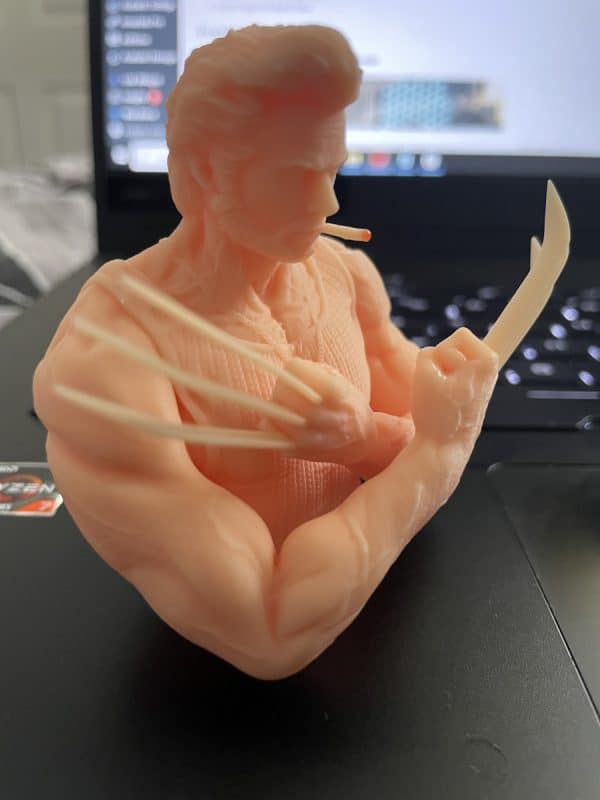
I tried printing the test print again, this time being more careful to minimize movement around the printer and things went a lot better. You can see the finished wolverine model below which came pre-supported.
This is made with Anycubic’s Craftsman Resin (Beige).
Here is a closer look at the model after washing & curing it.
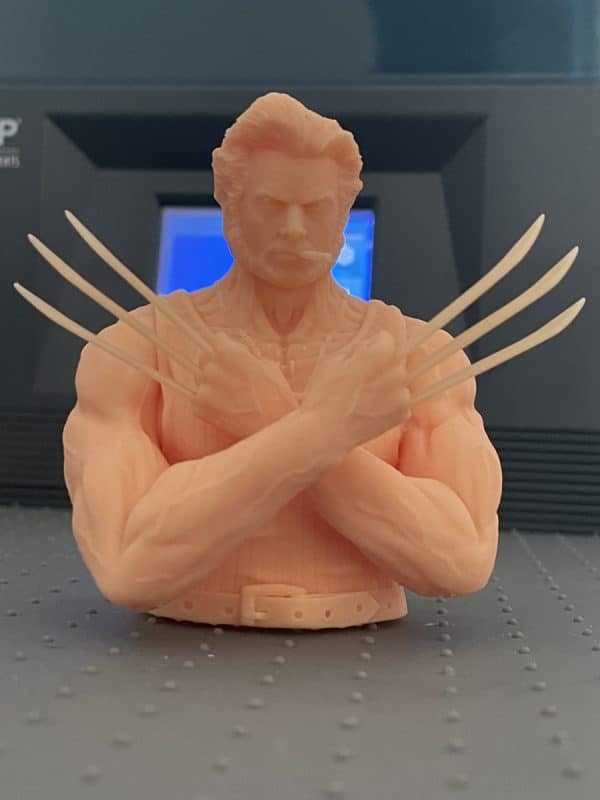

I took some more shots so you can see the quality better.
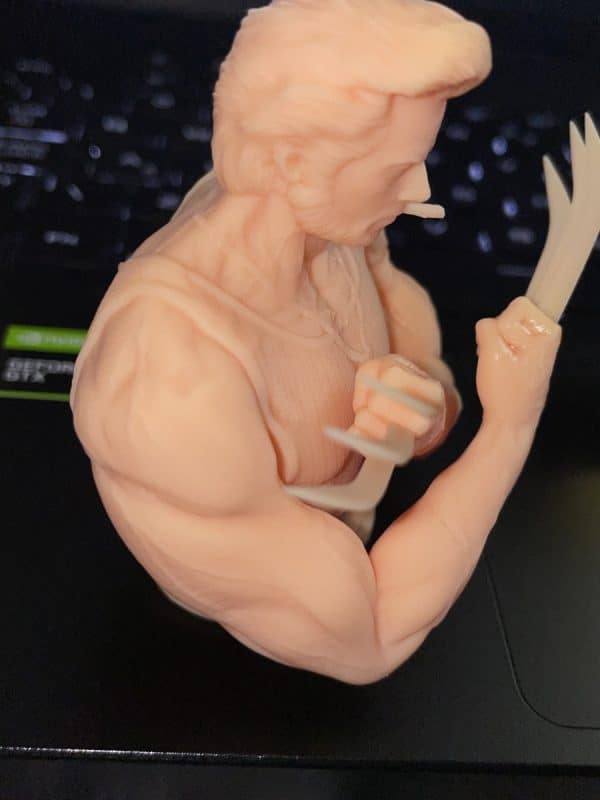
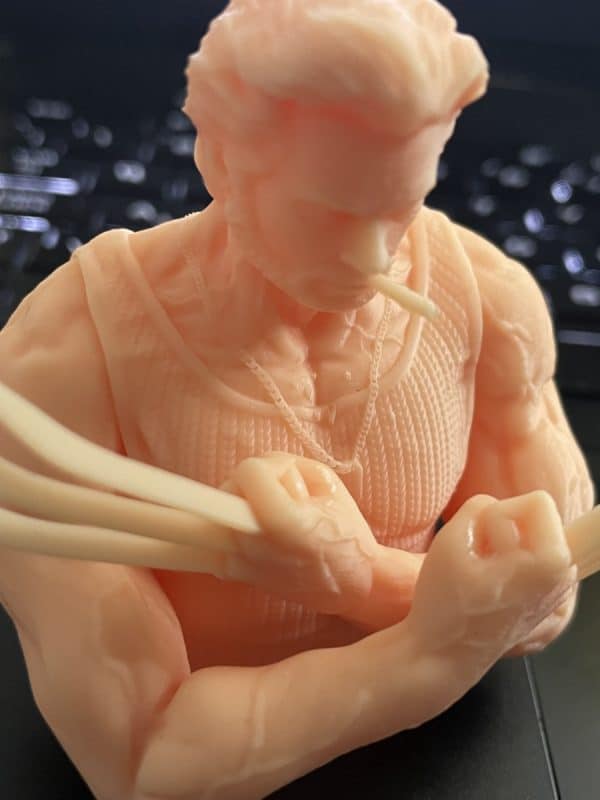
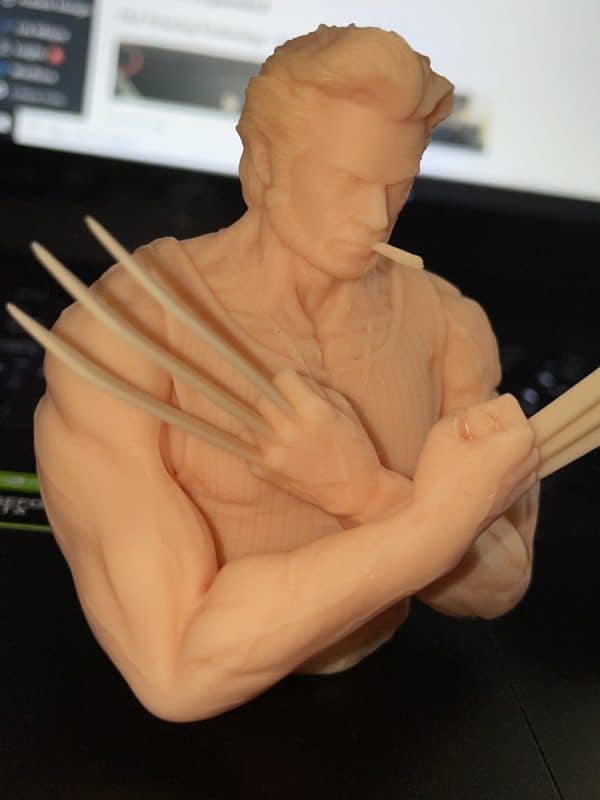
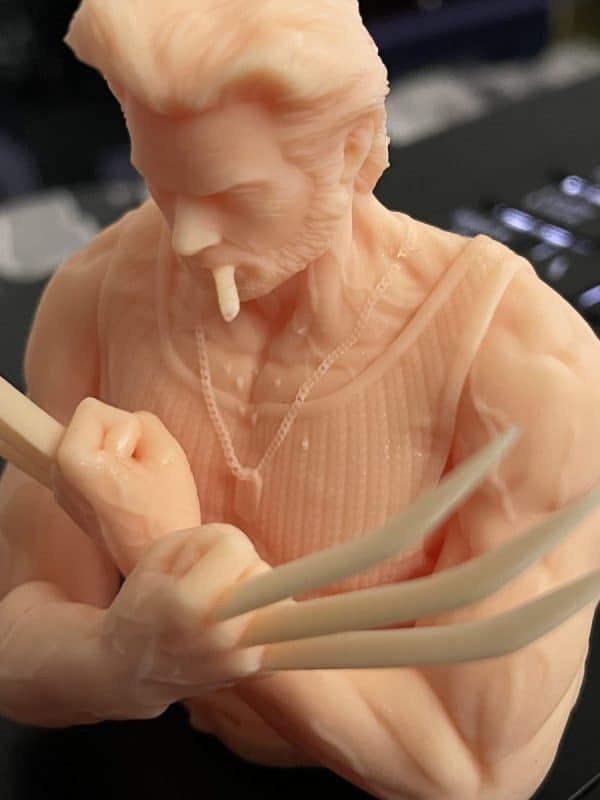
I thought to make the model a little realer by adding some red resin to the end of the cigarette to mimic it being lit.
Barbarian
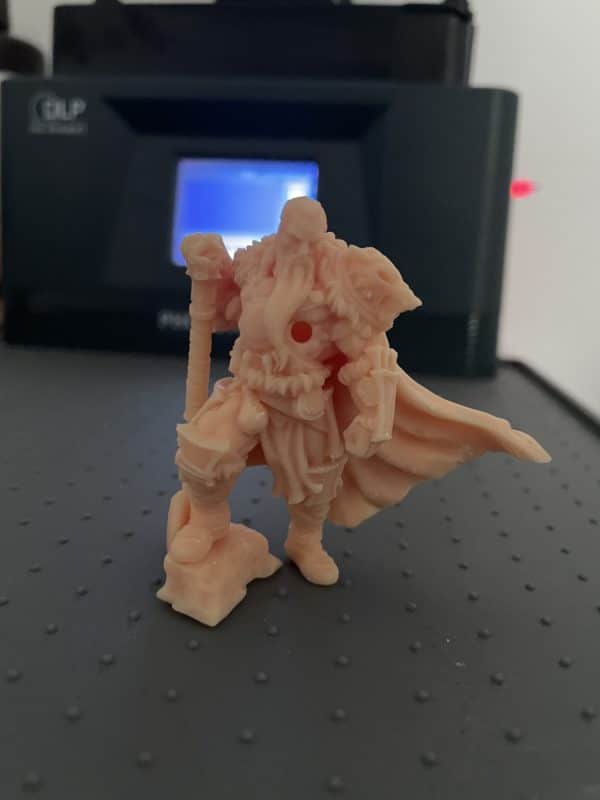
Here’s the model with the hole filled up with resin then cured.
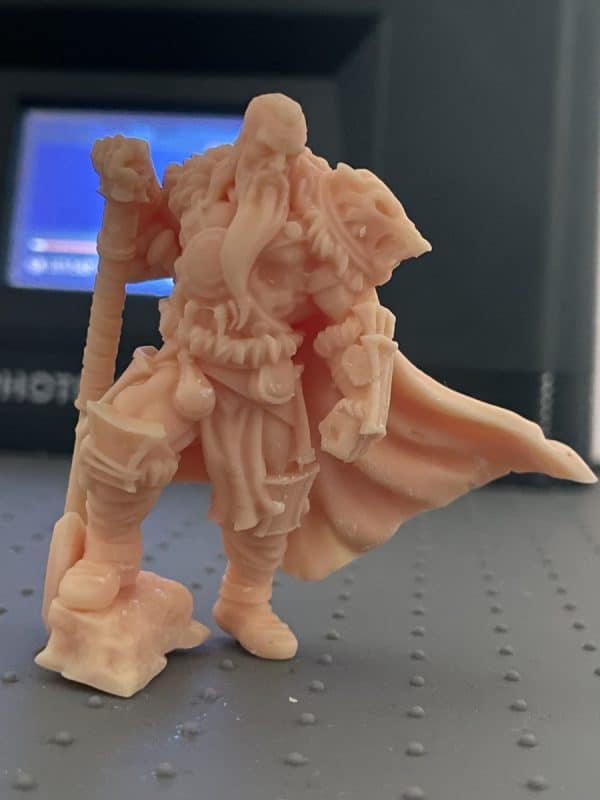
Here are some more shots. You can really appreciate the details in these DLP models.

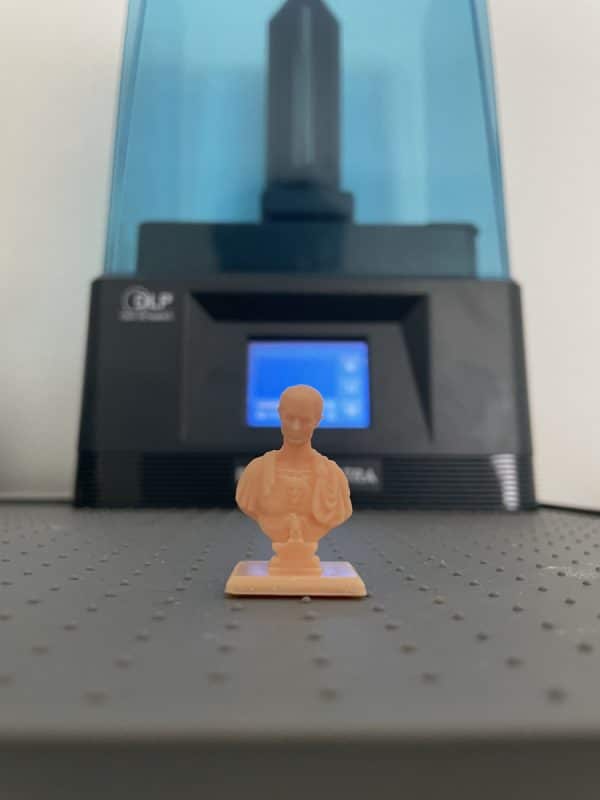
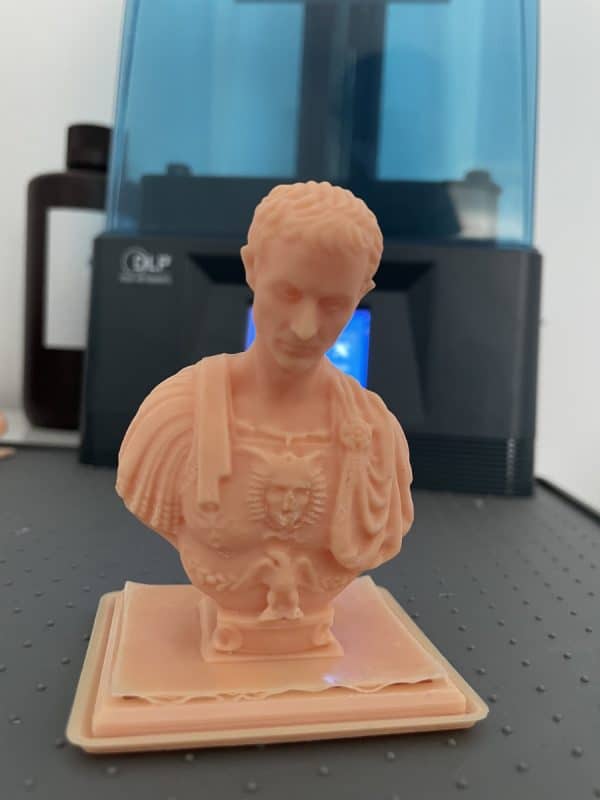
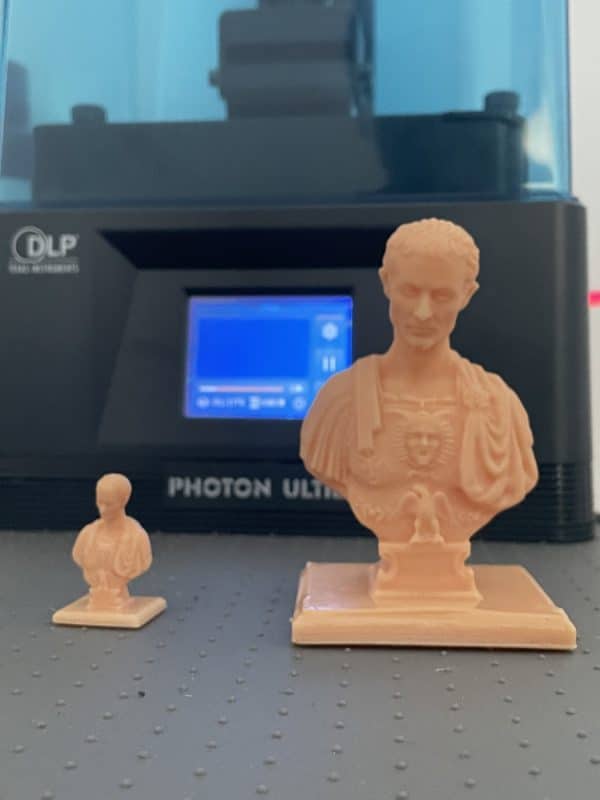
Julius Caesar
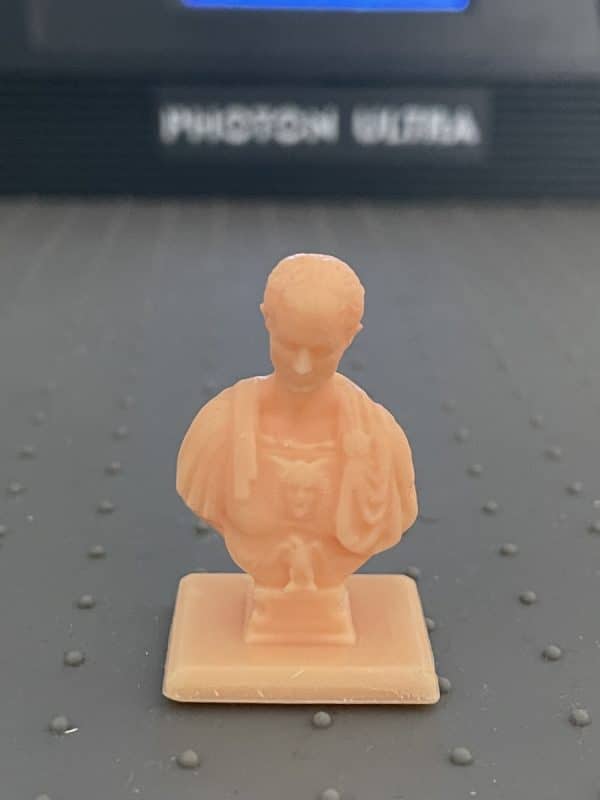
I started with a smaller Caesar model which came out pretty nicely.
You can still see plenty of details in the face and chest.
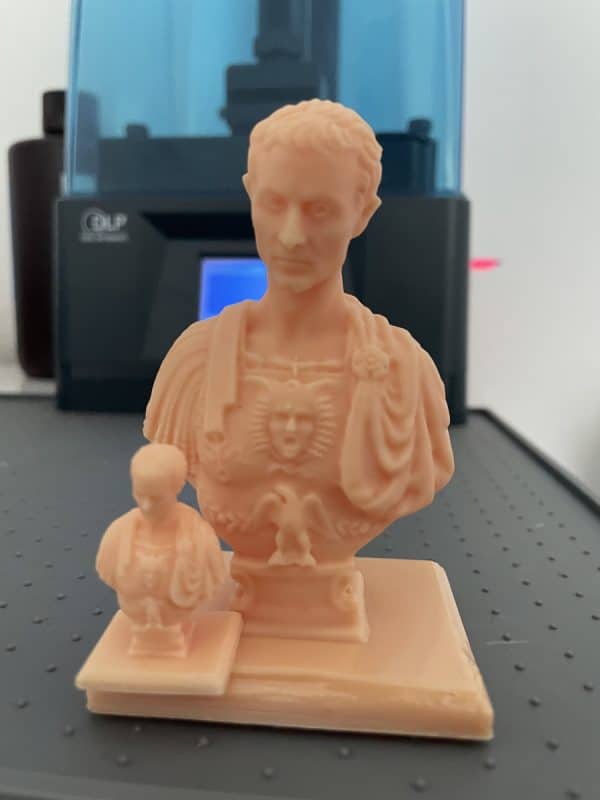
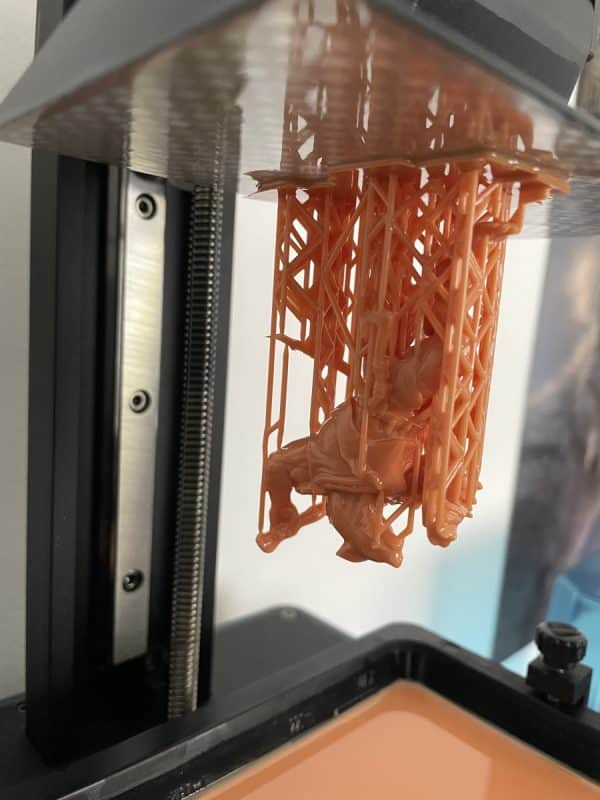
Here is a larger Caesar print. It did have some issues with the base pulling away but still finishing the print in the end. Also, the supports were a little too close to the model below the chest plate and a little came off while I removed them.
I printed another Caesar model with a few changes but I still had the base pull away a little bit. I did a little repairing of it by getting some uncured resin, spreading it across the base and curing it to stick it together.
I should have printed this at an angle, so there’s less surface area and suction for these larger layers.
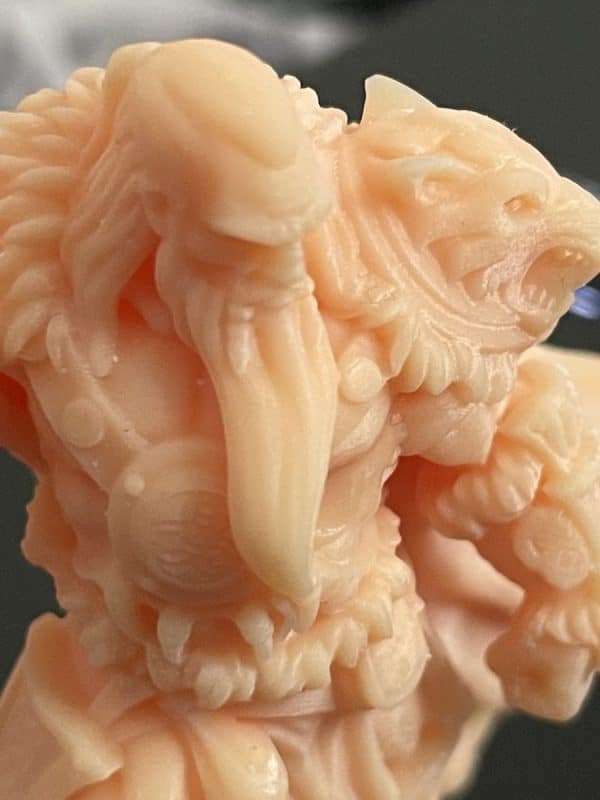
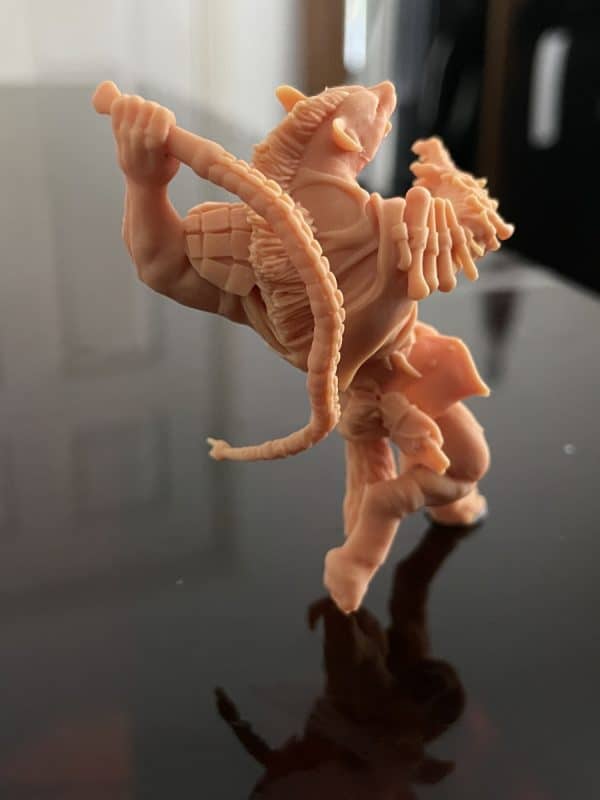
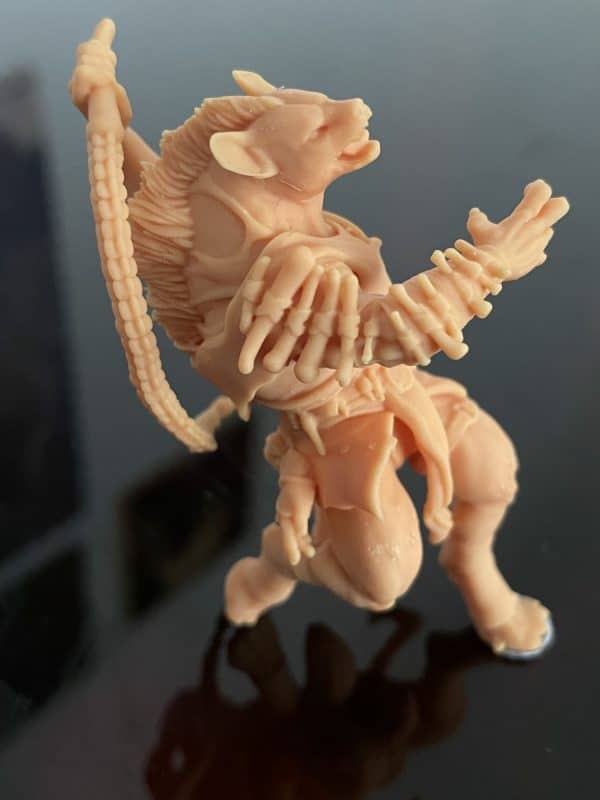
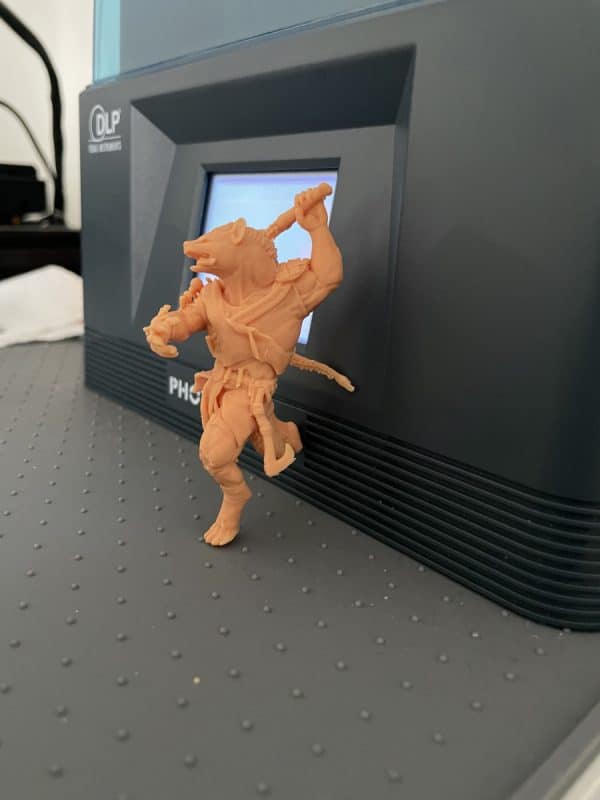
Gnoll
I did try to print this Gnoll model and had a failure, maybe due to having a normal exposure too low for the resin, so I cranked it up to 2 seconds instead of 1.5 seconds and had better results. I also changed the resin color from Anycubic Craftsman Beige to Apricot.
I love how much detail is shown in this model from the fine hairs to the accessories. The whip is another amazing feature of this 3D print that shows the ripples and aesthetics nicely.

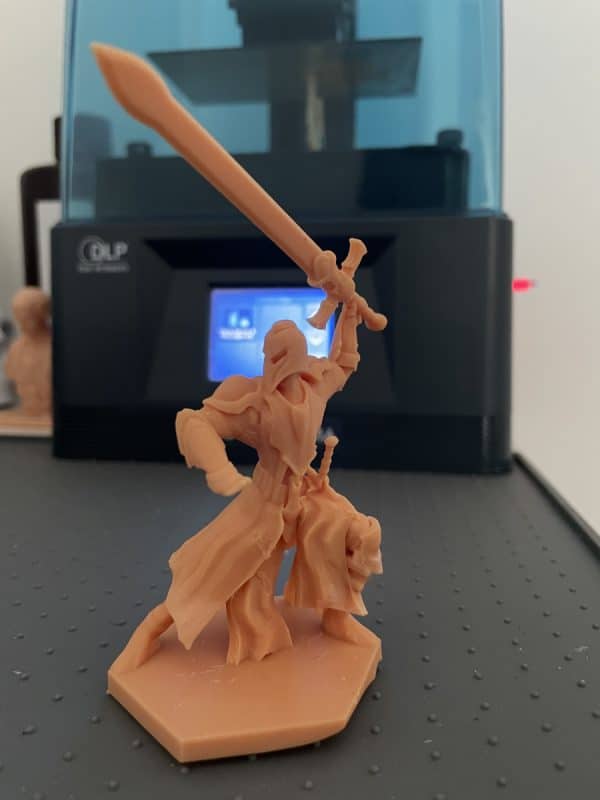
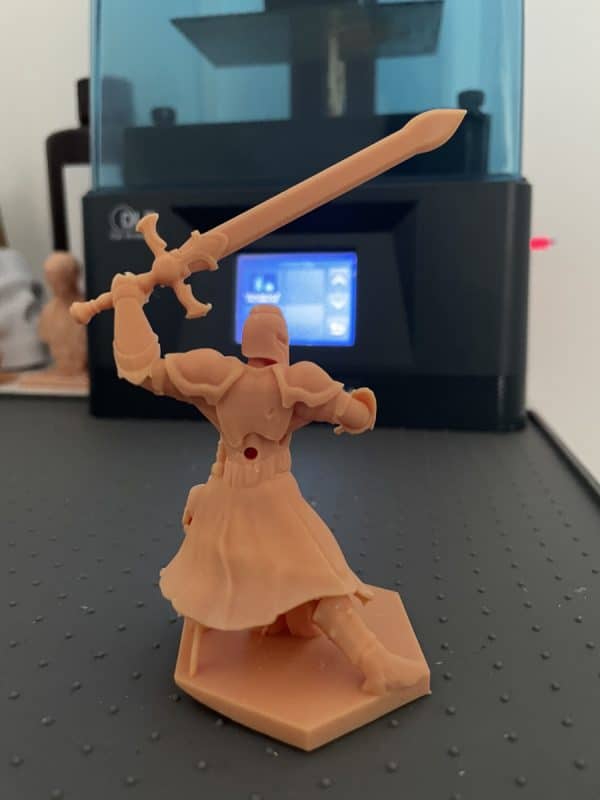
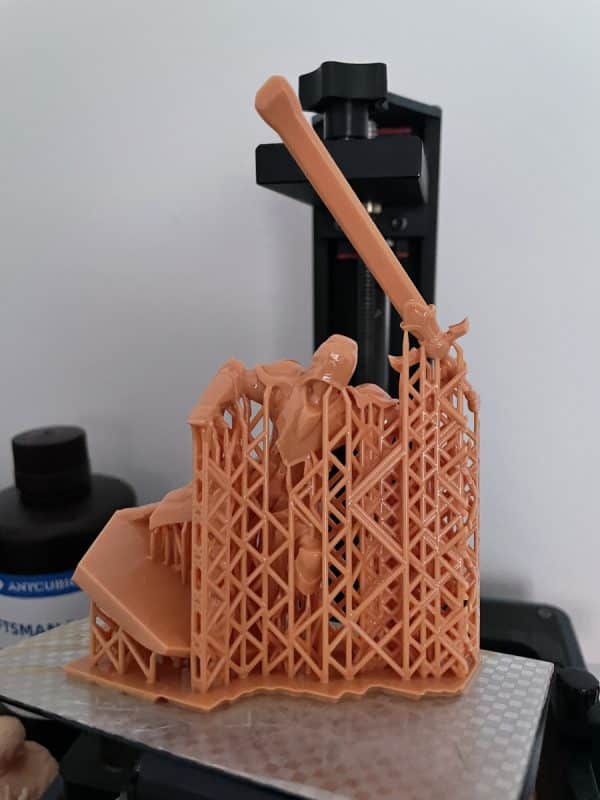
Knight
This knight model came out pretty great. The details are outstanding and really intricate from the sword to the armor and helmet. I did have the base not being supported fully which you can see, mainly from finding it hard to support models in Anycubic’s Photon Workshop.
I’d recommend using another slicer to create supports then export the STL to Photon Workshop to slice the .dlp format.
I couldn’t find the exact file since I downloaded it a while ago, but I found this Armored Warrior on Thingiverse as a similar model.
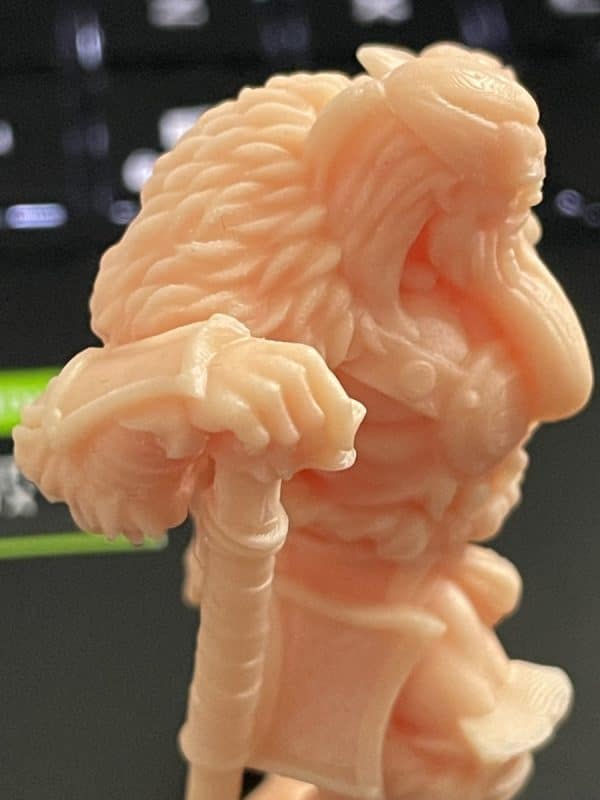
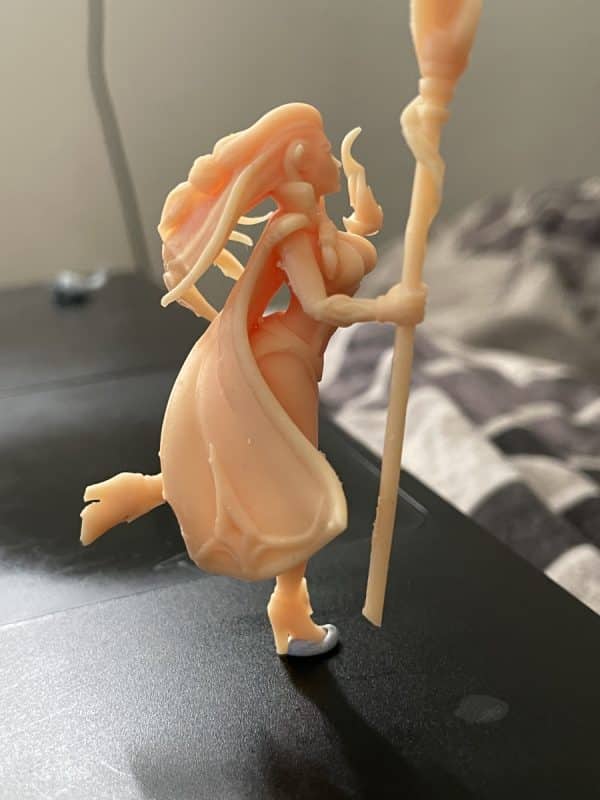
Witch
This witch model came out really nicely, with plenty of fine details from the face, to the hair to the cape and staff. I had one model fail at first, but I tried again and it worked well.
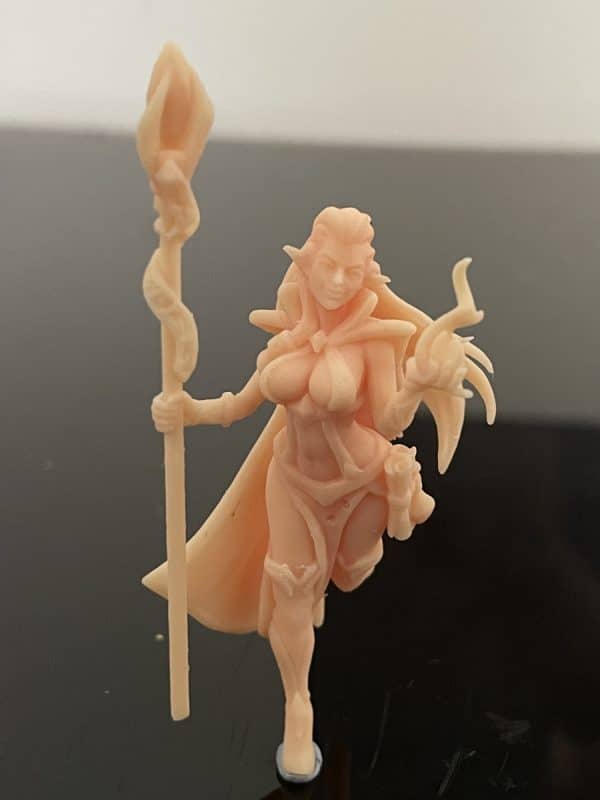
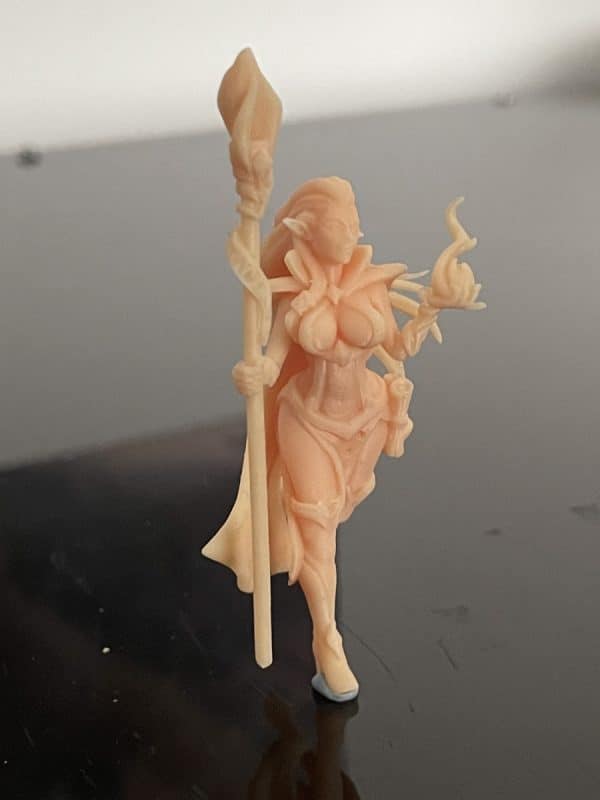
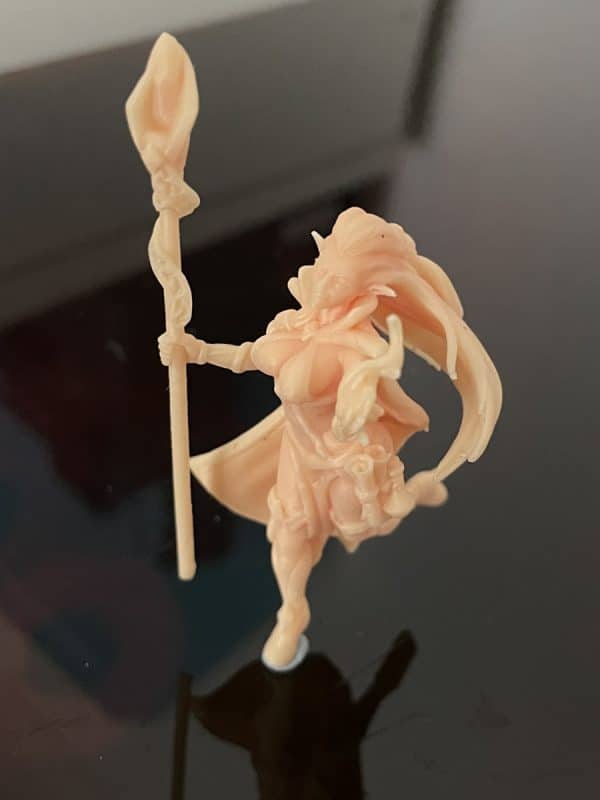
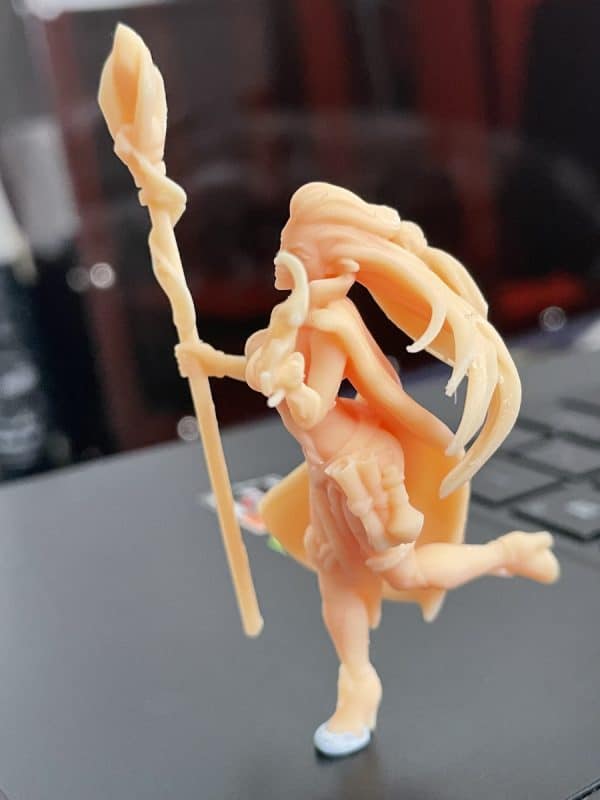
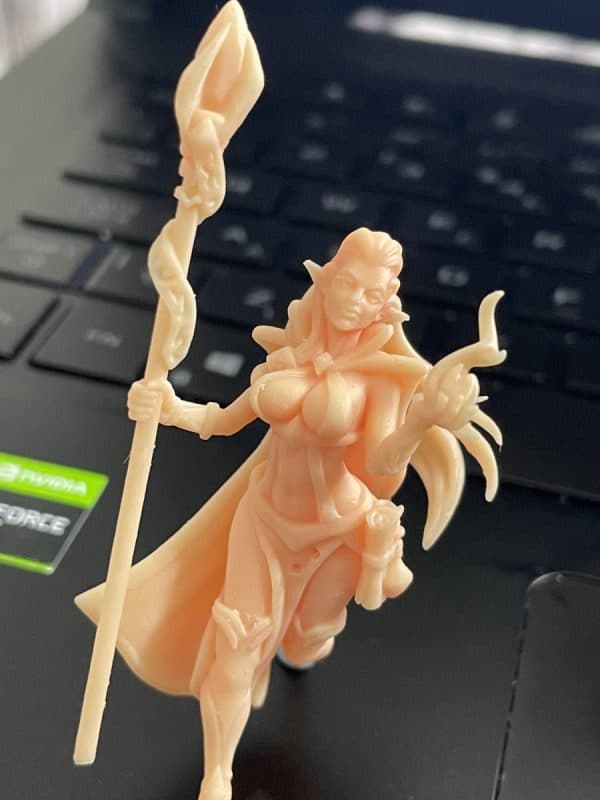
Here’s one final print!
Now that you’ve seen the actual models and quality potential of the Photon Ultra, let’s take a closer look at the features.
Features of the Anycubic Photon Ultra
- DLP Printing Technology – Fast Speeds
- Longer Lasting “Screen” (DLP Projector)
- 720P Resolution
- Low Noise & Energy Use
- High Level Anti-Aliasing (16x)
- Laser Engraved Build Plate
- Metal Resin Vat with Level Marks & Lip
DLP Printing Technology – Fast Speeds

One of the main features of the Anycubic Photon Ultra (Kickstarter) is the DLP or Digital Light Processing technology that it uses. It has a projector that is built into the machine below, to shine light through the screen.
It allows users to cure layers in only 1.5 seconds which is very fast compared to other resin printers. The early generation resin printers have curing times of around 10 seconds, while the later generations have cut these times down to around 2-5 seconds.
This technology really brings a forward change to the speeds that users can create resin 3D prints, and with precision too.
So, what is the difference between a DLP printer and an LCD printer?
Rather than using a laser and LEDs to project light through the screen, DLP printers use a digital light projector to cure resin in the vat.
You get a similar effect of curing whole layers at a time, but instead, there’s a digital micromirror device (DMD) that is built up of hundreds of thousands of small mirrors that can accurately control light.
These light beams provide a surface light uniformity of up to 90% compared to 75-85% from LCD printers.
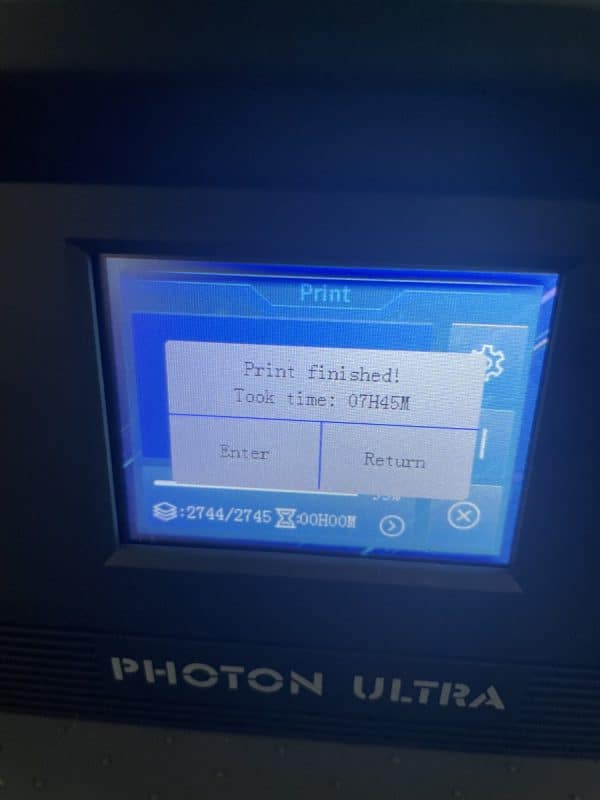
In terms of how long prints actually take, they work on height so I actually tried maxing out the build plate height and I got a print time of 7 hours and 45 minutes.
This was the knight model, but I was experimenting with the build plate since there is quite a bit of space that’s not used, so I tried to go past the build area in the Photon Workshop Slicer to see if it would still print.
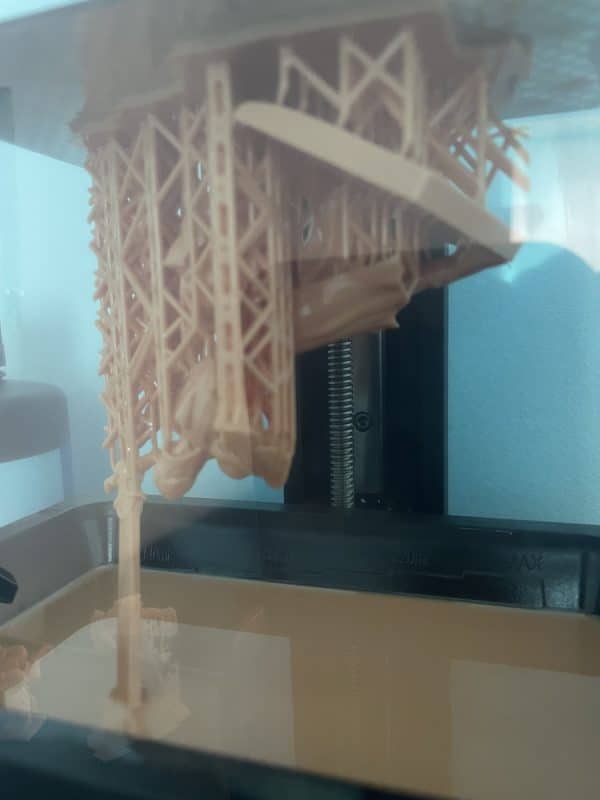
You can see the tip of the sword didn’t print all the way as that was past the maximum height shown in Photon Workshop, as well as a small section of the right side which also got cut off.
Here is the timing for this “maxed out” print.
Longer Lasting “Screen” (DLP Projector)
Having a screen that lasts long is a desired feature that many users want, due to how traditional screens don’t last very long. RGB screens are known to last around 600 hours, while monochrome LCD screens definitely progressed and lasts around 2,000 hours.
We now have these spectacular DLP projectors that give the Photon Ultra a whopping 20,000 hours of printing without needing replacement. It’s a huge step in the right direction for having a resin printer that requires a lot less maintenance and fewer costs in the long-run.
Screens can be very expensive, so these longer lasting DLP projectors can be very appreciated by users of this printer.
Low Noise & Energy Use
When we compare the energy usage between a DLP and LCD printer, it is said that the power consumption of a DLP printer is around 60% less than LCD printers. The Photon Ultra specifically is rated at 12W and uses an average power consumption of 8.5W.
This machine has higher efficiency meaning it doesn’t require a mechanical fan, and uses less energy overall. We also benefit from not needing to replace screens as much which further reduces environmental impact and downtime.
In terms of noise, the tester device I received has around the same noise levels as the Anycubic Photon Mono X which is relatively quiet compared to other resin and FDM printers.
The loudest noises probably come from the suction force of the FEP and the moving of the build plate in the upward and downward direction with the motors.
High Level Anti-Aliasing (16x)
Having a high level of anti-aliasing can be very beneficial to getting some nice details in your 3D prints. The Photon Ultra has 16x anti-aliasing that helps to reduce stepping that may be able to be seen on your 3D models.
DLP doesn’t have the best convergence so some of the steps from layers can be visible, so having anti-aliasing can protect against these potential imperfections.
Laser Engraved Build Plate
To help with build plate adhesion, Anycubic decided to equip the Photon Ultra with a laser engraved build plate, giving more of a texture for the cured resin to hold on to. It also gives a lovely looking underside pattern for prints with a checkered look.
I’m still getting the hang of getting good adhesion to the prints with different settings, so I’m not sure how much it helps, but when it does stick down properly, it does a great job.
I think the Anycubic Craftsman’s Resin that I was using is a lot more liquid and not too viscous, leading to adhesion being a little harder to perfect. With the right settings and adjustments, adhesion should be a lot better.

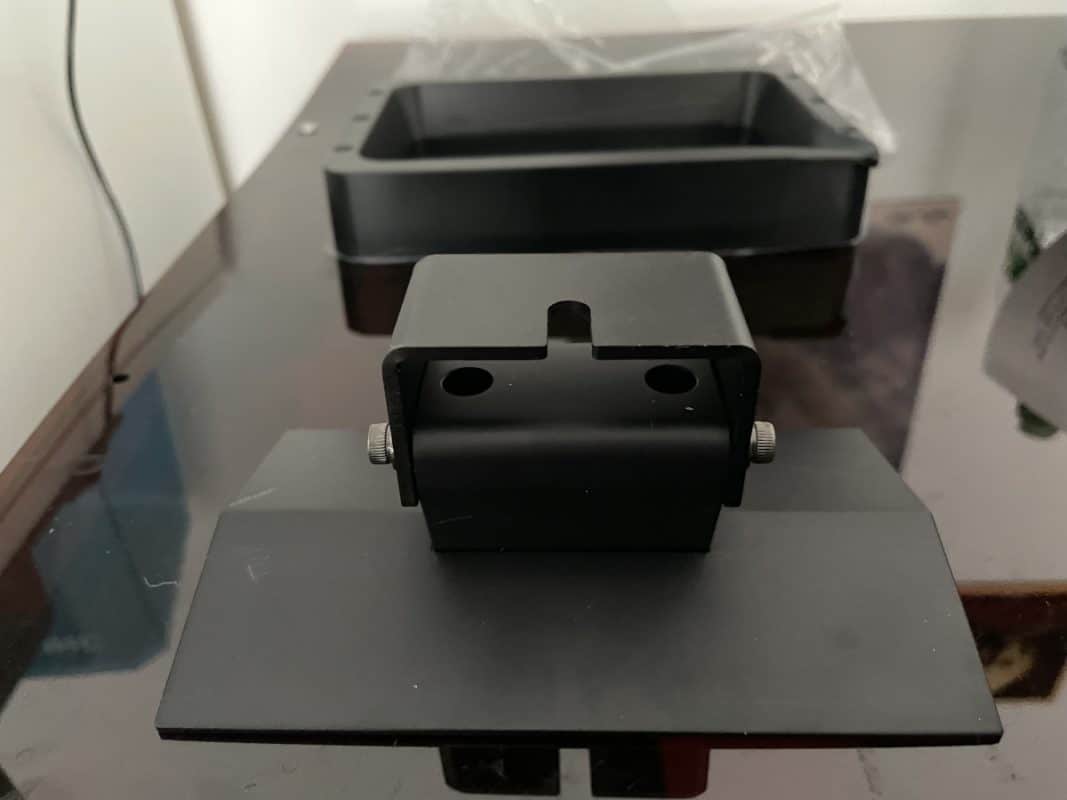
Metal Resin Vat with Level Marks & Lip
The resin vat is a high quality feature that has multiple levels to show you how many ml of resin you have in there, up to a max. value of around 250ml. It slides in simply and is held in place with the two thumb screws on the side as usual.
The bottom corner has the lip where you can pour resin out of, so the process is a little cleaner.
Specifications of the Anycubic Photon Ultra
- System: ANYCUBIC Photon Ultra
- Operation: 2.8-inch Resistive Touchscreen
- Slicing Software: ANYCUBIC Photon Workshop
- Connection Mode: USB
Print Specifications
- Printing Technology: DLP (Digital Light Processing)
- Light Source Configuration: Imported UV LED (wavelength 405 nm)
- Optical Resolution: 1280 x 720 (720P)
- XY Axis Precision: 80um (0.080mm)
- Z Axis Precision: 0.01mm
- Layer Thickness: 0.01 ~ 0.15mm
- Print Speed: 1.5s / layer, Max. 60mm/hour
- Rated Power: 12W
Physical Parameters
- Printer Size: 222 x 227 x 383mm
- Build Volume: 102.4 x 57.6 x 165mm
- Net Weight: ~ 4KG
Benefits of the Anycubic Photon Ultra
- Uses a technology (DLP) that can bring really high quality prints and create fine details
- It’s the first desktop DLP printer that gives regular users access at a budget
- Easy setup process where you can get started in less than 5-10 minutes
- The DLP projector is very durable which means less maintenance and fewer costs in the long-run
- USB comes with a really great wolverine model rather than the usual basic test prints
- The Photon Ultra is aesthetically pleasing, especially with the unique blue lid
- Allows users to change settings during the print process
- Uses less energy than MSLA printers
Downsides of the Anycubic Photon Ultra
- Build volume is relatively small at 102.4 x 57.6 x 165mm, but it’s made up for in the boost in quality.
- I’ve had some trouble with some prints not sticking to the build plate, though more bottom layers and exposure times help.
- The USB had a loose connection, but this should be just for tester unit and not the proper models.
- The file format uses .dlp which to my knowledge, can only be sliced on Photon Workshop. You can import a model using another slicer and export the STL afterwards luckily. We may get other slicers to use this file format after release.
- The touchscreen isn’t the most accurate so it can cause some miss clicks. You want to use either a stylus-type object, or use the back of your nail to operate it. Hopefully this will be fixed with the actual models rather than the test unit.
Verdict – Is the Anycubic Photon Ultra Worth Buying?
Based on my own experience, I’d definitely recommend getting the Anycubic Photon Ultra for yourself. The introduction of the DLP technology to average users is a massive step in the right direction for resin 3D printing, and the precision we can reach is remarkable.
I appreciate just how simple the setup process was, as well as the operation and final print quality of the models.
In terms of the pricing, I think it’s a very fair price for what it delivers, especially if you get the discounts.
Update: They have now released the Anycubic Photon Ultra Kickstarter which you can check out.
According to the Kickstarter page, the regular retail price will be $599.
I hope you enjoyed this review that I put together. This looks like a great machine so definitely consider adding it to your arsenal when it’s released for your high quality 3D printing desires.