9 Ways How to Fix 3D Print Brim Not Sticking
3D print brims improve stability by attaching the object firmly to the bed. However, there are cases where the 3D print brim may fail to stick to the bed, thus leading to print failures. I will discuss some ways to fix this issue if you’ve encountered it before.
To fix the 3D print brim not sticking to the bed, move the nozzle closer, level the bed, increase the bed temperature, and slow down the print speed. It would help if you also cleaned the bed with Isopropyl alcohol or used adhesives such as glue sticks or a different print bed surface.
This is just the basic answer. I will provide more details on these methods, so keep reading to learn more.
How to Fix 3D Print Brim Not Sticking
- Relevel the bed
- Increase the bed temperature
- Slow down the print speed
- Decrease the Z-offset or lower the nozzle closer to the bed
- Clean the bed with Isopropyl Alcohol and wipe it with a clean paper towel
- Wash the bed with dish soap and a soft sponge
- Using adhesives
- Use a different print bed surface
- Replace a worn nozzle
1. Relevel the Bed
The second method you can use to solve a 3D print brim not sticking is releveling the bed. If your 3D printer bed is not level, your filament might be deposited unevenly across the bed surface because the nozzle will be too close or far from the surface in certain areas.
However, releveling the bed provides a flat and stable base for printing and enables the nozzle to deposit the filament evenly across the bed. This improves the bond between the print brim and the bed surface.
Depending on your 3D printer, you may need to adjust the bed level manually. You can do this using the bed leveling screws and a feeler gauge or sheet of paper placed between the nozzle and the bed.
Another way you could do this is by using an Auto Bed Leveling (ABL) sensor if your printer has one.
Check out this video by CHEP that shows users how to level the bed using a feeler gauge on an Ender 3 V2.
You can also take a look at this article I wrote on some of the best auto-leveling sensors: Best Auto-Leveling Sensor for 3D Printing – Ender 3 & More.
One user printing with an Ender 3 S1 and white eSUN PLA had a constant issue with his brim not sticking to the plate. Multiple users advised him to relevel his print bed and lower the printing temperatures. After doing it, he successfully fixed the issue.
Another user whose brim kept wrapping up after some time also releveled the bed until it was ridiculously accurate and set the first layer speed to slow to make the 3D print brim stick to the bed.
A user said that what fixed his issue was leveling his bed to the best of his ability, then printing a warp test at varying temperatures to see what worked best. This is the Warp Test for Print Bed Adhesion model he got from Thingiverse and used to carry out the test.
2. Increase the Bed Temperature
You should try increasing the bed temperature in your slicing software or printer’s control panel to help the brim to stick to the bed better. Increasing the bed temperature reduces the difference in temperature between the nozzle and the bed.
If your bed temp is too low when the filament comes into contact with it during printing, it can cause it to cool too fast and shrink, preventing it from sticking to the bed.
Increasing the bed temperature softens the filament making it flow and bond with the bed surface better. Additionally, it reduces the rate at which the filament cools and contracts enabling it to maintain better contact with the bed.
One user said that he had to relevel his bed, set his first layer speed to slow, and increase the hot end temperature from 200 > 210 and bed temperature from 60 > 68 to fix the print brim not sticking to the bed.
Another user said he had the same issue with their brim not sticking properly, so he had to increase his initial bed temperature by 5 degrees until the problem disappeared.
Here is a video tutorial on changing the build plate temperature in Cura for better adhesion.
3. Slow Down the Print Speed
Another method of fixing the 3D print brim not sticking is to slow down the printing speed. High print speeds can cause the filament to cool too fast, preventing the brim from sticking. In addition, it drags the filament, especially at the corners, causing the brim to pull away from the bed.
That is why you should reduce the print speed to increase the time the filament spends in contact with the heated bed to enable it to soften and stick more effectively.
Lowering the printing speed also gives the filament enough time to cool, solidify and bond better with the bed while printing the brim. You can experiment by gradually reducing the print speed in your slicer software until you find the right speed that enables the brim to stick to the bed perfectly.
One user said that the solution to the print brim not sticking to the bed is to slow down the print speed. He further explained that the part cooling fan doesn’t get enough time to cool the hot plastic when the print speed is too fast.
This causes the new layers to contract and pull on the layers below them, which makes the edges of the print brim edges to lift. However, slowing down the speed gives the part cooling fan enough time to cool the plastic to keep its intended shape and stick to the bed better.
Check out this interesting video tutorial on how to change the print speed settings in Cura.
4. Decrease the Z-Offset or Lower the Nozzle Closer to the Bed
One way to fix the 3D print not sticking to the bed is to decrease the Z-offset or lower your nozzle much closer to the bed. When your nozzle is too far from the bed, the filament doesn’t contact the bed well enough to stick properly.
Decreasing the Z-offset reduces the gap between the nozzle and bed, ensuring that your filament is deposited onto the bed in a more controlled and accurate manner. It also helps you achieve the optimal squish (where the filament is pressed onto the surface to bond with the bed).
3D Musketeer shows how you can adjust your Z-offset to achieve the optimal squish for perfect first layers.
Here is an article I also wrote on how to get the optimal squish: How to Get The Perfect First Layer Squish – Best Cura Settings.
One user said that he had brim sticking problems that he couldn’t find a solution for. He was told it could’ve resulted from offset changes (changes in the distance between the nozzle and bed) during the 3D printing process.
To fix the issue, he needed to lower the Z-offset by 0.1mm or level the bed.
A user added that the Z-offset not being low enough prevented the filament from being squished together so it could adhere to itself as it was being laid on the bed.
Another user complained that his brim was not sticking to the build plate. Some users recommended lowering his Z-offset even if his bed was level.
They also advised him to look closely at the filament lines being laid down and see if they were flat at the top (slightly squished) and not rounded. If not, the nozzle was probably too far from the bed and needed to be moved closer.
5. Clean the Bed with Isopropyl Alcohol and Paper Towels
Sometimes the print surface may contain dirt, filament leftovers, or glue that stop the print brim from sticking to the bed properly. In that case, you should carefully clean the print bed before printing the brim.
Isopropyl alcohol effectively cleans various bed surfaces, such as glass and PEI. Pour a small amount of it onto a clean paper towel until damp (not dripping wet).
Now, use it to gently wipe the entire print surface to remove dust or any other residue that may prevent the brim from sticking.
After that, you should give the bed some time to dry completely before starting any print. Luckily, this shouldn’t take long since alcohol evaporates quickly.
One user who had been printing with an Ender 3 for a while said that his brim refused to stick. To fix the issue, he removed the bed, scrubbed it with a red scotch bright pad, cleaned it with alcohol, and put it back on.
This left him with a nice non-glossy surface that enabled the prints to stick well. However, cleaning using alcohol wasn’t the only thing he did. He also turned up the printing temperature to 230°C for the first layer and bed 75°C.
6. Wash the Bed with Dish Soap and a Soft Sponge
For certain bed surfaces, using Isopropyl Alcohol to clean the bed may not do the trick, and the brim sticking issues may persist. In that case, you should take out your print bed from the 3D printer and use a plastic scraper to remove any filament leftovers stuck to it.
You can use this Plastic Razor Blade Scraper that you can find on Amazon.
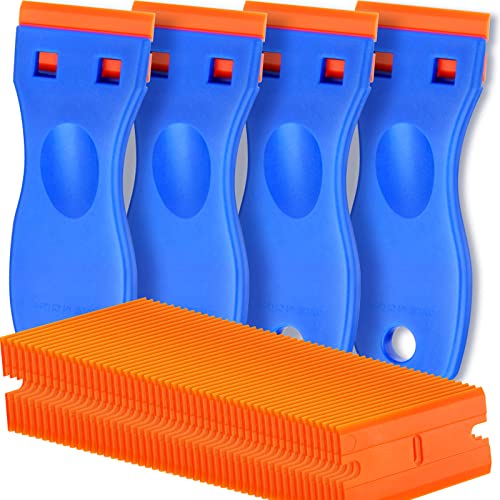
- A VERSATILE TOOL: Scraper tool is ideal for removing vinyl, debris, decals, sign, glue, stickers, labels, grease and paint from glass, walls, appliance, metal, oven and more. These plastic scrapers work great for removing labels, dripped wax, and even melted plastic from 3D printer beds. Youll find the scraper tool a useful little tool. Very handy.
Prices pulled from the Amazon Product Advertising API on:
Product prices and availability are accurate as of the date/time indicated and are subject to change. Any price and availability information displayed on [relevant Amazon Site(s), as applicable] at the time of purchase will apply to the purchase of this product.
After that, mix a small amount of dish soap with warm water and gently scrub the bed surface with a soft sponge. Then rinse thoroughly with clean water and allow the bed to dry completely.
It is recommended to wipe the bed with acetone or Isopropyl Alcohol after it is dry to remove any remaining grease or oil. Once you’re done, you should have a smooth printing surface where the brim can stick easily.
One user said that a simple solution that worked for him after his brims failed to stick to the bed was washing the bed in the sink with Dawn Dish Soap. He decided to use this method after wiping the bed with Isopropyl Alcohol failed to fix his adhesion issues.

Prices pulled from the Amazon Product Advertising API on:
Product prices and availability are accurate as of the date/time indicated and are subject to change. Any price and availability information displayed on [relevant Amazon Site(s), as applicable] at the time of purchase will apply to the purchase of this product.
Another user was seeking advice on what to do for his brim to stick to the build plate. Someone advised him to wash it with dish soap and water and air dry it. He added you shouldn’t touch the build surface with your fingers after that since the oil from your hands may prevent the filament from sticking.
7. Using Adhesives
Another great way to fix the 3D print brim not sticking is to apply an adhesive to the print bed surface to make the brim stick to the bed better. One popular adhesive that many 3D printing enthusiasts use is glue sticks.
Check out these 3D Printer Glue Sticks that you can easily find on Amazon.

- ▌Compatibility: 3D printer glue perfect for all 3D printer hot bed, include build surface sheet plate, aluminum and glass plate,PEI, 3D printer stickers, Kapton etc.
Prices pulled from the Amazon Product Advertising API on:
Product prices and availability are accurate as of the date/time indicated and are subject to change. Any price and availability information displayed on [relevant Amazon Site(s), as applicable] at the time of purchase will apply to the purchase of this product.
Before starting a print, rub a thin layer of glue stick to the bed. This will enable the print bed to grip the brim better. You should be careful not to apply a thick, uneven layer of glue as it may interfere with the overall quality of your print.
A user who needed help troubleshooting wanted a solution to his print brim not sticking to the build plate. Multiple users recommended that he clean and level the bed and then apply a glue stick to fix the issue. This was especially useful when it came to glass beds.
Another user said they had never had a single issue with the brim not sticking since they started using glue sticks when printing with PLA.
8. Use a Different Print Bed Surface
If you’ve tried all the methods above and can’t successfully get your print brim to stick to the bed, then you should go for a different print bed surface, such as PEI (Polyetherimide) sheets or BuildTak. PEI sheets are designed to make the print stick better to the bed.
This Comgrow Texture Double-Sided PEI Sheet found on Amazon can be particularly useful when printing with materials such as PETG and ABS because they offer excellent adhesion for the prints.

- 【Simple Installation】 The Ender 3 V2 PEI sheet is combined with 2 parts, a flexible steel platform textured PEI surface on one side, smooth PEI on the other side and a magnetic bottom sheet with adhesive on the back. Simply stick the magnetic bottom sheet onto your heated bed, then place the steel platform with PEI surface on the top.
Prices pulled from the Amazon Product Advertising API on:
Product prices and availability are accurate as of the date/time indicated and are subject to change. Any price and availability information displayed on [relevant Amazon Site(s), as applicable] at the time of purchase will apply to the purchase of this product.
A user said that his favorite solution to a 3D print brim that was not adhering to the bed and was pulling up constantly was to get a PEI sheet for the print bed. This fixed all the adhesion issues that he previously had.
Brim prints fine but doesn’t print evenly and this happens, which turns into a disaster every time. What am I doing wrong??
byu/Field-Jumpy in3Dprinting
9. Replace a Worn Nozzle
Using a different nozzle can potentially fix a 3D print brim not sticking. It is normal for nozzles to wear out or get clogged over time, causing the filament to start flowing out inconsistently. This makes it harder to deposit it uniformly to stick to the bed.
Switching to a new nozzle will ensure the filament flows out consistently to ensure the brim and bed surface bond properly.
You can get a good set of brass nozzles from Amazon, like these XIFOWE MK8 Brass Nozzles. They come with multiple sizes ranging from 0.2mm up to 1mm.

- 【Material】----High quality brass.
Prices pulled from the Amazon Product Advertising API on:
Product prices and availability are accurate as of the date/time indicated and are subject to change. Any price and availability information displayed on [relevant Amazon Site(s), as applicable] at the time of purchase will apply to the purchase of this product.
One user whose print brims regularly stopped sticking to the bed said that his worn-out nozzle was the main cause of the issue. He advised anyone who had used their nozzle for a long time to switch them out to fix the 3D print brim not sticking issue.
Here is a video briefly explaining how to change a nozzle on your 3D printer.