7 Best Cura Plugins & Extensions + How to Install Them
Ultimaker’s Cura is widely considered one of the best slicers out there for FDM printers. It packs many great features and settings into a free, easy-to-use software package.
To make it even better, Cura provides a marketplace with plugins for users looking to extend the software’s functionality. With Cura’s plugins, you can do various things like add support for remote printing, calibrate your print settings, set a Z-offset, use custom supports etc.
In this article, I’ll be going through some of the best Cura plugins & extensions that you can use, as well as how to install them. Let’s get into it!
7 Best Cura Plugins & Extensions
Many plugins and extensions, each tailor-made for different purposes, are available on the Cura marketplace. Here are some of my favorite plugins available on the market:
1. Settings Guide
In my opinion, the settings guide is a must-have, especially for beginners and first-time Cura users. According to the Cura developers, it should be at the top of your list because it’s a “Treasure trove of information.”
It explains what each Cura setting does in detail.
The settings guide will also show the user how changing the setting’s value can affect the print. In some cases, you can even get helpful, detailed illustrations to accompany the explanations.
Here’s an example of the illustration and explanation it provides for the Layer Height setting.
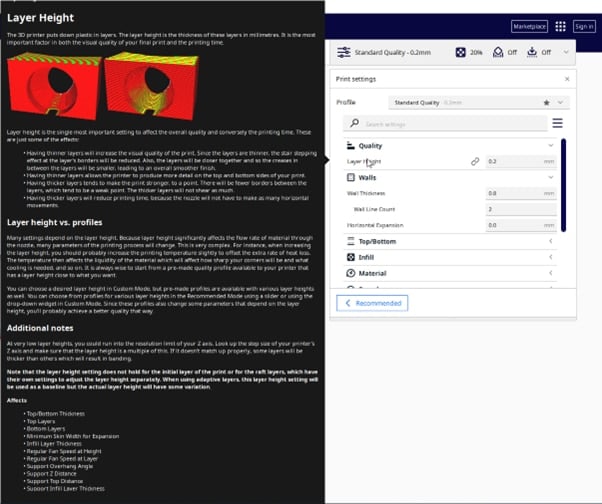
Using this guide, you can access and modify some of Cura’s more complex settings correctly.
2. Calibration Shapes
Before you can consistently get quality prints from your machine, you must dial in the settings properly. You have to print out test models to dial in settings like temperature, retraction, travel, etc.
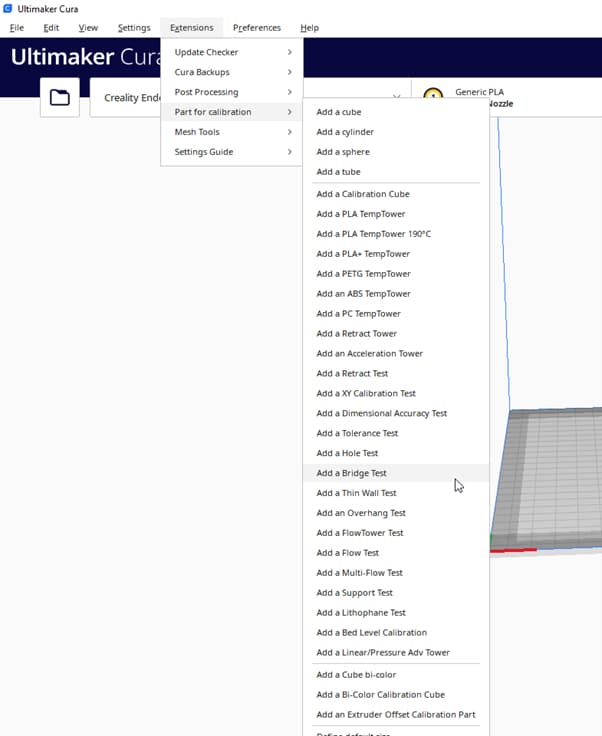
The Calibrations Shapes plugin provides all these test models in one place so you can easily fine-tune your settings. Using the plugin, you can access temperature, acceleration, and retraction towers.
You can also access basic shapes like spheres, cylinders, etc. The best part about these calibration models is that they already have the right G-Code scripts.
For example, the Temperature Tower already has a script that changes its temperature at different temperature levels. Once you import the shape to the build plate, you can add the pre-loaded script under the Extensions > Post-Processing > Modify G-Code section.
You can learn more about this in this video from CHEP on calibration shapes.
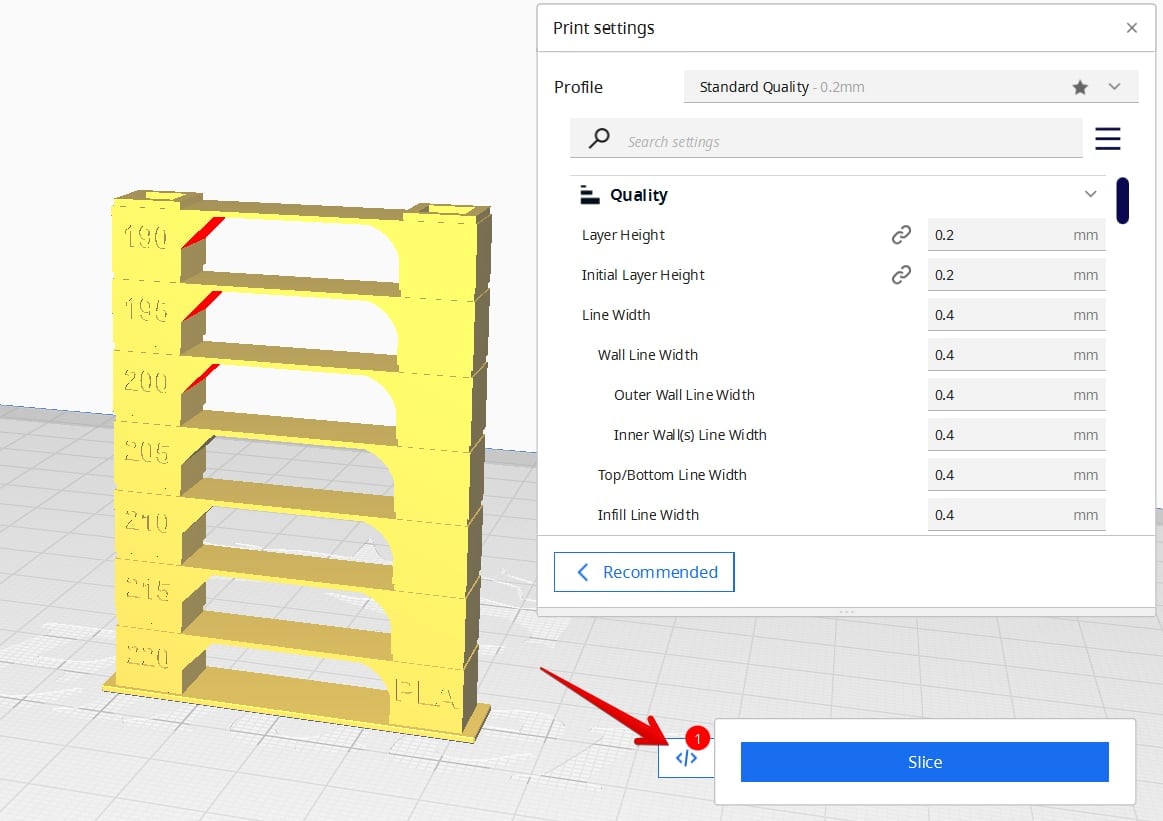
Make sure to remove the G-Code scripts after you have finished the calibration tests, or they will be applied to your normal prints. There will be a small symbol near the “Slice” button telling you the script is still active.
3. Cylindric Custom Supports
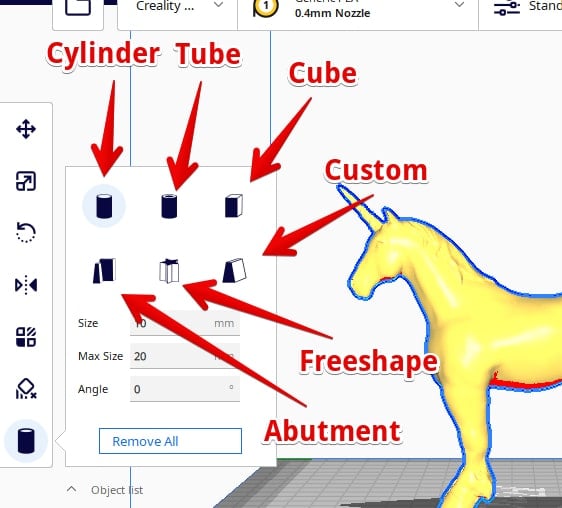
The Cylindric Custom Supports Plugin adds in six different types of custom supports to your slicer. These supports have shapes that differ from the standard one Cura provides.
These shapes include:
- Cylindrical
- Tube
- Cube
- Abutment
- Freeform
- Custom
Many users like this plugin because it gives hobbyists greater freedom when placing supports. It allows you to select the type of support you want, and then place it precisely on your model.
The other option, automatic supports, places supports all over the model with little regard for the user’s preference. You can learn more about custom supports in this article I wrote on How to Add Custom Supports in Cura.
There’s also a great video where you can learn more about using these effectively for your 3D prints.
4. Tab+ AntiWarping
The Tab+ AntiWarping plugin adds a round raft to the corner of the model. The round shape increases the surface area of the corner in contact with the build plate.
This helps reduce the chances of the print lifting off the build plate and warping. It only adds these brims to corners because they are more susceptible to warping. Also, warping usually starts from these sections.
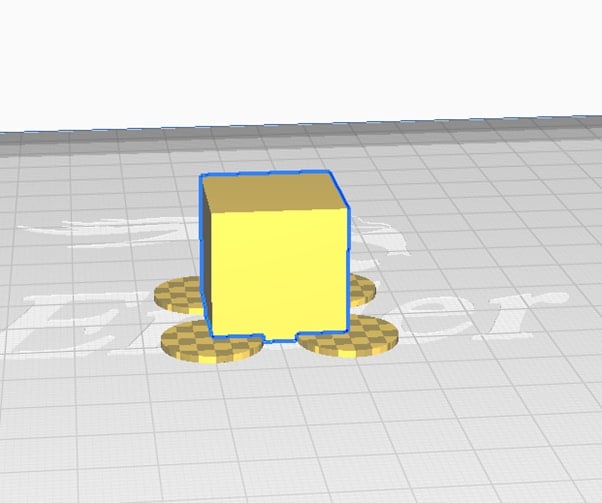
Since these rafts are only on corners, they use less material than conventional rafts and brims. You can see the amount of material this user saved on their print by using tabs instead of a full raft/brim.
Once you install the plugin, you’ll see its icon on your sidebar. You can click the icon to add the brim to your model and modify its settings.
5. Auto-Orientation
As its name says, the Auto-Orientation plugin helps you find the optimal orientation for your print. Orienting your print properly can help reduce the number of supports needed, decrease print failure, and speed up printing.
This plugin automatically calculates your model’s optimal orientation that minimizes its overhangs. It then positions the model on the print bed.
According to a Cura Developer, it tries to reduce printing time and the number of supports needed.
6. ThingiBrowser
Thingiverse is one of the most popular 3D model repositories on the internet. The ThingiBrowser plugin brings the repository right into your slicer.
Using the plugin, you can search and import models into Thingiverse from Cura without leaving the slicer.
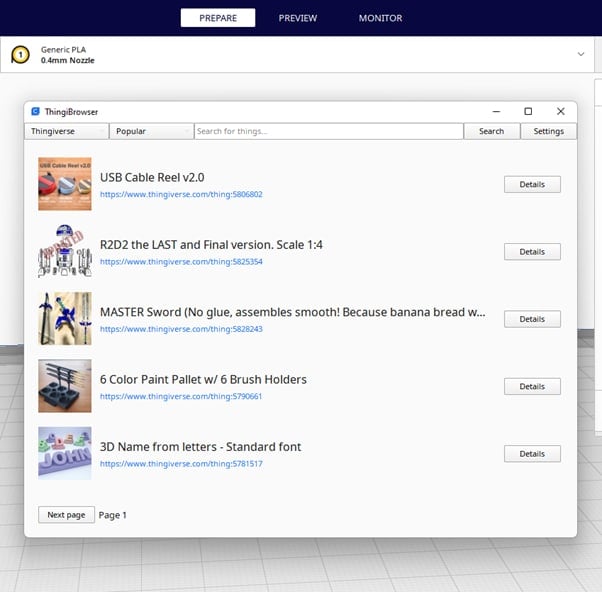
Using the plugin, you can also get models from MyMiniFactory, another popular online repository. All you have to do is change the repository’s name in the settings.
Many Cura users like it because it provides a way for them to bypass the ads present on the main Thingiverse site.
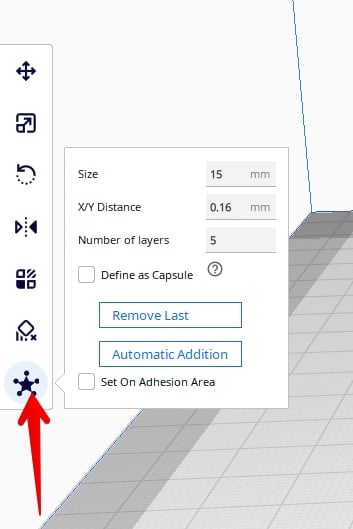
7. Z-Offset Setting
The Z-offset setting specifies the distance between your nozzle and your print bed. The Z-Offset plugin adds a print setting that lets you specify the value for the Z-offset.
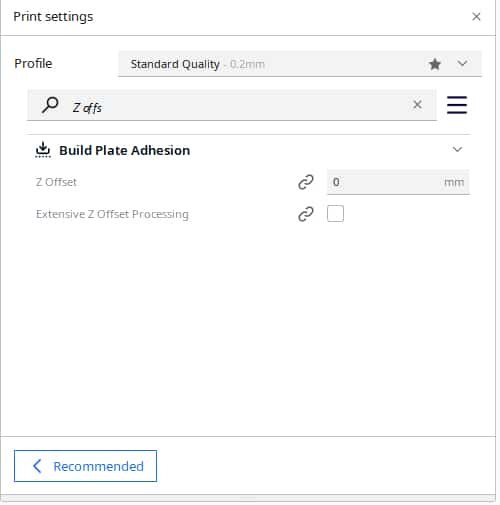
When you level your bed, your printer sets the location of your nozzle to zero. Using this plugin, you can adjust your Z-offset via G-Code to raise or lower the nozzle.
This can come in handy to help adjust your nozzle height, especially if your print isn’t sticking properly to the bed.
Also, people that print multiple materials with their machines find it very handy. It allows them to adjust the level of “squish” for each filament material, without recalibrating their beds.
Bonus – Startup Optimizer
Cura comes loaded with many plugins, printer profiles, and other features. These features often take quite a while to load, even on the most powerful PCs.
The Startup Optimizer disables some of these features to speed up the software’s loading time. It loads up only profiles and settings needed for printers currently configured in Cura.
This is very helpful if your PC isn’t the most powerful and you’re sick of slow loading times. Users that have tried it have noted that it reduces startup and loading times significantly.
How to Use Plugins in Cura
To use plugins in Cura, you must first download and install them from the Cura marketplace. It’s a very simple process.
Here’s how you can do it:
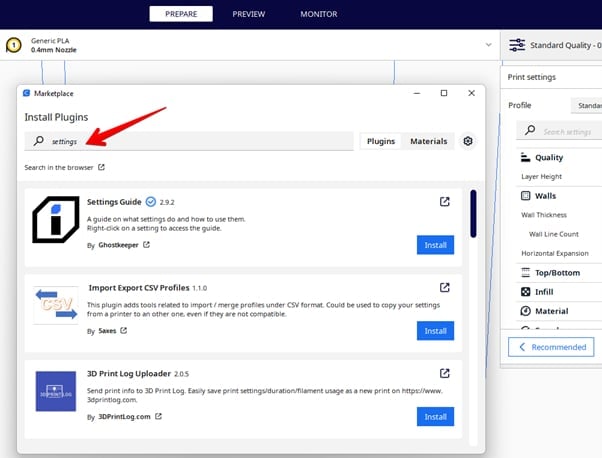
Step 1: Open Up Cura Marketplace
- Ensure you have a working internet connection
- Open up the Cura software
- You’ll see the Cura marketplace icon on the right side of the screen.

- Click on it, and it will open the plugin marketplace.
Step 2: Select the Right Plugin
- Once the marketplace opens, choose the plugin you want.

- You can find plugins by sorting through the list in alphabetical order, or use the search bar at the top
Step 3: Install the Plugin
- Once you find the plugin, click on it to expand it
- A menu will open where you will see a few notes on what the plugin can do and how you can use it.
- On the right side, you will see an “Install” button. Click on it.

- The plugin will take a moment to download. It may ask you to read and accept a user license agreement before installing.
- Once you accept the agreement, the plugin will install.
- You will have to restart Cura for the plugin to start working.
- A button at the lower right will tell you to quit and restart the software. Click it.

Step 4: Use the Plugin
- Re-open Cura. The plugin should already be installed and ready to use.
- For example, I installed the settings guide plugin. Once I hover over any setting, I get a detailed overview of what the setting can do.

- For other plugins, like the Calibration Shapes, you need to go to the Extensions menu to access them.
- Once you click on the extensions, a drop-down menu will appear, showing all the available plugins.
Good Luck and Happy Printing!