6 Ways How to Make Supports Easier to Remove in PrusaSlicer
Supports are important for successful 3D printing, but their removal can sometimes be challenging. To simplify this process, I have written this article detailing how to print easily removable supports in PrusaSlicer.
You can make supports easier to remove in PrusaSlicer by increasing the X, Y, and Z Contact Distance. Opting for a Rectilinear Pattern with higher Interface Spacing can resolve the mentioned issue. Additionally, reducing the Overhang Threshold and Interface Layers can also help.
Let’s now move toward the details of how each tip and technique should be done.
How to Make Supports Easier to Remove in PrusaSlicer
Here is how to make supports easier to remove in PrusaSlicer:
- Increase the Contact Z Distance between Supports
- Increase the XY Separation Gap
- Print Fewer Interface Layers
- Increase the Interface Pattern Spacing
- Try Different Supports Pattern
- Reduce the Overhang Threshold
1. Increase the Contact Z Distance between Supports
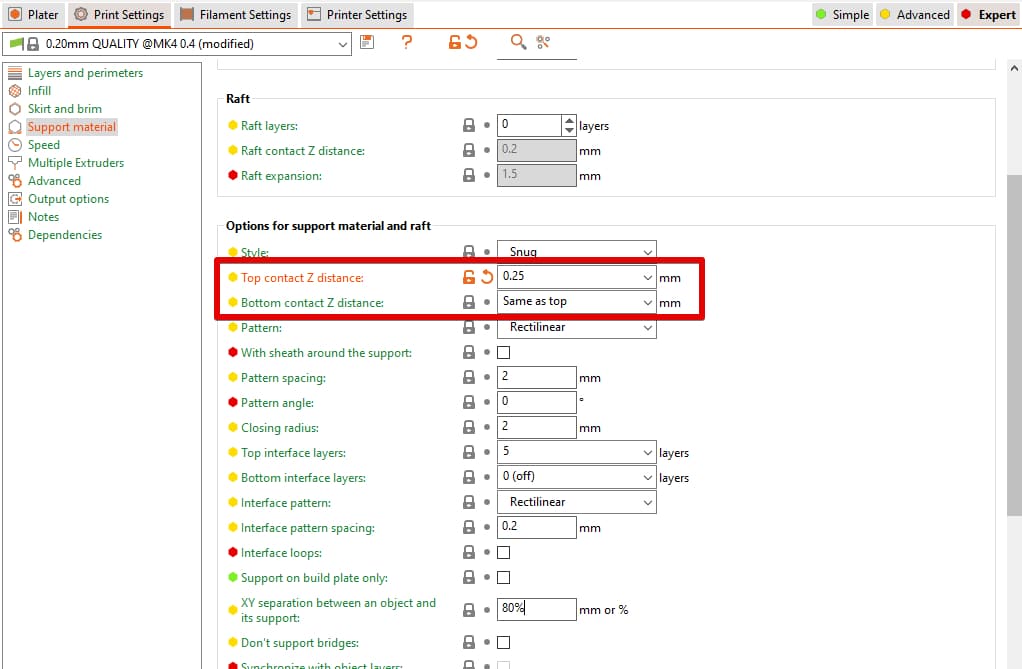
One way to make support removal easier is by increasing the “Top Contact Z Distance” and “Bottom Contact Z Distance” in the “Print Settings” tab under the “Support Material” in PrusaSlicer.
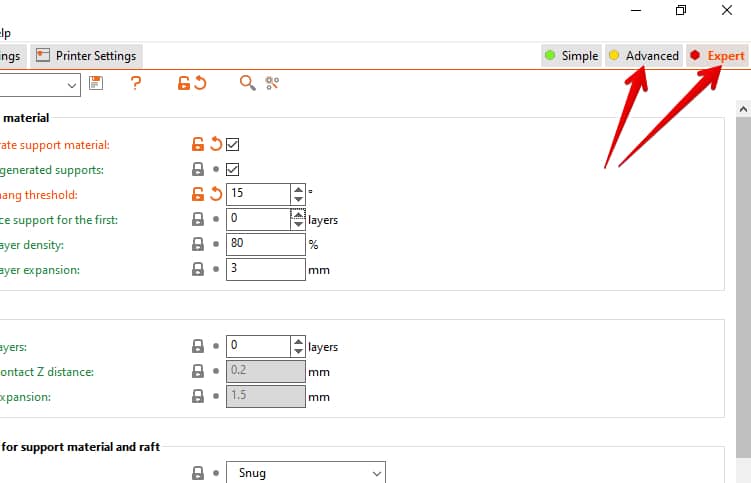
PrusaSlicer has three modes, Simple, Advanced, and Expert. Make sure you are using the Advanced Mode if not Expert to access such settings.
This setting creates the vertical distance along the Z-axis between the support structure and the actual to-be 3D-printed model. An accurate gap is crucial so that support fulfills the purpose of supporting the object while making removal easy as well.
Where too low a value of Z distance can merge the supports with the model, too high a value can also make them useless. So, keeping the value between 50-70% of your layer height is recommended.
Many users find 0.25mm as the best working value for both Top and Bottom Contact Z Distance. It balances the support and easy removal just perfectly. Since the part will be attached to the build plate, some users also suggest using 0 for the bottom.
Another user mentioned the settings that worked with PLA:
- Top Contact Z Distance: 0.20mm
- Bottom Contact Z Distance: 0.17mm
And for PETG:
- Top and Bottom Contact Z Distance: 0.25mm
So, depending on your 3D printer, part orientation, and nozzle size, you may want to tweak this setting until you get the best results for you.
2. Increase the XY Separation Gap
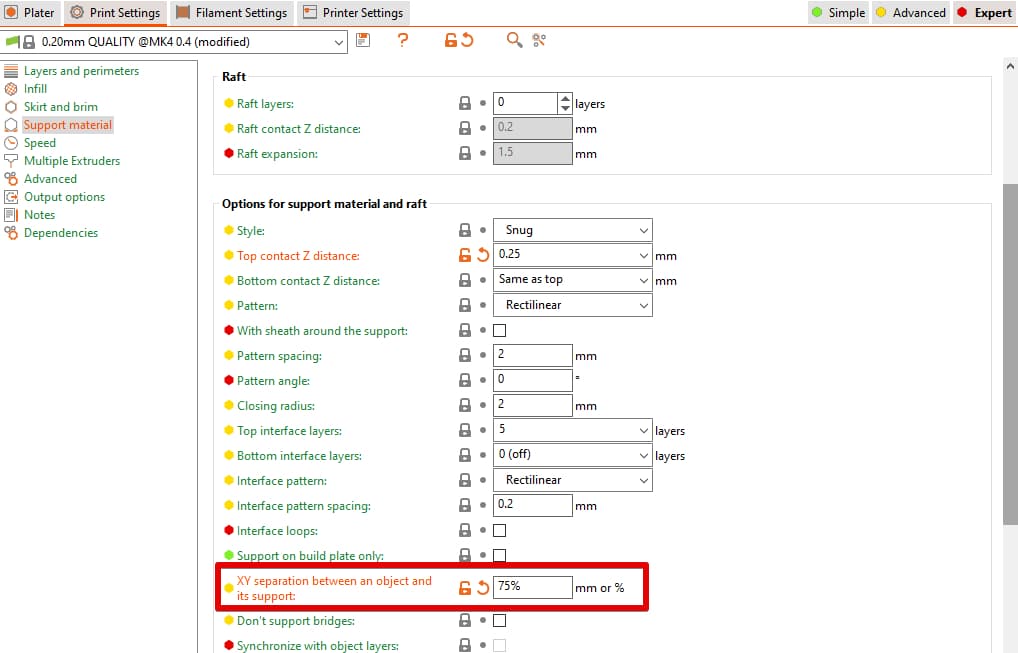
Increasing the “XY Separation between an Object and its Supports” in the “Print Setting” tab under “Support Material” is another similar setting to make supports easier to remove in Prusa Slicer.
It works as the Z Distance except that it is responsible for the horizontal gap along the X and Y- axis.
It specifies the gap between the outer edge of the model and the support structure. In most cases, a value between 70-150% would work well to support your model while ensuring easy removal.
However, 75% XY Distance along with 0.25mm Z Contact Distance is the value recommended by most users.
Here is a short video on how to change XY Separation Gap and Top Contact Z Distance in PrusaSlicer.
3. Print Fewer Interface Layers
Another good way for easy support removal is by reducing the number of “Interface Layers” in the “Print Settings” under the “Support Material” section in PrusaSlicer.

Interface Layers are the part that directly touches the to-be-supported 3D print part and is a bit denser than the overall support structure. A higher number of interface layers form a strong bond, making it difficult to remove supports.
Fewer interface layers reduce the amount of support material tightly bonded with the model, making it easier to remove supports as there will be minimal contact with the object.
Though you can experiment with different values to find the optimal setting for your specific print, most users consider 1-4 as a good number as it offers a strong connection while ensuring easy removal as well.
Though many users got efficient results with 4 interface layers for both Top and Bottom, one user said that bottom interface layers are of no use unless the supports are attached to the model instead of the build plate.
Another user gets easy-to-remove support with 3-4 Interface Layers and uses tools like Hakko CHP-170 Micro Cutters, Scalpel, or a Utility Knife Blade for removal.
4. Increase the Interface Pattern Spacing
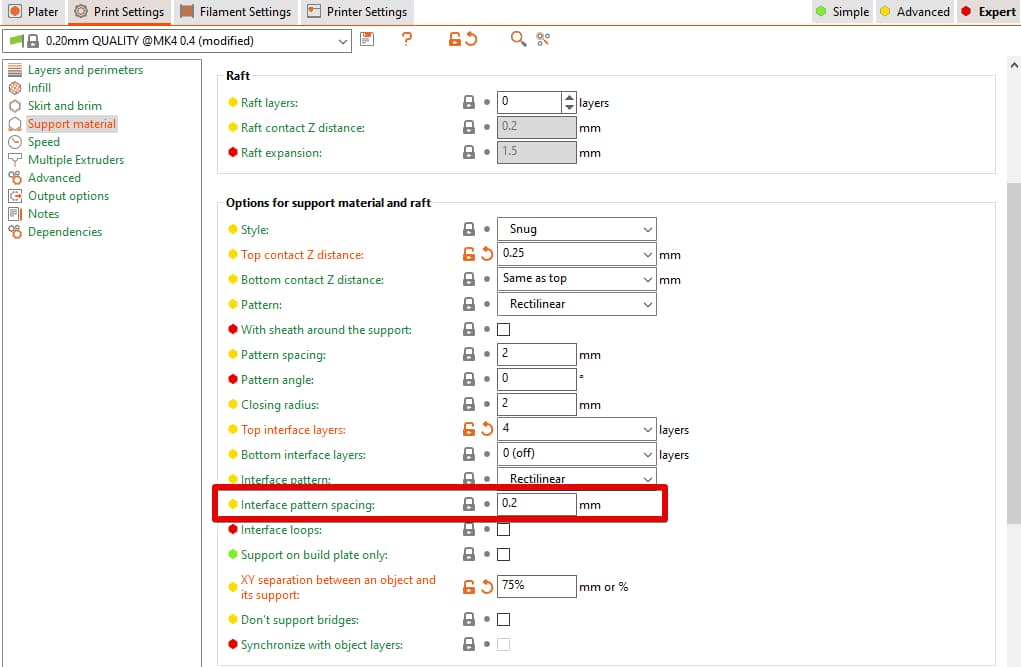
You can sometimes make supports easier to remove in Prusa Slicer by increasing the “Interface Pattern Spacing”. This setting is responsible for the distance between two interface lines or infill structures.
Increasing the interface spacing results in shallow infill which ultimately makes the removal easier. Don’t increase this value too much as it can result in print overhangs sagging or ruining the shape of 3D models.
The exact value that works for you depends on different factors such as the 3D printer, model, and complexity. So, tweak between the range suggested by experts of 0.2-0.6mm and see what works best for you.
One user shared the settings that worked for him at 0.2mm spacing and many users responded positively after 3D printing supports that were easier to detach.
5. Try Different Supports Pattern
Another method suggested by users is to try different infill patterns or inner structures in PrusaSlicer. You can change this setting by going through Print Setting > Support Material > Options for Support Material and Raft > Patterns. Currently, PrusaSlicer has 3 main options:
- Rectilinear
- Rectilinear Grid
- Honeycomb
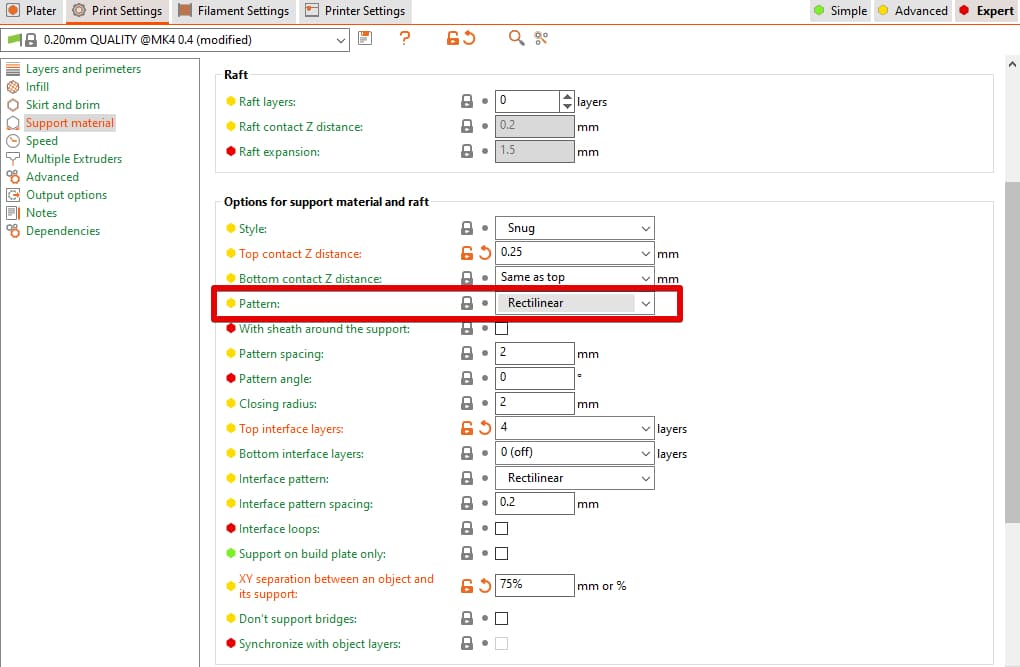
Unlike your actual 3D model, supports don’t need to be dense and these patterns are what decide this factor.
Rectilinear is the default pattern that creates parallel straight lines linked to almost the whole model. It takes minimum time, requires less material to print, and is the easiest to remove compared to Rectilinear Grid and the Honeycomb.
6. Reduce the Overhang Threshold
One interesting way is to reduce the angle or Overhang Threshold in PrusaSlicer. The value is the maximum horizontal slope or part of the model that can be printed without support.
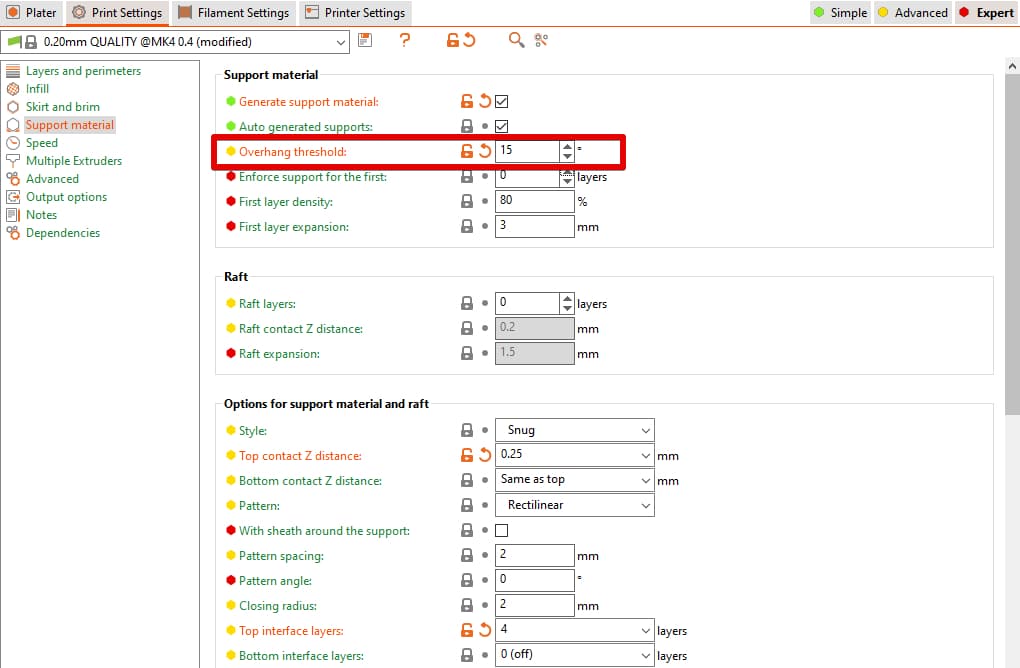
45 degrees is the default value; however, reducing it further will generate fewer supports making the removal quite easy. Make sure you don’t go too low that it becomes impossible for the overhang to print at all.
The exact value that may work for you will majorly depend on the geometry of your model. So, test prints with different angles until you can print the model successfully and remove supports easily as well.
Here is a short video on how reducing Overhang Threshold works.
Overall, the Bobstro’s or the best settings that have resolved the issue for almost all users with 0.25mm and 0.40mm nozzles are as follows:
- 0.25mm Z Distance
- 75% XY Distance
- 3mm Support Spacing
- 4 Interface Layers
- 0.2mm Interface Pattern Spacing
These settings work like a breeze for PLA; however, the user recommended printing hard materials like PETG in multiple small parts and then assembling them in the end.
Changing the orientation, flattening the supported areas, and using cooling fans preferably at 30% may also help 3D print easier to remove supports.