3 Ways How to Tap 3D Prints – Adding Screw Threads
Many 3D printing enthusiasts wonder how to properly tap 3D prints and add screw threads to them, which can be an important part of models that feature attaching accessories or assembling components.
To tap 3D prints and add screw threads you can add heat-set inserts after the model is printed. Printed-in threads can be added to the model before printing but require some knowledge of 3D modeling software. Thread tapping is another possible option to add screw threads to 3D prints.
Keep reading for more information on how to tap 3D prints and add screw threads.
How to Tap 3D Prints – Adding Screw Threads
These are the main ways to add screw threads:
- Add heat-set inserts
- Insert printed-in threads in design software
- Manually thread tap 3D prints
1. Add Heat-Set Inserts
One of the ways in which you can add screw threads is by adding heat-set inserts. Heat-set inserts, also known as threaded inserts, are a popular method for adding screw threads to 3D prints.
These are the steps in order to add heat-set inserts:
- Choose the location for the screw thread and mark it on the 3D print
- Select the appropriate heat-set insert based on screw size and type
- Heat the insertion point using a soldering iron or heat gun
- Align the insert with the heated point and press it gently into place
- Allow the plastic to cool and solidify around the insert
- Test the screw thread by screwing it in and ensuring a secure fit
You can find heat-set inserts available in various sizes and designs, such as brass or steel, depending on your specific requirements.
Users suggest using the in-saiL M4x4.7mm Thread Inserts for Plastic Heat Staking Brass, which are available at Amazon for a great price. A lot of users recommend the in-saiL threaded brass inserts to be used with 3D printed parts as they are clean and work really well.
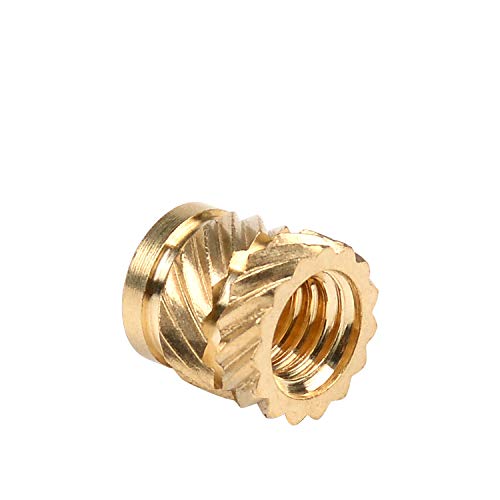
- Material:Brass C3604
Prices pulled from the Amazon Product Advertising API on:
Product prices and availability are accurate as of the date/time indicated and are subject to change. Any price and availability information displayed on [relevant Amazon Site(s), as applicable] at the time of purchase will apply to the purchase of this product.
The SEEKONE Heat Gun 1800W is also suggested by different users to help with the process. You can find it on Amazon for a great price. One user suggests using heat-set inserts as they are very easy to use and highly durable. He stated that they changed the game for him.

- 【Strong Power With 2 Modes】 SEEKONE 1800W heat gun provides strong power quickly heat up to 1202℉(650℃) in 1.5 seconds. Two modes: I: 50-450℃, 190-210L/min; II: 50-650℃, 250-500L/min
Prices pulled from the Amazon Product Advertising API on:
Product prices and availability are accurate as of the date/time indicated and are subject to change. Any price and availability information displayed on [relevant Amazon Site(s), as applicable] at the time of purchase will apply to the purchase of this product.
Another user stated that while heat-set inserts may be a bit expensive and complicated to install, they will last for a long time and can be very strong.
Many 3D printing hobbyists recommend using heat-set inserts as you can screw and unscrew many times without the threads wearing out.
Check out the video below for more information about this method.
2. Insert Printed-in Threads in Design Software
Another way to add screw threads to 3D prints is to add the threads directly into the design before printing. You should be aware that this method requires some knowledge of 3D modeling software and design.
These are the steps in order to insert printed-in threads in design software:
- Use 3D modeling software (like Fusion 360 or OpenSCAD) to add screw threads to the design
- Consider the screw’s tolerances and leave enough space for easy insertion and fastening
- Test the printed-in threads by screwing in the corresponding fastener
Printing a smaller test print with the thread is also a good idea, that way you’ll be able to see if the thread is fitting properly.
One user said that OpenSCAD has a library available for threads, which can help to insert them into the model. He also stated that Fusion 360 supports threads internally but if you need nonstandard sizes you’ll need to add a thread description file for it.
Another user said that directly printing the threads will only work well with large threads like the SP400 series bottle threads. For one 3D printing hobbyist, inserting printed-in threads is the best option.
He’s stated that he’s been doing it that way for M6 threads without any issues and has been able to screw a metal bolt into it with no further processing.
Check out the video below for detailed information about how to add a thread using Fusion 360.
3. Manually Thread Tap 3D Prints
Thread tapping is another option to add screw threads on 3D prints. It involves manually cutting threads into the 3D printed object using a tap tool.
This method can be very useful when dealing with larger objects or materials that may not be suitable for heat-sets or printed-in threads.
These are the steps in order to manually thread tap 3D prints:
- Add holes to the 3D model according to the desired thread size
- Choose the appropriate tap size that matches the screw’s thread pitch and diameter
- Align the tap tool with the hole and rotate it clockwise with gentle pressure
- Avoid using excessive force to prevent damage to the 3D print
- Test the newly tapped thread by inserting the corresponding screw and ensuring a secure fit
Many users recommend printing the hole slightly larger than the screw diameter. This is because during the tapping process, the tap cuts threads into the hole, and the hole needs to provide enough space for the threads to form without being too tight or too loose.
For an M3 screw that has a 3mm diameter, you would typically design a hole with a diameter of around 3.2mm to 3.4mm. You should choose the appropriate tap size based on the desired screw thread as well. The tap size should match the thread pitch and diameter of the screw.
Users recommend getting the 60-Pc Master Tap and Die Set which features a lot of different tap sizes that may be useful to you. You can find the set over at Amazon for a great price.
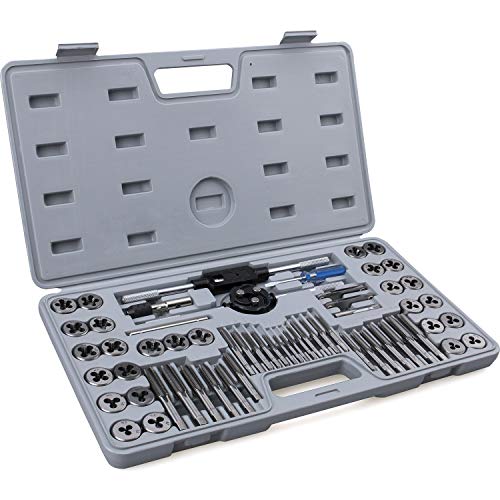
- ▲ PREMIUM MATERIAL AND DURABILITY - Industrial grade GCr15 bearing steel construction ensures durability and tool longevity to withstand professional uses
Prices pulled from the Amazon Product Advertising API on:
Product prices and availability are accurate as of the date/time indicated and are subject to change. Any price and availability information displayed on [relevant Amazon Site(s), as applicable] at the time of purchase will apply to the purchase of this product.
One user who has been thread tapping for a long time said that PLA is the filament he considers the most stable when tapping as ABS has a tendency to warp. He also stated that you can’t expect the threads to take much force as they are not very strong.
Another user said that he’s been able to tap M3 threads into holes without any problems. He’s tapped threads into PLA, ABS, and PETG and found success with all those filaments. He stated that while M3 threads work just fine, he has never tested the longevity.
3D printing hobbyists recommend using a tap to cut the threads rather than using the screw directly as that way causes the material to be pushed aside, potentially creating stress rises in the threads.
Check out the video below with detailed instructions on how to properly add screw threads by tapping your 3D printed model.