3 Ways How to Measure FEP Tension – FEP Tuning
Having the right tension on your 3D printer’s FEP film can make a big difference to the success of your models. Many people aren’t sure how tight the FEP should be or how to measure the FEP tension, so I decided to write this article going through some methods to do this.
To measure the tension on your FEP film, you can use a sound analyzer app on an iPhone or Android smartphone. Place the microphone of the smartphone near the FEP and use gentle striking force with a finger or side of a pen to make noise. The reading should be between 275-350Hz for ideal tension.
Keep reading to learn the details and various methods for measuring the tension of an FEP and more.
How to Measure FEP Tension – FEP Tuning
When installing a new FEP, a crucial aspect is getting the right tension. An efficient way of doing this is by measuring the FEP tension using various methods. This section will look at three ways of measuring your FEP tension.
These methods are:
- Use Phone to Measure Sound Wave
- Use Playing Cards
- Use Bottle Caps, Sponges, or Similar Sized Objects
1. Use Phone to Measure Sound Wave
This method is done with one of the two methods above because it serves as a way to double-check the firmness of the FEP tension. I
t involves carrying out one of the other two methods and then using an app on your phone to measure the sound wave of the FEP when stuck or tapped with a blunt object.
- Download an Application to Measure Sound Wave
- Strike the FEP with a Blunt Object and Measure
- Adjust the Tension by tightening or loosening the screws on the Metal Frames
Download an Application to Measure Sound Wave
After you tighten the metal frames, you want to download a good app on your iPhone or Android.
Some recommended apps you can download are Sound Spectrum Analyzer on the iPhone and Spectroid on an Android, both free to download.

Strike the FEP with a Blunt Object and Measure
After downloading the application on your phone, strike the FEP with a blunt object. Don’t hit too hard, but hard enough that it makes a distinctive sound. It should sound like you are hitting a drum.
Put the phone beside the vat with the downloaded app opened to record the sound wave.
Adjust the Tension by Tightening or Loosening the Screws on the Metal Frames
Check the result on your phone. Look for any readings between 275 and 350Hz on the hertz scale. Increase or decrease this number by tightening or loosening the screws on metal frames to achieve your desired result.
When you have a tighter FEP sheet/film (higher Hz frequency), your build plate doesn’t need to raise up as high for the print to separate from the film. A looser FEP bends more and needs a higher lift distance, though it has less of a peeling force on the FEP.
Check out this video by 3DPrintFarm as it shows how to replace and tune the FEP using a Gatorade bottle and Spectrum Audio Analyzer.
2. Use Bottle Caps, Sponge or Similar Sized Objects
- Put One of the Two Metal Frames on a Flat Surface
- Place a Bottle Cap, a Sponge, or Similar Objects in the Center of the Metal Frame
- Place the New FEP and Sandwich it with the Second Metal Frame
- Put Holes on the FEP Where you Would Re-Insert Screws
Put One of the Two Metal Frames on a Flat Surface
As with playing cards, the first step also involves setting one of the two metal frames on a flat surface.
Place a Bottle Cap, a Sponge or Similar Objects in the Center of the Metal Frame
You can use a Gatorade bottle cap or any other bottle cap of a similar size. You can also use an 80 x 80 x 8mm sponge if you don’t have a bottle cap.
Some users have also created models you can 3D print and use. An example is this Elegoo Saturn FEP Tool meant to get the right tension. Another example is this FEP Tensioner printed with an 80 x 80 x 8mm diameter for the Elegoo Saturn.
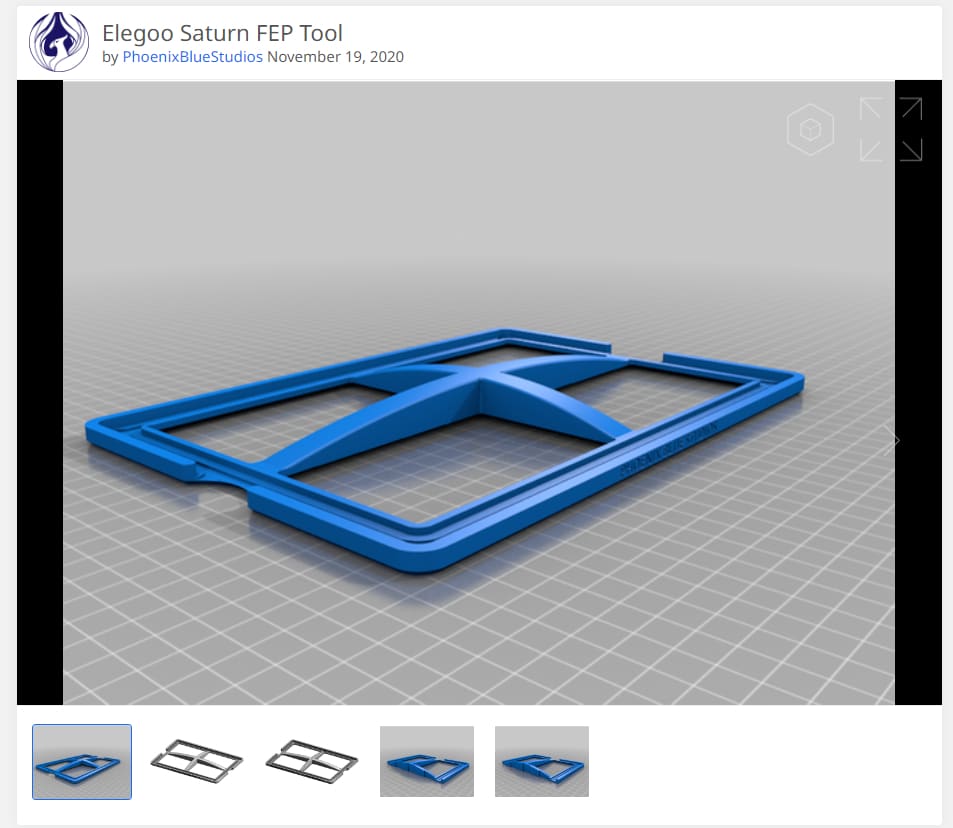
You can find both tools on Thingiverse. Both tools are also great substitutes for a bottle cap if you use an Elegoo Saturn or similar resin 3D printer.
Place the New FEP and Sandwich it with the Second Metal Frame
Place the new FEP and the other half of the metal frame on top of the bottle cap, sponge, or any other tool printed off Thingiverse. Ensure you hold the metal frames flat to get the right tension for the FEP. Don’t forget to peel off the protective sheet.
Put Holes on the FEP Where you would Re-Insert Screws
After placing the second metal frame on the FEP and holding down for some seconds, get a sharp object and create holes where you will put the loosened screws back.
Screw the two metal frames together, then place them on the vat’s body and screw the metal frames on too. You shouldn’t tighten the screws all the way but leave a little room.
Then you tighten the screws gradually from various sides rather than side by side.
3. Use Playing Cards
- Place One of the Two Metal Frames on a Flat Surface
- Place Playing Cards In the Center of the Metal Frame
- Place the New FEP and Sandwich it with the Second Metal Frame
- Puncture Holes Where you Would Re-Insert the Screws
Place One of the Two Metal Frames on a Flat Surface
After disposing of the old FEP, put one of the metal frames on a flat surface. It’s advisable to wipe both metal frames with alcohol to get rid of any resin residue. This is to avoid any resin on the new FEP.
Place Playing Cards in the Center of the Metal Frame
You place a certain number of playing cards in the center of the metal frame. Depending on the make of the 3D printer, you will need a different number of playing cards.
This simple table can assist with some 3D resin printers:
| 3D Resin Printer | Number of Cards | Minimum FEP Dimensions |
|---|---|---|
| Anycubic Photon Mono X | 54 playing cards | 200 x 260 mm |
| Anycubic Photon | 32 playing cards | 140 x 200 mm |
| Elegoo Mars | 54 playing cards | 140 x 200 mm |
| Elegoo Saturn | 54 playing cards | 200 x 260 mm |
| Mars 2 Pro | 32 playing cards | 140 x 200 mm |
If you aren’t sure about how many playing cards you need for your 3D resin printer, test it on your old FEP film before replacing it with a new one.
You can do this by stacking playing cards under the old FEP and holding the metal frames at each end until it’s impossible to hold the metal frames down flat.
Place the New FEP and Sandwich it with the Second Metal Frame
Peel off the protective sheets on each side and position the new FEP on top of the playing cards. After this, use the second frame to sandwich the new FEP, ensuring enough pressure is applied to the edges of the metal frame to stretch the FEP and create good tension.
Puncture Holes where you would Re-Insert the Screws
After achieving the desired tension, puncture the openings in the FEP where the screws go using a sharp object. Then put back the screws and tighten them. You should put the smaller screws first to hold the two frames together, then screw in the larger ones.
How to Remove Your Old FEP
Before measuring the FEP tension of a new FEP, you should first learn how to remove an old one. To remove an old or damaged FEP:
- Wear Protective Gear
- Empty your Vat of Any Residual Resin and Clear
- Unscrew the Large Screws on the Resin Tank
- Remove the Metal Frame with the FEP film Off the Resin Tank
- Unscrew the Small Screws on the Metal Frame
- Remove the Old FEP Film

Wear Protective Gear
Before you change the FEP film, ensure you are wearing the right protective gear since you are dealing with resin. Wearing hand gloves, a mask, and eyeglasses should be okay.
Since resin can easily irritate your skin and eyes, you don’t want any getting on you while changing the FEP film.
Empty Your Vat of Any Residual Resin and Clear
After ensuring your safety, empty the vat of any resin and use a plastic scraper to remove any remaining resin. You can also use isopropyl alcohol to wipe the vat to remove any other residuals and sterilize the vat.
Unscrew the Screws on the Resin Tank
There are screws connecting the metal frame holding the FEP to the resin tank’s body. Unscrew them with the Allen screw provided or a screwdriver of a similar size. After removing the screws, ensure you keep them together in a safe place not to lose them.
Remove the Metal Frame with the FEP Film Off the Resin Tank
After unscrewing the large screws attaching the metal frame to the resin tank’s body, take it off. You can use the opportunity to clean the edges of the resin tank and the metal frame to remove any residual resins.
Unscrew the Small Screws on the Metal Frame
After taking off the metal frame, remove the smaller screws on the metal frame using an appropriate-sized screwdriver. Unscrewing the metal frame will cause it to split into two, giving you access to the FEP.
Remove the Old FEP
Remove the old FEP and dispose of it, then unwrap a new FEP. The FEP has two protective sheets on both sides, so remove them before using the FEP.